Search Results : rif


video subscription graphic

By Dave McCracken

Under many circumstances, it is wise to first verify that a viable deposit exists on a property before a substantial investment is made into production equipment.

Dave Mack


How to outfit a suction dredging project, to a large degree, comes back to how you would answer the following questions:

1) What am I trying to accomplish; (sampling, production, or both)?

2) Where?

3) In what period of time?

4) How much of a budget is available for acquisition of equipment and for operational start-up costs?

A gold (and/or gemstone) mining project basically should to be looked at in two separate steps: First you sample to locate a viable deposit. Then you launch into a production program to recover the gold or other valuable minerals from the deposit. Generally, the idea is to minimize investment into a particular mining property until a viable deposit has been located and verified.

Production-equipment is commonly larger and is more expensive to purchase and move around. The logistical infrastructure to support a production operation is usually more substantial and costly than what would normally be required to just go in somewhere for a short sampling program. . So generally-speaking, a production operation costs more to set up and involves more gear and supplies to move around and put into place. Therefore, under many circumstances, it is wise to first verify that a viable deposit exists on a property before a substantial investment is made into production equipment. The idea behind sampling is to minimize risk.

Prospecting Equipment & Supplies

The following video sequence will provide you with a visual demonstration of this very important point:

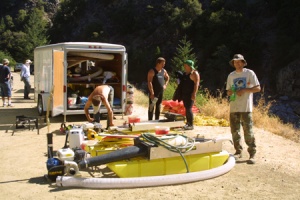
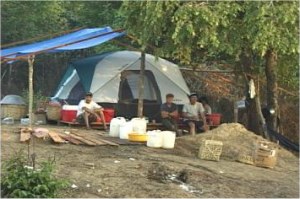
A typical camp to support a preliminary sampling operation usually would involve just the basic necessities.

The answers to “Where?” and “For how long?” also impact upon your decision about what kind of gear to buy. For example, if you are not tied to just one mining property, and you are prepared to launch a sampling program onto different properties until you find what you are looking for, then it would be a good idea to invest in good sampling equipment that is portable enough to move around the properties which are available to you. In this case, the capital expenditure is not tied to a single property, but rather into a portable sampling infrastructure that can be used for an extended period of time in many different places.

While sampling-gear is more portable, the smaller the size of a dredge, the less volume of streambed material it will process (in the same experienced hands), and the less-deep it will effectively excavate a sample into the streambed. Therefore, you trade-off productive effectiveness and the capability to make meaningful, deeper samples as you reduce dredge-size and gain in portability.

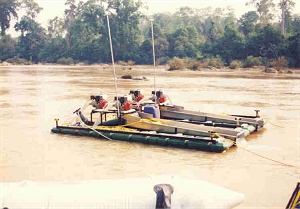
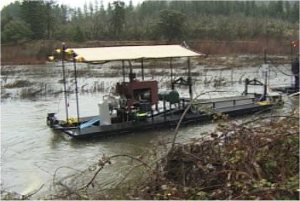
Two Pro-Mack 5-inch dredges were used to find rich deposits on this river in Cambodia, before a 10-inch production dredge was brought on line.

As an example of this, a 4-inch dredge can effectively sample down to around 4-feet deep in hard-packed streambed material). A 5-inch dredge can excavate about twice the volume of a 4-inch dredge down to around 5-feet of material. But the bulk of gear to move around is about twice as much.

A 6-inch dredge can excavate about twice the volume of a 5-inch dredge down to around 6-feet of hard-packed streambed. But the bulk of gear to move around is about twice as much.

An 8-inch dredge can excavate about twice the volume of a 6-inch dredge down to around 8-feet of material. But the bulk of gear to move around is about twice as much.

Here follows a video segment of a typical commercial dredge operating on the Klamath River in Northern California:

Ten-inch Pro-Mack dredge operating on New 49’er properties in Northern California.

A 10-inch dredge can excavate about twice the volume of an 8-inch dredge down to around 10-feet of material. But the bulk of gear to move around is about twice as much. By now, we are talking about a pretty substantial platform. But it still remains portable enough to place inside of an ocean shipping container, and can be towed around on wheels behind a small truck. For example, watch how this recovery platform for a 10-inch production dredge can be moved around by a normal-sized truck. This particular platform was built to ship overseas inside of an ocean shipping container:

These are just guidelines, because conditions change from one location to the next. It does not mean you cannot dredge deeper into the streambed using smaller-sized dredges. You can! But it generally does mean that the deeper you go beyond these guidelines, the less effectively your time will be invested. This is mostly a matter of over-sized rock management. All rocks that are larger than the intake-size of the dredge’s suction nozzle must be moved out of the way by hand. When dredging in an average hard-packed streambed, at the point where an experienced operator gets down through 5-feet of material using a 5-inch dredge, he has so many rocks to get out of the dredge hole that he is lucky to spend half his dredging-time operating the suction nozzle!

Bigger dredges get more accomplished primarily because they will suck up larger-sized rocks.

Under most circumstances, there are a proportionate greater number of smaller-sized rocks in a hard-packed streambed, than larger-sized rocks. So this is really a discussion about effective time-management. Since a larger dredge will suck up a larger rock, it means the operator will not have to move smaller-sized rocks from the excavation by hand. So he or she will spend his time moving even larger rocks out of his way, of which there are proportionally-fewer. This means he will get more done faster, and be able to dredge deeper into the material, before he reaches the point that there are just too many rocks to move out of the way.

Using a 5-inch dredge will mean having to move many, many more rocks by hand that would more-easily be sucked up the nozzle of a larger dredge.

This important reality cannot be overcome by positive thinking or an abundance of enthusiasm (as important as these are to have). We are talking here about the physical reality of how an excavation is accomplished. The size of the dredge-nozzle determines what size of rock can be sucked up (which is fast and easy), and what must be moved out of the hole by hand (which takes more time and effort).

The following video sequence demonstrates this very important point, and also explains why you must be very careful about projecting the true volume capability of different-sized dredges during feasibility planning:

By the way, when conditions allow for it and you want to increase the productive capacity of your equipment, you can also organize two or three separate teams to take shifts using the same production equipment. As demonstrated in the following video sequence, lights can even be set up to do a night shift:

So when deciding what to acquire for sampling or production equipment, it is necessary to balance the desire to get more productive activity accomplished (bigger dredge), with the necessity to remain portable (not so big that you cannot move it around to find what you are looking for). This must be decided on a case-by-case basis.

Here is my advice: Go as big as you are able to without forfeiting the portability that is required for your particular situation. I suggest these important decisions can only be wisely made after at least a preliminary evaluation of the project-area is completed.

Once you have proven-out your deposit(s) by sampling, you can feel more comfortable investing in production equipment and support-infrastructure to develop the project. In that case, bigger is not always better. Sometimes it is. A lot will depend upon the depth of water and streambed where you will be dredging. For example, a 10-inch dredge might not be as productive as a 6-inch dredge in a shallow-water and shallow-streambed area where a larger dredge cannot be floated around easily.

Another example is where shallow streambed material is made up largely of boulders that must be winched out of the way. In this case, some of your money might be better invested into a good mechanical or hydraulic winch, rather than a larger-sized dredge.

A well-done preliminary sampling program should result in a good production plan, based upon what type of equipment will be required to obtain optimum production under the conditions which exist where the gold deposit is located.

I am not going to discuss sampling, production or recovery systems here, because they have been covered in other articles. But since the type of equipment you should acquire is directly related to these subjects, I suggest it is a good idea to review that material very closely.

Some dredges are made to operate from the surface with the use of an automated cutter-head device at the nozzle. These are generally ineffective in hard-packed streambeds that are mostly made up of oversized rocks.

Some dredges are available with hydraulic-powered cutter-heads to help with the excavation. These are mechanical devices that help feed material evenly into the nozzle. They are most productive in doing channel-work in harbors or making navigation channels deeper or wider. Hard-packed streambeds which are made up mainly of oversized rocks and boulders will usually destroy a cutter-head device in short order.

Here follows the normal steps in the development of a mining program:

1) Preliminary evaluation: This is where you take a hard look at the available information about a potential project. Then you go out and have a direct look at the specific location(s) and surrounding area. You are looking at the potential for commercial gold (and/or gemstone) deposits. You are also looking at what it would take to accomplish a preliminary sampling program, based upon all of the information and observation you can bring together. A preliminary evaluation will often result in a preliminary sampling plan.

2) Sampling Program: Depending upon what the objectives are, sometimes sampling is accomplished in several stages. Generally, the purpose of a sampling program is to locate and verify the existence of a commercial deposit that is valuable enough to justify a production operation. Sampling should work out the recovery method upon which the deposit may be developed efficiently. A sampling program can evolve into feasibility planning to develop a mineral deposit.


3) Production Operation: Is full or partial development of the deposit.

While there can be some overlap, equipment needs are usually different in each phase of a mining program.

While each project is different, during a preliminary evaluation, I personally always at least bring along a face mask (so I can have a look at the underwater environment where we would sample), a gold pan and classification screen, zip-lock sample bags and marker pen, map, GPS, camera equipment, local money in small denominations (to buy mineral samples from local miners), a dozen bright-colored ball-caps (gifts for local miners), a bottle or two of whiskey (gift for the village chief in non-Muslim communities), and the other basic things I will need to visit that particular environment.

A sampling program will basically require the same things as will be required in a full production operation, but usually on a smaller and more portable scale. Here follows a basic outfitting list:

Dredging Equipment:
Dredge
Boat (and motor?) and ores
Winching gear and rigging?
Pry-bars
Rope (floating)
Fuel containers
Complete set of tools needed to service the gear

Diving Equipment:
Face mask
Air reserve tank and fittings
Air line(s) & regulator(s)
Wet-suit?
Weight belt & weights
Protective foot ware (steel tips?)
Rubber work gloves (bring spares?)

Clean-up Gear:
Wash tubs
Classification screens
5-gallon buckets
Scraping tool and/or hand scoop
Final concentrating equipment?
Gold pans
Steel finishing pans
Magnet
Portable gas stove
Weight scale
Zip-lock sample bags and marker pen

Support Gear:
Vehicle-support?
Shelter
Cooking & eating utensils
Wash tub for kitchen
Cook stove
Toilet facilities?
Portable chairs & table
Medical kit
Waterproof bag(s)
Ear infection preventative
Maps, GPS and camera equipment
Electric generator?
Camp lights
Paper and pens
Communication equipment?
Flashlights & batteries
Knife
Firearm?

Supplies:
Drinking water and/or filters
Food supplies and containers
Fuel & motor-oil for all motors
Dish washing detergent
Chlorine for sanitizing cleaning water
Laundry wash tub and soap
Hand-wash soap
Tissue paper
Cook stove fuel or canisters
Duct tape
Nylon line (plenty)
Plastic trash bags
Zip-lock bags & plastic containers for food

Spare Parts (priority often depends upon how remote the project location is):
Tune-up replacement parts for all motors
Extra water pump seals and bearings
Extra compressor & alternator belts
Rebuild kit for air compressor
Extra air compressor?
Rebuild kits for dive regulators
Extra dive regulators?
Repair kits for diver air lines
Extra diver air lines?
Extra air fittings
Extra water pressure and intake hoses
Extra water hose fittings
Extra rubber hose seals (each size)
Extra foot valve(intake for water pumps)
Extra suction hose?
Extra face mask(s)
Extra starter & alternator & fuel pump for dredge motor?
Spare tire (if dredge has removable wheels)


Article & photos by David Lawler, Consulting’ Geologist


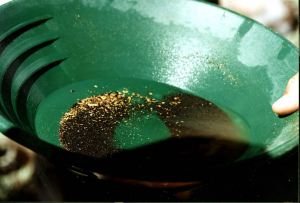
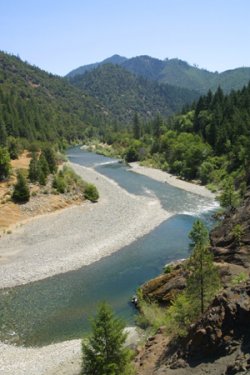
Placer deposits image 1Placer gold deposits represent the most attractive targets for small-scale miners and prospectors, since activities can be carried out with reasonably small costs, and encouraging prospecting results can be obtained rapidly. A small-scale miner has the opportunity to exploit small, rich accumulations of gold which larger-sized mining companies might pass by, due to reserve-size and overall ore-grade. In other words, because of the higher costs involved with a larger mining company, they will not be interested in some types of gold deposits which can be quite lucrative for a smaller-scale mining program.

Placer deposits have been exploited by man since early historic times and have remained an important source of gold on the world market into the 20th Century.

Placer deposits have yielded over 60% of the world’s gold production. Placer gold production in California alone during the height of the Gold Rush has been estimated at $81 million dollars. (Dollar-value in terms of $18/ounce in 1849, prior to 150 years of inflation).

While many texts and articles have been written on the subject of placer mining, the purpose of this article is to provide a brief overview of the subject and to introduce relevant facts which have practical application for the small-scale miner. The less common types of placers, e.g., Glacial, Aeolian, Bajada and beach placers will not be covered in this article.

Alluvial Placer Gold Deposits

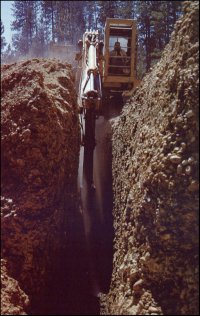
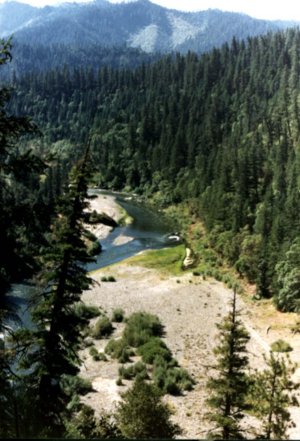
Placer deposits image 2Definition: Alluvial deposits are the most common type of placer gold deposit. This category includes fluxial (river and stream) placers which formed in well-defined channels. It also includes “bench” or terrace deposits. These are older river or streambeds which formed on the elevated side slopes of drainage valleys. Both ancient (paleo placers) and modern deposits are included in this category and have produced significant amounts of gold.

Characteristics: Good sorting of sediment and gold particles by size and weight.

Sediments tend to be well transported, reflecting significant rounding or flattening of individual particles as a function of distance traveled from its source. The source of gold can either originate from a nearby lode deposit, generally leaving the gold’s surface with a rough texture; or the gold can have originated from distant sources, generally leaving it with smooth, flattened particles, flakes or nuggets.

Ancient Fluvial Placer Deposits

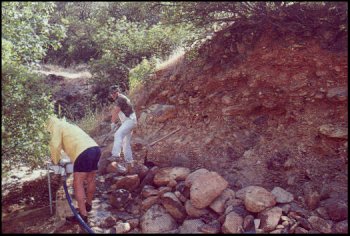
Placer deposits image 3Examples: (Ancient) Tertiary-age Ancestral, Yuba and Feather River systems, Sierra Nevada Mountains, California, Ancestral Klamath River system, Weaverville and Hornbrook basins Klamath Mountains, California. There are also widespread occurrences of other ancient gold-bearing channels in other western states in the U.S.

Prospecting Suggestions: Check areas where modem drainages (rivers, creeks, and gullies) have eroded ancient gold-bearing channel deposits. Many of these areas were worked by miners during the 19th Century, but there is still plenty of gold remaining for the modem-day small-scale miner.

For example, check side slopes of ridges which contain the ancient channel deposits, since these are areas that usually could not be exploited by hydraulic or ground-sluicing mine methods, due to lack of adequate water or water pressure. These virgin (unexploited) areas can produce eroded substantial pockets of placer gold.

Hydraulic Mine Pit areas often contain good prospects for small-scale mining. Check the exposed bedrock floor (representing the exhumed channel base) surfaces both for cracks and weathered cemented gravels. Gold may remain in small fractures and cracks in the bedrock. These areas can be particularly fruitful for electronic prospecting.

In addition, gold may be liberated from previously-cemented gravels after the long period of weathering on the pit floor. Check drain tunnels and tailraces that may have been cut into bedrock or the sides of the channel for several reasons: First, drain tunnels were driven through solid bedrock at the floor of a hydraulic pit to drain excess water and tailings from the working face of a mining excavation.

It is estimated that hydraulic mining methods lost between 30% – 50% of the gold that was liberated from the deposit. In addition, many of the drain tunnels were also used as the primary locations for the placement of elongated sluice box recovery systems. Thus, clean-ups were performed inside the tunnels. Although some of the drain tunnels have become choked with debris or collapsed from weathering, many still carry gold-bearing materials through the tunnels.

Testing and sampling of in-situ (in place) Tertiary gravel placers is one very proven method of locating valuable gold deposits for the serious small-scale mining operation today.

Modem Fluvial Placer Deposits

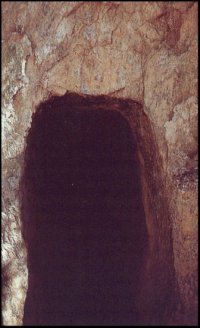
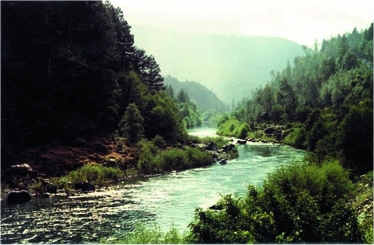
Placer deposits image 4Examples: Rivers and streams of the Sierra Nevada and Klamath Mountain areas in California.

Prospecting Suggestions: Prospect areas which are adjacent to known ancient channels or lode gold deposits, since modern river deposits will usually become more enriched close to those areas.

Gold-bearing stream and river channels must be examined and studied in detail in regard to their history, habit and special characteristics, in order to better-exploit the placers contained in them. Check available geologic maps of a particular river area or observe the different bedrock types which are present. This information will yield valuable clues to the location and manner of gold accumulation in various stretches of river.

Most modern-day small-scale prospectors are using suction dredges, sluicing gear, vack-mining equipment and/or gold pans to prospect for and develop these types of gold deposits.

Sample bench deposits adjacent to the active stream margin. Although these deposits are not as commonly reworked by stream processes, they often contain high concentrations of placer gold. Thick bench deposits containing gold-bearing material derived from hydraulic mines are still present along the margins of rivers and streams in the Sierra Nevada and Klamath Mountain regions of California.

Residual Placer Deposits

Placer deposits image 5Definition: Shallow mineral deposits forming directly from weathering and chemical disintegration of a gold-bearing quality vein near the surface. Residual deposits tend to be rich, but localized in occurrence, i.e., close to the vein or outcrop area. These are also termed “seam diggings” due to their occurrence in weathered gold-bearing quartz stringers contained in weathered schist and slate fracture-zones.

Examples: “Seam digging”s at Georgia Slide, Spanish Dry Diggings and French Hill areas, Georgetown Divide, El’Dorado County, California, Alleghany and Downieville districts, Sierra County, California, Humboldt Mountains area, Humboldt County, Nevada.

Prospecting Suggestions: Search in lode gold districts characterized by small high-grade gold-quartz vein pocket deposits. Focus your search into specific areas which are along the geologic trend of previously-exploited lode pocket deposits. Recent fires, landslides, or disturbance by logging operations are constantly exposing new virgin areas for prospecting.

Modern-day metal detectors may help in the exploration and exploitation of these deposits, due to shallow overburden and erratic distribution of the residual placer nuggets.

Eluvial (hill-slope) Placer Deposits

Placer deposits image 6Definition: Deposits representing the transitional stages between a residual and alluvial placer deposit (deposits which form in route between the lode erosion and drainage system). Residual gold tends to form accumulations in soil or colluvium by “creeping” along with material down a hill-slope.

Examples: Klamath Mountain region, California and Oregon.

Prospecting Suggestions: A metal detector can be the ideal tool for locating these deposits, since gold distribution tends to be spotty or erratic due to a poor degree of sorting and transportation. High-banking equipment can be very productive where an adequate water source is available nearby. Dry-washing equipment can be productive in places where there is no water available for processing. Mechanized earth-moving equipment is sometimes necessary to excavate thick eluvial deposits. In this case, small wash plants are being used to recover the gold.

Recommended Reading

Averill C. v: 1946, Placer Mining for Gold in California: California Div. Mines Bull. 135, 377 p.

Clark, B. 1965, Tertiary Channels: California: Div. Mines and Geology Mineral Inf. Service, Z 18

Clark, B. 1970, Gold Districts of California: California Division of Mines Bull. 193, 186 p.

Haley, C.S., 1923, Gold Placers of California: California Mining Bur. Bull. 92, 167 p. Jenkins, O.P., 1946, Geology of Placer Deposits, in Averill, C. Z Placer Mining for Gold in California: California Div. Mines Bull. 135 p, p. 147-216.

Lindgren, 1911, The Tertiary Gravels of the Sierra Nevada of California: U.S. Geol. Survey Prof. Paper 73, 226 p.

Whitney, J.D., 1880, The Auriferous Gravels of the Sierra Nevada of California: Harvard Coll. Mus. Comp. Zoology Mem. v. 6, no 1, 569p.

 
video subscription graphic

By Dave McCracken

Any place along the gold path where there is protection from the main flow of water is a good location to sample for gold.

Dave Mack


Thorndike/Barnhart’s Advanced Dictionary defines “placer” as “A deposit of sand, gravel or earth in the bed of a stream containing particles of gold or other valuable mineral.” The word “geology” in the same dictionary is defined as “The features of the earth’s crust in a place or region, rocks or rock formations of a particular area.” So in putting these two words together, we have “placer geology” as the nature and features of the formation of deposits of gold and other valuable minerals within a streambed

The main factor causing gold to become deposited in the locations where it does is its superior weight over the majority of other materials which end up in a streambed. By superior weight, I mean that a piece of gold will be heavier than most any other material which displaces an equal amount of space or volume. For example, a large boulder will weigh more than a half-ounce gold nugget; but if you chip off a piece of the boulder which displaces the exact same volume or mass as the gold nugget, the nugget will weigh about six times more than the chip of rock.

As gold is eroded from its original lode, gravity, wind, water and the other forces of nature may move it away and downwards until it eventually arrives in a streambed.

Gold erodes from its natural lode and eventually 
is washed into an active waterway.

There are several different types of gold deposits that a prospector should know about, because they have different characteristics and are dealt with in different ways. They are as follows:

RESIDUAL DEPOSIT: A “residual deposit” consists of those pieces of the lode which have broken away from the outcropping of the vein due to chemical and physical weathering, but have not yet been moved or washed away from the near vicinity of the lode. A residual deposit usually lies directly at the site of its lode.

ELUVIAL DEPOSIT: An “eluvial deposit” is composed of those pieces of ore and free gold which have eroded from a lode and have been moved away by the forces of nature, but have not yet been washed into a streambed. The fragments of an eluvial deposit are often spread out thinly down along the mountainside below the original lode. Usually, the various forces of nature cause an eluvial deposit to spread out more as its segments are washed further away from the lode deposit. Individual pieces of an eluvial deposit are popularly known as “float.”

An eluvial deposit contains those pieces of ore that have been swept
away from the lode which have not yet been deposited by running water.

BENCH DEPOSIT: (Also “terrace deposit”) Once gold reaches a streambed, it will be deposited in common ways by the effects of running water. Most of the remainder of this article will cover these ways. During an extended period of time, a stream of water will to cut deeper into the earth. This leaves portions of the older sections of streambed high and dry. Old streambeds which now rest above the present streams of water are referred to as “benches.” Accumulations of gold and other valuable minerals contained in an old, high streambed are called “bench deposits.”

An eluvial deposit might be swept down to rest on top of an old streambed (bench), but it will still remain as an eluvial deposit until it is washed into a stream of water. A bench placer deposit contains the gold deposited within that streambed before it was left high and dry.

Many benches are lying close to the present streams of water, and are actually the remains of the present stream as it ran a very long time ago.

Some dry streambeds (benches) are situated far away from any present stream of water. These are sometimes the remains of ancient rivers which ran before the present river systems were formed. Ancient stream benches are sometimes on top of mountains, far out into the deserts, or can be found near some of today’s streams and rivers. Ancient streambeds, wherever found, can contain rich deposits of gold.

Most surface placer gold mining operations today direct their activities at bench deposits. The reason for this is that the presence of an old streambed is evidence that it has never been mined before. Any gold once deposited there will still be in place.

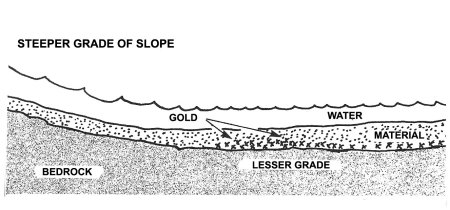
STREAM PLACER: In order to discuss what happens to gold when it enters a stream of water, it is first necessary to understand the two terms: “bedrock” and “sediments.” Many millions of years ago, when the outer perimeter of the earth cooled, it hardened into a solid rock surface–called “bedrock” (or “country rock” when discussing the subject of lodes). All of the loose dirt, rocks, sand, gravel and boulders which lie on top of the earth’s outer hardrock surface (bedrock) are called “sediments.” In some areas, the sedimentary material lays hundreds of feet deep. In other areas, especially in mountainous country and at the seashore, the earth’s outer crust (bedrock) is completely exposed. Bedrock can usually be observed by driving down any highway and looking at where cuts have been made through the hard rock in order to make the highway straight and level.

Streambeds are composed of rocks, sand, gravel, clay and boulders (sediments) and always form on top of the bedrock foundation (although they can be later covered up by volcanic activity). Bedrock and country rock are the same thing.

Streambeds are composed of sediments which lie on top of bedrock.

The following video segment will allow you a visual demonstration of these very important points:

A large storm in mountainous country will cause the streams and rivers within the area to run deeper and faster than they normally do. This additional volume of water increases the amount of force and turbulence that flows over the top of the streambeds lying at the bottom of these waterways. Sometimes, in a very large storm, the increased force of water is enough to sweep the entire streambed down the surface of its underlying bedrock foundation. It is this action which causes a streambed to cut deeper into the earth over an extended period of time. A storm of this magnitude can also erode a significant amount of new gold into the streambeds where it will mix with the other materials.

Gold, being heavier than the other materials which are being swept downstream during a large storm, will work its way quickly to the bottom of these materials. The reason for this is that gold has a much higher specific gravity than the other streambed materials and so will exert a downward force against them. As the streambed is being vibrated and tossed around and pushed along by the tremendous torrent of water caused by the storm, gold will penetrate downward through the other materials until it reaches something which will stop its descent-like bedrock. This very important principle is demonstrated by the following video segment:

With the exception of the finer-sized pieces, it takes a lot of force to move gold. Since gold is about 6 times heavier than the average of other materials which commonly make up a streambed, it takes a lot more force to move gold down along the bedrock than it does to move the other streambed materials.

So there is the possibility of having enough force in a section of river because of a storm to sweep part of the streambed away, yet perhaps not enough force to move much of the gold lying on bedrock.

When there is enough force to move gold along the bottom of a riverbed, that gold can then become deposited in a new location wherever the force of the flow is lessened at the time of the storm.

Bedrock irregularities at the bottom of a streambed play a large role in determining where gold will become trapped. A crack or crevice along the bedrock surface is one good example of a bedrock gold trap.

Streambeds are composed of sediments which lie on top of bedrock.

Many bedrock gold traps are situated so that the main force of water, being enough to move gold, will sweep the traps clean of lighter streambed materials. This leaves a hole for the gold to drop into and become shielded from the main force of water and material which is moving across the bedrock. And there the gold will remain until some fluke of turbulence boils it out of the hole and back into the main force of water again, where it can then become trapped in some other such hole, and so on. The following video segment further demonstrates these important points:

Some types of bedrock are very rough and irregular, which allows for many, many gold traps along its surface.

Some bedrock surfaces are very rough and
irregular–which allows for many gold traps.

How well a crevice will trap gold depends greatly upon the shape of the crevice itself and its direction in relation to the flow of water during a flood storm. Crevices extending out horizontally into a riverbed can be very effective gold-catchers, because the force of water can be enough to keep the upper part of the crevice clean of material, yet the shape and depth of the crevice may prevent gold from being swept or boiled out once it is inside.

Crevices running lengthwise with the flow of the stream or in a diagonal direction across the bed can be good gold traps or poor ones, depending upon the shape of the crevice and the set of circumstances covering each separate situation. For the most part, water force can get into a lengthwise crevice and prevent a great deal of gold from being trapped inside. However, this mostly depends upon the characteristics of the bedrock surface, and there are so many possible variables that it is no use trying to cover them all-such as the possibility of a large rock becoming lodged inside a lengthwise crevice, making its entire length a gold trap of bonanza dimensions. There is really no need to say much more about lengthwise-type crevices. Because if you are mining along and uncover one, you are going to clean it out to see what lies inside, anyway.

Potholes in the bedrock foundation of a streambed have a tendency to trap gold very well. These usually occur where the bedrock surface is deteriorating and some portions are coming apart faster than others, leaving holes which gold can drop into and thereafter be protected from the main force of water.

Bedrock dikes (upcroppings of a harder type of bedrock) protruding up through the floor of a streambed can make excellent gold traps in different ways, depending upon the direction of the dike. For example, if a dike protrudes up through the floor of a streambed and is slanted in a downstream direction, gold will usually become trapped behind the dike where it becomes shielded from the main force of the flow. A dike slanting in an upstream direction is more likely to trap gold in a little pocket just up in front.

Hairline cracks in the bedrock surface of a streambed often contain surprising amounts of gold. Sometimes you can take out pieces of gold that seem to be too large for the cracks that you find them inside of, and it leaves you wondering how they got there. Once in a while, a hairline crack will open up into a space which holds a nice little pocket of gold.

Hairline cracks can hold plenty of gold, and sometimes open up into small pockets.

How smooth the bedrock surface is has a great deal to do with how well its various irregularities will catch gold. Some types of bedrock, like granite for example, are extremely hard and tend to become pounded into a smooth and polished surface. Polished bedrock surfaces like this generally do not trap particles of gold nearly as well as the rough types of bedrock surfaces do. Also, polished bedrock, which sometimes contains large, deep “boil holes” (holes which have been bored into the bedrock by enormous amounts of water turbulence), is often an indication of too much turbulent water force to allow very much gold to settle there during flood storms.

Rougher types of bedrock, often being full of both large and small irregularities, have the kind of surface where many paying placer deposits are found. This kind of bedrock can be very hard and still maintain its roughness. Or it can be semi-decomposed. Either way, it can trap gold very well.

Rough bedrock surfaces tend to trap gold very well.

Basically, anywhere rough bedrock is situated so that its irregularities can slacken the force of water, in a location where gold will travel, is a likely place to find gold trapped.

Obstructions in a streambed can also cause the flow of water to slow down and can be the cause of a gold deposit, sometimes in front and sometimes to the rear of the obstruction. An outcropping of bedrock jutting out into a stream or river from one side can trap gold in various ways, depending upon the shape of the outcropping and the direction it protrudes into the stream. An outcropping extending out into the river in an upstream direction is most likely to trap gold in front of the outcropping where there is a lull in the water force. A gold deposit is more likely to be found on the downstream side of an outcropping which juts out into the river in a downstream direction, because that is where the force of the flow lets up.

LARGER GOLD TRAPS: PAY-STREAK AREAS

One of the most common locations within a stream or river to find a gold deposit is where the bedrock drops off suddenly to form a deep-water pool. Any place where a fixed volume of water suddenly flows into a much larger volume of water is a place where the flow may slow down. Wherever the flow of water in a streambed slows down during a major flood storm is a good place for gold to be dropped. And so it is not uncommon to find a sizable gold deposit in a streambed where there is a sudden drop-off into deeper water.

Any sudden drop-off into a deeper and larger volume of water is a likely spot to look for a sizable deposit of gold.

A waterfall is the extreme example of a sudden bedrock drop-off and can sometimes have a large deposit of gold at its base-but not always. Sometimes the water will plunge down into the hole of the falls and create so much turbulence that gold dropped into the hole during a storm can become ground up or boiled out. This is also potentially true of any other lesser sudden drop-off locations inside of a waterway.

On the other hand, sometimes large boulders can become trapped at the base of a falls and protect the gold from becoming ground up or boiled out by the turbulence. In this case the falls can become a bonanza.

In some waterfalls (or lesser sudden drop-off locations) the gold that has been boiled out will drop just outside of the hole, where the force of water has not yet had enough runway to pick up speed again-at least not enough to carry off much of the gold which arrives there.

Waterfalls are usually the territory of the suction dredger, because this type of gold trap usually deposits the gold underwater. Yet, this is not always the case. Sometimes during the low water periods of the year, some of the area below a falls can be exposed. There might be only a small amount of streambed to move in order to reach bedrock-where most of the gold is likely to be. The only dependable way to determine if gold will be present below a falls, or any other sudden drop-off location in a waterway, is to sample around and find out. Usually this is rather easy (unless you run into huge boulders); because if the area has been boiled out and swept clean of gold, often the bedrock will be exposed or have a layer of light sand and gravel on top. Again, this is not always true. Each falls has its own individual set of circumstances.

Another common location where a sizable gold deposit might be found is where the layout of the countryside causes the stream to run downhill at a rather steep grade for some distance and then suddenly it levels off. It is just below where the slope of the streambed levels off that the water flow will suddenly slow down during a major flood storm. This is where you are likely to find a concentration of gold. Areas like this are known for their very large deposits (pay-streaks).

The area just below where a streambed’s slope lessens often contains a good-sized gold deposit.

Boulders are another type of obstruction which can be in a riverbed and cause gold to drop out of a fast flow of water. Boulders are similar to gold in that the larger they are, the more water force it takes to move them. Sometimes during a storm, the force of water can pick up enough to sweep large amounts of streambed material and gold down across the bedrock. When this happens, the force may or may not be great enough to move the large boulders. A large boulder which is at rest in a stream, while a torrent of water and material is being swept past it during a large storm, will slow down the flow of the stream just in front, below and somewhere behind the boulder. This being the case, if the storm’s torrent happens to sweep gold near the boulder, some of the gold may concentrate where the slackening of current is at the time of the storm.

A boulder at rest in a streambed during a large storm might trap gold wherever it slows down the water force.

One thing to know about boulders is that they do not always have gold trapped around them. Whether or not a specific boulder will have a deposit of gold along with it depends greatly upon whether or not that boulder is in the direct path the gold took when it traveled through that particular section of streambed during earlier major flood storm periods.

THE PATH THAT GOLD FOLLOWS

Because of its weight, gold tends to travel down along a streambed taking the path of least resistance. For the most part, this seems to be the shortest route possible between major bends in the stream.

Gold tends to follow the shortest route possible between any major changes in the direction of the stream or river.

Take note that the route the gold is taking rounds each curve towards the inside of the bends in the river. While this might not be the route gold always takes in a streambed, it is true that when it comes to curves, the majority of gold deposits are found towards the inside of bends. In comparison, very few are found towards the outside. Centrifugal force causes a much greater energy of flow to the outside of the bend. This creates less force towards the inside, which allows for gold to drop there.


It is important for you as a prospector to grasp the concept that under most conditions, gold tends to travel the shortest distance between the bends of a stream or river, and it also seems to deposit along the inside of the bends. Your best bet in prospecting is to direct your sampling activities towards areas which lie in the path that gold would most likely follow in its route downstream within the waterway. This requires an understanding of what effects the various changes in bedrock and the numerous obstructions will have on changing and directing the path of gold as it is pushed downstream during extreme high water periods. For example, if you are sampling for concentrations of gold around and behind boulders, you are better off to begin with the boulders lying in the path that gold would most likely take. This is likely to be more productive than just sampling boulders randomly in the streambed, no matter where they are located.

WHERE THE STREAMBED WIDENS

Another situation within a stream or river where there is often a sizable concentration of gold (pay-streak) is where the stream runs narrow or at a certain general width for some distance and then suddenly opens up into a wider portion of streambed. Where the streambed widens, the water flow will generally slow down, because the streambed allows for a larger volume of water in such a location-especially during extreme high water periods. Where water force slows down is a likely place for gold to drop.

Anywhere that a streambed suddenly widens enough to slow the force of the
stream during high water periods is a likely place to find a deposit of gold.

Notice that some boulders will also drop where the water force is suddenly slowed down. Boulders are similar to gold in that it takes a tremendous amount of force to push them along. Wherever that force lets up enough, the boulders will drop. So boulders are often found in the same areas where large amounts of gold are deposited. But gold is not always found where boulders are dropped. This is because there are so many boulders within the waterway, and the majority of them probably do not continuously follow the same route that gold generally takes. Nevertheless, it is well to take note that those places where boulders do get hung up, which are on the same route that gold follows down the waterway, are generally good places to direct some of your sampling activities.

ANCIENT RIVERS

About two million years ago, towards the end of the Tertiary geological time period, the mountain systems in the western United States underwent a tremendous amount of faulting and twisting, changing the character of the mountains into much of how they look today. It was during the same period when the present drainage system of streams, creeks and rivers were formed, which runs pretty-much in a westerly direction.

Prior to that, there was a vastly different river system, which generally ran in a southerly direction. These were the old streambeds which ran throughout much of the Tertiary geologic time period, and so are called “tertiary channels” or“ancient rivers.” The ancient rivers ran for millions of years, during which time an enormous amount of erosion took place, washing very substantial amounts of gold into the rivers from the exposed rich lode deposits.

The major changes occurring towards the end of that period, which rearranged the mountains and formed the present drainage systems, left portions of the ancient channels strewn about. Some portions were placed on top of the present mountains. Some were left out in the desert areas. And some portions were left close to, and crossed by, the present drainage system.

Some geologists have argued that most of the gold in today’s river systems is not gold that has eroded more recently from lode deposits, but gold that was eroded out of the old ancient riverbeds where they have been crossed by the present river systems.

The ancient channels, where they have been discovered and mined, have often proven to be extremely rich in gold deposits. In fact, many of the richest bonanzas that have been found in today’s river systems have been discovered directly downstream from where they have crossed the ancient streambed gravels. Other areas which have proven to be very rich in today’s river systems have been found close to the old channels, where a few million years of erosion have caused some of the channel and its gold to be eroded into the present streambeds.

Ancient channels (benches) are well known for their very rich bottom stratum. This stratum is sometimes of a deep blue color; and indeed the rich blue color, when encountered, is one of the most certain indicators that ancient gravels are present. This bottom stratum of the ancient gravels was referred to by the old-timers as the “blue lead”, probably because they followed its path all over the west wherever it led them.

Ancient blue gravels usually oxidize and turn a rusty reddish brown color after being dug up and exposed to the atmosphere. They can be very hard and compacted, but are not always that way.

Running into blue gravel at the bottom of a streambed does not necessarily mean that you have located an ancient channel. But it is possible that you have located some ancient gravel (deposited there from somewhere else) which might have a rich pay-streak associated with them.

Most of the high benches that you will find up alongside today’s rivers and streams, and sometimes a fair distance away, but which travel generally in the same direction, are not Tertiary channels. They are more likely the earlier remnants of the present rivers and streams. These old streambeds are referred to by geologists as “Pleistocene channels.” They were formed and ran during the time period between 10,000 years ago and about a million and a half years ago — which was the earlier part of the Quaternary Period, known as the Pleistocene epoch. Some high benches that rest alongside the present streams and rivers were formed since the passing of the Pleistocene epoch. These are referred to as “Recent benches,” having been formed during the “Recent epoch” (present epoch).

Some of these benches, either Pleistocene or Recent, are quite extensive in size. Dry streambeds are scattered about all over gold country, some which have already been mined, but many are still untouched.

Usually, all that is left of a bench after it has been mined are rock piles. Notice in the picture that part of the non-mined streambed is in the background, behind the trees.

Usually all that is left of a high bench after it has been mined are piles of the larger-sized streambed rocks and boulders.

Most of the hydraulic mining operations which operated during the early to mid-1900’s were directed at high benches.“Hydraulic mining” was done by directing a large volume of water, under great pressure, at a streambed to erode its gravels out of the bed and through recovery systems, where the gold would be trapped.

A hydraulic mining operation. Photo courtesy of Siskiyou County Historical Museum.

So some bench gravels have been mined, but many of them still remain intact. While the Pleistocene and Recent benches are generally not as rich in gold content as were the Tertiary’s, it still remains true that an enormous amount of gold washed down into these old channels when they were active. They are pretty darn rich in some areas, and pay rather consistently in others. Also, any and all gold that has ever washed down into an old bench which has yet to be mined still remains there today.

FLOOD GOLD

A large percentage of the gold found in today’s creeks and rivers has been washed down into them out of the higher bench deposits by the erosive effects of storms and time. A certain amount of gold is being washed downstream in any river located in gold country at all times, even if only microscopic in size.

The larger a piece of gold is, the more water force that it takes to move it downstream in a riverbed. The amount of water force it takes to move a significant amount of gold in a riverbed is usually enough force to also move the streambed, too. This would allow the gold to work its way quickly down to the bedrock, where it can become trapped in the various irregularities.

Some streambeds contain a high mineral content and grow very hard after being in place for an extended period of time.

Sometimes a storm will have enough force to move large amounts of gold, but will only move a portion of the entire streambed, leaving a lower stratum in place in some locations. When this happens, the gold moving along at the bottom of the flooding layer can become trapped by the irregularities of the unmoving (“false bedrock”) streambed layer lying underneath. The rocks in a stable lower stratum can act as natural gold traps.

Flood gold is that gold which rests inside and at the bottom of a flooding layer.

Different streambed layers, caused by major flood storms, are referred to as “flood layers.” The flood layers within a streambed, if present, are easily distinguished because they are usually of a different color, consistency and hardness from the other layers of material within the streambed. That gold found at the bottom of or throughout a flood layer is often referred to as “flood gold.” Sometimes, the bottom of a flood layer will contain substantially more gold than is present on bedrock. Sometimes, when more than one flood layer is present in a streambed, there will be more than one layer of flood gold present, too.

The larger that a piece of gold is, the faster it will work its way down towards the bottom of a layer of material as it is being washed downstream during a storm. Finer-sized pieces of gold might not work their way down through a flood layer at all, but might remain disbursed up in the material.

So you can run across a flood layer which has a line of the heavier pieces of gold along its bottom edge, or a flood layer which contains a large amount of fine gold dispersed throughout the entire layer. You can also run across a flood layer which contains a lot of fine gold dispersed throughout, in addition to a line of heavier gold along the bottom edge.

Not all flood layers contain gold in paying quantities for a small-scale mining program. But in gold country, all flood layers do seem to contain gold in some quantity, even if only microscopic in size.

GRAVEL BAR PLACERS

Gravel bars located in streambeds flowing through gold country, especially the ones located towards the inside of bends, tend to collect a lot of flood gold, and sometimes in paying quantities even for the smaller-sized operations. The flood gold in bar placers is sometimes consistently distributed throughout the entire gravel bar. Sometimes the lower-end of a gravel bar is not as rich as the head of the bar, but the gold there can be more uniformly dispersed throughout the material.

FALSE BEDROCK

Once in a while a prospector will uncover an extremely hard layer of streambed material located just above the bedrock and mistake the layer for bedrock because of its hardness. A hard layer is often referred to as “false bedrock.” Such a layer can consist of streambed material, or of volcanic flows which have laid down and hardened on top of bedrock, or it can consist of any kind of mineral deposit which has hardened over time on top of the true bedrock.

There can be a good-paying gold deposit underneath a false bedrock layer. But when there is, it is usually rather difficult to get at.

Actually, for the purpose of sampling, the top of every different storm layer within a streambed should be considered a“false bedrock” and can be a surface-area for gold to become trapped out of the flood layer which laid down on top.


video subscription graphic

By Dave McCracken

“Good organization always comes back to having some understanding in advance of what conditions you will encounter when it is time to complete the mission.”


Assuming legal access to the property has already been arranged, and company executives intend for us to proceed in this way, here are the primary objectives that we try and accomplish during the preliminary evaluation of a potential mining project:

1) Meet with company executives to gain an understanding of what the mining program is about, what the overall objectives are, the timing and the budget. Review the information which they have accumulated so far. Make plans for a departure-date.

2) Obtain the very best maps of the area that we can get our hands on.

3) Locate and study as much information as we can find concerning the mining history of the area, and the areas surrounding where the project will take place. Plot this information on the map. This includes finding out the type of mining methods that were being used, and what kinds of values have been recovered.

Click On Thumbnails To Enlarge


4) Study background information about the geology, weather, culture, politics and economics of the area. This includes a look at the public information released by the U.S. State Department . Follow up with Internet research to see what others have to say about the people, events and mining activity within the area – and anything else of interest.

Is the political situation stable?

5) Establish a preliminary idea of how and where the potential project-area is located in relation to local communities, potential sources of supplies, emergency support, political structure and access. Bring together an early idea of what we want to see when we get there.

6) I always recommend that at least one representative (preferably one of the company directors) of the company accompany us through the full preliminary evaluation of the area where the potential project would take place. It is in the company’s best interest to have someone from existing management present to confirm our observations, and to help evaluate our conclusions.

7) Travel to the potential project area and:

A) Get a feel for the local politics in general, and in relation to the potential project. Will the locals ignore, support or object to the program? Are there pre-existing problems that will need to be fixed before beginning a sampling program? For example, the following video segment shows local campaigning on political issues within Madagascar that soon thereafter evolved into civil strife that disrupted all productive activity in the country for at least 6 months:

B) Find out the different ways of gaining access to the project site. Try and make contact with those people who would provide the transport service (if needed), and establish timing, cost and dependability. How can we make contact with them from the field? For example, the following video segments demonstrate boat transport services we needed to rely upon to support a dredging project in Cambodia :

Click On Thumbnails To Enlarge


C) Locate sources of food, fuel, supplies and personnel to support the mining program. This would include any special needs, like local guides and boat operators out at the project-site. Establish the cost of things and dependability of the supply and/or services. Are there periodic shortages of supplies or services?


D) Locate the nearest place for competent medical assistance. Do they have any kind of emergency evacuation service? If not, perhaps they can provide a referral to the nearest large medical facility which does provide such a service. Develop a viable plan to provide competent medical care in the event that it may be needed, and how to mobilize the service from the field.

E) Establish support in local communities within the vicinity of where we would conduct the mining operations.

Click On Thumbnails To Enlarge


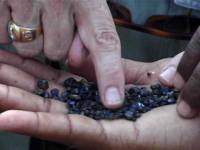
F) Locate local miners and gain as much information as possible from them about what is being done, where and what results are being accomplished. Purchase samples of the values if possible and carefully log where they came from. Take a hard look at the gold, gemstones or other values being recovered. It is important to verify the activity and results. Look at how much value the locals are recovering, in relation to the volume of their production. Relate that back to what can be accomplished in production with suction dredging or other modern equipment.


Click On Thumbnails To Enlarge

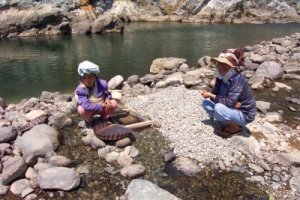
For example, the following video segment demonstrates a primitive hand-mining program that I stumbled upon along the border of western Viet Nam just a short while ago. These miners were breaking very small volumes of hard-rock ore free from the surrounding country rock with a hammer and chisel. The pieces of ore were being crushed by hand, and then surprising amounts of free gold were being panned in the river where we were sampling. While the amount of gold actually being recovered was not a lot, it was very rich compared to the very small amount of ore that was being processed by their primitive methods. Modern equipment and technology would turn this into an extremely valuable deposit:

The best local mining operations to observe are the ones that are actively processing the gravels within the waterway where our dredging would be done in a follow-up sampling operation.

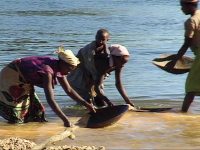
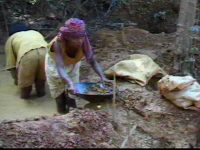
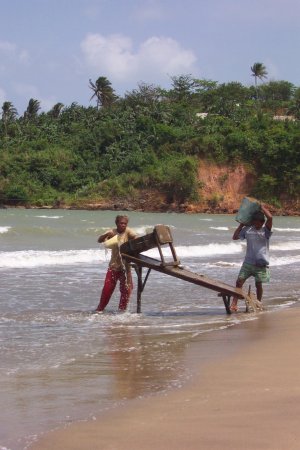
For example, I captured the following video sequence where active gold mining was being done by local miners alongside and inside of the river where we were considering a suction dredge program in Africa several years ago. As the local miners were recovering a lot of gold in proportion to the volume of river gravels being processed, we decided that a follow-up dredge sampling program was justified:

G) Find out if there are special concerns about dangers in the water, within the surrounding area, sanitary problems, health concerns, or security worries. How will they be dealt with? Will there be any special needs for this?

For example, the following two video sequences were captured during a dredge sampling project that we completed in Cambodia several years ago at a time when there was an active (brutal) civil war in progress. The dangerous situation at the time required us to bring along a substantial contingent of security forces and also arm each of the specialists on our team:

Is the waterway full of big rocks that will require specialized equipment to winch out of our way?


Click On Thumbnails To Enlarge 

H) Free-dive in the river and/or probe from the surface to gain a good perception of what equipment will be needed to perform a preliminary sampling program. How deep and fast is the water? How deep is the streambed material to bedrock? Is there a lot of material too large to move by hand? Are submerged trees going to interfere with the sampling process? Are there excessive amounts of mud or sand that will overwhelm the recovery system?

It is often possible to bring up smaller-sized samples to pan from the bottom of the river, to get a better idea what a dredge sampling program will find.

I) Decide if special recovery methods will be required to perform a preliminary sampling program. If conditions present will mean that more portable equipment will be required, this may require a floating container be constructed to fully catch the samples, so they can be carefully processed on shore.

Or it may be that you can refit your sampling dredge so that it will effectively capture the fine gold from your samples. Here is a substantial explanation of the system which we have developed to effectively recover more fine gold on our conventional suction dredges. It combines two classification screens to more-effectively separate material-feed into three size-fractions, each which is directed into a different recovery system. The smallest gold particles (which are most difficult to recover) are directed into low-profile riffles along the bottom of the sluice box which have long been proven to be very effective at trapping fine gold.


J) Establish the potential for a commercial mining opportunity, based upon evaluation of pre-existing information and direct observation of ongoing local mining programs, along with whatever limited sampling can be accomplished using the resources that are immediately available.

K) Document all important details as well as possible by logging names, phone numbers (or email addresses) and locations of important contact persons, along with how much things will cost. Obtain digital images of everything important..

L) If appropriate, conceptualize a preliminary sampling program. This includes how the sampling program would be performed, supported, and how long it would take to complete. The concept should be consistent with the company objectives and budget.

8) Write a report which includes all of the important details of our findings. Include a photo-library with explanations for each image. The report should conclude with a recommendation. For example, Here is an example of the non-proprietary portion of a completed Report.

For a better understanding of why a preliminary evaluation is so important, I strongly encourage you to read about some of the sampling projects that we have accomplished in remote locations outside of America. The full list of the adventures I have written about can be found here . When reading these stories, it should become very clear to you that the potential success of any sampling program will largely come back to how well it is organized in advance. Good organization always comes back to having some understanding in advance of what conditions you will encounter when it is time to complete the mission.


By Dave McCracken

The water flow should be just enough to keep the concentrating action going behind each riffle, yet not so much that the riffles are being swept clean.

Dave McCracken


As a general rule, the optimum slope-setting of a sluice is around one inch of drop per linear foot of box. This can change, depending upon the volume and velocity of water being used, and/or the average shape, size, volume or weight (specific gravity) of material that you are processing.

There is no exact formula for setting the proper water velocity through a sluice box which will work optimally under all conditions for all the different types of riffles being used today. Therefore, rather than give you a formula, I will attempt to give you an understanding of what affects the proper amount of water velocity will cause in a sluice box, and also what the affects are of too much or too little water velocity. In this way, you will be able to act from direct observation to ensure that your, or anyone else’s, sluicing device will be recovering gold to the fullest extent possible.

In setting up a sluice, if feasible, it is desirable to have enough water flow to move the material through the box as fast as you can shovel (or dredge) it in at full production speed.

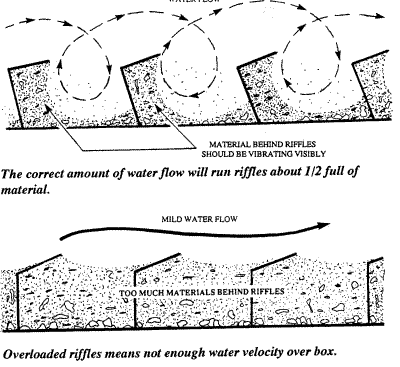
Most of the riffles being used today are designed so that a concentrating-action takes place behind the riffles. By increasing or decreasing the amount of water velocity over a set of riffles, the amount of water-action behind each riffle is also increased or decreased—which has an effect on the amount of concentrating action taking place. Water velocity can be increased by either putting more water through the sluice box or by moving the same amount through faster. Optimally, the water flow is just enough to keep the concentrating action going behind each riffle, yet not so much that the riffles are being swept clean (called “boiling”) of their concentrated material.

How much water velocity is directed over the box directly affects how much material will stay behind the riffles. When the correct amount of water force is being put through a sluice, its riffles will run about half full of material, and the material can be seen to be dancing and vibrating behind the riffles (concentrating) when the water is flowing.

If too little flow of water is directed through a sluice box, not enough water force can get into the riffles and they will “pack up” with material. In this case, little or no concentrating-action will take place and gold recovery will be poor. When this happens, little or no visible vibrating action behind the riffles will be seen and material will not be moving through the box fast enough to allow you to feed the sluice at production speed without loading up the entire box.

Too much force of water through a sluice box will put too much turbulence behind the riffles. This will cause some of the heavier concentrated material to be swept out of the box.

When this happens, gold recovery will also likely suffer, because the areas located behind the riffles are not calm enough to allow some percentage of the finer pieces of gold to settle. You will notice in this case that the dancing action is occurring behind each riffle, but less material will collect behind the riffles because of the increased amount of turbulence there. When you have too much water velocity, as material is shoveled into the box, it passes through very quickly and has little time to make contact with the riffles.

All the above points remain true when adjusting to get the proper amount of water flowing over an expanded metal-riffle system. However, when using such a system, it is necessary to remember that the riffles are very short. So it does not take very much water velocity to make them concentrate properly.

This means that the size of riffles affect how much water velocity is optimum through the box, how much classification of material is necessary and how fine in size your effective gold recovery will be.

The correct amount of flow is usually found to be just enough to move the material over the box to keep up with your feed of material. Since gold is around 6 times heavier than the average material that will pass through a sluice, there is usually some margin for error if velocity is a little faster than necessary. But a faster flow (than necessary) will affect how fine in size your effective gold recovery will be, if fine gold is present.

Once you have your sluice box set up the way you think it ought to be, it is a good idea to run a sizable portion of gold-bearing material through the box and then pan some samples of the tailings. If you do not find any gold in the tailings, you are set up properly. If you are finding gold in the tailings, some changes are in order. Another test is to mix some pieces of lead in with some material, run it through the sluice, and see where the lead stops.

Sluice boxes process material best when receiving it from a steady feed. Too much material dumped at once into a sluice box has a tendency to overload the riffles and choke off the concentrating-action behind the riffles. This will cause gold to wash right through the sluice box as if there were no riffles present at all.

On the other hand, it is not good practice to run volume-amounts of water flow over a sluice box without some material being constantly or regularly fed through. This is because the scouring-action from the water flows will continue to further-concentrate materials trapped behind the riffles, causing heavier materials to be washed out of the box. A sluice box operated for extended periods with no new material being fed to it has an increased chance of losing some of its fine gold values. How much gold loss will depend on a multitude of factors, such as the type of riffle design, how much water flow, the type and weight of concentrates and the size and purity (specific gravity) of the gold.

So if you will not feed more material into your sluice for a while, it is a good idea to cut your water flow back to reduce turbulence behind the riffles until you are ready to feed again.

Even when a sluice box is set properly, occasional larger-sized stones or rocks can become lodged within the riffles. These should be picked or flipped out of the riffles with minimum disturbance to the remaining portion of the sluice.

On most suction dredges, the volume of water being moved through the sluice continues at the same steady flow during production speed. So adjusting the water velocity to set up the dredge right is accomplished by changing the slope of the sluice box itself—which will speed up or slow down the flow of water over the box. Then, once you are dredging, if you will stop feeding streambed material into the suction nozzle for any period of time, it is wise to block the nozzle with a larger-sized cobble to slow the water flow through your sluice box.

When placing a sluice box within a stream or creek for its water flow, the water velocity can be adjusted by either changing the slope of the box, by varying the volume of water being directed through the box, or by placing the sluice at different sites in the stream or creek where the water is moving at different depths and speeds. Getting the right flow of water to pass through a sluice box out in the field is not difficult. But it is sometimes necessary to try different ideas until you find what works best in each situation. For example, in a location where the water is moving slowly, you might be able to direct more water through the sluice and gain the amount of water velocity that you need. In a stream where the flow is moving more swiftly, the water velocity through your box can usually be adjusted by changing the volume of water directed into it, and/or by varying its downward slope.

Usually, you will have little trouble arriving at the correct velocity through your sluice box when placing it in a fast stream of water. You can use river rocks to make a foundation within the stream so your box can sit level from side to side. By allowing different amounts of water volume through the box, and by changing its downward slope, you can work out a combination that does the job. It is good to have a length of nylon cord along with you for securing the sluice box to a rock or some other object upstream. This prevents the box from being moved off its foundation by the force of water. Sometimes it is necessary to pile a rock or two on top of the box to hold it in place. This is especially true when you are using a sluice made out of wood. You can shovel gravel into the box while trying the different combinations to see what effects the changes have on water velocity.

In a situation where you must set your sluice into slower water, you will find it is generally more difficult to get the flow you need, because you have to create more water velocity than is presently there.

If the flow of the stream itself is not enough to move material through your box, you will sometimes find that changing the slope of the box within the stream has little or no effect on speeding up the flow through the sluice. In this situation, there are several things that might be done to channel enough flow through your box so that you can run material through at production speed. Sometimes the flow of water within the overall stream itself is enough, so that by setting up a “water director” in the stream, you can move enough water through the box to give you the desired result. A water deflector, or barrier, like this can sometimes be built by throwing river rocks out into the stream to make more water flow into and through the sluice.

In this situation, there are several things that might be done to channel enough flow through your box so that you can run material through at production speed. Sometimes the flow of water within the overall stream itself is enough, so that by setting up a “water director” in the stream, you can move enough water through the box to give you the desired result. A water deflector, or barrier, like this can sometimes be built by throwing river rocks out into the stream to make more water flow into and through the sluice.

Sometimes you can get the water velocity needed by arranging a small water-elevator across the waterway. By doing so, and by placing your sluice where the moving water spills over the top, you might create more than enough water flow through the box to meet your needs. It really does not take very much volume of water through a medium-sized sluice box to get the right amount of velocity, if the water is moved through the box at speed. In the case of a short elevator (dam), the water level might only need to be raised up slightly to increase the downward slope of the box enough to create the needed water velocity. How high the elevator needs to be depends mostly upon how much water is flowing within the stream or creek.

A sheet or two of thin plastic, or a plastic tarp, or some old rice bags, can come in handy when you are arranging an elevator or water director within a stream. Such material helps prevent the water from pouring through the holes in your man-made barriers.

A water director or elevator can most often be used with good result wherever the water in a stream or creek is moving and is shallow enough that the barriers can be built easily.

If the water at the work site is moving too slowly, or for some reason a water director or elevator will not work in a particular location, it will be necessary to either set up your sluice in a different location where the water is moving faster, or use a motorized pump to feed water into your sluice. Or, in some situations, it is possible to siphon water into your box from a higher point upstream. Siphoning can be done effectively with the use of reinforced garden hose(es), other types of heavy-walled water hose or PVC.


BY ERNEST PIERCE

Gold Dredging for Fortune and Adventure


It was a beautiful June morning in Austin, Texas when my son Evan and I got up to leave for our trip to California. After killing some time getting some last minute things together and calling my Friend Truman to be sure he was ready to go, we finally set out. It was good to know that after months of careful planning and hard work, this trip started off only an hour behind schedule. No sudden problems cropped up–not a bad start at all.

I have learned that if things start to slow you down and nothing falls in place easily, then it’s time to stop and take a good look to see what might be wrong. Usually I find the problem, or the potential problem, and stop it from getting out of hand. This works every time without fail for me, and sure makes things easier all around.

On this trip out to Happy Camp, California, we decided to take a different route to see some more of the country, so we took Interstate 10 through west Texas and southern New Mexico. This is some beautiful country–very nice mountains, rolling prairies, mesas–and it continued that way on into Arizona and southern California. “Man!” It was hot out there. We stopped in Quartzsite about 10 o’clock on Sunday morning, and it was already 115 degrees. “Whew!”

After spending the night camped out with the rabbits at a KOA campground near Bakersfield, we grabbed a quick shower, a bite to eat, and rolled on up Interstate 5. We encountered very little traffic and no problems. Traveling was smooth all the way to Redding, where we got off the interstate to stop in at the Fish and Game Department to get my dredging permit. After a brief bit of being lost in town, we finally got the permit and were back northward-bound toward Happy Camp. (That name has a ring to it, doesn’t it?) I just love this little town–the laid back attitude, the friendly people, and no one rushing around in a hurry. It’s wonderful! It’s great! Just like a little fishing town I lived in on the Texas coast.

Evan and I finally arrived in Happy Camp about 6:30 Monday evening. We had arrived just in time for one of the nightly activities that is put on by the New 49’ers Prospecting Club during the summer months. These things are always a lot of fun and a person can meet some very good people in addition to picking up some good information.

Now, getting up on Tuesday morning wasn’t a problem at all, as we were both keyed up and ready to go. Evan and I started off by getting needed parts and other things at the Pro-Mack shop. The people who work and run this store are the most helpful folks you have ever seen. They will patiently listen to your questions and answer them if they can. If not, they will direct you to someone who can. While I was there, I left a note for our friends, Truman and Ruth, so they could find us without any trouble.

On we went out Highway 96 to a claim that I wanted to try. Two years before, two other friends and I tested parts of this claim and were not too impressed; but I always felt that we didn’t sample the right area.

In looking over this claim, I had spotted an area just past a set of mean-looking rapids that had a large chunk of stone missing from a sheer rock wall which formed an eddy pool about 15 feet by 20 feet. This was right on the inside bend of the river–right when the water started to slow down after the rapids. It looked real good. Sure enough, the water level in the river was low, and it looked like we should be able to work the spot. “Oh Boy,” time to set up the dredge. We drove down to the river about a quarter of a mile above the rapids where there was better access, and put together my five-inch dredge. This went very smoothly which surprised me; because I had extensively-overhauled this Keene five-inch dredge so that it didn’t look like its normal self at all.

The next step was floating it down to the rapids. After looking things over, I decided not to float it through, but to winch it around and over the rocks. About half way across the rocks, we stumbled onto a come-along-winch that someone had lost, possibly the previous year. It had some rust on it; but after a minor application of oil, it worked very well. Moving the dredge took almost two hours to get over about 200 feet of rocks (next time I will float it through and not be so chicken). After resting for a few minutes, we went back to get a load of things we floated to just-above the rapids on an innertube. On the way, I found a seven-pound lead dive weight and thought I sure was getting lucky finding things. Then, getting back to the dredge, I discovered that it was one of my own weights that had fallen off while we were moving the dredge. Oh well!

Evan and I finally got the dredge to a gravel bar on the opposite bank from where I was going to work, and parked it there. I ran a line across the river, got it firmly attached to a boulder on one side and a big tree on the other, then tested it by coming back across hand over hand. Well, OK, I didn’t get all the way back across, but it was fun trying. My son didn’t know what to think of his father acting so silly hanging from a rope going across the water.

I discovered that all this time, while I was stringing the rope and tying it off to the tree, I had been as close as three feet to a wild bee hive. Well, they didn’t bother me, so I didn’t bother them, and that’s the way it stood between us for the rest of our stay in the area. By the way, the hive was about the size of a basketball.

The next part was the most difficult so far because I had to put everything on the dredge and pull it across the rapids without turning over or losing it. So I sat down and studied the current and the flows and calculated how much rope to use, where to tie it and what angle to tie it on the dredge. It helps to understand about this kind of stuff in order to let the river help as much as it can and not fight you.

Well, we launched the dredge. It floated out a little way and then got caught in a reverse current. It floated upstream quite a bit, then shifted into the main current and started across a little faster than planned. About halfway to this side it reached the end of the rope and tried to play like a submarine. Finally the poor thing came up and smoothly settled into the notch in the cliff where I wanted it. Lucky!

Meanwhile, Evan was waving to get my attention and pointing down stream. When I looked, I saw the last few inches of the suction hose dive under water. Good thing the river was making plenty of noise, because what I said about that hose didn’t need to be heard. Oh well, the only thing to do was get my mask on and dive in. It took about ten minutes to locate the hose, then another five or ten to get it back on the bank. The water was about 12 to 15 feet deep where it stopped, and it took four dives in the swift current to even put my hands on it.

The rest of the afternoon was spent getting the dredge ready to go. When it was all done, Evan and I went back to camp, rested for a while and ate supper. We then returned to Happy Camp for the night’s activities with the New 49’ers.

Now I’ll tell you the whole trip is worth making just to attend the activities that are put on by The New 49’ers. I met some of the best people I have seen anywhere at these get-togethers. This night, I met a family from Georgia, and I really liked them from the moment we met. It turned out we were camping in the same campground and they were just around the bend down-stream from my son and me. They also had children the same age as my son, so that worked out great.

Wednesday morning dawned; and, by nine, we headed for the dredge and got it fired up and operating by 10. The water temperature was just right for dredging, very comfortable. Visibility was around 15 feet, and I considered that good. This area had looked great when I scouted it out. Being on the bottom with a suction hose made it look even better.

Working the gravel, I could tell it had not been dredged. When I uncovered an old car frame, mostly rusted away, I knew it hadn’t been touched at least as far back as the 1964 flood. This looked good!

An hour and a half later, when the first tank of gas ran out, I checked the sluice box and saw good color at the head of the riffles. I have a small one-foot square area at the top of the riffles that I can remove the sample carpet from, and so I panned this out. Wow! What came out of that section was the most gold I have ever seen come out of any of my dredging experiences! I have seen some pictures of gold in a pan like this, but it was a thrill to do it myself. I finished panning this down and set it aside to weigh it separately. (It came out to two penny-weight.) The next tank-full of gas that I ran through the dredge produced about the same results. As I cut deeper into the streambed, the amount of gold kept increasing for the next four days.

While I was on the bottom dredging, Evan was busy on the bank classifying some gravel he was digging at a spot I found for him. After he got about half a bucket full, he sat and panned it out. He did very well at this and always had some colors in the pan–sometimes he had a lot of them. Anyway, he stayed dedicated to panning for a longer period of time than I had thought he would. Also, when I would gas-up the motor, I cleaned the top of the sluice. Then I would separate out some of the concentrates to give to Evan to pan out. He really enjoyed this, because there was so much gold coming from the dredge.

It wasn’t all fun and games. I had to move some big rocks out of the way and that was no problem, but the one I waited too long to move was the one that almost got me. Yep, “The Loomer,” that one I just didn’t want to move yet–the one I would get to in a minute–the one that wasn’t really dangerous. Yeah; that one! Sure enough, I took my attention off it and turned to do something else. Well, when it started to move, I actually sensed it and instinctively jumped and pulled my legs up at the same time. It’s a good thing I did, because when the rock rolled, it missed my legs, but nicked me in the arm hard enough to throw me a few feet out of the way. It didn’t hurt, but it stunned my arm for a minute or two. After the silt cleared and I could see the real size of the rock, I set to work moving it out of the way. This rock was about 600 pounds, so it took a while to move by myself. All the while I was moving this thing I was wondering what I was doing this for anyway. But the longer I worked, the less I worried about it. You know that saying about getting back on the horse that threw you? That really does work! I felt better about the whole situation after I worked around that rock and finally moved it out of the way.

On Thursday, when we stopped for the day, we discovered that Truman and Ruth had finally arrived in camp and wanted to know how we were doing. We had split up at Bakersfield so they could go to visit some places around San Francisco; then they went up the coast to Eureka and finally across to Happy Camp. It was nice to have them in camp, so the next morning I took them down to the river to show where we were working. I showed Truman where Evan was digging and panning, so the two of them did that while I went back dredging. (I also showed them where the bees were.) These two people are the best people I know, and I think a lot of them. Truman and Ruth stayed with us for a few more days, and then they had to head back home. But in that time, we sure had a lot of fun and they both learned how to walk on river rocks without slipping too much.

Saturday was a big day back at Happy Camp. The New 49’ers were sponsoring a coin and prize hunt and the big Saturday barbecue. This is an event you don’t want to miss. More people were there than you could find the time to talk to. It was a grand event–lots of prizes and coins, not to mention the real nice folks. The potluck and barbecue-lunch was marvelous and that barely describes it.

Enough of the fun and games, and it was back to dredging the next day for us.

I continued to work that area, and when the hole reached a layer of packed and rotten branches mixed with tree stumps and logs, I spread it out further until I ran out of room to work. After this, I cleaned up the sluice completely, then got back in the water and began to break up the mass of wood to get underneath it. This was the first time I had run into anything of this nature. The stuff would mostly turn to a reddish powder when I touched it and cloud-out the area.

The layer under it turned out to be loose-packed and made of fine crushed stone but had almost no gold. I was expecting to find some big nuggets or a lot of small ones, but it really turned out to be a disappointment; because after getting through it, I found nothing on the bedrock. So, I quit and checked the sluice–sure enough, after panning out the sample carpet I only found 12 to 15 colors, so I pulled the dredge back to the other side to sample there. After sampling several places, I didn’t find any amount of gold to make me stay and work. Sad to say, but if I had tried a sample hole another 100 feet from where I stopped, I would have found another good pocket that produced as much as the one I worked. (It turned out that I was able to return to this area a month later, but that is another story.) I usually keep good records of the time I spend every day actually dredging, so I checked to see what the statistics were on this spot. It turned out that I was only dredging this hole for close to 12 1/2 hours total work-time under water. This produced close to 35 pennyweight of gold. Figure that out and it comes to over 2 1/2 pennyweight an hour. That’s not bad for a five-inch dredge and an semi-beginner who has only two years part-time gold dredging experience.

On Saturday of the next week, my wife Mary flew into Medford, Oregon, where Evan and I picked her up and brought her back to Happy Camp. We had been gone so long, she sure was glad to see that her long-lost husband and son were safe. She also loves Happy Camp and looks forward to going back next year.

All three of us spent the next week going around the area sampling here and there, just having a real good time. I showed Mary how to pan gold and that kept her busy for quite a while. She gets excited when she finds some color in the pan and calls me over to look at it. If there is a more beautiful part of this country than this area of northern California, I don’t know where it would be. The beauty of the countryside as we drive through is a wonder to behold. We really enjoy our trips out there and discover something new every time we visit.

After all this, you might think I would wait until the next summer to come back. But as we were leaving, I was thinking that it sure would be nice if I could return to California sooner than that… Well, it turned out that things arranged themselves in such a way that I came back at the end of August–but that is another story. See you on the Klamath!

Other Adventures with Ernie:


By Dave McCracken

You have a substantial prospecting-advantage with a modern gold detector!
Dave McCracken


woman with a gold nuggetI highly recommend The Fundamentals of Electronic Prospecting be read before reading this article.

All the rules of placer and desert geology apply to gold nugget hunting, and this knowledge should be utilized to establish where gold deposits and nuggets are most likely to be found.

Particular attention should be paid to locations which have little or no streambed or other material present, so the detector’s coil can search as closely as possible to bedrock or false bedrock layers. Also, exposed tree roots along the edges of the present streams, rivers and dry-washes have been proving successful, especially along the smaller tributaries in the higher elevations of known gold country.

Some of the most productive areas for electronic prospecting in the dry regions are in the near vicinity of old dry-washing operations. The old-timers were only able to make dry-washing work in very high-grade areas. They seldom recovered all the high-grade gold out of an area, because they did not have the means or equipment to prospect extensive areas. You have a substantial prospecting-advantage with a modern gold detector. Natural erosion over the years has likely uncovered more high-grade in the immediate area, or concentrated other spots into new high-grade gold deposits.

When prospecting old dry-wash workings, it is always worth a little time to rake back some of the old tailings piles and scan them with your detector. Dry-washers, today and during the past, almost always used a classification screen over the feed area. The screen was commonly around half-inch mesh. An operation shoveling onto the screen at production speed in dry high-grade gravel might have missed larger nuggets as they rolled off the top of the screen. Sometimes, when working a layer of caliche, if the material was not broken-up well enough, it would roll off the screen with nuggets still attached. A metal detector reads out strongly on these kinds of targets. Make sure to ground-balance to the tailing pile. One nice thing about prospecting in these tailing piles is that they usually are not filled with iron trash targets.

When dealing with natural streambeds above the water, you generally do not find too many other reading metallic objects besides gold, unless the spot which you are scanning is near an inhabited location, like a park or an old dump. So it is reasonably safe to dig any target that gives off a metallic reading in a streambed.

However, some locations have lots of trash and small iron targets. Sometimes, iron targets seem to accumulate heavily in the same areas as gold. This presents a big challenge! Once you have been scanning a particular area for a while, you will gain an understanding of how much “trash” (metallic objects of no value) exists within the vicinity. With some experience on gold objects, you will learn to distinguish the different tone changes between most gold objects and most trash targets. Pay particular attention to the very faint readings, as is often the case with natural gold targets.

One of the main keys to successful electronic prospecting is to slow down your sweeping action. You cannot do it fast like when hunting for coins. You almost have to crawl across the ground. Remember, you are listening for even the faintest whisper of a sudden increased threshold hum. A gold target may sound like a coin—only a quieter signal.

Different types of detectors have special non-motion or pinpointing settings which allow the coil to be moved very slowly and still pick up targets. This means you are able to slow down your sweep to almost a standstill and still hear a target as the coil moves over it. On the other hand, these settings may be too sensitive to use for nugget hunting on some detectors, depending upon field conditions and how fast you are sweeping. When in doubt, experiment while using a test-nugget on or in the ground you are searching.

Another important point is to overlap your coil sweeps. The area covered by the search-field under your coil is similar to a triangle. Directly underneath the coil, the search area is about the same size as the diameter of your coil. The search area becomes narrower as it penetrates the ground further away from the coil.

However, the size of this triangular search-field is not constant underneath the coil. It changes as mineralized conditions change in the ground below your search coil. If you do not overlap your search strokes, you can leave as much as 50 percent or more of the area below the search coil behind, without being adequately searched.

Image 1

You have to use your own judgment about how to discriminate between which targets to dig, and which to leave behind. This comes with practice and experience. Discrimination of any kind, whether by electronic circuitry or the audio sounds given off by the target, has limited accuracy. The depth of a target and the degree of ground-mineralization in that particular location can confuse any discriminator. In some places, you will want to dig every target. In other places, where there is lots of trash, you may find it more productive to discriminate your targets by sound and/or in combination with electronic discrimination features on your detector. In this case, you have to balance the need to leave some small pieces of gold behind, with not wanting to dig a bucket full of trash and valueless iron targets; and therefore, less gold.

When in doubt, dig! Or at least toss your sample nugget down and get a comparative reading.

With lots of practice in the field, you will eventually reach the point where your metal detector is like an extension of your arm—like an extension of your perception and knowingness. You will gain the ability to look down into the ground and have a pretty good idea of what is there.

Big nuggets are generally not too difficult to find. In most areas, however, there are hoards of smaller gold targets in ratio to each large nugget found. Small pieces of gold are your bread and butter! Most gold is small gold, but it has to be large enough to be worth your while. Some of the modern gold detectors will pick up pieces of gold so small that you could be finding them all day long; and at the end of the day, not have accumulated very much gold by weight. In this case, you may want to move to a different area.

Just like in other forms of gold mining, electronic prospectors have to set standards for themselves. Someone pursuing the activity to make money will be motivated to recover volume-amounts (by weight) of gold. Another person pursuing electronic prospecting as a part time activity may receive his or her best thrills by recovering the smallest-sized targets.

One interesting development in the electronic prospecting field, which I have not seen happen in other gold mining activities, is the tremendous emotional success gained from finding extraordinarily-small pieces of gold. Normally, in gold prospecting, we get excited to find a big nugget or a rich deposit. These are easy to locate when scanned over by a metal detector. The big challenge with a metal detector is in locating the smaller pieces. Experienced prospectors know that if they are finding the small pieces, they will easily-find the big pieces.

When scanning, keep your coil as close to the ground as possible. It takes a coordinated arm and wrist-action to keep the bottom of the coil parallel and close to the ground throughout the full sweeping action. Allowing the coil to move one or two inches away from the ground during the outside of a sweeping motion will also reduce depth-penetration by one or two inches. This will certainly result in lost gold targets. You have to practice keeping the coil close to the ground. Shorter sweeps is usually the answer.

Sometimes it helps to kick rocks out of the way, or use a garden rake to remove multiple smaller obstructions before you search an area. This allows you to keep the coil close to the ground with minimum obstructions.

During your prospecting activities, it is possible that you may find occasional targets which could potentially be classified as artifacts. The Archaeological Resources Protection Act defines just about anything you might find as a “protected” artifact. There are criminal penalties for disturbing or removing artifacts. What constitutes a protected artifact is primarily up to the judgment of local bureaucrats. Searching for natural gold targets is legal. Messing around with old junk and trash may be illegal. Sometimes, it is better to just leave old items where they lie. You will have to decide.

The main suggestion I commonly give to beginners about electronic prospecting is to not give up. With practice and by working in the right area, you will surely find some gold!

PINPOINTING

When you do have a reading target, its exact position in the ground should be pinpointed. This can be done by noting when the detector sounds out while scanning over the target in fore and aft and left to right motions. A steel or iron object can be often be distinguished by noting the size and shape of the object during the pinpointing process. Sometimes trash objects are large and/or lengthy in size.

Sometimes a stronger-reading target will seem to cover a larger area than it actually does. If you are having trouble getting an exact location, continue to lift the search coil higher off the ground while scanning with an even back and forth motion. As the coil is raised higher, the signal will become fainter; but the position of the metal object will sound-out at the very center of the search coil.

PINPOINTING WITH THE GOLD PAN IN WET AREAS

Once you have pinpointed the exact position of a target in an area near water, one way of recovering the object is to carefully dig up that portion of ground, using a shovel or digging tool, and place the material in your gold pan. Here is where a large plastic gold pan comes in real handy. Be careful not to cause any more disturbance or vibration of the streambed than is necessary while you are attempting to dig up a target. It is possible to miss the target on the first try and cause it to work further down into the streambed because of its greater weight in the wet environment. Sometimes you can lose the target, and not be able to locate it again with the detector.

Sometimes the ground is hard and needs to be broken up or scraped with a small pick. Keep in mind that a sharp blow from a pick can destroy a coin or disfigure a gold nugget, reducing its value. Digging and scraping is better than pounding, if possible. In hard ground, sometimes it is easier to loosen the material up and shuffle it into several small piles. These can then be flattened out and scanned to see which contains the target.

Once you have dug up that section of material where the target was reading, place it in your plastic gold pan and scan it with your detector. If the contents of the pan do not make your detector sound-out, scan the original target area over again. If you get a read in the original location, pour the contents of the pan neatly into a pile out of your way, pinpoint the target all over again, and make another try at getting the target into your gold pan. Continue this until you finally have the target sounding out in your pan. If you cannot see the target, and water is immediately available, pan-off the contents until the target is visible.

There is a good reason why you should not ever throw away any material from the target area until after you know for certain exactly what the reading target is. If you are looking for placer gold deposits and it happens that your detector is sounding out on a gold flake or nugget, the chances are pretty good of additional gold being present in paying quantities within the material which has been dug out of the hole, even if it does not sound-out on your detector. Remember, small particles of gold often do not make metal detectors sound-out. Therefore, the possibility exists that there could be hundreds of dollars worth of gold in a single shovelful of material not tightly-concentrated enough to cause your detector to sound-out. So wait until you have seen the reading target before you start throwing any material away.

If you dig for a target and then cannot get any further reads on the detector from either the pan or in the original target area, quickly pan-off the pan’s contents. There is always a possibility of a concentrated gold deposit which is no longer concentrated enough to read-out on your detector. In this case, you are most likely to have some of the gold deposit in your gold pan, which will quickly be discovered when you pan off the contents.

There is also another reason why you save the material from a hole until you have recovered your target. Because of the shape of a gold pan, and depending upon the size and shape of the coil you are using, if the gold target (especially a small target) ends up in the bottom of your pan, your coil may no-longer be able to scan close enough to the bottom of the pan to sound-off on the target. Because of this problem, gold pans have limited workability as a pinpointing tool in electronic prospecting. Sometimes, you can have better luck scanning the bottom-side of a gold pan.

DRY METHODS OF PINPOINTING

There are several popular methods of pinpointing reading targets in the dry regions where water is not available for panning. Some prospectors use a plastic cup. Material from the target area is scooped up and passed over the coil. If the contents of the cup do not sound-out on the detector, the target area is scanned again until the target is located. Take another scoop, pass it over the coil for a signal, and repeat until the target is in the cup. Then pour some of the contents into your hand. Pass the cup over the coil, then your hand, until you locate the target. Put the rest away in a neat pile, and repeat the process until you recover the object.

One important point to mention is that most search coils have equal sensitivity to targets both above and below the coil. In other words, during pinpointing, you can pass material over top of the coil and obtain the same results as if you turn the detector upside down and pass the material across the bottom of the coil.

Your handy magnet can be a big help when you are having difficulty finding a faintly reading target. Sometimes it is just a small piece of iron.

There is also the hand-to-hand method of pinpointing a target. You can reach down with your hand and grab a handful of dirt or material. Pass your hand over the coil to see if you are holding the target. Continue until you have the target in one hand. Then pass half the material in that hand to your other hand. Use the coil to find which hand has the reading target. Discard the material from the other hand and pass half the material from the reading hand to the second hand, again. Keep up the process until you only have a small amount of material in the reading hand. Carefully blow off the lighter material to locate the target.

Another procedure is to grab a handful and pass it over the coil as explained above. Once you have a reading handful, toss it in a pouch for later panning.

Some prospectors prefer to sprinkle a handful of reading material slowly on top of the detector’s coil. There are different ways to do this. One effective way, which requires some practice, is to sprinkle material over a slightly slanted coil while you vibrate it so that material slowly sweeps across and off. When the target drops onto the coil, the detector will sound-off with a distinctive bleep. Then, all you have to do is gently blow the dirt off the coil, or recover the target from the top of the pile where the material is landing. This method is nearly impossible in wet material.

One important thing about using your hands to pinpoint and recover gold targets, is that some of today’s most sensitive high frequency gold detectors react to the salt (mineral) content on or in your hand. When this occurs, your hand will give a reading when passed over the coil by itself, sometimes even a strong signal. This makes hand pinpointing methods more difficult. In this case, the plastic tray or cup works just fine, or the method of pouring material onto the coil.

If you find a gold target, be sure to scan the hole again. Sometimes it is worth doing a lot of digging and/or raking, with alternate scanning of the immediate area. Gold targets almost never travel alone! I have seen dozens of gold flakes and nuggets come from within a one-foot square area on bedrock. Many times!

HOT ROCKS

Sometimes you get soft or strong signals from your metal detector when the coil is passed over rocks which contain heavy mineralization. These rocks are called “hot rocks.” This needs to be clarified. It isn’t necessary for a rock to have an extraordinary amount of mineralization to sound-off as a hot rock. It just needs to have more than the average ground which your detector is ground-balanced to. The opposite of this is also true. A rock containing less mineralization than the average ground will change tone on a detector in the opposite way. These are called “cold rocks.” A hot rock from one location could be a cold rock in another location containing higher mineralization in the average ground.

Put another way, when your detector is properly ground-balanced to the average ground, it will sound-off on rocks containing condensed heavier mineralization. Often, the signals given off by these hot rocks can be mistaken for signals which might be given off by gold targets in the ground. Some locations have lots of hot rocks. Naturally, since gold travels with other heavy mineralization, you can expect to find hot rocks in the various gold fields.

Hot rocks come in all sorts of colors and sizes. A big hot rock, depending upon the degree of mineralization over the average ground, can sound very similar to a gold target. The same goes for small hot rocks.

Quite often, most of the hot rocks within a given area will be similar in nature, color and hardness, but not necessarily in size. After searching an area for a while, you will know what most of the hot rocks look like. This makes pinpointing targets a little easier, especially when dealing with small hot rocks. When receiving signals from rocks which are dissimilar to the average-looking hot rock of the area, check them out closely, especially when they have quartz. Some of these may not be hot rocks at all, but gold specimens.

If you are finding hot rocks on top of the ground, you will almost always find them buried, as well.

Metal targets gradually lose signal-strength in proportion to the increased distance from the coil. Hot rocks rapidly lose their signal-strength as they are scanned further from the coil. Also, a metal target tends to create a more specific, sharper signal as the coil is passed over. The signal given off by most hot rocks is not as sharp. It is more of a mushy sound which doesn’t have as clear a change in tone-intensity as the coil passes over the target.

When uncertain about a reading target, one way that some hot rocks can be identified is by passing the coil over the target from different directions. If the target only sounds out when being swept from one particular direction, then it is nearly certain that the target is not a gold nugget.

Sometimes, when lowering the sensitivity on your detector a few numbers, the signal given off by a nugget will continue, but weaker. A hot rock signal will quickly disappear by lowering the sensitivity. You can get a better idea how your detector is reacting to sensitivity changes by running it over your test-nugget.

Another test is to slowly raise the coil further away from the reading target as you are scanning. The signal of a metal object will become progressively fainter as the distance is increased. The signal given off by a hot rock will rapidly die away as just a little distance is put between the target and the coil. Most hot rocks in a given area will have a very similar sound, the intensity depending upon size and distance from the coil. Sometimes, you will find that a gold nugget gives off a much sharper signal. But not always. Much also depends upon the size of a gold target, its distance from the coil, and the amount of mineralization interference in the ground that is being scanned.

Each area is different. The hot rocks in some areas are reasonably easy to distinguish. In other areas, it is necessary to dig every signal.

Larger hot rocks are easier to detect. Many can simply be kicked out of the way. It is the smaller pebble-sized hot rocks which create faint signals. In some locations, these signals are so similar to the signals given off by gold nuggets that you have no other choice but to dig them up.

If lots of hot rocks are making it difficult for you in a particular area, you might try experimenting with smaller coils. Smaller coils are more sensitive to smaller pieces of gold. Therefore, the sharpness of the signal over gold targets is also intensified. This may give you the needed edge in distinguishing the slightly-different signals being given off by hot rocks in that area.

Some gold prospectors go so far as to ground-balance over top of a hot rock until it no longer gives off a signal. This will eliminate a large portion of the hot rocks in the area, but it is also likely to eliminate a large portion of the small and marginal signals given off by gold targets. This procedure may work well in areas containing just large nuggets. However, most areas I am aware of have dozens or hundreds of smaller pieces of gold for every larger piece that you will find.

Since cold rocks are made up of a lesser-concentration of iron than the average material which your detector is balanced to, they give off a negative reading signal on your detector. Ground-balancing over a cold rock will cause your detector to react positively to the average ground within the vicinity.

PRODUCTION

Once you find a location which is producing gold targets, you will want to thoroughly work the entire area. This is commonly accomplished by carefully gridding the site. By this, I mean creating parallel crisscross lines on the ground, usually about four feet apart. You can do this by drawing light lines in the sand with a stick. Grid lines allow you to keep track of where you are, and what has already been searched.

If there are obstructions in the producing area (“nugget patch”), they should be moved or rolled out of the way if possible. The smaller rocks and materials on the ground can be raked out of the way. This allows you to keep the coil closer to the ground. In a proven area, this will surely mean more recovered gold targets.

Some areas produce quite well on the surface. Then, by raking or shoveling several inches off the surface and scanning again, sometimes you can find even more targets. I know of numerous small-scale mining operations in many different parts of the world, using metal detectors as the only recovery system. They use a bulldozer to scrape away material which has already been scanned, two or three inches at a time. A layer is removed; the area is scanned thoroughly with metal detectors to locate all of the exposed gold targets. Then, another layer is removed and scanned. This process is done all the way to bedrock. They make good money at it!

I have heard of others doing the same process on a smaller-scale by attaching plow blades to four-wheel drive vehicles. Some even do it using ATV’s!

While hunting over a proven nugget patch, be sure to keep your detector properly tuned all the time. Otherwise, you will certainly miss gold targets.

PROSPECTING OLD HYDRAULIC MINING AREAS

Perhaps the most productive areas of all to prospect with metal detectors are areas which were already mined by the old-timers using hydraulic methods. Many of these areas are left with a large amount of bedrock exposed. This allows immediate and easy access for search coils to get close to old gold traps. Sometimes, the exposed bedrock has been further-deteriorated because of direct exposure to the elements. Once a nugget patch is located, raking away decomposed bedrock sometimes can produce remarkable results.

While searching such areas, pay attention to the color of dirt which covers and surrounds nugget patch. You might discover a pattern. In our area of operation, it is a white powder which often signifies the possible presence of a good spot. Perhaps in other areas, it might also be this white powder, or something else.

PROSPECTING OLD MINING TAILINGS

It is usually possible to find piles and piles of old mining tailings throughout most proven gold-bearing country.

Many of the larger earlier gold mining operations (the ones that were set up to move large volumes of material), concentrated on recovering only the fine and medium-sized values from the material being processed. This meant that the larger material was classified-out so the smaller material could be processed through controlled, slower-moving recovery systems. On the larger operations, classification was usually done either with mechanical vibrating classification screens, or with the use of a “trommel.” A trommel is a large circular screening classifier which rotates and tumbles material through, allowing the smaller classification of materials to pass through the outer screen and into a channel which directs them to the recovery system. The larger materials are passed down the inside of the trommel to be discarded as tailings.

In many of the larger operations, there were no means to recover the larger pieces of gold which were screened-out along with the other large materials. As a result, larger nuggets were sometimes discarded along with the waste material as tailings.

Anywhere you see large tailings piles, especially near the present waterways, it is evidence of a large volume operation where it is possible that the nuggets were discarded with the waste and are likely to still be there. Some large tailing piles still have large goodies inside them, which sing out very nicely on the proper metal detectors. One way to distinguish the right kind of tailing pile to be looking through is there should be a pretty wide range of material sizes in the tailing pile. Tailing piles which consist only of the larger rocks (cobble piles) were most likely stacked there by hand during a smaller surface-type operation.

Scanning tailing piles with a metal detector is proving to be highly-productive in some cases, and should not be overlooked as a possibility for finding nice specimen-sized gold nuggets. VLF ground-cancelling detectors are usually best-suited for this, because tailings almost always also contain a large quantity of mineral content, which is likely to cause interference on a BFO-detector.

PROSPECTING OLD MINING SHAFTS

Even the most experienced cave explorers shy away from entering declining mine shafts because of the dangers involved.

CAUTION: The first thing to say about prospecting in old mine shafts is that they are dangerous! There are different things that can go wrong when prospecting around in such places, one main danger being a potential cave-in. The shoring beams in some of these old shafts may have become rotten and faulty over the years. So it is best not to lean up against or bump any of the old wooden structures situated in old mine shafts. Loud, sharp noises should also be avoided.

Shafts which extend down into the earth on a declining angle are particularly dangerous; because if the ladders or suspension systems are faulty and collapse while you are down inside, you may not have any way to get out again. It is never a bad idea to bring along a caving rope, and use it, when exploring declining-type old mine shafts. Caving rope is different than mountaineering rope in that it is made not to stretch nearly as much. But I suppose, when going down in dark holes, any rope is better than no rope at all!

Another potential danger involved with exploring old mine shafts is encountering poisonous or explosive gasses. Entire mines were shut down because of such gasses—even when they were good-producing mines. These, however, were usually caved in and closed off to prevent unsuspecting adventurers from entering at a later date and getting into trouble.

Before you enter any old mine and start sorting through its low-grade ore piles, or pecking samples off the walls of the mine, it is a good idea to make sure the mine is not already owned by someone else. Or, if somebody does own it, it is wise to get the person’s permission first. There is probably nothing more dangerous in a mine shaft, cave-ins and poisonous gases included, than some old cantankerous miner who catches you, uninvited, in his mine and thinks you are stealing his gold!

There is probably more danger in prospecting old shafts than in any other gold prospecting activity.

After all that, just in case I have not succeeded in scaring you out of the idea of entering old mine shafts in your prospecting adventures, here are a few pointers about how and where you might find some rich ore deposits, or rich ore specimens, with the use of your metal detector:

But first, let me recommend that if you do go into such places, you bring along a buddy and leave another one at the surface with explicit instructions to not enter the shaft under any circumstances, but to go get help in the event that you should get into trouble within. It is also a good idea to let a few others know where you are going, just in case your outside-man doesn’t follow orders and you all become trapped inside.

There are two main sources of possible gold and silver in an old mine:

1) High-grade ore specimens that may have been placed in the low-grade ore piles and left as waste material.

2) High-grade ore which has yet to be mined.

With the exception of the largest production hardrock mines, there is always a certain amount of rock (ore) which has been blasted away from the wall of the tunnel that was not milled and processed. This was because some ore is of such apparent low-grade value that it is not worth the expense to process.

Sometimes the vein being followed into the mountainside was not as wide as the tunnel needed to be in order to progress into the mountain. Therefore, that rock material which was not part of the vein itself, or the contact zone, that looked to be of lower-grade value, was also discarded into the waste piles.

Crushing and milling ore is, and always has been, somewhat of a timely and expensive process. For this reason, a good many mines only processed what appeared to be the highest-grade ore that was blasted from the ore body. The rest was usually piled out of production’s way inside or outside of the shafts.

In the smaller operations, the kind where the ore was crushed and milled by hand and then processed with a gold pan to recover the values, only the highest of high-grade ores could be processed at a profit. The rest was usually laid aside out of the way.

The sorting of a higher-grade ore from lower-grade ore has always been a matter of judgment on the part of the person who was doing that part of the job. And, until the more recent breakthroughs in electronic detecting equipment, sorting needed to be done by eye or by feel (weight). There simply was no other way.

The interior of mine tunnels was often poorly lit with miner’s candles during earlier days, and the air inside the shaft was often foul after the powder explosions used to blast ore from the interior of the mountain. As a result of all this, it is not difficult to imagine that some higher-grade ore was likely discarded as waste material in most mines.

How rich the ore was in a mine will have a lot of bearing on whether or not a present-day prospector will find high-grade ore in the waste piles of that mine. The size of a mine does not necessarily have anything to do with how high-grade its ore was, although it may have a bearing upon how much waste ore will be available to test.

County reports can be looked over to locate the old mines within an area. Many of these reports also include information about the grade of ore being extracted from some of the mines.

When you are testing ore samples from a mine with a metal detector, and you do not come up with any specimens, try a few different piles. If you still do not come up with any specimens, it was probably not a high-grade mine. Try another.

Keep in mind that the floor of a mine shaft is likely to have some iron, brass and other metallic objects which will cause your detector to read-out.

One of the fastest and most effective ways of thoroughly checking out samples of ore is to lay the detector down on the ground or upon a makeshift bench with the search coil pointing upward so individual ore samples can be quickly passed by the most sensitive portion of the coil. The 3-inch diameter search coils are probably best-suited for this kind of work, because of the increased sensitivity, and because there is seldom great need for increased depth-sounding when testing ore specimens.

The most sensitive portion of the search coil is usually located near the center of the coil. It can be easily pinpointed by passing a coin back and forth across the coil while the detector is in tune, and by finding that spot where the coin causes the loudest and sharpest reading. The most sensitive area should be marked brightly with a Magic Marker so it will be easier for you to move ore samples directly past it. It is worthy to note that the top of the coil should have similar sensitivity to targets as does the bottom.

Ground-balancing would probably best be achieved by tuning to the overall ore pile. But, you may need to experiment. A lot will depend upon the grade of ore you are looking for. High-grade gold specimens will require the surrounding mineral to be cancelled out. On the other hand, sometimes high-grade ore is full of fine particles of gold which would not sound-off on a detector. In this case, the high degree of mineralization in the ore specimen might sound-out like a hot rock. Therefore, you would not want to ground-balance out high mineralization. So, depending upon the nature of the ore in a mine, you will need to use your own best judgment regarding the proper way to ground-balance.

Bring along a bucket, canvas bag or a knapsack so you will have something to carry your specimens as you find them.

Both BFO and the VLF ground-cancelling metal detectors can be successfully used to locate high-grade ore specimens. For the individual who is interested in finding a wider range of high-grade ore specimens rich enough to be worth milling on a small-scale for the gold and silver values, perhaps a BFO is the better type of metal detector to be used for the job. This is because the BFO does exceptionally well at picking up highly-mineralized ore. When you are dealing with hardrock veins, high mineralization is a good index of gold being present, especially when you are working with the ore that was blasted out of a previously-successful gold mine. Ore which contains large amounts of locked-in values or lots of fine gold that is thoroughly dispersed throughout the ore is not likely to read-out as a metal on any kind of conventional metal detector, although the high degree of mineralization which usually goes along with such ore probably will sound-out on a BFO-detector as a mineral. So the BFO-detector is handy in finding rich ores which might otherwise be undetectable.

By placing a BFO-detector on its mineral setting and keeping the pieces of ore which sound-out, you can accumulate a lot of good-paying ore. With the use of a BFO as such, the perimeters of ore piles can be scanned first to find a pile that has a lot of mineralization.

Portable rock crushers and mills and processing plants are available on the market. Perhaps by combining these with the use of a good BFO-detector to pick out the highly-mineralized, discarded ore, a small operation could be quite profitable without having to invest the higher costs associated with developing a lode mine from scratch.

LOCATING RICH ORE DEPOSITS

When prospecting around in an old mine with a metal detector, don’t discount the idea of searching the walls of the various shafts to locate rich ore deposits which may have been overlooked by the miners who originally developed the mine. With today’s market value of gold and advanced milling techniques, a small-scale mining operation can be run profitably in ore producing about ½-ounce to the ton in gold values, or perhaps even less. Abandoned mines which will pay this well and even better are scattered all over the west. If a person were really interested in locating a lode mine that he could work at a profit, one way would be with the use of a BFO-detector to prospect the various abandoned mines within the area of his or her interest. In using the BFO to scan the walls of such mines, highly-mineralized ore deposits can be located, samples can be taken for assay, and a person could find the mines having the richer-paying ore deposits. When prospecting like this, it is a good idea to bring a can of spray paint, a pen and paper and some zip-lock bags, so samples can be accurately marked as to where they came from, along with their respective deposits being marked with the spray paint.

If you are not interested in starting up a lode mine, but are just prospecting around for a bonus, again, the VLF detector is good for looking through mineralization and detecting the richest deposits. If, however, you do locate a reading metal inside the wall of a mine shaft with a VLF detector, and you have determined that it is not some falsely-reading mineralization, it could be well worth your while to investigate further. This is because the chances are pretty good that you have located some bonanza paying ore. I know of one highly successful high-grade gold mine in the Mother Lode area of California that is using VLF detectors as its sole method of determining where to blast. At this writing, they have located and recovered millions of dollars in gold during the past two years, in a mine which was failing prior to the use of metal detectors.

MEDICAL

Bring along some mosquito repellent during electronic prospecting ventures. Otherwise, if bugs are around, sometimes it is difficult to put your full attention on listening to what your detector is trying to tell you.

In some areas, you also have to be careful of ticks. Some ticks carry Lyme disease. Some insect repellents will keep ticks off of you. DEEP WOODS, TECNU 10-HR INSECT REPELLENT, and OFF seems to work pretty well. Spread the repellent on your boots, pants and other clothing.

In the hot climates, you should bring along the proper sunscreen and apply it to exposed body parts.

It’s always a good idea to bring along a good first aid kit, and at least leave it in your vehicle in case of emergencies.

Extra clothing and water is also a good idea. You can leave it in your vehicle. You never know…


By George Mullen


Desert tortoiseMost traditional methods for recovering gold from gravels require an ample supply of water. However, an old prospector’s adage has it that gold is where you find it. In the southwest, the “where” is all too frequently situated miles from even a trickle of water. Dry-washing of gold-bearing soil or gravel provides an effective solution to this dilemma.

Click here for a more thorough explanation of dry-washing techniques.

The Spaniards used a scheme similar to the winnowing of wheat from chaff and straw. Two men would grab the comers of a blanket, upon which a small quantity of classified gold-bearing material had been placed, and they repeatedly would toss it upward into the air. The wind would blow away the lighter fraction, and any gold and black sands, which are heavier, would fall back onto the blanket. Wool blankets worked best, because the static electrical charge generated by the wool tended to attract fine-sized gold on the blanket’s surface.

The modem prospector uses an efficient tool called a dry-washer to extract the ever-elusive gold particles from screened gravels or other material. Dry-washers can range in size and complexity from hand-shovel-fed models, to large machines serviced by wheeled or tracked front-end loaders.

All dry-washing machines require a low-pressure, high-volume source of air. At the low-cost end, this can be provided by a bellows which is linked to a hand-operated crank or motor-driven fly wheel. At the higher-cost end, the air source is typically provided by a gasoline engine-driven blower. The remaining components of a dry-washer combine to construct a sloped classification screen (or “grizzly”), which routes fine-sized material to a pneumatic sluice box, where a mechanically-modulated flow of air accomplishes the separation of gold from the lighter-weight material which contains no value.

Dry-washing for goldA dry-washer for small-scale prospecting might consist of a rectangular screen with 1/2 inch openings over a sloped trough. The screened material would pass from the lower-end of the trough to the head-end of a sloped riffle tray consisting of cotton fabric stretched over an inner frame. The tray includes sides to contain the flowing material, and its surface is interrupted by five crosswise riffles. Under the tray is a hollow box and the mechanism which modulates air flow through the tray at a rate of about 200 puffs per minute. The rate of air flow is designed to be sufficient to lift lighter material over the riffles, while the gold remains trapped. When everything is working right, the flow of material through the riffle tray resembles water flowing through a conventional sluice box.

My dry-washer was built from a plan published by Carl Fischer. It is mostly constructed of wood and is extremely portable. A small gasoline engine drives the air box via a belt and pulley speed reducer, producing the required 200 puffs of air per minute. The end result is an efficient separator which saves even the finest particles of gold. I have checked the tailings on numerous occasions and have yet to find any significant amount gold in them.

Prospecting for gold in the desert uses techniques similar to those that are used to locate placer gold on flowing streams or within old stream channels. You want to sample dry-washes on pediments to mountains, feeder-canyons in the mountains and ancient streambeds.

Another old prospector’s adage suggests that one should look for gold where it has been found before. This is still sound advice!

Very fine gold is abundant at many sites in the northwest, and the usual methods of final gold recovery do not always work very well. I have found that the screening and drying of dredge or high-banker concentrates, and then running them through my dry-washer, really works well. I use a metal detector to monitor both the feed and the tailings.

After processing pay-dirt material for about an hour, I suggest it is usually a good idea to clean-up the riffles to check your recovery. I use a plastic gold pan and small wash tub for the final clean-up and have operated all day on just a few gallons of water.

My wife, some friends and I operate suction dredges and high-bankers on the extensive New 49’er properties near Happy Camp, California during the summer months, where there is always an abundance of water. Our dry-washer allows us to remain active during the winter, usually around Quartzsite, Arizona. These gold prospecting and mining activities provide enjoyable activity, along with an extra source of income when we need it.

 
video subscription graphic

By Dave McCracken

“These gold prospectors were sending pay-dirt
to the surface from 30+ feet deep in liquid muck!”

Dave Mack

This was somewhat of an informal preliminary evaluation into several areas of the Philippines to see if we could find any promising commercial dredgingopportunities there. A longtime close friend of mine and fellow gold dredger, John Koczan, had been spending a lot of time in the Philippines with his job, so he knew his way around pretty well. John and his wife Madel made the necessary arrangements to move us around the country for a few weeks.

Diver

I personally spent quite a lot of time in the Philippines when I was in the navy. So I already knew the country to be very friendly towards Americans. Most of the people in the Philippines speak some amount of English. The country is rich in natural resources. The infrastructure is quite good; especially the roads and communication systems. Supplies and services there are readily available at relative low cost. And the mining laws seem to encourage mining exploration by American companies.

Since I had other business in Asia to take care of first, John, Madel and I agreed to meet in Manila, which is the Philippine Capital. Manila is a busy place. The entire modern infrastructure that we are used to in the West is present there, although traffic can be a problem if you are not careful with your timing.

JeepneyTrike

“Jeepneys and trikes are the primary modes of public transportation in the Philippines.”

Public transportation in the Philippines is very effective. Regularly-scheduled buses are destined to just about everywhere. Jeepneys and trikes are the primary mode of moving people around the townships and cities. Jeepneys are like vans with a jeep-like look to them. You see them in all sorts of shapes, sizes and colors. Up to a dozen or more people can ride in the back. A standard fee of about 10 cents (6 Pesos) is charged for a ride in almost any single direction. Trikes are basically a side-cart motorcycle. There are zillions of them. For about a Dollar (50 Pesos), you can hire a trike to take you one way to nearly anywhere in town.

I captured the following video segment on a bright morning in Manila while John and Madel were arranging to rent a car for us to drive north to Angeles City:

Angeles City is about an hour drive to the north of Manila. It is the home of Clark Air Base, which was once America’s largest military base. The base (huge) has since been turned back over to the Philippines. They have converted it into a free economic zone. A very large shopping mall has recently been put up there. The Angeles City area is where John had been doing quite a bit of business. So this seemed like a good place to launch our own sampling expeditions to elsewhere in the Philippines.
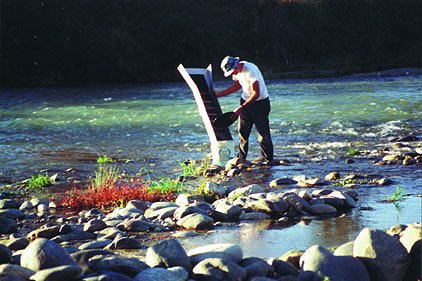
John and I began by researching all the historical information we could gather about the proven gold bearing locations in the Philippines. Our research indicated that the best gold potential is in Mindanao, one of the most southern islands of the Philippines. The problem with going there on any kind of extended commercial venture is that Mindanao is the place within the Philippines where Muslim extremists maintain a stronghold. The Philippine military is down there with American assistance unsuccessfully trying to put them out of existence. Because of potential danger to outsiders, John and I ruled out Mindanao right from the beginning. We figured there is no good reason to lose your head over gold!

As we allowed ourselves only two weeks for this expedition, we decided to do a preliminary evaluation into two separate locations. The first was a gold-bearing area in the north of Luzon near the city of Baguio. This area is well known for historic gold mining activity. It took us the better part of a day to drive up there from Angeles City on a very good highway. Baguio is a very nice place, way up in the mountains. With pine trees and cool air, it kind of reminded me of the mountains in California.

“We were very encouraged when we first saw this clear-running river with so much bedrock exposed along the banks!”

One of our first stops in Baguio was at the Department of Mining & Geology. We were looking for information and maps concerning the historical gold mining areas. Our hope was to find a sizable gold bearing river where local technology has not allowed deeper river high-grade gold deposits to be mined by previous activity. To our surprise, the Mining & Geology officials there welcomed us in with open arms, provided us with all of the available information that we desired and offered to escort us out to a gold-bearing river which they believed was most likely to provide the type of mining opportunities that we were looking for.
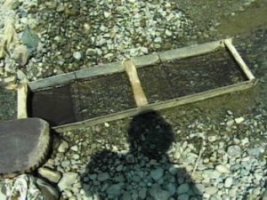
Interestingly, none of the mining officials we spoke with in the Philippines had any idea what a suction dredge is or how it works. We did our best to explain it. But our final realization was that it is vital to bring along several DVD’s of my basic dredging video on these types of expeditions.

We devoted the next full day to an expedition to a sizable river located in the mountains some distance to the east of Baguio City. The following video sequences were captured soon after we saw the river from a heightened position in the mountains:

We soon met up with several local miners (woman) who were panning and sluicing along the river. They were kind enough to show us the gold that they were recovering. Their gold consisted of just a little bit of fine colors in every pan; not much different than what we would expect to recover along New 49’er properties along the Klamath River near Happy Camp in Northern California.

SluiceLocal miners

“Local village miners were panning and sluicing small amounts of gold from the river.”

John and I took a few pan-samples of streambed material and also turned up some color. The big question in our minds was how rich the high-grade pay-streaks were going to be at the bottom of the river. The main problem, though, was that the average depth of streambed material looked like it was going to be more than we could manage with suction dredges. While there was some bedrock visible along the sides of the river, it was mostly slanting into the river at a steep angle, and most of the streambed deposits appeared to be very deep.

The challenge in prospecting for high-grade gold deposits with a suction dredge is to find them in shallow enough streambed material that you can gain access to the gold without being overwhelmed by too much material to move out of the way. This area generally looked to have too much streambed material along the river-bottom for us to gain access to pay-streaks in most areas. So, John and I quickly ruled out the likelihood of a commercial opportunity for our type of mining.

The officials with us told us that they did not know of any other (larger-sized) river in the area that would fit our needs. Later that afternoon in Baguio, the mining officials suggested that we go have a look at the gold potential near Legaspi. This is a gold-bearing area located on the island of Bicol further to the south. The Mining Director in Baguio made a phone call on our behalf to his counterpart in Bicol. Sure enough; there was some active “gold dredging” going on down there, and we were invited to have a look. This sure felt like a lucky break!

Rather than drive all the way down to Bicol, John, Madel and I decided to fly down there from Manila and hire local transportation to get us around. In the parking lot of the airport upon our arrival in Bicol, John was able to negotiate a reasonable rate for a van and driver to accompany us for several days.

One of our first stops in Bicol was at the Department of Mining & Geology to meet with the Director there. He was expecting us. In short order, he assigned one of his people to assist us with whatever we needed. That person supplied us with maps and information, and some instructions to our driver where to take us. While the official was willing to accompany us to Legaspi, he suggested that our reconnaissance might be more productive without him, since the type of “dredging” we were going to see was against the law. Apparently, because it is so dangerous, laws have been passed to prevent people from pursuing the particular kind of mining that we were going to see. The official suggested that the people doing this type of illegal mining might be more open to us if mining authorities were not present. We took his advice and just went along with our driver.

Upon our arrival in Legaspi, our first stop was at the local Mayor’s office. From long experience at doing these types of reconnaissance missions, we have discovered that it is usually best to check in with the local authorities before going out in the field on a prospecting expedition. This is the respectful thing to do. As is often the case, the local Mayor was happy that we checked in with him, and he assigned one of his personal staff to accompany us on our expedition. This was good, because the staff person (who became our guide) knew right where to take us. He was also able to introduce us to local miners in such a way that they were more open to giving us information about what was going on.

Local Miners

“Local miners were recovering some gold from the beach sands, but the amount
of gold did not appear to create any commercial opportunity for the type of dredge mining that we do.”

In Legaspi, our guide first took us to the beach, where local miners were recovering small amounts of gold from the beach sands using sluicing devices which were built on stilts to position them above the small waves washing up on the beach. Here follows a video segment that I captured which demonstrates the beach mining activity:
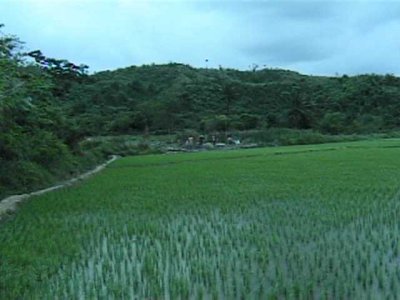
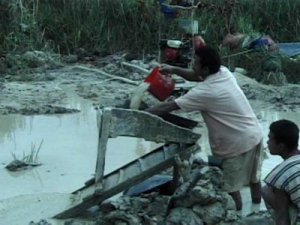
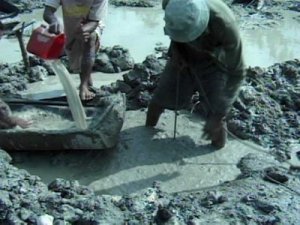
While the beach miners were recovering some gold there, John and I could not envision any kind of commercial dredging opportunity, so we moved on.

Next, our guide took us to a river estuary-area where apparently some bucket line dredges had operated during the past. We could see some of the tailings that were left behind. There, we found several active family mining operations that were recovering gold from river-bottom gravels using more sluices standing on stilts. Here follows a video segment that I captured while we spent some time with one family of river miners:

Again, while there was some gold being recovered from the river, without doing some preliminary dredge sampling of our own, we could not identify any commercial opportunity for ourselves.

Our main interest in Legaspi was to have a look at the ongoing dredging program that we had been hearing about. We kept reminding our guide about this, but he believed that type of mining would not fit into the type of opportunity we were looking for. Still, we wanted to see what it was all about, so our guide finally agreed to take us there. That involved a considerable ride in the van over some pretty rough roads.

Rice

“As we got closer, I could see that there was some kind of
mining operation going on from beneath the submerged rice paddy!”

Washing MaterialPulling Buckets Up

“Right image: Miner pulls canvas bag to surface from about thirty feet deep, where a diver filled the bag with ore.”

When we finally arrived at the “dredging” site, all I could see was a very large rice paddy. There was no river or other open water to be seen anywhere! As our guide led us on a trail across the rice paddy, I could see that there was some kind of digging activity going on at the far end. When we got closer, I recognized that it was an active mining operation!

These miners were recovering gold from bottom gravels that were located about 10 meters beneath the surface of the rice paddies! Because the paddy was flooded for an ongoing growing season, it meant that the miners were excavating a tunnel straight down through 30+ feet of mucky water, and then drifting (tunneling) along the bedrock at the bottom to fill canvas bags with pay-dirt. The canvas bags were then raised to the surface by others using a rope, where the material was broken up (a lot of clay in the material) and directed through a sluice box to recover the gold.

Each rice paddy diver received his air for breathing underwater through an airline that was connected to a makeshift air compressor which was taken from an automotive air conditioner, powered by a small Honda motor. No hookah regulator was being used by the diver. Hookah regulators do not work very well when you try to use them in muck! I know, because I have attempted it! These rice paddy divers were getting their air down 30+feet in the muck by just placing the end of the airline in their mouth and holding onto it with their teeth! Holy Mackerel!

Here follows a video segment that I captured which demonstrates the mining activity these rice paddy divers were doing. Please take note how far the man at the surface pulls up the rope to finally bring the canvas bag of ore to the surface. That’s how deep underground the diver was actively filling canvas bags! Is that amazing, or what?

While these rice paddy miners were recovering enough gold to help support their villages, John and I still could not see any reasonable way that we could implement suction dredge technology to their situation that would create an improved commercial opportunity.

I have to say that these were perhaps the most qualified underwater prospectors I have ever met to work on a commercial dredging program if and when we ever put one together in the Philippines or any other nearby country. Anyone who is able to mine gold with nothing more than an airline stuck in his teeth, while extracting pay-dirt from submerged shafts 30+ feet under liquid muck, is certainly alright with me! Imagine how well guys like this could perform on a suction dredge in clear, shallow water?
On our way out, our guide brought us by another active mining operation where hard-rock ore was being brought to the surface by rope from an underground hand-mining program. The ore was being loaded into wooden sleds, and then dragged to water by a water buffalo. There, the ore was being crushed by hand methods and panned down to extract the gold. And while they were recovering goodly amounts of gold for their effort, John and I still could not identify any commercial opportunity for the type of mining that we do.
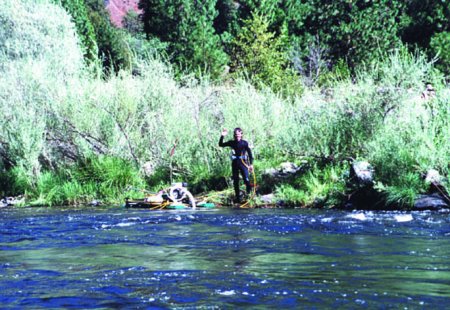
“John & Madel”

All in all, our expeditions were productive in that we discovered that the people of the Philippines are very friendly, hard-working, and definitely have their doors open to allow modern exploration companies to look for commercial opportunities there. It just turned out that the two preliminary places we decided to look at were not suited for the type of mining that we do.


BY MARCIE STUMPF/FOLEY

In the town of Tollhattan, Sweden, lives a goldpanner named Morgan Bjarne Zakariasson. There he works and enjoys his life with his girlfriend Ingela Kvist, and a group of gold panners of the Guldgravarnas Forening (Golddigger’s Association).
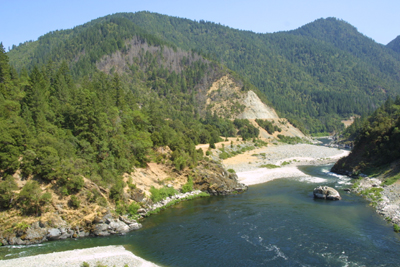
When Morgan was 23 years old, he was told about the Goldpanner’s Association, and soon developed a severe case of gold fever. Still active in the club, he is now their “cashier” or Treasurer. The group has more than 500 family memberships and is very active.

Each September they hold a large, weekend-long “Gold Rush Days” meeting at the site of the oldest gold mine in Sweden, located in the southern part of the country. One of the high points of the weekend is when they each show the gold recovered for the year and tell about their experiences.

Several years ago, a group of young men who had come to the U.S., and to Happy Camp, were at the gathering, and Morgan was very interested in their story. He talked to them in detail, finding out all he could about The New 49’ers, whose club they’d joined, the claims, the gold, living conditions and expenses; and it became his goal to come to Happy Camp and join The New 49’ers himself.

By trade, Morgan is a lathe operator in a factory where hydraulic pumps are manufactured. He is allowed five weeks vacation a year; and if he wants, can put one week in a “bank” to save for a long trip. He is also allowed to work overtime, saving that also. In this way, he can save up a two-month vacation every two years.

In the intervening years, Morgan made trips to Norway and Italy prospecting for gold. In Italy, he met a gold miner who showed him a place to dredge at the base of the Alps, and Morgan did well there.

In 1993 Morgan and his girlfriend Ingela made the trip to Happy Camp and stayed for a month. They joined the New 49’ers on arriving, and set up Morgan’s 2-1/2” dredge on the East Fork of Elk Creek. Soon they met Floyd and Donna Parker, New 49’er members from North Carolina who were also dredging on the East Fork of Elk Creek. Floyd, after seeing how Morgan was doing, said, “That’s not good enough! Move your dredge down here below us-I’m sure you can do much better!” Morgan took his advice and did do much better after that. Floyd and Donna remained good friends, providing a lot of helpful assistance, and have kept up a correspondence with Morgan ever since. While Morgan was happy with the gold he was finding, he looked with envy at the four-inch dredges while he was in Happy Camp. He was determined that he would have a dredge that size before he returned again.
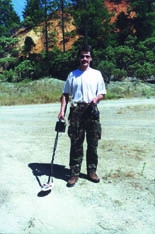
When Morgan arrived again in Happy Camp in the late spring of 1995, it was to pick up a brand new four-inch dredge he’d ordered ahead of time, and he beamed from ear to ear as everyone helped him pack it into and on top of his rental car. He was so excited, he could hardly stand it!

This trip was made without Ingela. She had to work, so Morgan was here on his own. Their first trip they’d flown into San Francisco, and driven up from there. This time he flew into Seattle, visiting with his mother’s cousin, and making plans for the cousin to visit while he was in Happy Camp.

It was so late on that first day, by the time he was ready to leave with his new equipment, Morgan drove up to his old camping spot on Elk Creek and pitched his tent in the dark, leaving everything else for the morning.

Early the next morning, he quickly cleaned up and then headed for the creek to look for the ideal spot to put his new dredge. He was almost skipping along; everything was right in his world. He was where he wanted to be, doing what he loved most; the weather was beautiful, and the scenery was gorgeous, when he found he was not alone.

It seemed he and the bear had seen each other at the same moment, and they both paused while they sized each other up. Then the bear began walking toward Morgan.

Morgan was thinking…”I’ve seen the bears at the dump here in Happy Camp, and they looked very friendly down there below me. This bear does not look so very friendly. I think he is going to tell me it would be better for me to find another place to dredge.” As he finished this last thought, he began slowly backing up. Once he put a tree between himself and the bear, he turned and sprinted the short distance to his car. Morgan decided to move camp.

He had thought he might dredge on the creek until the high water went down, and while he acquainted himself with his new, larger dredge. Spring rains were hanging on, and rainy weather kept him from the water much of his first two weeks. He spent the time looking around, however; and found many places right on the river where he could be out of the current with shallow bedrock while he familiarized himself with hookah diving and the larger dredge.

Already an experienced scuba diver, it didn’t take long to master the technique involved; and Morgan grew more and more enthused about this new adventure. He loved being able to process more streambed material, and felt he was really accomplishing a lot for the time worked, in comparison to the smaller dredge.

And, it didn’t take long to find out that his rewards were going to be much greater with this equipment. He was able to find much, much more gold.

While Morgan was mastering his new dredge, he took time to attend several of the training events sponsored by The New 49ers. He attended the two-day electronic prospecting seminar. He wanted to broaden his knowledge of methods; and before investing in a metal detector, he wanted to learn the right way to use it from the first. He was so impressed with the method, that he ordered an underwater detector to take scuba diving with him in Sweden.
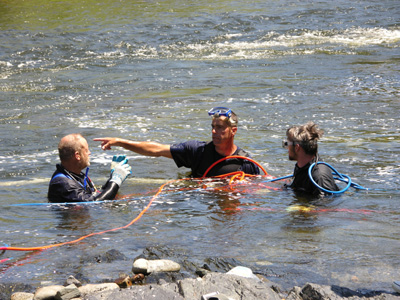
Morgan also attended the weekly potlucks sponsored by The New 49’ers and found that he was warmly welcomed there by many gold prospectors from around the world.

With all these other activities going on, Morgan found that he had a hard time pulling himself away from dredging, because he was enjoying it so much. Even so, Morgan made time to attend one of Dave McCracken’s week-long Group Mining Projects. This is the most comprehensive training available anywhere in the world on modern small-scale gold mining, and he didn’t want to miss out on it.

Morgan really gained a lot from the week of training. Floating the river with Dave was very educational, as Dave helped him understand how to look for pay-streaks in the river and the materials that make up the layers of the river. Learning how to process material through a suction nozzle at optimum speed was a big help.

Armed with all his new information, and a tip from Dave about where to do some testing, Morgan set up a daily routine that seldom varied. Up by 7:30, he quickly ate, cleaned up the gold from the previous day, and prepared to leave camp, arriving at the dredge by 9:30. He wanted to be “suited up,” have the dredge filled with fuel, and into the water before 10:30. This first dive was a 21/2-hour dive. After frilling the gas tank, he took his lunch break. He then went back to dredging; and except for refill and short breaks, he dredged each day until 7:00PM. It was not full-dark until 9:30 or so in summer, so he had long days, and he wanted to pack just as much into every minute that he could.

At the end of each day, Morgan cleaned the dredge, but did not clean up his “fines” — the gold too small to pick out. He then made sure his dredging area was all cleaned up and neat, and headed back to camp, where he most often had a canned meal for dinner, out under a canopy of a million stars and a brilliant moon, then climbed into bed to be soothed by the sounds of the nearby river as he drifted off to sleep.

Some Saturdays, Morgan took a break and either did chores in town or quit early to attend the potlucks held by The New 49’ers. These were lots of fun, and the food was really great!

While much of his time was spent alone, Morgan could always find someone to visit with when he was ready for some company. That was one of the things he most enjoyed about The New 49’ers and his experience in Happy camp. He had met people from all corners of the U.S. here in this one little town. And all of them were friendly! He hadn’t met even one person who was not friendly and helpful.

On the days he was alone, Morgan didn’t feel lonely. The river was so alive with wildlife, he drew great pleasure from being a part of it. The plentiful deer and the Great Blue Heron that frequented his dredging area were a joy to watch. Ducks, geese, and other birdlife, and the playful otter in the river, kept his time above water occupied. The relaxed atmosphere in the town, and the spectacular scenery of the Klamath River Canyon and the Siskiyou Mountains gave him a feeling of peace and contentment.

His mother’s cousin came to visit, and Morgan proudly showed off his new dredge and all the gold he was finding. The cousin was very impressed, and he and Morgan spent the rest of the weekend panning and relaxing. Morgan drove back up with him as far as Grants Pass, Oregon, where they went rafting on the Rogue River, and then parted until time for Morgan to Leave.

Morgan called home each week, and kept everyone informed about his trip. Ingela told him all his friends had given him two nicknames. One was “Morgan More Gold” and the other was “Bear” from his bear experience ”Morgan More Gold” was winning out as the favorite name. Morgan was pleased — he liked that one better, also.

At long last, his trip came to an end, and Morgan had to go home. He delayed so long, in fact, that his mother’s cousin became worried and called, trying to locate him. Morgan really didn’t want to leave.

His last stop was to the New 49’s headquarters to weigh his gold. He had kept it all separate; and his best day totaled 8.8 pennyweight. The total found on the Klamath River was 47.3 pennyweight, almost 2-1/2 ounces; and another 6.6 pennyweight he’d found while visiting in Seattle his first two weeks. As he posed for photos with the gold, he regretted having to leave, again; but then he thought-the sooner he was home, the sooner another two years would arrive, and he could come back again. And, what a great trip he’d had! He’d learned so much he no longer felt like a beginner. “Wait until next time!”

With this cheerful thought, and already-forming plans for his next visit. And, with the sensation he would make at the September outing with his story (and his gold), he made his way toward Seattle, and a long, satisfied trip home to Sweden.

Tags