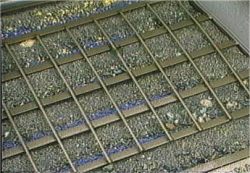
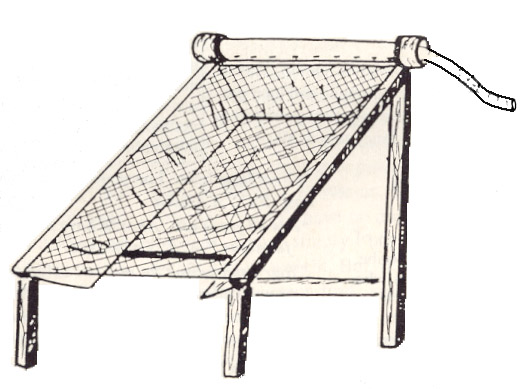
 A “sluice box” is a trough-like gold recovering device which has a series of obstructions or baffles, called “riffles”, along its bottom edge. While a steady stream of water is directed to pass through, streambed material is shoveled into the upper-end of the box. The flow of water washes the streambed materials through the sluice and over the riffles, which trap the gold out of the material.
The reason a sluice box works is that gold is extremely heavy and will work its way quickly down to the bottom of the materials being washed through the box. The gold then drops behind the riffles and remains there, because there is not enough water force behind the riffles to sweep the gold out into the main force of water again.
A sluicing operation, when set up properly, can process the gold out of streambed material about as fast as it can be shoveled into the box. This can be many times more material than a panning operation can handle, yet with similar efficiency in gold recovery. How much material can be shoveled into a sluice box greatly depends upon the consistency and hardness of the material within the streambed itself, and how easily it can be broken away.
A sluice requires a steady flow of water through the box to operate at its best efficiency. Most often, the box is placed in a stream or creek where water is moving rather swiftly, with the sluice being placed in such a way that a stream of water is directed through the box.
In locations where water is available, but is not moving fast enough to be channeled through the box for sluicing purposes, the water can be pumped or siphoned to the box with excellent results (covered later). How much water is available, and whether or not it will need to be transported to your sluice box, is something that needs to be considered during the planning stages of a sluicing operation.
Because so much more material can be processed with a sluice, than with a gold pan, streambed materials which contain far less gold values can be mined while recovering just as much or more gold. Therefore, if the streambed material had to pay a certain amount in gold values in to be worked with a gold pan to your satisfaction, gravel containing only a fraction of as many values can be worked with the same result using a sluice box. This is an important factor to grasp; because it means the modern sluice box opens up a tremendous amount of ground that can be profitably mined by an individual.
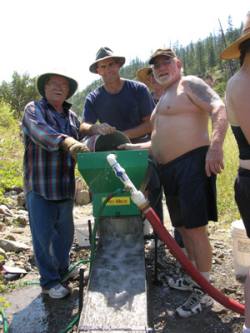
Motorized sluicing (also often called “high-banking”) is an activity similar to sluicing, except that sluicing is almost always accomplished with the water-flow from the creek or river keeping gravel moving through and over the riffles. As demonstrated in the following video sequence, a motorized sluice (also called a “hydraulic concentrator”) is usually set up with a water pump that supplies water for the sluice box:
 Motorized sluices are usually equipped with a recovery system that is set up with adjustable-length legs. This allows the box to be adjusted from side to side and front to back on uneven ground. This allows the water flow to be created for optimum gold recovery. Most motorized sluices available on today’s market also include a screening device over the top of the feed-section of the sluice box. Screening the larger-sized rocks out of material to be sluiced is one of the primary methods for improving fine (small) gold recovery. Any time you can screen larger rocks out, you can slow the water down through the sluice, which will allow even smaller particles of gold to become trapped inside the riffles.
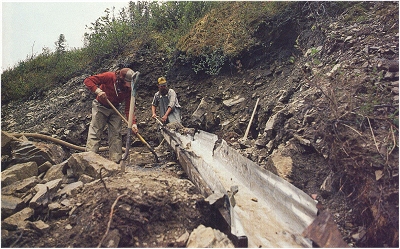
In normal sluicing, the operators must find a location alongside of a creek or river where the water is flowing just right, at the proper depth, to set up the sluice so the proper amount of water can be directed through. Once the sluice is set up, gold-bearing material must be carried to the sluice, screened separately, and carefully fed through the sluice box.
With a motorized sluice, all you need is a supply of water within several hundred feet of where you want to dig. The screen and sluice assembly can be set up directly at the work site so that pay-dirt can be shoveled directly onto the screening section. The pump/engine assembly will pump water from the water source, through a pressure hose, to the sluice.
 Another advantage to the motorized sluice is that in some areas today, it is not legal to wash silt directly from the bank into an active waterway. With a motorized sluice set up some distance from the stream or river, you have an opportunity to utilize natural contours up on the land to slow the water down enough to allow the sediments to settle before (if ever) the water re-enters the creek or river.
SAMPLING
Just like in any other type of gold mining activity, the key to doing well is in digging sample holes to first find a high-grade gold deposit.
Placer Geology
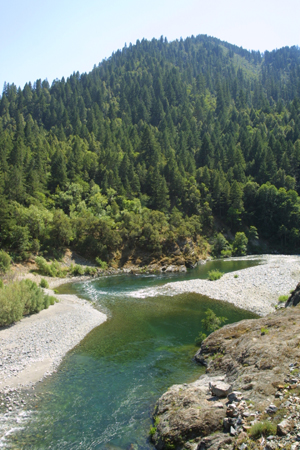
In many places, there is more gold up on the banks than you will find in the river. This can sometimes be true on the Klamath River in northern California. Actually, it is not only that there is more gold on the banks than in the river. The gold on the banks can sometimes just be easier to get at for a small operation.
What happened along the Klamath River, and in many other areas, is not difficult to understand. The old-timers started mining down in the creek or river, and moved uphill, allowing gravity to carry the water and tailings back down towards the creek or river. As the old-timers worked further up into the banks, often the gravel became deeper and more difficult to remove by conventional hand methods. In time, the old-timers developed hydraulic mining. This is where they directed large volumes of water from nearby (or sometimes distant) creeks under great pressure through monitors (huge pressure nozzles). The high-pressure water was used to wash large volumes of gravel through large sluice boxes placed on the banks of the creeks and rivers. As the sluicing operations cut further up into the banks, the sluice boxes were moved forward, which left tailings deposited on the banks.
 It is estimated that as much as 50-percent of the gold washed right through the sluice boxes in hydraulic operations because of the large volume and velocity of water which such operations used. Hydraulic operations did not lose gold in the same amounts all of the time. Much of the gravel that these operations processed contained little or no gold. The concentrations of gold were found along bedrock or at the bottom of lower strata flood layers. So, valueless top-gravels were processed at volume speed, and they would try to slow down when getting into pay-dirt materials. Sometimes, however, they would cut into pay-dirt materials at volume speed–before having a chance to slow down. This is where large volumes of gold would wash directly into the tailing piles.
Since the time of large-scale hydraulic mining, there have been several occasions of extreme high water. The 1964 flood in the western United States is one example. Floods of such magnitude, all throughout gold country, re-deposited old hydraulic tailings piles into newly-formed streambeds up on the banks and within the active waterways. Places where gold was lost from hydraulic operations formed into new pay-streaks–often only inches or a few feet from the surface. This is true all up and down the banks of the Klamath River–and probably many other rivers as well–which has created a wonderful and exciting opportunity for modern small-scale gold miners.
Contrary to popular belief, many pay-streaks today are not found down along the bedrock. In fact, many of the pay-streaks surface miners are finding along the Klamath River are situated in a flood layer (1964 flood) within two feet of the surface. This flood layer is often resting directly on top of undisturbed hydraulic tailings.
We are also finding similar pay-streak deposits inside the active river with the use of suction dredges.
 Finding pay-streaks with a surface digging project is usually done by setting up the sluice in several different locations, and giving each sample a large enough test hole to obtain an idea of how much gold the gravel is carrying. Sample holes should be taken to bedrock if possible. However, if the gravel goes deep, you have to avoid getting in too far “over your head.” At the point where you start digging deeper than 3 or 4 feet with a pick and shovel, any pay-streak is going to have to be exceptionally rich to make the effort worthwhile. Richer deposits are more scarce; and therefore more difficult to find. So it is important to stay within effective digging/sampling range, and not get yourself into a full-scale production operation before you have found a high-grade gold deposit.
Sometimes you can learn valuable information before you start sampling. If other miners in the immediate area are finding gold deposits along a specific flood layer, you should be sampling for gold along the same flood layer while digging around in the nearby vicinity. Gathering information such as this is one of the many benefits of belonging to an active mining club or association. Active mining organizations will include others who are actively pursuing the same type of mining activity that you are engaged in.
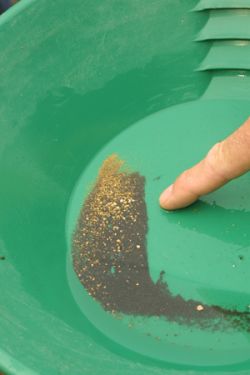
While sampling with a pick and shovel, it is very seldom that you will actually see gold in the gravel as it is being uncovered. Usually, you do
not see the gold until it is time to clean-upthe sluice box after the sample is complete.
If you finish a sample hole and end up with a good showing of gold, the next step is to find out exactly where the gold came from. In other words, did it come off the bedrock, or did it come from a particular layer in the streambed? You must know where the gold is coming from to evaluate the value of the pay-streak. For example, digging two feet into a paying flood layer requires much less time and effort than digging four feet and having to clean rough bedrock. If you do not know for certain where the gold is coming from, and you assume it is coming from the bedrock underneath four feet of hard-packed streambed, you might decide it is not rich enough to work and walk away from a very rich deposit located at the two-foot flood layer
At the same time, if you are able to reach bedrock, you always want to get a good sample there by thoroughly cleaning the surface and any irregularities there. Sometimes that is where the richest deposits are found.
Pinpointing the source of gold is reasonably easy once the sample hole has been opened up. It is likely that the gold will be concentrated either along the bedrock, along the bottom of a flood layer, or at both locations. Sometimes, there is more than one flood layer that carries gold. You can run small production samples of each stratum separately to see which is paying. Or, sometimes you can simply take pan-samples in the different contact zones between the layers
Some pick & shovel miners are using metal detectors in their prospecting activities. Some of the new gold metal detectors will sound out on pieces of gold as small as the head of a pin! But in gravel deposits, metal detectors can also be used quite well to locate the concentrations of magnetic black sand. Black sand tends to concentrate in pay-streaks, just like gold. Therefore, locations sounding out heavy concentrations of magnetic sand on metal detectors are excellent places to follow up with pick & shovel sampling.
One question commonly asked about sluicing procedure is the proper slope-setting for a sluice box. A sluice box generally requires about an inch drop per each linear foot of sluice. This is just a guideline. Basically, you need enough water velocity to keep the material active in the sluice behind the riffles, but not so much that you are washing most of the material out from behind the riffles. I like to get enough water flow to keep the larger material moving through and out of the box. If I see lots of rocks building up in the sluice, I know I do not have enough water velocity. An occasional rock needing to be helped along is alright in a sluice (although maybe not a dredge sluice!). In surface sluicing (non-dredging), I would rather toss out an occasional rock and have the peace of mind that I am also achieving maximum possible fine gold recovery.
A common practice in sluicing is to also to set up a second sluice behind the primary sluice. The plastic Le’Trap sluice works exceptionally well for this because it recovers fine gold so well, and for its ease in cleanup. The idea is to have a safety check on your primary recovery system to make sure it is working properly.
And if all else fails, you can always do some pan-testing in your tailings to see if your sluice might be losing any gold.
 One mistake that beginners often make is in thinking that the recovery system is at fault because they are not recovering very much gold. Most often, however, it is not the recovery system. It is the lack of a good-paying pay-streak! The answer to this is to hustle around with more sampling. Ask around to see what and where it is working well for others in the area. Use their operations as a model.
Flood layer pay-streaks are often easier than bedrock pay-streaks to clean up with pick & shovel surface mining operations. There are several reasons for this. One is that a flood layer pay-streak is closer to the surface. This means less gravel to shovel to reach the gold. Another reason is that it takes more effort to clean the gold off of a bedrock surface when you are not using a dredge. You can only do so much with a shovel. After that, you must resort to a whisk broom and/or a motorized vacuum cleaner. This is why portable dry land dredges are also becoming so popular. They give you the ability to clean bedrock surfaces and cracks with minimum effort. If the gold is coming off bedrock, you must invest the extra effort to clean it off well. Otherwise, you stand the chance of leaving an important portion of the gold behind as you mine forward on the pay-streak.
Many pick & shovel miners today also are equipped with an optional suction attachment. To use it, the pressure hose from the water pump is attached to a suction nozzle that directs the water and material through a suction hose into the sluice. So after an initial hole is dug up out of the water, the hole can be filled with water and material can be sucked into the sluice box. The recovery system can be positioned so that the water discharge can run back into the hole– keeping the hole from running out of water.
So you can dig a hole up on the land, and then begin a suction mining operation outside of the active waterway. This is great!
In California, dredging permits are only required when dredges are operated inside of the active waterway. Therefore, my personal understanding is that suction miners up on the land are not required to have a dredging permit as long as they are not dredging inside the active waterway.
Some surface miners also sample for the gold-path up on the bank by pan sampling the moss. Sometimes, how well the moss is producing gold at the surface can also be an indication of how well the gravel is paying underneath.
When moss, roots, clay and other types of materials are producing good quantities of gold, it is always a good idea to break up the material as much as you can before running it through a sluice box. This is usually done by pulling it apart over the top of a classification screen, or breaking it up inside a bucket of water before running it through the sluice. This slows down production, so the additional work must be rewarded by the recovery of more gold.
Once you find a pay-streak in pick & shovel mining, you want to give some thought to how you are going to develop the deposit with a minimum of wasted effort. For example, you will have to pile the cobbles (rocks too large to pass through your recovery system) and tailings somewhere. Preferably, cobbles and tailings would not be placed upon some other section of the pay-streak. Otherwise they might need to be moved twice, or you might be forced to leave behind high-grade areas that have been further buried. So it is worth some extra sampling to get an idea of the pay-streak’s boundaries. Then you can deposit the tailings material in a location where you will not need to move them again.
Placing tailings is, and always has been, one of the most important aspects of a mining operation–of any size. Yet, it is one of the most neglected aspects of mining by a substantial portion of small-scale miners. In fact, we have a standing principle, true as it may be, along the Klamath River: “Dowsing works: just look where a successful pick & shovel miner or dredger has been throwing his or her cobbles. It is almost guaranteed there will be excellent gold underneath!”
This usually comes back to a simple case of gold fever. The miner starts getting a good showing of gold, gets excited, and never slows down to define the boundaries of the deposit. This almost guarantees an important portion of the deposit will end up underneath cobbles.
Pay-streaks up out of the water are often different from those found in the river or creek. What I mean by this is that they do not always follow the same gold path. When you find a pay-streak in the river, you can usually line it up with the next river bend and make a pretty fair guess where the next several pay-streaks are likely to be. This is because river pay-streaks usually form from gold that has washed down the river along its own gold path during major flood storms.
Pay-streaks outside of the river often were formed from gold out of tailings from old hydraulic mining operations. So you can find a small pay-streak up on the bank, follow it until it plays out, and then not find any sign of it further upstream. This is because the source of the gold deposit was not from a point further up river. Then you can find another pay-streak on another path altogether. In other words, pay-streaks up on the bank might not follow a specific single gold path, as they usually do in the river.
Pick & shovel mining is a lot of fun – when you are finding gold. A healthy portion of our miners along the Klamath River mine out of the water. The reason for this is that it gives them an opportunity to find pay-streaks without having to commit to an underwater dredging operation.
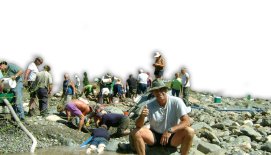
We manage Group Mining Projects just about every other weekend during the spring, summer and fall months in Happy Camp You can find this year’s schedule HERE. You have my personal invitation to come out and get some firsthand experience. We always send participants home with a sample of gold that they help recover–that is, those who go back home. Many join up with us. Watch out–the biggest challenge in gold mining is not in finding the gold; it is getting over the “fever” after you have found it!


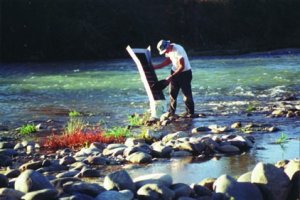
 Last winter my partner and I devoted our two-week-long vacation to gold prospecting. We enjoyed our time exploring some New 49’ers Mining Club claims, in the beautiful Mountains of Siskiyou County in northern California. We panned for gold, dug out crevices in rocks that “old-timers” missed, hunted for nuggets with metal detectors (“nugget-shooting,”) and surface-sluiced some virgin placer material!
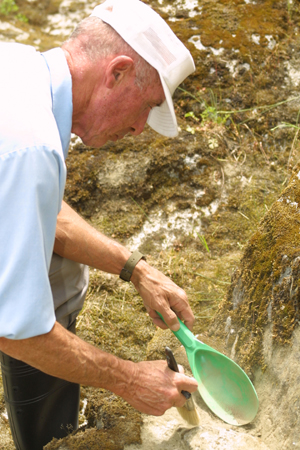 The first couple of days we did some surface-sluicing behind a huge boulder on the west bank of the world famous Scott River. We found a few small nuggets (“pickers”) in our first small sample hole. We averaged about 10 to 15 gold flakes in each pan. That was pretty good, since we’d only mined a couple of yards of material and weren’t on bedrock! But, we wanted more gold!
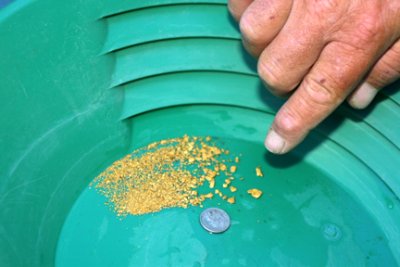 However, even though we went to some old hydraulic mining tailings high above the Scott River, we were only able to find nails, foil, hot- rocks, an old shovel and a horseshoe; not quite the large nuggets that we know are “out-there” still waiting to be found! Don’t worry; we will be back!
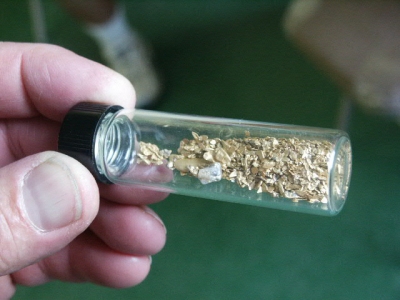 Winter is a good time to go prospecting; it is a sure cure for cabin fever. You have the whole country to yourself at this time of year, because there is hardly anyone around. We did not see a single person on the river or creeks that we visited. Water is high enough that it is possible to prospect (pan or surface sluice) locations that are normally dry. Mosquitoes and flies are very “low-profile” during the winter. We did not see any! Perhaps most important of all, the high water allows you to see where the gold is being deposited, since you can actually see the water in flood conditions.
 In gold mining, when we talk about gravity-recovery systems (as opposed to chemical-recovery systems), we are basically talking about the creation of a suspended medium. A suspended medium is a condition of fluidity where materials are allowed to separate because of their relative weights.
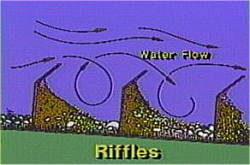
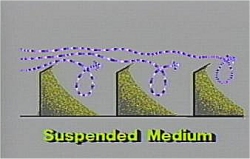
 But the one mistake I often see is that the pre-sized materials are usually being directed into slower-moving recovery systems that are using deep riffles. As these riffles do not have enough water-flow directed over them to create the required suspended medium, they pack up and don’t work very well. What I mean by this is that most of the space behind a larger riffle can pack up. Sometimes it is only the surface area behind a big riffle that is working, while the rest of the area behind the riffle is packed solid.
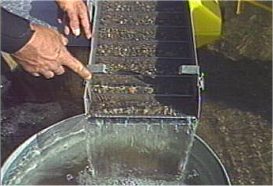

 As a general rule, the optimum slope-setting of a
  How much water velocity is directed over the box directly affects how much material will stay behind the riffles. When the correct amount of water force is being put through a sluice, its riffles will run about half full of material, and the material can be seen to be dancing and vibrating behind the riffles (concentrating) when the water is flowing.
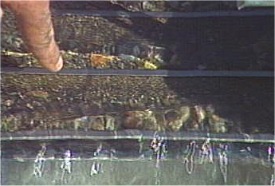
 When larger rocks are pushed through a sluice box by water force, they also create greater turbulence behind the riffles as they pass over, which may cause an additional loss of fine gold.
 The old man leaned against his shovel and wiped his brow as the hot interior Alaska sun beat down upon him. He was a veteran of the
  My first homemade sluice box was built from old photos, some advice (some poor and some good), a few aged pieces of plywood and two-by-fours, wooden slats for riffles and burlap to catch the gold. At sixteen, I had visions of gold, just like any other person would after reading Jack London’s books and other stories about the gold rush. Having been raised in the gold camps of the Circle Mining district in eastern Alaska, I had watched many miners, including my father, extract gold with sluices and gold pans.