By Dave McCracken

Suction mining underwater without a “dredge!”

Dave Mack

Important note: Since writing this article, over the period of a year,  the State of California has adopted new regulations which no longer allow any type of vacuum or suction to excavate material off the bottom of a waterway.  Therefore, the underwater suction gravel transfer systems outlined here will no longer be allowed until we overcome the suction dredge moratorium.  It is for this reason, we have now switched over to underwater blow mining.

Let me begin this by informing you that I am not a licensed attorney. Therefore, I am prohibited by law from providing legal advice. So the material here should just be taken as my own opinion based upon the factual material which I will present to you.  You guys are free to form your own opinions and take responsibility for your own actions.  Having said that, I will also inform you that our attorney has reviewed the following explanation and agrees that government officials are bound by the very language that they enforce upon us – and that my reasoning here is sound.

This discussion began on our Internet Forum where I announced that we have recently acquired the richest dredging claim along the Klamath River near Happy Camp, which will also provide some fantastic surface and underwater crevicing opportunities because of the gentle slope of exposed bedrock which is extending off the side of the river where the gold path is located.

We have actually acquired several very rich properties, but I will save that for the coming newsletters.

In my announcement, I pointed out that there is nothing in California’s dredging moratorium that prevents us from crevicing underwater using a motorized hookah air system, or even using a water pressure system to help blow gravel out of cracks.  The question I posed to our forum members is how to get the gold up and into a catch container without using a suction dredge.

It would be one thing if we were just uncovering an occasional gold nugget or two.  We would simply free those up with some hand tools and pick them out with a set of tweezers.  But I have seen crevices on this particular mining claim that were loaded with a zillion pieces of gold, much of it in fines and flakes.  You pretty much have to suck that up, or you will be there all year with a pair of tweezers! The original claim owners were recovering six and seven-ounce days (sometimes more) in places along this claim.  They were only in there a few years before they retired.  Since they operated an 8-inch dredge, they remained on the lower, slower portion of the claim.  There is at least a half-mile stretch of faster, shallower water on the upper portion of the claim that, to my knowledge, has never even been sampled.  This is the area I believe will make for good above and below water crevicing.

In response to my question, one of our more informed members sent me a copy of the California Department of Fish & Game’s (DFG) current suction dredge regulations which clearly state that “A person is suction dredging as defined when all of the following components are working together: (A) a hose which vacuums sediment from a river stream or lake; and (B) A motorized pump; and (C) A sluice box.” The regulations further state, “Every person who operates the suction nozzle of any suction dredge shall have a suction dredge permit in his or her immediate possession.” These regulations are current now, having been formally adopted in California on April 27, 2012.

The existing moratorium in California prevents DFG from issuing suction dredge permits.  We are strenuously challenging the moratorium in several jurisdictions.  Until our challenges are resolved, it is unlikely that we can operate suction dredges as defined by the regulations without being cited.  Since most of us don’t want to be in trouble with the authorities, we have been doing our dredging in southern Oregon for the past few seasons.

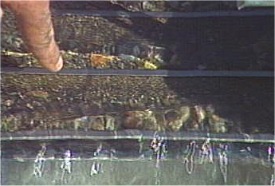
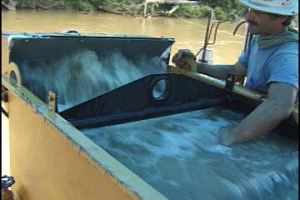
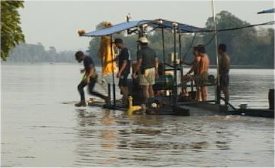
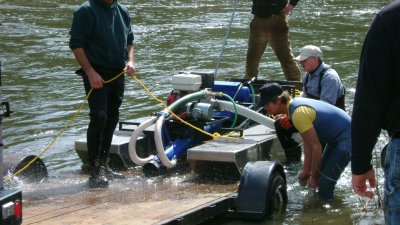
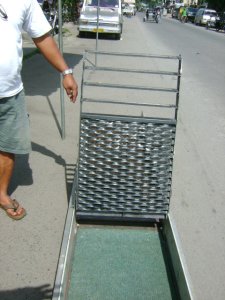
Suction Gravel Transfer image 1

But looking closer at the California regulations, there does remain a way for us to go down on the bottom of California’s waterways and suction up the shallower, higher-grade gravels.  This is because, as defined by DFG’s own formal regulations, as long as we remove the sluice box from our motorized suction system, we are not operating a “suction dredge.”  Said another way, there is an opportunity to use a motorized suction system to transfer high-grade gravel from one place in the river or creek to another location where the gravel can be more-easily processed in a separate system.

I am in possession of written communication from a high ranking DFG official, the very person who was in charge of developing the current regulations, which acknowledges that underwater suction-powered gravel transfer would not be considered “suction dredging” as long as the sluice box is removed from the system.  He also cautioned that there are water quality concerns and also streambed alteration considerations.  So there would be some limits involved.  I’ll discuss these more in a minute.

For now, let’s just get back to my original discussion about using a hookah and motorized pumping system to expose and recover gold from very shallow deposits out in the river.  I’m not talking about shallow water. I am talking about shallow material on top of underwater gold deposits.

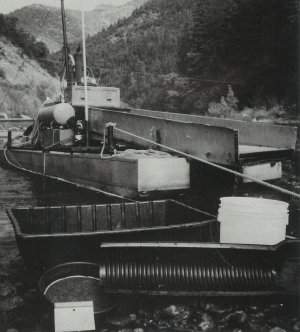
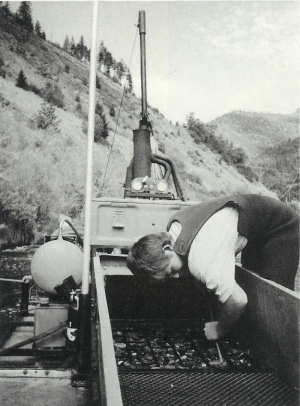
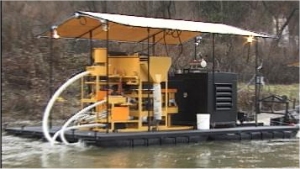
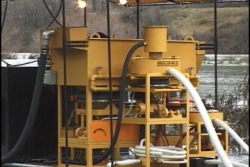
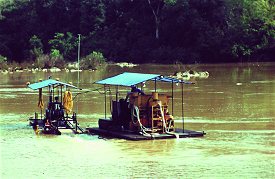
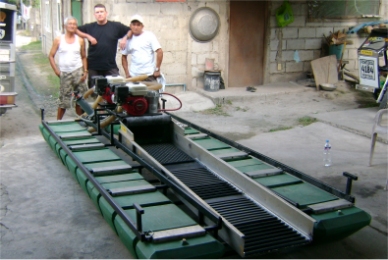
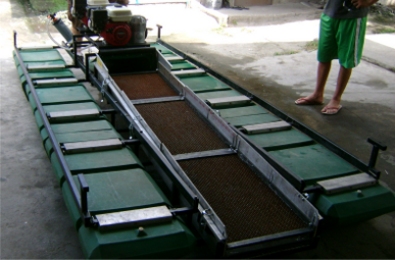
Here is just one of several ideas:  Please see Figure A above. If I completely remove the sluice box from my 5-inch dredge, I am left with a floatation system which supports twin 6.5 HP Honda motors and pumps with a hookah compressor.  I could use a single motor & pump with compressor to power a 3-inch Hydro-Force nozzle jet.  This special nozzle will allow me the option to blow off lighter gravel to expose cobbles, which I can then move out of the way by hand.  This will allow me to work my way down to the pay-dirt without having to suck up any gravel.  Once I expose the pay-dirt, the Hydro-Force nozzle will allow me to suck it up and transfer it over to a catch container in shallower, slower water which is closer to the bank.  Or for that matter, I could just drop it in a small pile in the shallower water along the edge of the river.

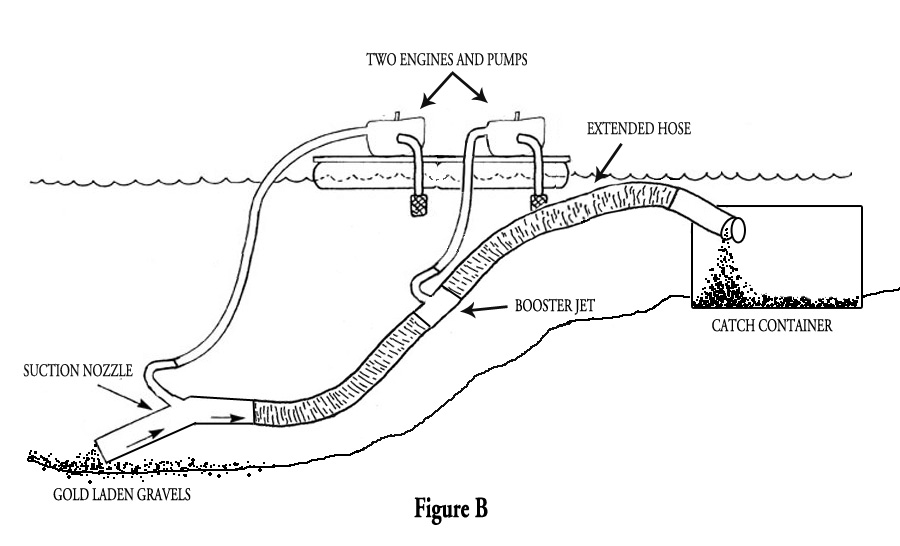
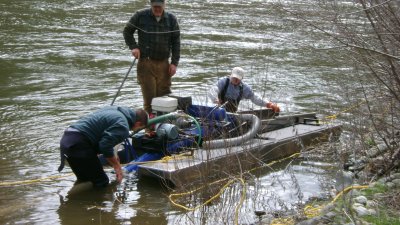
If there is some distance involved between where I am prospecting and my catch container, I can use my second engine & pump to provide power to a booster jet attached to a second 3-inch hose (See Figure B).  Since the whole suction system would be underwater, I’m guessing that would give me a reach of fifty feet or more.

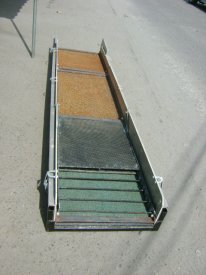
Suction Gravel Transfer System image 2

The catch container would need to be large enough to accumulate the amount of pay-dirt that I would suck up on a single dive. My suggestion would be to fabricate a baffle on the feed into the container so the material would be deposited there neatly.

If you make smart use of the blower function on the Hydro-Force nozzle, you can really minimize the amount of gravel that you transfer by suction to the catch container; perhaps so little that you could work it all down and recover your gold between dives with just a classification screen and gold pan!

If there is more non-gold bearing material present than you can blow off with the Hydro-Force nozzle, you would always have the option of sucking that off separately and depositing it outside of your catch container.

Several experienced prospectors I have spoken to about this had other ideas.  One suggested fabricating the catch container between the pontoons on his floating platform.  Then he could just float it over closer to the bank to pan the material after each dive.  Another who has already experimented with the idea says he successfully attached a 20-foot piece of PVC plastic tubing to direct the discharge into a catch container that was sitting up on the streambank.  This took place in the fall of 2012.  He was visited by local game wardens while doing the activity.  And while they expressed reservations (“sure looks like a dredge”), he was not cited and the wardens did not return.

While I’m sure we will learn more as we gain experience, here are a few of my own thoughts on “underwater suction gravel transfer systems:”

1)      Make certain to not have the sluice box from your original “suction dredge” anywhere in the vicinity of the program.  DFG regulations prevent you from having a “dredge” within 100 yards of any active waterway.  Therefore, that third component (sluice) should not be sitting up on the streambank or even in the back of your pickup truck, even if you are not using it.  Leave it at home!

2)      Do not direct the discharge of your suction system into some other type of recovery system that uses a sluice.  Using any sluice in combination with the suction system, all working at the same time, would likely meet the definition of a “dredge” in the regulations.

3)      There has been some suggestion that even sluicing the recovered gravels at some later time would fulfill the definition of a dredge.  You guys can make your own decisions about this, but I’m not buying the theory.  The language in the regulation defines the three components working together.  So it would seem reasonable that you could shut your underwater suction transfer system down and then separately process the gravel in any normal way that does not violate water quality standards.  Though I would not be using the sluice that I took off my suction dredge, or any sluice which could be attached to the suction system. Be advised, though, that as soon as you have any sluice as part of your program within 100 yards of the suction system, you will be on thinner ground. Personally, I am inclined to be careful about sucking up a lower volume of only the highest-grade material and use a gold pan to work that down between dives (more on this below).

4)      I would not suck a bunch of silty material into a catch container that is sitting in dead water alongside the bank.  That might provoke water quality concerns.  This is why I suggest using the blowing option on the Hydro-Force nozzle to first free up material out under the moving water. Gold is heavy.  It won’t blow away if you pay attention to what you are doing.

5)      I also would not advise using this system to make large excavations out in the creek or river.  That might provoke streambed alteration concerns.  I would use this method to work shallow deposits much the way we do in high-banking.  Having said that, it has also been pointed out that the existing suction dredge regulations clearly state that there would be no requirement for a stream alteration permit, and there would be no deleterious impact upon fish, from the use of 4-inch suction dredges in California’s waterways.  So it would be pretty unreasonable for DFG to make a stream alteration argument if you are careful about not making large excavations.

6)      I would advise the use of riged pressure hose between the pump and nozzle jet on this type of system.  It is difficult enough to keep the kinks out of lay flat pressure hose outside of the waterway.

7)      Since initially, DFG wardens may not be aware of their own formal definition of a “dredge,” I suggest you print out at least the first page or two of the regulations which include the formal definition of a “dredge,” and have them available if and when any officials come around to see what you are up to.  Make sure to point out the complete absence of a sluice on your suction system. And whatever you do, never refer to this activity as “dredging.”  Because it is not dredging!  It is an underwater suction system used to direct small volumes of high-grade material into a catch container.  Nothing more.  If you tell the warden you are “dredging without a sluice box,” you will probably provoke a citation, the warden telling you to explain it to the judge!

8)      If any citations are written for this non-dredging underwater form of prospecting, please get in touch with us without delay.  We will likely want to become involved with your defense.

Conclusion:  I can process material through a “suction dredge” about as fast as anyone I know.  Yet, my tailings don’t amount to much at the end of my dives.  This is because most of the underwater work has to do with freeing and moving oversized material out of the way (rocks that are too big to suck up).  Depending upon the size of the suction nozzle, perhaps as much as 95% or more of the volume has to do with rolling rocks behind me.  I would normally suck up the other 5% of material into my sluice box if I were “dredging.”  That volume over my sluice box gives me a substantial amount of heavy concentrates to process – which takes quite a bit of time.

But with this underwater gravel transfer system, I can easily visualize how I can blow the lighter material out of my way and only suck up the pay-dirt.  This would dramatically reduce the amount of material I will need to process out of my catch container.  While the underwater process may not be as fast or efficient as “dredging,” I might make up for it by having fewer concentrates to process.

Please note my words in bold just above.  They are perhaps the most important words I have said here.  This is because if you suck everything into your catch container, it will soon fill up with low-grade material which may not be worth the time to process further!  The whole idea in this new system is to get the low-grade material out of your way, and only suck up the very small volume which is directly associated with the gold deposit.  Gold deposits are nearly always located in a contact zone.  This means either on the bedrock, between storm layers, or on top of the upper layer of hard-pack.  There is an entire education about this in the articles at this link. If you still need help understanding this, you should attend one of our weekend group mining projects and allow us to show you exactly what you are looking for!

Using this system to discriminate carefully about what you suck up will accomplish two important objectives:

A)    You won’t find yourself up on the bank most of the day panning a bunch of gravel that doesn’t have much gold in it.

B)    You will only use the suction system to recover a very small volume of material – only that which contains the gold.  A small volume tool to help with your crevicing program will give our enemies less to complain about.

I thought you guys might be interested in an official position. There has been quite a lot of debate about this “underwater suction gravel transfer” idea on the GPAA forum since I have gone public with it; and finally, someone asked Mark Stopher of DFG for the straight scoop:

Here are the official answers (2 January 2013):
“I carefully read (today) the information that McCracken provides on his website. I believe Dave McCracken’s description of the legal requirements and application of the regulations is accurate. If practiced as he describes, this is not a violation of the moratorium and is not prohibited.

There is no specific permit required and no seasonal restrictions. Since this is not suction dredging, neither the moratorium or our adopted regulations for suction dredging apply. It’s essentially a loophole in existing law. However, as McCracken notes, Fish and Game Code section 1602 could apply if the streambed alteration is substantial, that is, you create a big hole. My guess is that such a system will be less efficient, and less excavation will occur, than if you were using a suction dredge since there is no sluice box and miners will need to use some other system to sort through the material.”

Mark Stopher
Habitat Conservation Program Manager
California Department of Fish and Game
601 Locust Street
Redding, CA 96001

voice 530.225.2275
fax 530.225.2391
cell 530.945.1344

Underwater Mining Seasons on New 49’er Properties:  Underwater suction mining without the use of a “dredge” is allowed  on our Klamath River properties between the Scott and Salmon Rivers on a year-round basis, and up the Klamath from its confluence with the Scott from the 4th Saturday in May through September 30.  Underwater suction mining is permitted along our creek properties and the Scott River from July 1 to September 30. Underwater suction mining is permitted on the Salmon River from July 1 through  September 15.

This new idea will at least allow us access to some of the submerged gold deposits that otherwise would be out of our reach until the “dredge” moratorium is lifted in California.  How’s that for good news?


By Dave McCracken

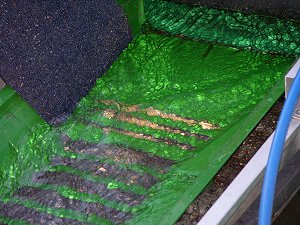
When the gold starts being trapped further down the length of the box, it is definitely time to clean up your box!

Dave Mack


Some miners like to clean up their sluice boxes after every hour of operation. Some prefer to do clean up at the end of the day. Others will go for days at a time before cleaning up. This is a matter of preference and seldom has much to do with the actual needs of the sluice box. Some of the large-scale operations, which ran during the early 1900’s used to allow the lower two-thirds of their boxes to run for months at a stretch without cleaning them up, and without very much concern about losing gold. However, it is true that sluice boxes were longer in those days.

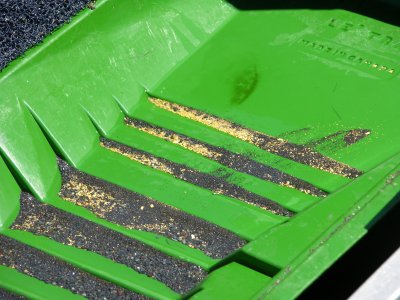
There is a method of determining when a sluice box needs to be cleaned up to keep it operating at its utmost efficiency. If the majority of gold is catching in the upper third section of the sluice box, then the recovery system is working well.

After a sluice box has been run for an extended period of time without being cleaned, the riffles will have concentrated a large amount of heavy materials behind them. Sometimes a lot of heavy concentrated material in a sluice box will affect the efficiency of the riffles’ gold recovery. This is not always the case; it depends on a number of different factors, like the size and shape of the gold, the size and type of riffles being used and how they are set up in the box.

The true test of when a set of riffles is losing its efficiency because of being loaded down with heavy concentrates is when the gold starts being trapped further down the length of the box than where you are comfortable seeing it. When this occurs, it is definitely time to clean up your box.

Otherwise, clean them whenever you like.

Expanded metal riffles, being short, will tend to load up with heavy black sands faster than the larger types of riffles. But shorter riffles generally concentrate fine gold better than deeper riffles.

A large, visible amount of black sand being present is not necessarily a sign that you are losing gold. Gold is four times heavier than black sand. In some cases, the black sand will have little effect on gold recovery. Again, it depends on how the system is set up, the type of material being run, the purity (and therefore weight) and shape of the gold, as well as other factors.

The best way to evaluate your recovery system is by direct observation of where the gold is being trapped.


BY SAMUEL T. LONG

No matter what the size or nature of our mining operations, we all have one common procedure to deal with—the cleaning up of our concentrates. Sometimes, the process of separating the gold from the other sand and gravel is a tedious task. But, there is a way to make it relatively quick and easy.

This final step, before the gold is totally isolated, is of no less importance than the prior steps used to recover the gold laden concentrates themselves. Many times, in a mining operation, much thought and energy have been used to successfully reach the clean-up stage, only to squander the last remaining hours of the afternoon or early evening on an inappropriate and/or wasteful system of final gold clean-up. In fact, some operations take so long to complete this stage that they’re not started until the next day!

Final clean-up of concentrates should take minutes, not hours. If you can’t go from sluice box concentrates to gold in a bottle in less than an hour, your technique needs to be examined, then streamlined.

We all know the direct relationship between time, effectiveness, and gold. Its no secret, for instance in dredging, that the more time you spend during the day pumping gravel, the more gold you’ll have at the end of the day. All the effort you spend on plug-ups, throwing and re-throwing rocks, moving the dredge, winching unnecessary boulders, and all the other odds and ends “Murphy” continually throws at you, essentially steals valuable time from operating the suction nozzle. This, in turn, logically lessens the amount of gold in your box on any given day. So, an important aspect of successful gold production is efficiency. Isolated efficiency used mainly during diving time is not enough. Productivity, in every aspect of your over-all mining operation, is vital for success. Clean-up of concentrates is no exception.

Before we go any further, lets look at a few clean-up methods that, for one reason or another, don’t prove to be satisfactory. Maybe yours is in this short list:

1. Panning: Simple, direct, and economical. But time consuming. It works after a fashion, but obviously a prospector’s sampling tool, at best. If you do use a pan to do final clean-up, you will find the process goes much better if you first classify your concentrates through a series of mesh-screens and pan each size-fraction separately.

2. The Tweezer Method: Again—simple, direct, economical and EXTREMELY time consuming. Actually, it works great for the first eight or ten pieces of gold you pick up. Its the next two hundred pieces, or 20,000 pieces, and your unasked for double vision, that puts the “kibosh” to this method. This method is unworkable as soon as you begin finding more than just gold traces in your sampling.

3. Spiral Gold Wheels: Here’s the backbone of many clean-up operations. Wheels are basically good tools at a moderate price, but can fall flat on their face when it comes to efficient use of time. Its almost impossible to classify, run, and re-run concentrates through any wheel and still break the one hour target. If you use a wheel, don’t throw away the final concentrates that remain in the bottom-edge of the wheel after all the gold has climbed out. Because there always seem to be pieces of gold that will not climb out! Save those concentrates for another day…

4. Shaker Tables: Very effective for fixed commercial operations. But generally too bulky to support portable sampling programs. They are also quite expensive. Unless you already own one, you can still be effective without it.

This is not to say that there is only one correct way to clean-up; and if you’re not doing it that way, that you’re doing it wrong. This is just to show you a fairly quick, cost-effective, simple way to separate gold from your sluice box concentrates; a method by which you can cut your clean-up time from two hours to less than one hour with only the addition of a few simple tools and techniques:

1. A very important part of any efficient clean-up method is what percentage of the sluice that you are cleaning up. No matter what size sluice you have, or how it came from the factory, it is imperative that you re-design it so it’s possible to clean the top 20-25% of it without disturbing the rest of the sluice.

We call this the “high-grader.” Because it is extremely heavy, eighty percent or more of the gold will regularly be in the top 20% of the sluice box. Given this fact, there’s no need to spend extra time and effort cleaning the entire box each time you clean-up. All that extra time could be much-more effectively invested in the sampling or production-phases of your program! On an average, clean the top section every day, the middle section every two weeks and the back section every month or so. You have to be flexible about this, depending upon how rich the gravel is that you are mining. This saves a lot of work while still retaining all the gold. Design your sluice in individual sections and clean them on a staggered basis.

2. Remove the riffles and miners moss with concentrates from the top section. Rinse the riffles and thoroughly wash out the miners moss into a utility tub. A flat kitchen-counter scraper works well to clean the bottom of the sluice. Immediately replace the miners moss and riffles.

3. Using another utility tub, transfer the concentrates from one to another via a 4-mesh classifying screen.

Check the top of the screen for nuggets before discarding the over-sized material. You never know when one will appear. This 4-mesh classification should cut the amount of concentrates by around fifty percent. Dump the classified material into a five gallon bucket. Now you have gone from five gallons of concentrates to two in only about ten minutes.

4. Start the dredge and run it at low idle. Set the black plastic mini sluice (or the Le’ Trap plastic clean-up sluice) in the top of the sluice. The moving water will hold it in place. Note here that it is counter productive to use a longer plastic sluice instead of a small one. That’s because you’ll end up with twice as much material, but no more gold. The object of this step is to get the material down to a workable amount for final clean-up. If you use too large a mini sluice, it will take another step to reach this proper volume. While it is probably not necessary, we like to lace the one-foot square of miners moss under the tail of the mini sluice in such a manner that all material washing out must travel over the moss. This is to catch any fine flakes of gold that may be washed out of the sluice. However, because the process is usually done inside the sluice box of your bigger recovery system, there is little chance any gold can be lost anyway.

5. Carefully drop the concentrates a handful at a time into the top of the mini sluice.

Adjust the water flow via the throttle so that the concentrates are gently carried away while leaving the gold in the top few riffles. We have found that this step goes much quicker and simpler than using a gold wheel or gold pan. The process is so efficient, we have found that running the concentrates through the mini-sluice twice is a waste of time.

6. At this point you’ve only spent about twenty minutes and you’re more than half-way to having completely separated the gold from the rest of the concentrates. Next, rinse out the square of miners moss and the contents of the mini sluice into a bucket.

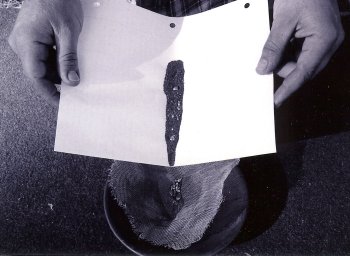
Notice there is only a fraction of a pan’s worth of concentrates remaining. These can be dried out in a small, steal gold pan over an open flame (outside in a well-ventilated area), screened, and carefully separated with a gentle blowing process on paper. The best demonstration I have ever seen of this final process of separation can be found in Dave McCracken’s video, “Successful Gold Dredging Made Easy.” Who said clean-up had to be tedious and time-consuming using expensive tools? So far, we haven’t even left the river and we’ve gone from nearly five gallons of concentrates to less than a cup in only twenty-to-thirty minutes. This easy technique, coupled with the dry final separation, is all you need to make your operation more enjoyable and successful.

Expertise in clean-up demands an approach that will deliver all of the gold in your concentrates in less than an hour. Anything longer than this is a waste of time and energy which definitely subtracts from your over-all mining success and enjoyment. As you know, a chain is only as strong as its weakest link. While streamlining clean-up may not drastically improve total gold quantity, it is surely a step in the right direction. Gained insight concerning your clean-up methods may reveal ineffectiveness in other areas as well; the sum of which very well could mean the distinct difference between success and failure in your operation.


By Dave McCracken

To recover finer gold more efficiently, it is necessary to direct finer-sized materials into more-shallow riffles, that require milder water flows to keep them functioning when filled with concentrated material.

Dave McCracken


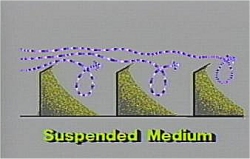
In gold mining, when we talk about gravity-recovery systems (as opposed to chemical-recovery systems), we are basically talking about the creation of a suspended medium. A suspended medium is a condition of fluidity where materials are allowed to separate because of their relative weights.

Since gold is around six times heavier than the average of other materials which make up a streambed, if you pass raw streambed material through the right kind of suspended medium, you are able to drop the gold to the bottom, and direct the lighter materials off the top as tailings.

As an example of this, if you dropped some gold onto the hard ground, even though the gold is much heavier than the material making up the ground, because the ground is somewhat hard and compacted, it would probably take a very long time for the gold to work its way through to the bottom of the material in that compacted state.

But if you dug up all that ground (and gold), and dumped it into a raging river during a major flood storm, the material would all get churned into a liquid slurry as it is washed downstream in the river, and the gold would very quickly work its way down through to the bottom of the slurry. This is because the slurry is in a liquefied state of suspension, where heavier particles can easily penetrate downward, because gravity is pulling on them much harder than the lighter materials.

There are different ways to create suspended mediums so that gold can be recovered from streambed materials. Mechanical jigs create a pulsating medium within a chamber that keeps water and material in a state of fluid suspension. Oscillating sluices create a left and right movement (similar to panning) as material is washed over top by a mild flow of water. Shaker tables use a finely-tuned vibrating action, with a very mild flow of water, to separate material by weight. Because these systems use mechanics to help keep or create a suspended medium, we refer to them as “mechanical recovery systems.”

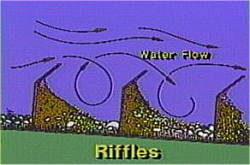
Most recovery systems on suction dredges use fixed riffles to trap gold out of lighter streambed materials as they are washed through a sluice box by a flow of water. Riffles are baffle-like obstructions, fixed in place along the bottom of the sluice box. They are designed and positioned so that there is a back-pressure created that sucks water and material behind the riffles from the flow over top. When the correct water-flow is directed over a riffle, the back pressure keeps the area just behind the riffle in a state of continuous fluid suspension. This creates a medium where the heaviest material (gold) is allowed to concentrate.

Gold recovery systems that use a flow of water over riffles are called “fixed recovery systems.”

Classification (sizing of material) is the key to fine gold recovery. This is true in both fixed and mechanical-type recovery systems. In general terms, this means that the finer (smaller) in size that you want to recover gold efficiently, the more closely the material must be sized, and the more finely-tuned the suspended medium must be to facilitate the separation.

As an example to put this in perspective, the water flow it would take to move a 5-inch (diameter) rock will likely be violent enough to wash away a fine particle of gold. And vise-versa: A suspended medium tuned so gentle as to allow fine particles of gold to efficiently separate from lighter streambed materials would be completely overwhelmed by a 5-inch rock.

The general idea is that if you want to efficiently recover finer-sized gold, you have to first separate it from larger-sized material. This is accomplished by screening. The process of screening is called “classification.” Classified material(s) can then be directed into a recovery system that has slower water and more gentle suspended medium(s).

What do I mean by a “gentler suspended medium?” In this discussion, I am mainly talking about the size of riffles. Because, the bigger (deeper) the riffle, the greater (and more violent) water-flow required to maintain a suspended medium of water and material behind the riffle.

Let’s talk a little about what happens behind the riffle in a sluice box. If you only run water over the box, it does not take very much water-flow to maintain fluid movement behind the riffle, because there is nothing solid to obstruct the flow. But the average streambed material (rocks, gravel and sand) weighs around 4 times more than water. This means water-flow and turbulence must be dramatically increased to keep material in a suspended state behind a riffle. The deeper the riffle, the greater the volume and weight of material which must remain suspended – so the greater the water force (and violence) needed to keep a riffle from packing up.

What is “packing up?” That is when you overwhelm a riffle with too much weight of material (rocks, sand, silt), and the suspended medium is lost. When the suspended medium is lost, most of the riffle will no longer concentrate the heaviest materials as they are washed over the sluice box.

Keep in mind that when a riffle is operating correctly, it will continue to concentrate the heaviest materials that are passed through the suspended medium.

At the beginning of a production-run, the specific gravity of the average material behind a riffle will be similar to the average specific gravity of the raw material found in the streambed. For the purposes if this discussion, let’s say this is around 4 times the weight of water. But as other heavier materials like iron (specific gravity of around 8) flow into the riffles, the heavier materials will displace lighter materials, and the materials behind the riffle (called “concentrates”) will become heavier. Each area is different, but it generally does not take long to accumulate concentrates in a sluice box that are around twice as heavy as the average raw material being processed. Heavier materials are usually associated with iron, and dark-colored by nature. These are often referred to as “black sands.”

The heavier the concentrate behind a riffle, the more water-flow and turbulence is required to maintain a suspended medium. The deeper the riffle, the more it will become overwhelmed by the increased accumulation of heavy material. So a deeper riffle requires a faster, more violent flow to keep it working as the concentrated material behind the riffle becomes heavier.

On the other hand, the shallower the riffle, the less water-force it takes to maintain a suspended medium behind the riffle. Less water force and violence will allow smaller particles of gold to settle.

But a shallow riffle also requires that the water flow be reduced. This is because a shallow riffle will not create enough protection behind it to prevent turbulent flows from boiling fine gold away. What do I mean by “boiling?” I mean that if you put too much water-flow over top of any riffle, the suspended medium becomes so violent that even the heaviest particles can be washed away.

Here is what I am saying: If you want to recover finer gold more efficiently, then it is necessary to direct finer-sized materials into more-shallow riffles, that require milder water flows to keep them functioning when filled with concentrated material.

But the problem with suction dredges is that we are sucking up a lot of rocks! Let’s just use the example of a 5-inch dredge. The nozzle-restriction will allow a 4.5-inch rock to be sucked up into the sluice box. And there must be enough water-flow through the sluice to keep the 4.5-inch rocks, and everything else that is being sucked up, flowing through and out as tailings. Otherwise, the material will build up on the dredge and sink it in very short order!

So initially, we are dealing with a water-force through the sluice box that will wash 4.5-inck rocks all the way through. That is a lot of force. And the force is turbulent.

Part of the reason why a rock is moved by a water-flow is because it is being pushed along by the water. A nearly-equal reason is that it is also being pulled along by the vacuum that is created behind the rock as the water flows around it. The vacuum behind a rock creates enormous turbulence that will affect anything it comes in contact with – including small particles of gold. The turbulence associated with the movement of a 4.5-inch rock is a lot, compared to the mild state of suspension necessary to allow a fine-sized particle of gold to settle behind a short riffle.

Since we must suck up rocks in dredging, the bigger rock we can suck up, the fewer we have to move out of the way by hand. Therefore, the first priority in the recovery system is to separate the big rocks away from where we want to recover the fine-sized gold. We do this by dropping the smaller-sized materials through a classification screen, and then directing them into slower-moving recovery systems. Sometimes, we are even able to screen two different sized products, and direct each into a separate recovery system, where the suspended mediums can be adjusted accordingly.

But the one mistake I often see is that the pre-sized materials are usually being directed into slower-moving recovery systems that are using deep riffles. As these riffles do not have enough water-flow directed over them to create the required suspended medium, they pack up and don’t work very well. What I mean by this is that most of the space behind a larger riffle can pack up. Sometimes it is only the surface area behind a big riffle that is working, while the rest of the area behind the riffle is packed solid.

Bigger is not better when it comes to riffles in a fine-gold recovery system. In fact, it can be worse.

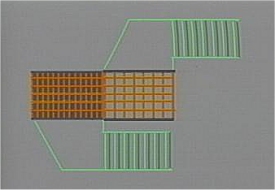
Here is a substantial explanation of the system which we have developed to effectively recover more fine gold on our conventional suction dredges. It combines two classification screens to more-effectively separate material-feed into three size-fractions, each which is directed into a different recovery system. The smallest gold particles (which are most difficult to recover) are directed into low-profile riffles along the bottom of the sluice box which have long been proven to be very effective at trapping fine gold.

Here are some things to look for to get a better idea if a riffle is working for you:


1) The material behind a riffle should be visibly dancing during normal operation. You should be able to see that all of the material there is in a continuous state of vibration and movement. This can be deceiving, however. Because sometimes, only the surface of the material behind a riffle is in movement. Everything under the surface can often be packed up.

This is almost certainly the case; if after you shut down, you scrape behind the riffle and find that just below the surface of black sand, it is all packed up with lighter, blond-colored material. In this case, you will have to decide if you need to increase the water flow and violence (which will make it harder to settle fine gold) or shorten the riffle.

Shortening the riffle is usually the best solution.

Please don’t get me wrong here. I am not talking about the riffles that get big rocks passed over top of them. I am talking about the riffles where you direct pre-sized, smaller material.

2) Do some controlled tests at production-speed (meaning while someone is sucking material into the dredge’s suction nozzle or feeding material into a sluice), while feeding a pre-weighed amount of fine-gold into the system. You can either catch and test the tailings, or you can process the gold from the recovery system (or both), to evaluate how well your recovery system is working.

Here is where you can buy panning ore which contains fine gold.

If you are losing gold from a fixed recovery system, it will come down to either a screening system that is not working very well (to separate the fine gold from the big rocks that must be washed away using heavy force), or a bad relationship between the flow of water and depth of riffles in the fine-gold recovery system.

The answer is to just keep working at it until you get it right.

Okay; so, if bigger and deeper riffles are not the answer to recovering fine-gold from pre-sized material, how small and shallow should you go? Weight and shape-characteristics of the average streambed material in each area may be a little different. For example, crystalline, angular-type material requires more force and turbulence to keep it moving along. So there is not a fixed answer that will work perfectly in every single situation.

However, as a general guideline, I would say that the depth of a riffle should not be much more than the maximum size of material that is being directed there. In other words, if a 3/8-inch screen is being used to pre-size material, you probably don’t want to use riffles much deeper than 3/8-inches. Then you set the water-flow to keep those riffles fluid when there is an accumulation of concentrated material behind them. This is not a fixed formula. You will have to use your own best judgment to dial it in right based upon your local conditions.

Remember: If you use shorter riffles, you must slow down the flow over top of them to keep from boiling-out your fine gold. Slower water, and less violence, allows for finer particles of gold to settle – as long as a suspended medium is maintained behind the riffle. If you can keep the black sand in movement, without boiling out the riffles, you will have a great recovery system. Because gold is around 2.5-times heavier than iron, fine particles of gold will displace the iron behind the riffles, as long as there is movement there.


video subscription graphic

By Dave McCracken

“It is vital that you design your recovery systems from the beginning to make certain they will actually do the job!”

Dave Mack

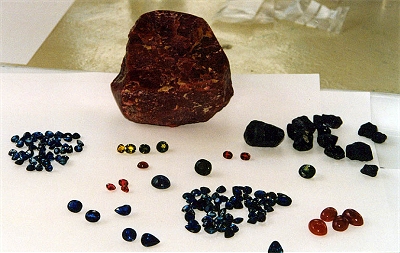
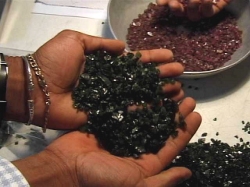
 Rubies and sapphires from Cambodia.

Over the many years, my various partners and I have experimented a lot with secondary recovery systems to catch fine gold and gemstones that get sucked up the suction nozzle of a floating dredge. There are numerous issues involved, each which must be carefully resolved to make it all work out right. I strongly advise you to study these issues for yourself as much as possible before deciding how to acquire accurate samples, and what to do for a production dredge if you decide to move forward with a mining program.

If these problems are not carefully considered and resolved in the construction of the equipment, the problems will definitely have to be dealt with in the field, where it becomes much more difficult to fix them!

Since the purpose of sampling is to accurately determine the real value of gold (and/or gemstones) in the river gravels, it is important how you acquire the samples. And if the samples turn out well, it is vital that you design your production dredge and recovery system from the beginning, to make certain they will actually do the job. The reason I stress this point so strenuously is because my team has been called in so many times to help with projects that did not acquire equipment that would efficiently recover fine gold and/or gemstones in the first place.

I also advise you to please not take for granted that gemstone-dredges advertised by various dredge-builders within the industry will recover diamonds or other gemstones efficiently just because the builders advertise that they do. I encourage you to review the points that I will outline here. Then you will have a foundation of understanding from which to ask questions and make your own judgments at the time when you will need to make pivotal decisions.

Gemstones are not heavy like gold. Therefore, they are much more difficult to recover.

Conditions must be set up to near-perfection to effectively recover gemstones from the volume of sand and gravel which passes through a dredge nozzle. This is especially true of production dredges in the hands of experienced operators!

Any enquiry into gemstone-recovery on suction dredges should certainly lead you to the subject of “mineral jigs”. A mineral-jig is a mechanical device that can be adjusted to create a specific suspended medium inside. As raw material flows into a jig which has been set up properly, different minerals are separated according to their specific gravity. Minerals that are lighter than a specific weight-range are allowed to flow off the top of the jig as tailings. Minerals that are heavier are allowed to settle to the bed, or to the bottom of the jig. The heaviest finer-sized materials (mostly gold and iron) are allowed to (flow) bleed out the bottom of the jig to keep it from concentrating with heavy material. Heavier materials are then collected elsewhere, or are directed to even more finely-tuned recovery systems.

The following video segment will demonstrate a mechanical suspension medium that can be created by a mineral jig:

Any and every enquiry into suction dredges and jigs should prompt a series of important questions:

1) classify and separate the smaller-sized raw material that is sucked up through the dredge’s suction nozzle?

2) What size-classification and how much volume of material will feed the jig?

3) How much volume and velocity of water will be included with the feed to the jig?

4) What will you do with the heavier material that is bled from the bottom of the jig?

Let’s please take these important questions up one at a time:

1) Classification: You cannot direct large-sized materials (rocks) into a mineral jig and expect it to perform well. This is actually true of any recovery system being set up to recover gemstones or fine-sized gold. Some method of screening is necessary to “classify” the size-range of materials that you want to direct into each type of recovery system. The more that different size-fractions of material are separated from each other, the easier it is to separate gold or gemstones from the other materials by their differences in weight.

Since dredges have limited space to work with (usually on a floatation platform or two), classification systems must be kept reasonably simple and portable.

Most suction dredges are set up with a fixed (not mechanical) classification screen which material and water flow across inside the sluice box. Riffles and various types of traps are constructed below the screen to trap gold and other valuable minerals out of the flow of water. All of the material that passes over top of the classification screen, or that is not trapped by the riffles under the screen, is allowed to flow out of the box and be discarded as tailings. For lack of a better term, let’s call this a “hydraulic classification and recovery system,” because it depends entirely upon water-flow to move raw material across the classification screen and through the riffles. This is the type of system that you can expect to receive as standard dredging equipment on today’s market.

Hydraulic classification and recovery systems have evolved over the years to the point where they generally recover gold and platinum with a reasonable degree of efficiency down to size-fractions relatively small in size. How fine in size depends upon various factors, like the purity of the gold, its average shape (round, flat or crystalline), and the nature of the material (slurry) that is flowing through the recovery system along with the gold or platinum.

It is reasonably safe to say that any recovery system is efficient down to a certain size-fraction of gold or platinum in any given area. The size-fraction might vary from one place to another. The reason for this is that the specific gravity of gold and platinum is generally 5 to 6 times greater than the average of other materials which commonly exist within a streambed. This incredible difference in weight will generally allow pieces of the heavier metal to penetrate the screen and drop behind the riffles in a sluice box – even though there is a strong force of water present to wash larger-sized material (rocks) over top of the screen.

It is also reasonably safe to say that the smaller a piece of heavy metal is (gold or platinum), the more it will be influenced by the fast, turbulent flow of water that is required to wash larger-sized material through a sluice box. For example, it requires a violent force of water to wash 9-inch rocks over top of a screen in the recovery system of a 10-inch dredge. So the smaller it is, the less likely that a piece of gold will drop through a hydraulic screen and get trapped behind a fixed riffle. Therefore, hydraulic classification and recovery systems lose efficiency as the particle-size of a heavy metal becomes smaller.


It is important to understand this: Because gemstones are only slightly heavier than quartz, and are within a similar weight-range as the average materials generally found in a streambed, hydraulic classification systems on dredges are not an efficient method of sizing raw material. This means that probably more gemstones wash across the top of a stationary classification screen (into tailings), than drop through it into the recovery system.

Furthermore, hydraulic recovery systems (fixed riffles and baffles) are actually designed to discard gemstones.

Because gemstones are light, it is unreasonable to expect them to drop through a classification screen that has a torrent of water passing over top. And then, because riffles will quickly accumulate a concentrate of material behind them that is heavier than the average specific gravity of a gemstone, you should not expect to recover gemstones efficiently using fixed riffles.

As far as I know, Pro-Mack is the only dredge-builder that has accomplished mechanical classification on a suction dredge. We do it by placing a shaker-screen (powered by a hydraulic pump) in place of the sluice box. Raw material from the suction nozzle is directed onto the shaker-screen. Minus-size raw streambed materials drop into a hopper under the screen and are then pumped to a recovery system – usually on a second platform. The following two video segments demonstrate this very important principle:

Summary: On suction dredges, there are basically 2 kinds of classification systems:

(A) A fixed screen which a flow of raw material is washed across by the force of water, with some portion of minus-sized raw streambed material dropping through. This system works relatively well on heavy metals down to a certain size-fraction. Efficiency is lost below that size, and there is poor efficiency on gemstones (they are too light).

(B) Mechanical classification, when set up properly, can be depended-upon to provide nearly 100% of the size-fraction that you want to separate out from the raw material, then to be directed into a recovery system. Please take a look at the following free video segment to see how we recently worked this out on a Pro-Mack commercial dredge system that is being used on a diamond recovery project in India:

Since it is impractical to refit smaller-sized dredges (which must remain portable for sampling) with mechanical classification, here is a substantial explanation of the system which we have developed to effectively recover more fine gold on our conventional suction dredges. It combines two classification screens to more-effectively separate material-feed into three size-fractions, each which is directed into a different recovery system. The smallest gold particles (which are most difficult to recover) are directed into low-profile riffles along the bottom of the sluice box which have long been proven to be very effective at trapping fine gold.

2) Size and volume: Jigs are available in different types and sizes. Generally, a certain size of jig is designed to process a given volume of material. Each manufacturer will have their own set of guidelines.

I say “guidelines” because there are variables that will change from one location to the next. The main consideration is the difference in weight between the mineral you are trying to save, and the medium that it is mixed with.

For example, because the weight-difference is so great, it is relatively easy to drop a particle of gold (19.6 times heavier than water) through a suspended medium of pre-sized quartz crystals (only 3 times heavier than water), because the difference in weight is more than 6 times. Therefore, with heavy metals, there is greater margin to introduce a larger variation of size-fraction (different sized material) into the jig, or a larger volume of pre-sized raw material, without forfeiting recovery.

If you are trying to drop gold particles through a raw material made up of iron (8 times heavier than water), you will be required to tighten-up the sizing and slow down the feed to the jig. This is because the weight-difference between what you want to retain and what you want to discard is only around 2 ½ times.

Sizing and volume are critical in the recovery of gemstones (usually only around 3.5 times heavier than water), because there will be only the smallest weight-difference between the valued material and the other streambed materials which must be rejected by the recovery system.

Summary: Sizing and volume requirements for jigs are largely affected by the difference in weight between the type of material you are trying to recover, and the raw material you want to discard as tailings. This becomes critical as you try and recover gemstones with efficiency.

3) Water feed: Most suction dredges operate on a “venturi” system, where a stream of high-pressure water is pumped into a power-jet at an angle to create a vacuum through the suction hose and nozzle. In this way, gravel and rocks can be sucked up from the bottom of the river and directed to a screening or recovery system floating at the surface, without having to pass them through a water pump. This allows a suction dredge to be manufactured at a small fraction of the cost to produce a dredge of the same size which must pass rocks and material through a pump.

But venturi-dredges are limited, in that they cannot lift streambed material and water more than about a foot (or less) above the water’s surface. Therefore, anything that is going to initially be done to raw material excavated by a suction dredge must be accomplished directly at the water’s surface. This is the reason why almost all standard suction dredges are equipped with hydraulic classification and recovery systems; because there is very little room at the water’s surface to do much else.


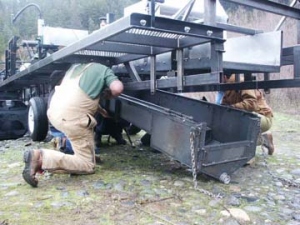
Men installing the Catch-hopper which mounts under the shaker-screen on a 10-inch commercial Pro-Mack dredge.


Classification systems used on a suction dredge almost always drop the minus-sized gravels into a sump or hopper that is located below the water’s surface. Therefore, to get the classified material up into a recovery system, it will need to be pumped.

Any jig is designed to allow only so much water-flow with the feed. The reason is that too much water velocity can wash sized-material across the top of the jig before the suspended medium has an opportunity to place particles where they should go.

Water-flow through a jig is highly critical in the recovery of gemstones because they are so light.

Therefore, important consideration must be given to how classified materials will be directed into the feed of a jig. We use hydraulic-powered gravel pumps on the Pro-Mack design, because we have found that venturi-elevators (using a high-pressure water flow) usually deliver too much water volume with the feed. For example, check out the water and raw material feed into the rougher jig (Preliminary jig) on one of the commercial dredges we were operating in the following video segment:

4) Bleeding off the heavy material: One of the reasons why jigs work so well, is that they are allowed to keep bleeding off the heaviest materials from the bottom. These otherwise would accumulate inside the jig and alter the suspended medium which creates the desired separation of your target-mineral from the other streambed materials. For example, if your target mineral is an average weight of 3.5 (times the weight of water), you must bleed enough heavy material from the bottom of the jig to maintain a suspended medium that is lighter than 3.5. Get the idea? If the suspended medium in the recovery system is heavier than your target mineral, the system will then be set up to discharge your target mineral along with tailings.

What you should do with the heavy materials from the bottom of a jig depends entirely upon what they contain.

On the production dredges we build at Pro-Mack, it is common to have a series of three jigs. The first (called a “rougher”) accepts the classified raw material from the sump under the dredge’s screen. The rougher accepts a larger classification of material at volume speed. Its purpose is just to make an initial classification and trap the largest gemstones and heavy metals on top of a bed (smaller classification screen) inside the jig. Large materials and the lightest small materials flow off the top of the rougher-jig as tailings. Heavier, classified materials are bled off the bottom and directed into a “secondary-jig.”

The secondary-jig can be more finely-tuned to further separate a finer-classified, slightly-heavier material at a slower speed. Then the finer-classified, heavier material from the bottom of the secondary jig is fed into a “finishing-jig” – which can be tuned to complete a final separation.

The following video sequence demonstrates how these systems harmonize together:

Most or all of the gemstones will become trapped on top of the jig-beds (classification screens) inside of the jigs. If there are fine-sized heavy metals present, the bleed from the bottom of the finishing-jig usually is directed into a final concentrating device – commonly a centrifugal bowl. The final concentrate is then separated in camp, often with the use of a mechanical shaker table. This final step is demonstrated by a video segment included in an article that I wrote about a sampling project we performed in Cambodia.

As all of these mechanical recovery systems are very sensitive to sudden jerking movements, changes in water pressure and other factors, we have found that it is much better to set up the recovery system for a production dredging operation on its own independent flotation platform. This includes the water pumping system that supports the recovery system(s). Here are a few reasons why we have found this works better:

1) Dredge platforms jerk around a lot as the suction nozzle is managed underwater. The suction hose is flexible, so there is an accordion-affect when varying amounts of suction are used at the nozzle. This causes the dredge to bounce around. The bouncing can throw off critical settings on mechanical recovery equipment.

2) Demands made upon the dredge’s main water pump fluctuate widely, depending upon how much suction is being used at the nozzle. If the dredge’s water pump is being used to supply water to mechanical recovery systems, the pressure-fluctuations can throw off the criticle suspended mediums that make the systems work.

3) A production gold dredging platform has a constant parade of divers, managers and tenders moving about while doing their various jobs. Most recovery systems are designed to be fastened down to a level, stable platform. The movement of numerous people around a dredge platform can throw off important settings.

4) Security: The final product(s) on a commercial mining operation should accumulate in a safe location where traffic can be carefully controlled.

5) These mechanical recovery systems have a lot of moving parts. It is better to keep wet, slippery divers and all their gear clear of the machinery.

In my view, the best way to do it is to set up two platforms:
A) A dredge platform that you can move around, put divers and tenders on, pump raw material to; and pump classified materials from.

B) A recovery platform that receives the classified materials and processes them. This system needs to be carefully engineered, and large enough to manage the volume of raw, classified material that is directed to it from the dredge. You only need to have one or two operators on this platform, so as to not upset the delicate balances that can be easily offset by people walking around changing the way the platform is sitting in the water.

Please take a closer look at the point I am trying to make here by viewing the following video sequence. See how much more organized it is to have a separate platform to contain an advanced recovery system. Just picture trying to combine all of that equipment onto a single platform and still retain some mobile flexibility:

I have found that when you try and put it all on one platform, you are forced to ignore several vital factors which can ultimately add up to a dredge-package that does not do the job very well.


By Dave McCracken

The water flow should be just enough to keep the concentrating action going behind each riffle, yet not so much that the riffles are being swept clean.

Dave McCracken


As a general rule, the optimum slope-setting of a sluice is around one inch of drop per linear foot of box. This can change, depending upon the volume and velocity of water being used, and/or the average shape, size, volume or weight (specific gravity) of material that you are processing.

There is no exact formula for setting the proper water velocity through a sluice box which will work optimally under all conditions for all the different types of riffles being used today. Therefore, rather than give you a formula, I will attempt to give you an understanding of what affects the proper amount of water velocity will cause in a sluice box, and also what the affects are of too much or too little water velocity. In this way, you will be able to act from direct observation to ensure that your, or anyone else’s, sluicing device will be recovering gold to the fullest extent possible.

In setting up a sluice, if feasible, it is desirable to have enough water flow to move the material through the box as fast as you can shovel (or dredge) it in at full production speed.

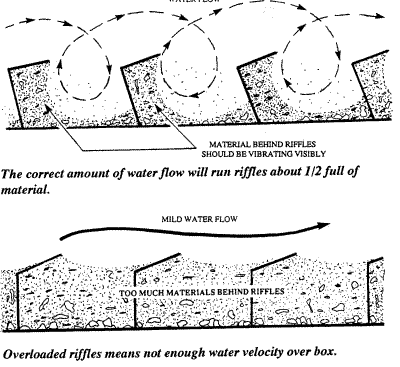
Most of the riffles being used today are designed so that a concentrating-action takes place behind the riffles. By increasing or decreasing the amount of water velocity over a set of riffles, the amount of water-action behind each riffle is also increased or decreased—which has an effect on the amount of concentrating action taking place. Water velocity can be increased by either putting more water through the sluice box or by moving the same amount through faster. Optimally, the water flow is just enough to keep the concentrating action going behind each riffle, yet not so much that the riffles are being swept clean (called “boiling”) of their concentrated material.

How much water velocity is directed over the box directly affects how much material will stay behind the riffles. When the correct amount of water force is being put through a sluice, its riffles will run about half full of material, and the material can be seen to be dancing and vibrating behind the riffles (concentrating) when the water is flowing.

If too little flow of water is directed through a sluice box, not enough water force can get into the riffles and they will “pack up” with material. In this case, little or no concentrating-action will take place and gold recovery will be poor. When this happens, little or no visible vibrating action behind the riffles will be seen and material will not be moving through the box fast enough to allow you to feed the sluice at production speed without loading up the entire box.

Too much force of water through a sluice box will put too much turbulence behind the riffles. This will cause some of the heavier concentrated material to be swept out of the box.

When this happens, gold recovery will also likely suffer, because the areas located behind the riffles are not calm enough to allow some percentage of the finer pieces of gold to settle. You will notice in this case that the dancing action is occurring behind each riffle, but less material will collect behind the riffles because of the increased amount of turbulence there. When you have too much water velocity, as material is shoveled into the box, it passes through very quickly and has little time to make contact with the riffles.

All the above points remain true when adjusting to get the proper amount of water flowing over an expanded metal-riffle system. However, when using such a system, it is necessary to remember that the riffles are very short. So it does not take very much water velocity to make them concentrate properly.

This means that the size of riffles affect how much water velocity is optimum through the box, how much classification of material is necessary and how fine in size your effective gold recovery will be.

The correct amount of flow is usually found to be just enough to move the material over the box to keep up with your feed of material. Since gold is around 6 times heavier than the average material that will pass through a sluice, there is usually some margin for error if velocity is a little faster than necessary. But a faster flow (than necessary) will affect how fine in size your effective gold recovery will be, if fine gold is present.

Once you have your sluice box set up the way you think it ought to be, it is a good idea to run a sizable portion of gold-bearing material through the box and then pan some samples of the tailings. If you do not find any gold in the tailings, you are set up properly. If you are finding gold in the tailings, some changes are in order. Another test is to mix some pieces of lead in with some material, run it through the sluice, and see where the lead stops.

Sluice boxes process material best when receiving it from a steady feed. Too much material dumped at once into a sluice box has a tendency to overload the riffles and choke off the concentrating-action behind the riffles. This will cause gold to wash right through the sluice box as if there were no riffles present at all.

On the other hand, it is not good practice to run volume-amounts of water flow over a sluice box without some material being constantly or regularly fed through. This is because the scouring-action from the water flows will continue to further-concentrate materials trapped behind the riffles, causing heavier materials to be washed out of the box. A sluice box operated for extended periods with no new material being fed to it has an increased chance of losing some of its fine gold values. How much gold loss will depend on a multitude of factors, such as the type of riffle design, how much water flow, the type and weight of concentrates and the size and purity (specific gravity) of the gold.

So if you will not feed more material into your sluice for a while, it is a good idea to cut your water flow back to reduce turbulence behind the riffles until you are ready to feed again.

Even when a sluice box is set properly, occasional larger-sized stones or rocks can become lodged within the riffles. These should be picked or flipped out of the riffles with minimum disturbance to the remaining portion of the sluice.

On most suction dredges, the volume of water being moved through the sluice continues at the same steady flow during production speed. So adjusting the water velocity to set up the dredge right is accomplished by changing the slope of the sluice box itself—which will speed up or slow down the flow of water over the box. Then, once you are dredging, if you will stop feeding streambed material into the suction nozzle for any period of time, it is wise to block the nozzle with a larger-sized cobble to slow the water flow through your sluice box.

When placing a sluice box within a stream or creek for its water flow, the water velocity can be adjusted by either changing the slope of the box, by varying the volume of water being directed through the box, or by placing the sluice at different sites in the stream or creek where the water is moving at different depths and speeds. Getting the right flow of water to pass through a sluice box out in the field is not difficult. But it is sometimes necessary to try different ideas until you find what works best in each situation. For example, in a location where the water is moving slowly, you might be able to direct more water through the sluice and gain the amount of water velocity that you need. In a stream where the flow is moving more swiftly, the water velocity through your box can usually be adjusted by changing the volume of water directed into it, and/or by varying its downward slope.

Usually, you will have little trouble arriving at the correct velocity through your sluice box when placing it in a fast stream of water. You can use river rocks to make a foundation within the stream so your box can sit level from side to side. By allowing different amounts of water volume through the box, and by changing its downward slope, you can work out a combination that does the job. It is good to have a length of nylon cord along with you for securing the sluice box to a rock or some other object upstream. This prevents the box from being moved off its foundation by the force of water. Sometimes it is necessary to pile a rock or two on top of the box to hold it in place. This is especially true when you are using a sluice made out of wood. You can shovel gravel into the box while trying the different combinations to see what effects the changes have on water velocity.

In a situation where you must set your sluice into slower water, you will find it is generally more difficult to get the flow you need, because you have to create more water velocity than is presently there.

If the flow of the stream itself is not enough to move material through your box, you will sometimes find that changing the slope of the box within the stream has little or no effect on speeding up the flow through the sluice. In this situation, there are several things that might be done to channel enough flow through your box so that you can run material through at production speed. Sometimes the flow of water within the overall stream itself is enough, so that by setting up a “water director” in the stream, you can move enough water through the box to give you the desired result. A water deflector, or barrier, like this can sometimes be built by throwing river rocks out into the stream to make more water flow into and through the sluice.

In this situation, there are several things that might be done to channel enough flow through your box so that you can run material through at production speed. Sometimes the flow of water within the overall stream itself is enough, so that by setting up a “water director” in the stream, you can move enough water through the box to give you the desired result. A water deflector, or barrier, like this can sometimes be built by throwing river rocks out into the stream to make more water flow into and through the sluice.

Sometimes you can get the water velocity needed by arranging a small water-elevator across the waterway. By doing so, and by placing your sluice where the moving water spills over the top, you might create more than enough water flow through the box to meet your needs. It really does not take very much volume of water through a medium-sized sluice box to get the right amount of velocity, if the water is moved through the box at speed. In the case of a short elevator (dam), the water level might only need to be raised up slightly to increase the downward slope of the box enough to create the needed water velocity. How high the elevator needs to be depends mostly upon how much water is flowing within the stream or creek.

A sheet or two of thin plastic, or a plastic tarp, or some old rice bags, can come in handy when you are arranging an elevator or water director within a stream. Such material helps prevent the water from pouring through the holes in your man-made barriers.

A water director or elevator can most often be used with good result wherever the water in a stream or creek is moving and is shallow enough that the barriers can be built easily.

If the water at the work site is moving too slowly, or for some reason a water director or elevator will not work in a particular location, it will be necessary to either set up your sluice in a different location where the water is moving faster, or use a motorized pump to feed water into your sluice. Or, in some situations, it is possible to siphon water into your box from a higher point upstream. Siphoning can be done effectively with the use of reinforced garden hose(es), other types of heavy-walled water hose or PVC.


BY DON PADGETT

During my fourteen years of mining throughout the United States, with a variety of gold mining equipment, I’ve seen and processed a lot of black sand. And since the mining equipment I’ve used has ranged in size from gold pans and suction dredges to Caterpillars and heavy equipment, its been possible to approach “fine placer gold recovery” and its liberation from black and blonde sands from virtually every level.

Learning in any form takes time and usually a lot of practice, which all too often includes making a few mistakes. So I might as well begin this article by admitting that I’ve certainly left my share of gold on the ground, even after all the hard work of getting it out of some of nature’s most elusive hiding places.

Liberating gold from black sand can be a very difficult process, especially when the gold is extremely fine. The finer the gold, the more difficult the recovery seems to be. And whether you’re an experienced miner or a novice, it is certainly a waste to walk away from your fine gold, leaving it half processed in a pile of black and blonde’ sands at your clean-up site along the river bank or in your campground. For example, let me relate a true story of one of my own recent experiences:

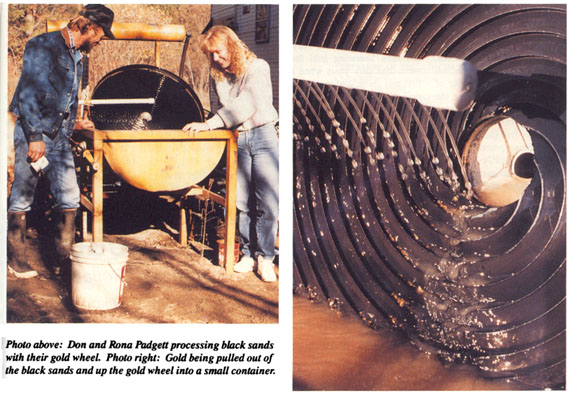
During a recent winter, after a fairly good dredging season, the cold water and my own curiosity caused me to wander around and check out some of the black sand piles (left behind by other miners) I had noticed earlier in the season. Knowing from my own experiences how miners tend to lose gold during clean-up, I took along my gold pan to test with; and sure enough, in the first pile of sand I found two nuggets (about 1/4 and ½-pennyweight) along with plenty of color. I immediately went back to camp and returned shortly with my shovel and some buckets which I used to transport the heavy black sands back to my campsite where I do my own clean-ups. I use an industrial-type spiral-wheel which is larger and faster than the typical gold wheel sold in most mining supply stores. Gold wheels will do a great job of fine gold recovery providing they are set up and used properly. And since every wheel and concentrate deposit is unique, your ability to tune your wheel and work your sands will be the critical factors affecting your fine gold recovery, not a particular brand name.

During the past few months, I’ve also been running the final clean-ups from a number of mining operations along the Klamath River in northern California. In most cases what were only five gallon buckets of “previously processed” black sands magically changed within a few hours into literally pennyweights and ounces of liberated fine gold. You can just imagine the surprise and excitement experienced by these dredge operators when they saw that the black sand byproduct they had so very often considered “nearly worthless” or “unrecoverable” was in fact valuable and could even pay a substantial portion of their operating expenses.

Most of what I’ve learned was to a large extent the result of associating with some of the best clean-up men in the gold mining fields of Alaska. They had been liberating gold for more than fifty years when I first met them, and many are probably still at it today. If there is a single and most important key to unlocking the mysteries of fine gold recovery, it is “the basics always work.” So if you’re in fine gold, and you’re not able to recover it, remember to return to the basics.

What follows is a simple step-by-step process of the basics of fine gold recovery:

Without Classification, Liberation is not Possible

Virtually every piece of modern mining equipment currently available in local mining and equipment shops has its own inherent system of material classification. To classify, in mining terminology, simply means to separate the material (rocks, gold, and sand) by size and/or weight (usually by size). It only makes sense to take this process even further in handling the clean up of your concentrates.

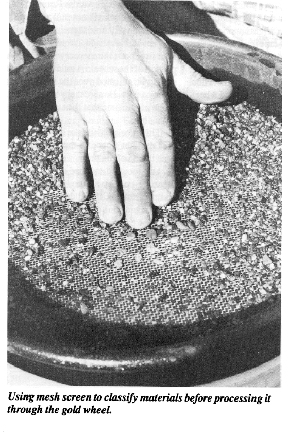
Classification is often accomplished by using screens of various sizes or meshes, and while many gold miners choose to buy these screens from their gold mining supply store, it is not unusual at all to see lint screens, window screens, and even kitchen sifters alongside a clean-up operation. Classification screens come in many sizes: 4, 8, 12, 20, 30, 50, 100, and even smaller. These numbers represent the number of openings per linear inch. For example, a 4-mesh screen has four holes per linear inch or 16 holes per square inch, and allows material to drop through which is smaller in size than about 1/4 inch smaller, actually, because the wire in the screen takes up some of the space.

With a little practice and experimentation you will find out which screen will work the best for you and your particular clean-up operation.

Beginning Your Clean-Up

Start your clean-up by removing your concentrates from your sluice box. Next, use your #4 screen to classify and remove this spectrum of material, checking closely for nuggets and large, flat flakes. Surprisingly, many miners fail to inspect closely because they are working a deposit that only seems to produce fine gold. Nuggets can be lost because they are simply thrown out in this important stage of the process. Usually this first step is done right at the river bank, making what you must carry back to your camp less cumbersome. Now screen your materials though your #8 screen. What’s left on top of this screen will be easy and quick to pan at the river. Take what falls through the screen back to your wheel for processing.

Using Your Wheel

It is very important to go through the above steps before attempting to use your wheel to process your concentrates. Remember, the wheel works on the principles of weight, angle (pitch), and water-flow. In the following steps, you’ll be first separating the blonde sands from the heavier black sands. This process is called the “first split.”

This separation should be done using your wheel’s fastest speed if you have a variable speed wheel. This split will take a little time, but remember that if you were panning this material it would probably take as much time or more, and may not be as effective for fine gold recovery. Many people purchase a wheel to reduce the amount of panning time in their clean-up operation, as well as recovering more gold.

At this stage, you’ll want to pull the black sands and gold from the blonde sands. It’s okay if a small portion of the blondes are drawn up along with the blacks in this first split.

We have found that skimming the lighter sands off the top of the material being processed in the wheel (not in the riffles) can be more effective than allowing the tailings to simply run out of the wheel with excess water.

The best demonstration of how to use a gold wheel that I have ever seen is in Dave McCracken’s video, “Modern Gold Mining Techniques.

When running this first split, the wheel will pack just like the riffles of a dredge. When this occurs, for better results, you can spoon material from the bottom of the wheel up onto the riffles. We also seem to get better results by spooning material onto the drier section of the wheel so that it passes into the flow of water as the wheel turns. Watch yourself very closely because this is the step where many of the larger flat flakes are lost simply by scooping the material out of the wheel too soon. Once this split is complete, you should find that you have cut your material in half or more.

Now you should have what we call salt and pepper sand and gold. If you have only black sands at this point, you have probably lost some of the finer gold already. Look closely; and if this is the case, stop, back up and rerun this split again. Remember, the wheel will only recover as well as the skill of the operator permits. So take your time and make sure you’re not losing your fines at each stage of the process.

Next, classify the remaining concentrates once more using a #12 screen. This time you’ll only have half as much material so it will go very fast. The material on top of the screen produces your bigger gold; and if you’re in good gold, you’ll be able to still see it lying all over the surface of the screen. Sometimes, I find it easier to dry and run a magnet through the sands. This approach will usually remove 50% to 80% of the magnetic black sands, leaving your gold and just a little material to pan or blow off. These gold particles and flakes should be bright and beautiful and can be put in your gold jar.

Now it’s time to tackle the material that dropped though the #12 screen by running it through the wheel. When using a variable speed wheel, this split should be processed at the slowest speed, and the pitch of the wheel should be set at a steeper angle. Use a moderate-to-slow water flow, adjusting the wheel to pull just a little black sand, and all the gold. Once you’ve run it through, simply adjust the wheel a bit steeper and rerun this gold-laden material once more, only this time just pull the gold.

This process will leave you with all your gold, and perhaps just a very small amount of fine black sand. I find that if you dry this final product, it is very easy to blow the remaining black sand of by sorting through it on a clean piece of paper and blowing gently. It is a nice way to end your day!

And finally, if you’re having any trouble in your clean-ups, remember to return to the basics by watching your classifications, checking what you’re about to discard on a regular basis, and by making sure that you’re not leaving your fine gold for someone else to recover simply by re-running your old sand piles. I hope these hints are helpful, and good luck with your future clean-ups.

 
video subscription graphic

By Dave McCracken

“When to do a clean-up”

Some miners like to “clean-up” their sluice boxes after every hour of operation. Some prefer to do clean-up at the end of the day. Others will go for days at a time before cleaning up. This is all a matter of preference and seldom has much to do with the actual needs of the sluice box.

More commonly these days, a dredger only cleans-up the “high-grade” section of riffles in his or her dredge after each sample or at the end of a production day. That is a special small section of riffles which catch most of the gold near the head of the sluice. The full recovery system is usually only cleaned-up when enough gold has accumulated to make the effort worthwhile, or it is time to take the dredge out of the water.

There is a method of determining when a sluice box needs to be cleaned up, so that you can keep it operating at its utmost efficiency. If the majority of gold is catching in the upper-third section of the sluice box, then the recovery system is working well.

After a sluice box has been run for an extended period of time without being cleaned, the riffles will be substantially concentrated with heavy materials behind them. Sometimes an abundance of heavily-concentrated material in a sluice box can reduce the efficiency of the riffles. This is not always the case. Much depends upon the type of riffles being used and how they are set up in the box. The true test of when a set of riffles is losing its efficiency because of being loaded down with heavy concentrates is when an important amount of gold starts being trapped further down the length of the box than where it normally catches. When this occurs, it is definitely time to clean up your box. Otherwise, clean the box when you like.

Expanded-metal riffles, being short, will tend to load up with heavy black sands faster than the larger types of riffles. Still, a large, visible amount of black sand being present is not necessarily a sign that you are losing gold. Gold is about four times heavier than black sand. As long as there remains fluid action behind the riffles, the black sand might have little or no effect upon gold recovery. The best way to evaluate your recovery system is by direct observation of where the gold is being trapped.

DUMPING OFF

The concentrates which have accumulated in a sluice box can be removed by unsnapping the riffles, carefully removing the carpet underlay, and washing everything into a washtub or bucket. The contents can easily be rinsed out of the carpet underlay inside the washtub.

A medium-wide plastic putty knife can be very helpful in removing lingering concentrates from the high-grade section of a sluice box when that is the only place in the recovery system being cleaned-up.

The concentrates can then be screened into another wash-tub or into a bucket, depending upon what type of screens you are using. Classification of the concentrates into several sizes will allow you to process each more efficiently. The size-classifications that you want to use will depend largely upon how you will process the final concentrates. No matter how you process the final material, you almost always want to begin with a ½-inch or ¼-inch screen, just to eliminate all the larger-sized material from your concentrates. The following video segment demonstrates this preliminary screening, reminding you to carefully remove any gold nuggets which stay on top of the screen before discarding the larger-sized material:

There are several types of final clean-up devices on the market which can help you process the final concentrates, including different kinds of wheels, bowls and miniature sluicing systems. They all work pretty well when set up properly. Here is a video sequence demonstrating the use of a gold wheel to facilitate final clean-up:

Each device has its own instructions about the proper classification-size of concentrates for optimum performance. So you will want to buy or make your screens accordingly. The following video sequence demonstrates a second screening through a common sieve about the size of window screen – which is about normal for splitting concentrates into two sizes:

In my own operations, when we accumulate more than just a small amount of concentrates to clean-up, we have had very good results by first running the concentrates through a plastic Le Trap Sluice. First, though, we screen the concentrates through 8-mesh or 12-mesh screen to remove larger material. The following video sequence shows the Le Trap being used to help with a final clean-up:

Or, rather than use a special device (wheel, bowl, etc), you can work your concentrates completely or nearly down to the gold with the use of a gold pan. In this case, I would suggest that you first classify the material through 8-mesh (8 openings per linear inch) and then through 20 mesh (20 openings per linear inch) screens to break it up into three sizes: 1) the material which stays on top of the 8-mesh screen; 2) the material which passes through the 8-mesh screen but stays on top of the 20-mesh screen; 3) and the material which passes through the 20-mesh screen.

Under normal circumstances, the larger two classifications of concentrate will pan down to gold by themselves quite fast. Because of this, even a final clean-up device is usually only used in the field on that material which will pass through the smallest classification screen.

I have thoroughly demonstrated the panning process in a separate article, so I won’t repeat that here.

FINAL DRY SEPARATION

These final clean-up steps can be done at camp, preferably in a dry environment, where the wind is not blowing much and where there is a table top or some other flat surface available to you for a work space.

Important: Before you do the first step of this process, it is best to work your concentrates down as far as possible, to remove all of the black sands that you possibly can. The more black sand you can remove while the material is wet, the less you have to deal with after it is dried. Sometimes you can remove more black sand with the careful use of a finishing pan (small steel gold pan about 6-inches in diameter) inside of a small wash tub.

A Gold Extractor will allow you to work all of your gold down with no loss, and only about a tablespoon of black sands remaining.

Important Note: The best finishing device I have ever seen for working concentrates down to only about a tablespoon of remaining black sand, with zero loss of your gold, is called a “Gold Extractor.” Once your final concentrates are worked down to a very small amount of black sand remaining, you are ready to go on to the next step.

STEP 1: First dry out your final concentrates. This can be accomplished by pouring them into a small metal pan (finishing pan is best) and slowly heating them over an open fire or gas stove-whichever is at hand.

Dry out the concentrates.

CAUTION: Heating the concentrates from a gold mining program should not be done inside of a closed environment. Heating should be done outside and/or in a well-ventilated location, where any and all vapors given off by the various steps will be swept away from you and other bystanders.

You do not want to heat the concentrates too much at this stage. This is because they may still contain some lead. Excessive heat can melt the lead onto some of the gold within the concentrates. Pay attention to heat just enough to thoroughly dry out your concentrates. Be careful that boiling or bubbling during heating is not allowed to spatter gold out of the pan. The following video segment demonstrates this step:

STEP 2: Once the concentrates have cooled enough that they can be handled, they should be screened through a piece of window screen (about 12-mesh). A small piece of window screen, about 6-inches square, is handy to use for this purpose.

STEP 3: Take the larger-sized concentrates (the material which would not pass through the window screen), and pour them onto a clean piece of paper. If there is a lot of this sized concentrate, this step will have to be done in stages, handling a little at a time. Once the concentrates are poured onto the paper, it is easy to separate the pieces of gold from the impurities. The impurities should be swept off the paper and the gold should be poured into a gold sample bottle. This is where a funnel comes in handy.

STEP 4: Once the larger-sized concentrates have been separated, the remaining concentrates can be classified through a finer-mesh screen. A stainless steel, fine tea strainer (about 20-mesh) works well for this. Tea strainers can be found in just about any grocery store.

STEP 5: Take the larger classification of concentrates from the second screening, pour them onto a clean sheet of paper, and separate the gold from the impurities in the same way that it was done with the larger material in Step 3 above.

Use of a magnet on each size-classification of concentrates can be very helpful to remove those impurities which are magnetic.

Some prefer to use a fine painter’s brush to separate out the non-magnetic impurities. Separation can also be accomplished by using your fingers. This step goes faster if you only do small amounts of concentrate at a time. Pour the gold recovered in this step into the gold sample bottle.

STEP 6: Take the fine concentrates which passed through the final screening and spread them out over a clean sheet of paper. Use a magnet to separate the magnetic black sands from these final concentrates. The magnetic black sands should be dropped onto another sheet of clean paper, spread out, and then gone through with the magnet at least one more time. The reason for this is that some gold can be carried off with the magnetic black sands. They tend to clump together. Once the magnetic black sands have been thoroughly separated from the gold to your satisfaction, pour them into your black sand collection. There may still be some small gold values left with them which can be recovered by other methods at another time.

NOTE: There is a really nice set of final clean-up screens on the market that are made just for the purpose of separating your final concentrates into the ideal size-fractions for final dry separation. I highly recommend them, because they separate your final material into multiple size classifications which make the final dry process go even faster.

STEP 7: Now, all that should be left is your fine gold, possibly some platinum, and a small amount of non-magnetic black sand. These final black sands can be separated by blowing lightly over them while vibrating the sheet of paper. Since the sand is about 4 times lighter than the gold, it will blow off the paper a little at a time, leaving the gold behind. Once all the black sands are gone, you can pick out the pieces of platinum if present, and separate them from the gold. Pour the gold into the same gold sample jar used in the earlier steps.

This dry process (Steps 1-7) goes very quickly if an effort was made during the final wet stages to get as much black sand and other waste material as possible separated from the gold.

CLEANING GOLD

Sometimes placer gold just out of a streambed is very clean and shiny. If this is the case with your gold, after the final dry cleanup procedure is completed, your gold is ready to be weighed and sold or displayed or stored away in a safe place.

Sometimes, gold will come out of a streambed with some impurities attached to it. When this happens, it will be necessary to perform a final cleaning process to make the gold’s natural beauty stand out.

If your gold is not clean and shiny, and you want to get it that way, place it in a small non-breakable water-tight jar about half full of water and add a little dishwashing liquid. It does not seem to matter what kind is used. Fasten the top on the jar and shake the contents vigorously until the gold changes to somewhat of an unnatural glittery color. Sometimes this happens quickly and sometimes it takes a little longer. This mostly depends upon how much gold is in the jar. The more gold, the faster the process. This is because it is the friction of gold against gold which facilitates the cleaning process. Once the gold is glittery, rinse the soapy water out of the jar, pour the gold into a small (metal) finishing pan, and heat it up (outside and down wind) until the gold takes on a deep, natural, shiny luster. It is important to make sure that all of the soap has been rinsed away from the gold using clean water before you dry the gold.

Gold has a tendency to turn a dull color after having been stored in an airtight container for an extended period of time. For this reason, some gold miners and dealers store their gold in water-filled jars, and dry it out just before displaying it or making a sale.

If you should happen to store your gold in an airtight container and notice that its color does not seem to be as bright as it once was, wash it with soap and water and re-heat it, as in the above steps. This process will bring back the beautiful color and luster of the gold.

The best time to weigh your gold to get the most accurate measurement is after you have completed all of the final cleanup steps.

SELLING GOLD

There are numerous markets where you can sell your gold. Refineries will pay you for the fineness (purity) of the gold itself and subtract a few percent for refining charges. In this case, you will receive a little less than the actual value of the gold. Refineries usually will not pay for the silver and platinum contained within your placer gold unless you are delivering it in large quantities. Refineries prefer that you bring your gold to them in large amounts. They will often charge less for refining, and sometimes pay just a bit more for the gold, when it is brought to them in larger quantities.

Flakes of gold and nuggets have jewelry value on a different market. If marketed to the right buyers, flakes and nuggets can usually bring in more than a refinery will pay-or sometimes even much more.

If you are in gold country and ask around, you can nearly always find someone who is buying placer gold from the local miners. These individuals usually pay cash. Unless the fineness of the gold within the area is lower than normal, there is no reason to settle for less than 70% of the market-value of the gold for that day. This means that the gold is weighed and the buyer pays you for the weight of what you deliver. Impurities are never calculated into this type of deal. If you enquire around, you can usually find someone who is willing to pay 75% of weight. Sometimes you can find an 80% straight-out buyer-which is good.

There are also people out there who are ready to gyp you out of your gold if they can get away with it. It is wise to bring your own pocket calculator along when dealing with a new buyer.

If you go to a dealer who starts figuring a certain percentage of the fineness, and his final figures end up lower than a straight out 70% of the bulk weight of your gold as it is, go find another dealer. This is not to say that 70% is the going rate. You can do better if you look around. Although, you should never have to accept less than 70% of the going market price for your gold. If a dealer starts to tell you all sorts of reasons why your gold is not worth what you want for it, go find someone else. There are plenty of gold buyers around who will at least admire your gold. So there is no reason to hang around and listen to someone who is trying to steal it from you.

Local miners will know who pays the most! Or go up on our web forum and ask. Someone there is sure to turn you onto a good deal!

Cleaning your gold well before you take it somewhere to be sold can help a lot.

Sometimes dentists will give you a good price for your gold, and a phone call or two can pay off. Also, some lawyers and businessmen like to invest in gold. Sometimes you can get up to 100% of spot for your fines (fine gold) when dealing with them.

Some jewelers will pay well for your flakes when they have a demand for them. It is not uncommon to get as much as 90% or better when you make such contacts.

The best way to get top dollar for your gold is to do a lot of inquiring, always with the intention to find more and better markets. Then, when you need some cash, you can sell to the buyer who pays the most.


By Dave McCracken

This system combines two classification screens to more-effectively separate material-feed into three separate size-fractions, each which is directed into a different recovery system.

Dave Mack


Riffles in box Three sections of screen

Classification is the Key to Fine Gold Recovery

It is well-established that if you want to effectively recover finer particles of gold, you must first separate them from the larger-sized materials which are being washed through your recovery system by a higher-velocity flow of water. The small-sized material can then be directed to a milder-flow of water over a shorter set of riffles. The smaller you can classify the size of the material, which can be directed by and even milder flow of water over lower-profile riffles, the finer-sized gold that you can effectively recover.

This is all rather easy to accomplish with surface processing plants where earth-moving equipment can be used to feed a plant some distance above the ground. Feeding a plant well above the ground allows plenty of drop for water and gravity to direct material through multiple sizes of classification screens. Then, gravity can be used to direct the different size-factions of material to separate recovery systems with controlled water-flows and riffle sizes specifically designed to recover gold effectively from each size-fraction.

Conventional Suction Dredges do not allow for Much Classification

I am not sure what the exact formula is, but I know from long experience that every inch you lift the feed of a suction dredge above the surface of the water, you lose a considerable amount of suction-power at the dredge nozzle. Therefore, since we have to accomplish both classification and gold recovery from a feed that can only be effectively lifted about 4-to-6 inches above the surface, our options are pretty limited.

Dredge manufacturers have worked out different ways to direct classified materials into slower-moving recovery systems. Generally these methods fall into three categories:

1) Placing a classification screen over top of a set of riffles. This way, smaller-sized material can fall through the screen into a slower-moving flow of water over riffles that are more-protected from higher-velocity water-flow. You see screened-over riffles in common use today.

2) Placing a classification screen towards the head of the sluice box, and then directing the classified material to one or two completely separate sluices which have a slower-moving flow of water over lower-profile riffles. This was most commonly seen in the form of side-by-side triple sluices during the 80’s and early 90’s. While effective, the problem with the side-by-side sluices is that the side sluice(s) normally have to be placed on top of the dredge’s pontoons. Therefore, in order for gravity to make everything work right, the initial feed to the dredge has to be lifted higher out of the water. This causes a power-loss at the nozzle. So you do not see as many side-by-side recovery systems in production on suction dredges these days.

3) Placing a classification screen somewhere towards the upper-end of the recovery system, and directing the classified material to a slower-moving recovery system which is located directly below the main box. This is commonly referred to as an “over-under recovery system, and remains in popular use today. An over-under system is most commonly accomplished in the same basic sluice box, which is constructed with a removable false bottom. By this, I mean two separate recovery systems, one sitting over top of the other, in the same sluice box.

I cannot go into which of these systems are better or worse; because there are too many variables in play, and experienced prospectors can work it out to get the best recovery possible out of any of these designs, each which would likely be comparable to the other. That’s because all three of these system concepts depend upon a single classification screen to remove some portion of the smaller-sized material from the higher-velocity water-flow which is required in a dredge.

This particular discussion has more to do with the effectiveness and size of material-classification. Remember, with conventional suction dredges, we are using water-flow to move all our material across any classification screen(s) that we are using. The larger the dredge, the faster and more powerful the water-flow must be to wash larger-sized rocks and a larger volume of material through the sluice. The faster the flow, the less time that smaller-sized material has to drop through a classification screen. The smaller the openings in the screen, the less opportunity smaller-sized material has to drop through the screen. The shorter the screen, the less opportunity smaller-sized material has to drop through the screen.

Each of these factors combine into to the effectiveness of the dredge’s classification. For example, the substantial flow of water to move 5-inch sized material over 10 inches of 1/8th inch punch plate does not present much opportunity for minus-1/8th material to drop through the screen. So while a separate slower-moving recovery system might be doing a better job recovering smaller-sized gold, perhaps the classification system is only allowing 5% of the finer-sized gold to be directed into the slower-moving recovery system. In other words, the effectiveness of your recovery system is largely affected by how you are attempting to classify and separate the smaller-sized material.

Therefore, on the subject of fine gold recovery with suction dredges, our first challenge is to try and accomplish effective classification as best we can out of a strong flow of water (strong enough to move the largest rocks you are sucking up through the recovery system).

Years ago, we overcame this whole challenge on commercial dredges by working out a mechanized shaker screen at water level which provided 100% classification of the dredge feed. Minus-sized material from the screen was dropped into a sump where it was redirected by a gravel pump to an elevated feed on a surface-type recovery system either on the shore, or on a separate floating platform.

But it is impractical and too expensive to try and place a mechanized classification screen on smaller-sized dredges — which also must remain more portable for sampling. Therefore, on conventional dredges, until someone comes up with something different (if ever), we must continue to make due with a water-flow to wash material across our classification screen(s). With this in mind, here are a few principles which I believe to be true:

1) The faster the flow, the more difficult it is to drop finer-sized material through the openings of a screen in your sluice box.

2) The smaller the holes in the screen, the less finer-sized material you can expect to drop through the openings out of the high-velocity flow required to move larger material through your sluice box. Example: Using the same flow of water and material, you could expect more fine-size material to drop through a 3/8-mesh screen, than a 1/8-mesh screen. This is because the larger openings provide a bigger doorway for material to drop through.

3) The shorter the length of a classification screen, the less fine-sized material you can expect to drop though. Therefore, we want the classification screens to be as long as we can get away with. Longer screen means more opportunity for finder-sized material to drop through.

4) Effective classification of finer-sized material can be accomplished better in stages. For example, first drop 3/8-minus material out of the fastest flow in the box. Then, using a slower flow of water, direct the minus-3/8 material over a 1/8-inch screen.

5) Since we only have 4 or 5 inches of drop to work with from the feed of a conventional suction dredge, there is only room for two levels of classification screen before we must drop the finest-sized material into a recovery system. Otherwise, we will be underwater where reduced gravity is not going to allow water-flow to work for us, anymore.

What to use for a fine-gold recovery system?
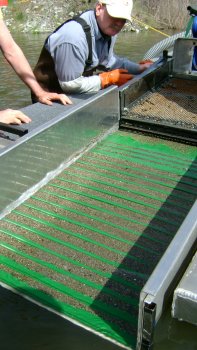
material in rifflesAs I have explained elsewhere, I believe it is necessary to direct finer-sized material over lower-profile riffles that will continue to remain fluid under a mild flow of water, even when they are full of concentrated (heavy) material. If you have not reviewed the theory on this, I strongly suggest you read “The Size of Riffles.”

There are different kinds of low-profile fine gold recovery systems on the market. Just take a look around and make your own choice.

We have been using the green, plastic Le Trap sluices to reduce the volume of our dredge and high-banking concentrates all the way back to the early 90’s. I cannot overstate how effective these Le Trap Sluices are. When set up with the proper water-flow, a Le Trap will recover all the visible gold from a feed of minus-1/8th material with losses that are so minimal as to be meaningless. We know this from panning the tailings hundreds of times over the many years.

So when we needed something to recover overwhelming amounts of fine gold using a dredge on a river in Cambodia, I started giving a lot of thought to how we could more-effectively classify dredged material down to minus-1/8th, and direct the material in a controlled flow over Le Trap-type riffles.

Dredge 1Dredge 2

Several very experienced dredge-builders and I created the prototype several years ago from a Precision 6-inch dredge. To accomplish our objective, we assembled two layers of classification screen, each which could be independently raised or lowered, so that we could adjust the water-flow over the riffles, and over each of the screens. The top screen is 3/8-inch mesh. This is to allow the larger-sized material and strong water-flow to wash through the box without affecting the plastic riffles along the bottom. Minus-3/8ths material drops through the top screen onto a 1/8th-inch mesh screen, where the water flow is substantially reduced. Slower water-flow then allows finer-sized material more-extended contact with the 1/8th-inch screen.Double screens over riffles
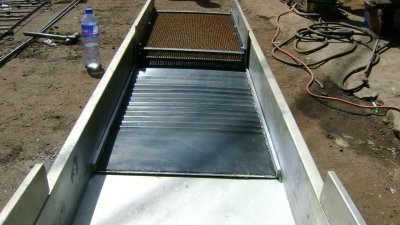
Material that drops through the 1/8-inch screen is then carried over the Le-Trap sluice by a mild flow of water. By adjusting the height of the lower screen over the plastic riffles, and the slope of the sluice box, we are able to control the amount of water-flow over the lower-profile riffles.

Since the sluice box in the 6-inch Precision was much wider than a normal Le Trap sluice, the prototype required quite a lot of work in a cut and paste project (using of 4 or 5 Le Traps) to create the first underlay recovery system for a dredge.
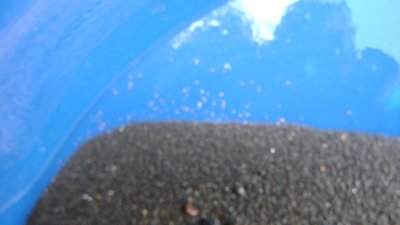
Fine goldWe invested quite a lot of time and energy into the prototype. All you have to do is look at how much (very fine) gold we found on that river in Cambodia to understand why we did it. We were shipping this 6-incher over to resume (sampling) where we had left off on that earlier project.


During trials on the Klamath, I was amazed at how much (very) fine gold we recovered out of just a minute or so of dredging loose material off the surface!

Our trial run on the Klamath River near Happy Camp in March several years ago turned up so much fine gold out of the lose surface gravel, that I hesitated over sending the 6-inch prototype to Cambodia!

I have been told for 30 years that there is so much fine gold in the river that we are losing out of our conventional dredges, if we could just recover it, we could make the river pay just by pumping any gravel! This new system seemed to prove that theory may be true, especially with these higher gold prices. But it was March and the Klamath was cold; so we shipped the original prototype dredge to Cambodia.Cambodia Dredging
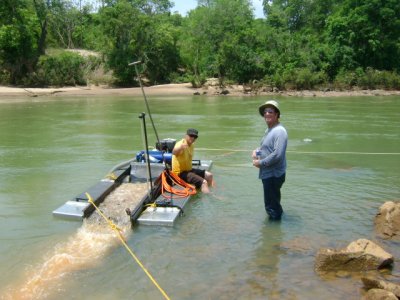
I devoted plenty of time in Cambodia (underwater) observing three separate flows of material coming off the back-end of the recovery system; and it was poetry in motion!

I have a non-disclosure agreement with our clients in Cambodia, so I cannot go into details or images of how well the new system performed over there. But I can say that I devoted a lot of time underwater watching water and material exit the sluice box in three separate flows; and the double-screen system is by far the best thing I have seen on a conventional dredge for effectively classifying material into three separate size-fractions.

Because of that, my experienced buddies and I invested quite a lot of time during the 2009 mining season to adapt the double-screen system to my 8-inch dredge. 8-inch dredge
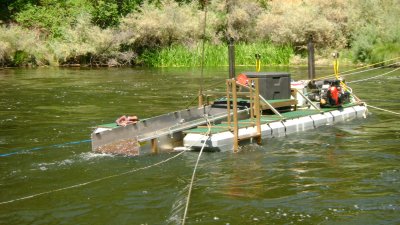
Building double classification screens, so they can be adjusted up and down to allow you to set three separate water-flows through the sluice box, requires quite a lot of labor! But getting this right is the foundation of this whole concept.

Here are some video links which demonstrate the system being used on my 8-incher. These give you a much better look at how we created a double-screen classification system over top of the fine gold recovery: Take a look at the size of the gold we were recovering!


As (bad) luck would have it, the State of California imposed a temporary ban on suction dredging just as we completed the double-screen refit on my 8-inch dredge. This forced us up onto the Rogue River in Southern Oregon, where we are limited to smaller-sized dredges. So my 8-incher had to be set aside.

Picking up on the idea of my double-sluice conversion over a plastic sluice, one industry-fabricator was recently promoting the idea of refitting conventional sluices (using the plastic sluice underlay) which do not include the double-screen classification, and do not allow the screens to be adjusted. I would advise caution on short-cutting these concepts. That is what prompted me to write this article. Since these conversions must be accomplished through custom shop work, I wanted to provide you with some background so you can make your own decisions.

While there is still a lot to learn, for the reasons I outlined above in points 1 through 5, I personally do not believe that you can classify raw material effectively from a 4, 5 or 6-inch (or larger) dredge being washed across an 8-mesh screen by high-velocity water.

I believe effective classification must be accomplished in stages; first to drop the 3/8-minus material out of the higher-velocity flow which is needed to push the larger-sized material through the sluice. Then, drop the 1/8-minus out of the much slower flow necessary to wash 3/8-inch material across the lower screen.

I believe you have to be able to adjust the height of each screen (set the water velocity) in order to get a workable water-flow over the riffles and over the 1/8-mesh screen. The water-flow cannot be so much that you boil-out the riffles, and it cannot be so little that you load the riffles. You also must not pack up the space between the two screens!

Eric Bosch and I first experimented with this double-screen concept in the early 90’s. But we made the mistake of fixing both screens (welded them where we estimated they ought to be). Our estimate of how much water-flow was needed between the screens was incorrect; the space between the screens packed solid with material; and the whole system failed.

Also, if you cannot adjust the water-flow over the riffles, and between the screens, you cannot compensate for different conditions in different areas.
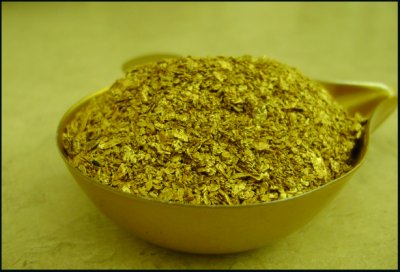
Dave's goldAs an example, there is an overwhelming amount of heavy black sand and small iron rocks (and lead) along the Rogue River in Southern Oregon. We do not encounter this magnitude of heavies on our properties along the Klamath River in northern California. The heavies along the Rogue completely overwhelmed my fixed recovery system (buried the riffles on my 5-inch conventional dredge) at the beginning of last season. This prompted me to place smaller riffles below my (fixed) screen, spaced further apart. That worked better, and I recovered a lot of gold. But I believe I lost most of the (very) fine gold (I could see it in the last riffle) that was fed into my sluice box. This has prompted me to refit the recovery system on one of my 5-inch dredges for the upcoming season.

The images at the beginning of this article show an early version of the double-screen system that was designed for deposits we located in Cambodia. We did not find a single particle of gold on that river that was larger than the size of a pinhead. Since larger-sized gold was not present, we did not want to waste the (very) limited amount of room we had to work with by installing riffles for larger gold. Those images are helpful in showing the plastic sluice underlays (there are two of them, one following the other).

The images at the beginning of this article show the Cambodian version of the double-screen refit. Those images are helpful in showing the initial plastic sluice underlays that we were using (there are two of them, one following the other).

Header areaHeader with screen and miners moss

The images in this article also show a header section near the upper-end of the box. My initial theory was that the initial impact of the water and material must bottom-out on something other than plastic sluice underlays. We experimented with a combination of different kinds of heavy screens over top of miners moss or ribbed rubber matting to absorb the initial force of the water and material where it bottoms-out at the head of the sluice box. Fortunately, nearly everything we have tried in the header section seemed to work really well. As you will read below, we have since evolved completely away from using plastic sluice underlays… Header area after running
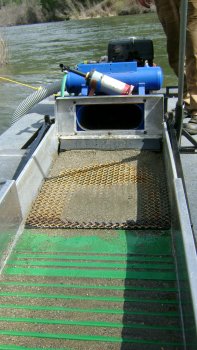
This is what the header area looked like under the screens when we shut the dredge off while dredging at production speed. You can see how classified material kind of mounds up there before flowing onto the slick plate of the riffle system. We are finding that quite a lot of (very) fine gold also gets trapped in the header section!

We have noticed that while in production, material tends to mound on top of the header section under the 8-mesh screen, and then wash off the mound onto the first sluice underlay. This is really good, as long as the mound does not rise up and pack-up the whole space between the screens.

While we were still using them, the plastic sluice underlays followed just behind the header section. This allowed water-flow and material to settle out and slow down before being washed across the lower profile riffles.


Two kinds of rifflesriffle section

Notice that the shorter section of riffles (remains protected by the top screen) are present only to process classified material which washes across the 8-mesh (lower) screen in the box.

Adding larger riffles for bigger gold

We have since evolved the system, adding two sets of different-sized riffles to catch larger-sized gold. We accomplished this by replacing one of the 1/8-mesh (lower) screens with a solid bottom that supports both sets of the added riffles. The false bottom continues to allow an under current to wash minus 1/8th material across a low-profile underlay, just like in the Cambodia version.

The first set of riffles on top of the false bottom is designed to process the material that drops through the 3/8-inch screen, but is too large to drop through the 1/8th-inch screen (1/8th-to-3/8th size-fraction). This would be for small nugget-sized gold. That size-range of gold is very easy to recover.

As I discussed in The Size of Riffles, the height of a riffle necessary to recover a piece of gold normally does not need to be much taller than the size of the gold you are trying to trap. So the first set of riffles for larger gold can be rather short. Notice that the first set of riffles continues to be protected by an extension of the top screen.

Then we added a final set of open riffles (not covered by a classification screen) to catch any gold we might suck up that is larger than 3/8th-inch (larger nuggets). For example, depending upon where you dredge, the Rogue River in Southern Oregon can produce a lot of gold in these larger sizes. But the river is loaded with fine gold, as well.

It is kind of hard to see in the images; but if you look close, you can see the plastic sluice under the false bottom where we placed the riffles for larger gold.

Since you cannot buy these double-screen systems ready-made, you either have to refit your own sluice, or arrange with a capable fabricator to do it for you. With this in mind, I will follow with some basic directions which we have learned from building several of these systems:

Building the System

If you look at a Le Trap, you will see that it has 3 important sections: There is a slick plate at the top. This is vital; because it allows the water-flow to smooth out before material encounters the riffles. Then there are some short riffles. These capture all the gold unless you over-feed the box with too much material at once, or unless you completely fill the short riffles with gold. Then there are some deeper riffles which more-aggressively capture all the rest of the gold when you do over-feed the short riffles up front. “Overfeeding” has more to do with the amount of heavy iron material, than light sand or gravel. I will talk more about this down below.
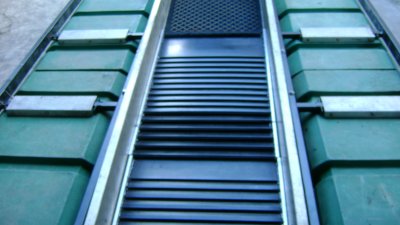
Close-up of rifflesThis image shows two sluice underlays following the header section (with no screens on top)

When we planned these sluice underlay riffle-panels, we included the slick plate up front, and then went about 50/50 the rest of the way using short and deep riffles. We did this because I wanted more of the short-type riffles that work so well in the Le Trap. But I did not want to eliminate the deeper riffles which create such a strong back-flow, especially at times when lots of material is being fed across the box. But through extensive trial and error using the third evolution of this system this past season, we discovered that the higher velocity flows that are necessary to move volume-amounts of classified material across the plastic riffles were also causing some of the trapped fine gold to boil out of the system. Too bad! We then tried Keene’s new ribbed rubber matting (good stuff!) and ended up with the same result (we were losing some gold). So it appears that these plastic and rubber riffle systems are better suited for final concentrating work, rather than being used in the volume production setting inside of a dredge recovery system (more on this below).

Because the double-screen assemblies are heavy, in order to manage them, you have to divide your sluice box into several smaller sections. How many sections depends upon how long your sluice box is. You will notice in the images at the top of this article that we divided my 5-inch dredge into three separate sections. One section is over the header area. The other two sections are over top of two identical sluice underlays. It is wise to divide the sluice underlay sections into exactly the same sizes. This way, the parts can be interchanged when it is time to reassemble your recovery system.

We build the double-screen assemblies so they rest exactly upon the sluice underlays. This allows us to take apart one only portion of the sluice box if that is all we want to look at or clean-up.

The screen assemblies are built so the aluminum side supports slide down inside the sluice box and sit directly on top of the side rails of the sluice underlays. This pins everything down snuggly against the bottom of the sluice box. Then we snap the screen assemblies down tight to make sure everything stays in place when we are running the dredge or moving it around on land or in the river.

Sluice Underlays

Close-up of matting
Close-up of both

Through a very substantial amount of trial and error this past season, we discovered that both the plastic sluice material and also the new Keene rubber matting were losing gold from under the twin screens.
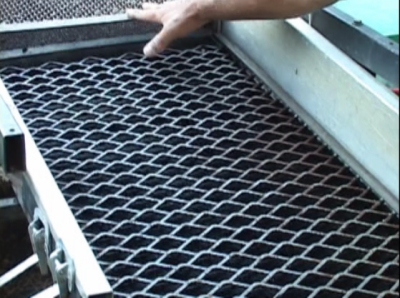
Expanded metalWe finally found the right combination by using a wide, raised expanded metal over top of deep ribbed rubber matting. The aggressive expanded metal was dropping the gold out of the classified feed. Once it was in the ribbed mat, the gold was not getting away. This combination was so effective, we even replaced our header section with the same expanded metal, though we used miners moss underneath, rather than ribbed rubber matting.

We did multiple checks; and we were never able to find a single speck of gold in the final 25% of our recovery system, even though we were mostly dredging in fine gold pay-streaks (loaded with fines in the front section of the recovery system) all season.

This is important: The width of the sluice underlays (and screen assemblies) have to be a bit narrower than the inside of your sluice box. Otherwise, it is too difficult to get them in and out when you want to perform a clean-up or reassemble the recovery system. I always allow a margin of around 1/8th or 3/16ths of an inch, maybe even ¼-inch on a wider sluice.
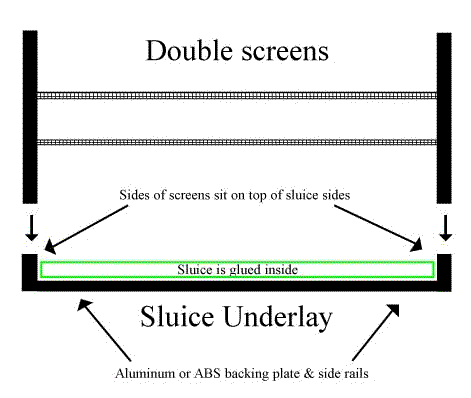
Note: We have since replaced the sluice underlay in the drawing above by welding some 3/4-inch angle iron on both sides of the expanded metal to create side rails that the double-screen assemblies can rest on top of.

The following video sequence should give you a better idea of what we have ended up with as a sluice underlay:

The width of your side rails needs to be greater than the margin you are allowing between the sluice underlay and the side of your sluice box. This is so you will be sure that the sides of the screen assembly are going to slide down and meet the rails of the sluice underlay.

Double-screen Assemblies
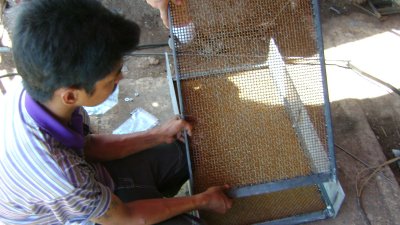
Sliding the second screen into the frameThese add up to some weight; so you have to plan how to divide your sluice box into small-enough sections that you can lift the screen assemblies out of your sluice box without too much trouble. On the other hand, you want to minimize how many sections you have to make, because these are very labor-intensive to build.

The length and width of the screen assembly should match the sluice underlay, so that they will marry-up exactly when you set the screen assembly down on top of the underlay.
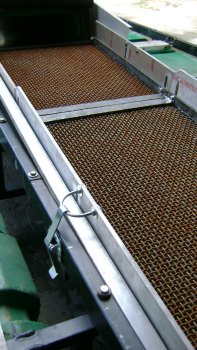
 

Screen LatchYou have to use aluminum plate for the sides to keep the overall weight of the screen assembly from adding up too much. The height of the sides needs to be at least as tall as your sluice box. I build mine high enough that I have room to adapt a latch to snap everything down tight.

Once you have the aluminum sides of your screen assembly cut to size, bring them all to your local machinist, and ask him to mill slots so that you will be able to raise and lower your two screens. If you bring the machinist one of the lag bolts you are going to use, he can mill the slots just wide enough to allow the lags to slide up and down freely, but not so wide that the lag is allowed to turn in the slot when you are tightening or loosening the nuts that hold the screens in place. Just to make sure I will have the full range of adjustment, I have the slots milled nearly the full height of the sides, to within about ¾ inch of the edge, equally at the top and the bottom. Each aluminum side needs three slots; one on each end and another in the exact middle.

You can source thin-headed lag bolts from fastener supply outlets. If you look, I’ll bet you can find them on line. If you cannot find them, then you have to grind the heads down on regular lag bolts, because normal heads are too thick and will take up too much space between the screens and the sluice box.

Helpful hint: The head-thickness of lag bolts on both sides of the screen assembly need to be included when you are deciding how wide your screen assembly and sluice underlay need to be for everything to slide in and out of your sluice box without too much difficulty.

Another helpful hint: If you cut the side plates all the same size, and have the machinist mill the slots exactly the same on all the plates, all the pieces will be interchangeable, and then you can jig-up to drill standardized holes in the side rails to your classification screens.
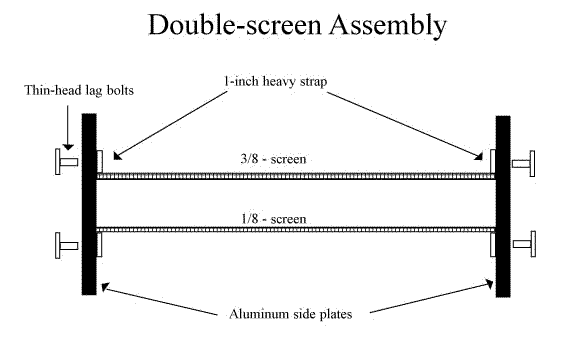
The lag bolts need to be heavy enough to support the weight of your screens (perhaps 5/16ths or 3/8ths). Different boxes have different widths, meaning heavier screens. It is better to go a little heavy on the lag bolts. The bolts need to be long enough to extend through the aluminum side, through the side rail of the screen, and have enough room for a flat washer and self-locking nut.

Screen frameStacking screens

Ideally, you build all your screens exactly the same size, so they can be interchanged. We accomplish this by rigging up a jig to cut all the side rails exactly the same; then to weld the frames all the same; and then to drill all the bolt holes the same. We drill the bolt holes in the side rails a little large to allow some margin for error.

Side rails for the screens need to be heavy enough to support the weight of your screens with you standing on top of them. By heavy, I am discussing rail thickness. Because, if you go too wide, you will limit how close you can adjust the distance between the screens. Thicker 1.25-inch-wide strap has worked well on my refits for the screen side rails.

Unless you want to buy whole new sheets of screen (expensive), I suggest you source used screen at your local metal scrap yard. The one we go to in White City, Oregon nearly always has a large supply in all mesh sizes. I gather that commercial screening plants replace their screens pretty often – most of it still in good enough condition to meet our needs.

The top screen (around 3/8th-inch openings) needs to be heavy enough to span the length and width of your screen assemblies without needing additional support, and without bending or sagging when you stand on top of the finished screen.

The lower screen (around 1/8th-inch openings) needs to be heavy enough to span the length and width of your screen assemblies without needing additional support.

Helpful note: I experimented with a finer-mesh lower screen (about 1/10th-inch openings), and had trouble with small particles of rock plugging up all the holes. We call this “blinding.” It’s when the holes in a screen all become plugged-up (or overwhelmed by too much feed), preventing the screen from doing its job. So it would appear that you do not want to use a mesh on the lower screen much smaller than 1/8th-inch.
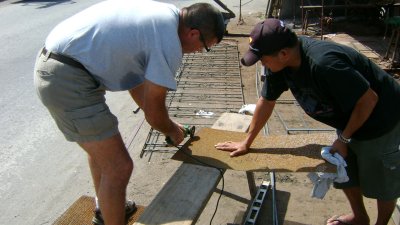
Cutting screenWe have had good luck cutting the screens to size using a cutoff wheel on a hand-held grinder. If your side rails are made of thick material, you should be able to cut the screen to size and weld it down directly on top of the side rail frame. Grind all the edges nice and smooth, so your hands are not getting cut up once you start working with these screens on your dredge.

Helpful note: If you weld the bottom screen on top of the side rails, and the top screen on the bottom of the side rails, you will be able to loosen or tighten the center bolts in the side plate much more easily. I am talking about the lag bolts which attach the screens to the aluminum side plates. If you end up with your center bolts between the screens, it is much more difficult to get at them!

Another helpful note: You might want to drill your holes just off center through the side rails. This way, you can still get a socket on the nuts after the screen is welded on.

These helpful notes are things I have learned the hard way!

When you assemble the screens, a good starting point would be so that the bottom screen rests maybe just a little more than an inch above the plastic sluice.

Helpful hint: If you make the side rails on your sluice underlay too tall, it will limit how far down you can slide your lower screen.

We have had pretty good results lifting the upper screen about 1.25 inches above the lower screen.

This is important: To add more flexibility, if not already present, we modify the sluice box supports on the dredge so that we can raise and lower the slope of the box. This creates a very helpful mechanism for adjusting flow rates.

Once in the field, you can make adjustments to sluice slope and height of each screen to work out the needed velocity in three separate water-flows: First, the water-flow across the sluice; then the water-flow between the screens; and finally, the water flow across the top screen.
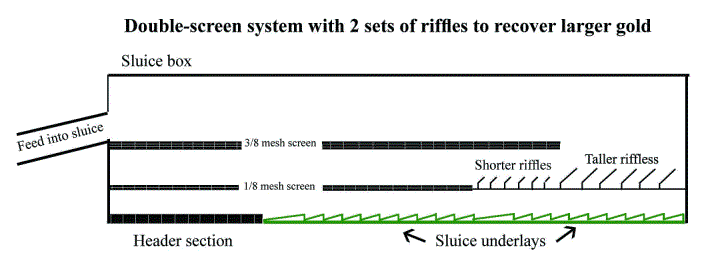
I already discussed above how to replace the lower screen with a false flat bottom which you can place riffles on top of to recover the larger classifications of gold. In my view, it is more effective to do this in the lower section of the sluice box (though, I mounted the riffles for larger gold in the upper-end of the sluice on my 8-inch dredge). I know this viewpoint is not popular with some prospectors, because they do not want to chance losing a bigger piece of gold that is allowed to get so close to the end of the recovery system. My answer to this is that gold is really heavy stuff! If there is some anomaly (like the gold is attached to quartz rock which makes the piece lighter) that would keep it from trapping in a set of riffles in the back-end of the box, it probably will not drop out in the front portion of the box, either.

Other than in a very rare occasion, the vast majority of the gold you will recover is small enough to drop through an 8-mesh screen. Some important part of that gold is so fine as to be difficult to recover using the recovery system on a conventional suction dredge. The journey of fine gold through 20 feet of suction hose, and then up through a diffuser (flare jet) places most of this fine gold right on the bottom of the material as it first flows into the sluice – right where you want it; right where it is most likely to drop through the classification screens out of the higher-velocity flows, which otherwise can wash it through your box like sand. Better, I think, to get the minus-1/8th gold into a safe holding area as the first priority.

If you look closely at the diagram just above, you will see another reason to put the larger riffles towards the rear-end of a double-screen system. See how all or most of the fines are directed through an undercurrent below the larger riffles? This means the larger riffles will not be getting flooded and loaded up with fine-sized material. So, while fine material gets more exposure to low-profile riffles (where it belongs), the deeper riffles remain more open so that larger gold has a place to drop out of the flow.

But that is just my view. You guys can do it any way you decide to!Riffles just after shut-down
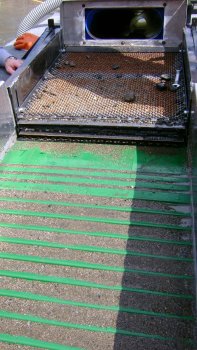
The reason you see rocks on top of the double-screens, is because we turned the dredge off while we were pumping at production speed. See how the riffles are working? They are not loading up, and they are not boiling- out. This means the system was working!

I do my classification and sluice flow adjustments when running the dredge at normal operating speed while I am feeding the nozzle at production speed in hard-packed streambed. I arrange for a second person to kill the motor without notice. Then, when I disassemble the system, I can see how the sluice and screens are performing while I am pumping gold and gravel into them at production speed.

Between these explanations, the drawings above, the images and the video segments, you guys (or the fabricator who will help you) should be able to see how these systems come together, and how they work. They provide you with a whole lot more than I started with!

Here follows a video segment we put together at the end of this last season which demonstrates the most recent evolution of this very effective dredge recovery system:

Other Considerations
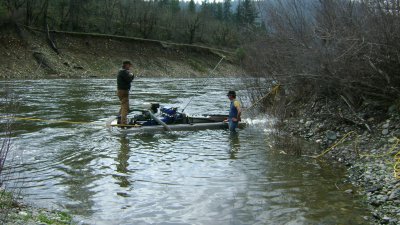
Trial runPossible need for added floatation: As I mentioned above, these double-screen assemblies are heavy. So if you do a refit of your sluice, you may also consider adding some floatation to your dredge. When I refit the original 6-inch Precision dredge for Cambodia (image above), I also had new, larger aluminum pontoons made up to provide enough floatation so that I could also stand on the dredge while it was running. Nice!

Having enough water-flow to make double-screens work: Every dredge is a bit different. Before refitting your dredge with a double-screen system, you might turn the dredge up and watch the water-flow across your existing recovery system and estimate if you will have enough water volume to provide sufficient velocity to meet the needs of three separate flows.

Overfeeding the system: Every recovery system has its volume-limits! Since I find nearly all of my high-grade gold associated with hard-pack, I design my recovery systems to process average material which makes up normal hard-packed streambed that was put in place during the evolution of a major storm event. Normal streambed consists of rocks which are fitted together, with smaller rocks and pebbles in-between, with gravel, sand and silt filling the smaller spaces. When taking apart normal hard-packed streambeds, the smaller-sized material only comprises a small fraction of the overall volume. Therefore, I have yet to overwhelm one of these double-screen systems while production-dredging in hard-packed material.

On the other hand, if you go out on the river and just start pumping sand or loose, classified gravel (like tailings), a much-higher percentage of the material will penetrate the screens and you will almost certainly overload (blind) the sluice with too much material – and perhaps even pack-up the space between the sluice and the bottom screen. Let me be clear: This double-screen system is not designed to process sand or loose gravel deposits or tailings from some earlier mining activity!

This same concern is true for any type of recovery system used on a suction dredge. So it is important for you to be mindful of the material that you are feeding into your suction nozzle. If it is a layer of sand or loose gravel, you should either slow down; or you can speed up and pump it through as fast as you can; and then go up and make sure your system is no longer packed-up before you start feeding pay-dirt into your dredge.

The fine gold needs to be present: The only good place to test the effectiveness of your recovery system is when you are feeding high-grade into your dredge. The more gold you feed into the recovery system, the better you can see how well it is working.

Effectiveness cannot be discounted just because you see a speck or two of gold down towards the end of your box. The thing to look at is where most of the gold is stopping.

So many times, I have watched others decide their recovery system is not working, only because they are not recovering much gold. You cannot recover much gold if it is not present in the streambed that you are dredging! So I suggest you reserve judgment until you test your system in high-grade.
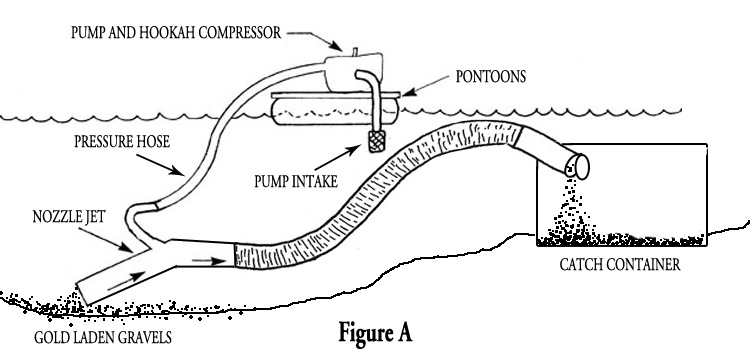


BY JUDE COLLEN KENDRICK


This is a picture that you will seldom see – me getting up at 5:30 a.m. full of excitement – to vacuum! Yet, I spent some of last summer and almost all of this past winter, doing just that. It wasn’t “dust bunnies” I was after, however; it was gold!
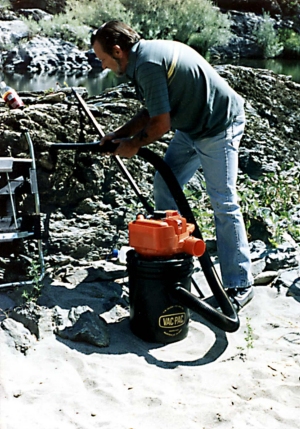
A few Decembers ago, I wrote a Christmas dry-washing article about the Mojave Desert. I said that I had made a portable vack machine to clean off the caliche (cement-like material) shelves that one encounters out in the desert. But it was not until last summer on the Klamath River near Happy Camp in California that I actually used the vack machine for what most people use them for, which is crevicing.

I knew about crevicing, of course, but it just wasn’t my thing. In fact, on several of my surface mining (motorized sluicing) trips there would be lots of prospectors around the creeks crevicing and getting gold. I cannot recall, though, at that time seeing anyone with a vack. They all had store-bought or homemade tools to get the gold out of all the nooks and crannies. On the Klamath, I borrowed a Mack-Vack made by Pro-Mack in Happy Camp, because I did not have the space to bring my motorized sluice along. My little portable vack that I had made was in the “equipment graveyard.” I had brought gad bars and digging tools, so I was set up to crevice. I will admit that I was not very enthusiastic about it at the time. I like to see dirt flying and lots of material running through my equipment. But it did not take long to change that lack of enthusiasm!

The bedrock around the area where I was on the Klamath broke apart fairly easily. I walked around trying to find the right kind of hard-packed gravel between the seams of these massive slabs. I had only used the vack for a while and had only about half of the 5-gallon bucket filled (not much material, I thought). Yet, when I panned it out, there was a beautiful match head-sized nugget. Now, this type of prospecting wasn’t bad at all!

Kay Tabbert and her husband Chuck, both members of The New 49’ers, were in the same area at the time. Chuck was busy dredging while Kay, with only her little hand tools, a whisk broom and dustpan, was crevicing on some bedrock not far downriver from me. All of a sudden I heard Kay calling for Chuck (and anyone else around). So I walked over to see what was going on. I could not believe it. Kay had separated a rock about the size of a melon, and in the crevice, stuck to one side, were 7 beautiful large flakes of gold! Just like that! I could not get back to my area fast enough!

I had dredged for years and I knew just how to spot the places where the water would deposit gold. It was really no different from working in the water – I just did not have to get my hair wet! I was feeling a little impatient, though, as I never did wait to fill up an entire 5-gallon bucket with material using the vack machine. But what I did pan produced great little “clinkers” of Klamath gold.

Unfortunately, I only had about seven days last summer up on the Klamath. But, I had five months this winter to play in the dirt. Lucky for me, I got “hooked” on vacuuming crevices!

I was prospecting Quartzsite, Arizona and the surrounding areas. The desert had a lot of rain this past summer and everyone was hoping that the washes would “pay off!” I decided to sell my beloved “Nick’s Nugget” dry-washer, as I knew I was going to be out prospecting alone a lot. As great as it was, it was too heavy and clumsy for me to manage on my own. I purchased a small dry-washer combo (with the vack option) from my friends Bob and Linda Taylor. This was great. One engine ran both and I could carry everything in one trip.

Hunting for bedrock in the desert is certainly not like on the rivers. It definitely does not expose itself as much. Yet in many places it is not deeply hidden. I was finding many places in washes where people had dug down to bedrock and had not even touched it with a whisk broom. So, guess what I did? They had already done the heavy work. I just sat there and vacked up the gold!

Finding new places to vack was not easy, as I have said. I have known for years, from experience, that the gold in the deserts isn’t always where it is supposed to be. What would look like great bedrock on the rivers often means nothing in the desert, mostly due to the lack of water volume and movement in the deserts. When I arrived at Quartzsite I met up with Al Powell, who is also a New 49’er member that I met briefly while on the Klamath. Al and I were finding “perfect” looking bedrock, in established gold areas, that produced nothing. We were always shocked, because all the “recipes” for gold were there. We could have found more gold in downtown Quartzsite! We were not giving up, however!

I decided to take five days and go off to find a hot spot for Al and me to work. I found a very small ravine below a heavily mined area that had a large section of bedrock exposed. It took two days of pulling “Buick-sized” rocks to work myself down to where I was getting some nice gold. After the fourth day, I showed Al my gold and took him out to the spot so we could clean it out together. Well, I suppose I did my job too well; as except for some small flecks, Al and I vacked all day and got nothing large. “OOPS! Sorry, Al!”

The weather in the desert turned nasty, with off and on heavy rains that went on for days. Consequently, all of the dry-washers around the desert were silenced. The ground in places was damp as deep as eight inches down, which forced people to grab their gold detectors and head out nugget-shooting until things dried out. Yet, Al and I were not held back; we were still out there, in a new area, with our vacks. We didn’t have any trouble bringing up the damp gravel, although the two of us looked like “mud pies” at the end of the day.

I had, from the beginning, been running my vack materials through my dry-washer so I would not have to pan as much concentrate. Even the damp material did not present much of a problem, as Al and I just ran everything through the dry-washer two or three times. I am sure that the people driving by during those wet days who saw the dry-washer running, said to themselves, “They are crazy!” Well, that is a whole other story, but we did have our pretty desert gold to look at all the way back to our desert “sanitarium!”

I would recommend purchasing a vack to anyone, even as a backup to your usual motorized sluice or dry-washer. And, now, when “housework” day comes each week, I won’t dread using the vacuum; I will just be practicing! Good Luck!


Tags