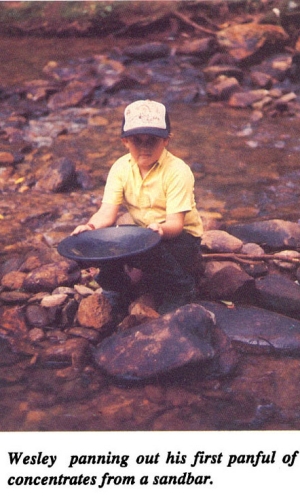
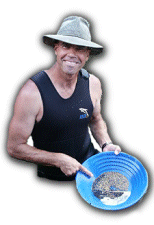
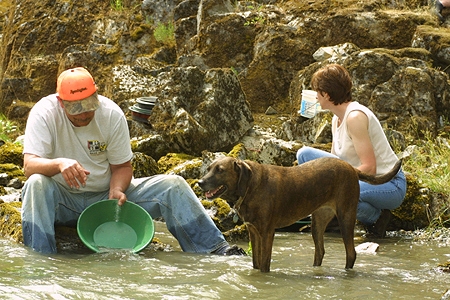
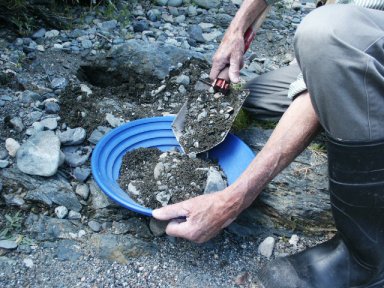
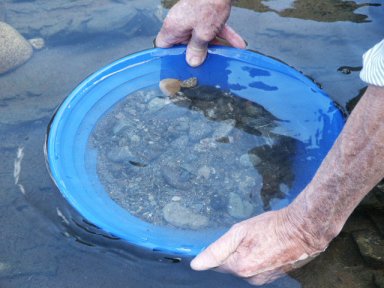
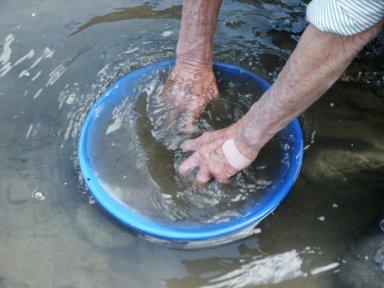
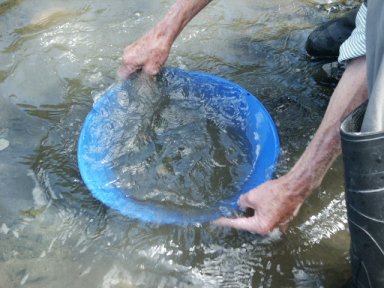
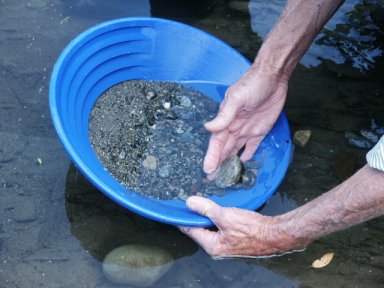
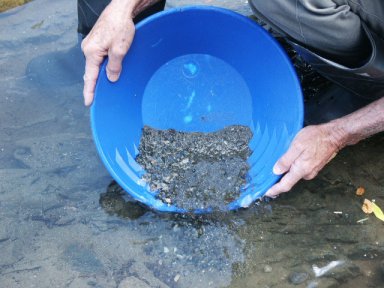
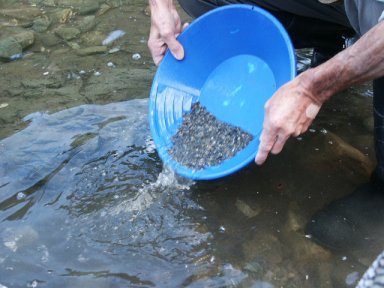
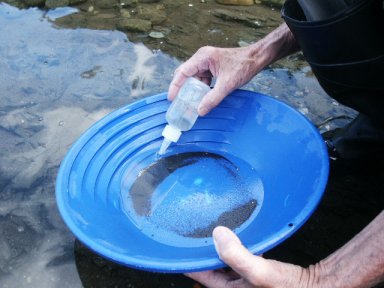
The main thing to remember about the use of a gold pan is that while it is very effective as a gold-catching device, it can only process a limited volume of streambed material. For this reason, the gold pan is normally not used as a production tool in commercial use, other than in the most remote locations where it would be very difficult to haul large pieces of equipment, and where there is only a small amount of streambed material present — which is paying well enough to make the panning worthwhile.
The gold pan is most commonly used to locate a richer paying area by sampling, so that larger production equipment can be brought into that location to work the ground to recover more gold.
There are stories in the old mining records about the ground being so rich during the 1849 gold rush that as much as 96 ounces of gold were recovered from a single pan. That is $100,000+ at today’s rate of exchange, and must have been some very rich ground indeed!
Stories like that are rare and pay-dirt like that is not run across very often. However, it is not too uncommon to hear of prospectors today who are able to consistently produce better than an ounce of gold per week with a gold pan in the high country, and have the gold to show for it. Some do better, but these prospectors have usually been at it for awhile and have located hot spots. I personally know of two guys who support themselves with a gold pan, and one of them lives pretty well. As mentioned earlier, the gold pan gives you unlimited accessibility, and these prospectors look around to find the pockets in the exposed bedrock along the edges of the creek-beds in their areas, picking up a few pieces here, a few there, and a little pocket of gold once in awhile. It adds up, and to them it is better than punching a time clock.
There is still plenty of rich ground to be found in gold country if you are willing to do the work involved in finding it.
Gold Panning Procedure
Panning gold is basically simple, once you realize that you are doing the same thing that the river does when it causes gold to concentrate and deposit during flood storms.
The process basically consists of placing the material that you want to process into your pan and shaking it in a left to right motion underwater to cause the gold, which is heavy, to work its way down toward the bottom of your pan. At the same time, the lighter materials, which are worthless, are worked up to the surface of the gold pan where they can be swept away. The process of shaking and sweeping is repeated until only the heaviest of materials are left-namely the gold and heaviest black sand.
Once you are out in the field, you will notice that no two people pan gold exactly alike. After you have been at it awhile, you will develop your own little twists and shakes to accomplish the proper result.
Here follows a basic gold panning procedure to start off with which works well and is easy to learn:
STEP 1: Once you have located some gravel that you want to sample, place it in your gold pan-filling it about 3/4 of the way to the top. After you have been at it awhile, you can fill your pan to the top without losing any gold. While placing material in your pan, pick out the larger-sized rocks, so that you can get more of the smaller material and gold into the pan.
STEP 2: Choose a spot to do your panning. It is best to pick a location where the water is at least six inches deep and preferably flowing just enough to sweep away any silty water that may be washed from your pan. This way, you can see what you are doing better. You do not want the water moving so swiftly that it will upset your panning actions. A mild current will do, if available.
It is always best to find a spot where there’s a rock or log or stream-bank or something that you can sit down upon while panning. You can pan effectively while squatting, kneeling or bending over, but it does get tiresome. If you are planning to process more than just one or two pans, sitting down will make the activity much more pleasant.
STEP 3: Carry the pan over to your determined spot and submerge it underwater.
STEP 4: Use your fingers to knead the contents of the pan to break it up fully and cause all of the material to become saturated with water. This is the time to work apart all the clay, dirt, roots, moss and such with your fingers to ensure that all the materials are fully broken up and in a liquid state of suspension whithin the pan.
The pan should be underwater while doing this. Mud and silt will float up and out. Do not concern yourself about losing any gold when this happens. Remember: gold is heavy and will sink deeper in your pan while these lighter materials are floating out and away.
STEP 5: After the entire contents of the pan have been thoroughly broken up, take the pan in your hands (with cheater riffles on the far side of the pan) and shake it, using a vigorous left and right motion just under the surface of the water. This action will help to break up the contents of the pan even more and will also start to work the heavier materials downwards in the pan while the lighter materials will start to surface.
Be careful not to get so vigorous in your left and right shaking that you slosh material out of the pan during this step. Depending upon the consistency of the material that you are working, it may be necessary to alternate doing steps four and five over again a few times to get all of the pan’s contents into a liquid state of suspension. It is this same liquid state of suspension that allows the heavier materials to sink in the pan while the lighter materials emerge to the surface.
STEP 6: As the shaking action causes rocks to rise up to the surface, sweep them out of the pan using your fingers or the side of your hand. Just sweep off the top layer of rocks which have worked their way up to the pan’s surface.
Don’t worry about losing gold while doing this, because the same action which has brought the lighter rocks to the surface will have worked the gold deeper down toward the bottom of the pan.
When picking the larger rocks out of the pan, make sure that they are clean of clay and other particles before you toss them out. Clay sometimes contains pieces of gold and also has a tendency to grab onto the gold in your pan.
Note: Working the raw material through a classification screen into the gold pan during Step 1 or Step 3 will eliminate the need to sweep out larger rocks in Step 6. This will also allow you to pan a larger sample of the finer-sized material(which contains all the gold you will find in a pan sample).
STEP 7: Continue to do steps five and six, shaking the pan and sweeping out the rocks and pebbles(if present), until most of the medium-sized material is out of your pan.
STEP 8: Tilt the forward edge of your pan downward slightly to bring the forward-bottom edge of the pan to a lower position. With the pan tilted forward, shake it back and forth using the same left and right motion. Be careful not to tilt the pan forward so much that any material is spilled over the forward-edge while shaking.
This tilted shaking action causes the gold to start working its way down to the pan’s forward-bottom edge, and continues to work the lighter materials to the surface where they will be more easily swept off.
STEP 9: Carefully, by using a forward and backward movement, or a slight circular motion just below the surface of the water, allow the water to sweep the top layer of worthless, lighter materials out of the pan. Only allow the water to sweep out a little at a time, while watching closely for the heavier materials to be uncovered as the lighter materials are swept out. It takes some judgment in this step to determine just how much material to sweep off before having to shake again so that no gold is lost. It will just take a little practice in panning gold before you will begin to see the difference between the lighter materials and the heavier materials in your pan. You will develop a feel for knowing how much material can be safely swept out before re-shaking is necessary. When you are first starting, it is best to re-shake as often as you feel that it is needed to prevent losing any gold. When in doubt, shake! There are a few factors which can be pointed out to help you with this. Heavier materials are usually
darker in color than the lighter materials. You will notice while shaking the pan that it is the lighter-colored materials that are vibrating on the surface. You will also notice that as the lighter materials are swept out of the pan, the darker-colored materials are uncovered.
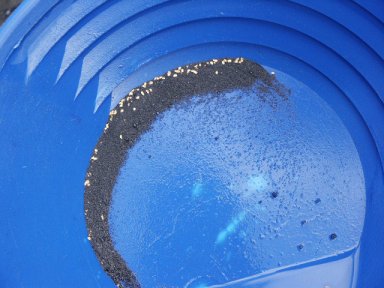
Materials tend to get darker (and heavier) as you work your way down toward the bottom of the pan, where the darkest and heaviest materials will be found, they being the purple and black sands, which are usually minerals of the iron family. The exception to this is gold, which is heaviest of all. Gold usually is of a bright and shiny metallic color and shows out well in contrast to the other heavier materials at the bottom of the gold pan.
One other factor to keep in mind is that the lighter materials sweep out of your pan more easily than do the heavier materials. As the heavier materials are uncovered, they are increasingly more resistant to being swept out of the pan, and will give you an indication of when it is time to re-shake.
As you work your way down through your pan, sometimes gold particles will show themselves as you get down to the heavier materials. When you see gold, you know it is time to re-shake your pan.
There is another popular method of sweeping the lighter materials out of the top of your pan which you might prefer to use. It is done by dipping your pan under the water and lifting it up, while allowing the water to run off the forward edge of the pan, taking the top layer of material along with it.
STEP 10: Once the top layer of lighter material is washed out of your pan, re-shake to bring more lighter materials to the top. By “lighter materials,” I mean in comparison to the other materials. If you continue to shake the lighter materials to the top and sweep them off, eventually you will be left with the heaviest material of all, which is the gold. It does not take much shaking to bring a new layer of lighter material to the surface. Maybe 5 or 6 seconds of shaking will do it, maybe less. It all depends upon the consistency of the material and how much gold is present.
Continue to pluck out the larger-sized rocks and pebbles as they show themselves during the process.
STEP 11: Every few cycles of sweeping and re-shaking, tilt your pan back to the level position and re-shake. This keeps any gold from being allowed to work its way up the forward-edge of your pan.
STEP 12:Continue the above steps of sweeping and re-shaking until you are down to the heaviest materials in your pan. These usually consist of old pieces of lead and other metal, coins, BB’s, old bullets, buckshot, nails, garnets, small purple and black iron rocks, and the heavy black sand concentrates. Black sands consist mainly or in part of the following: magnetite (magnetic black sands), hematite (non-magnetic black sands), titanium, zircon, rhodolite, monazite, tungsten materials, and sometimes pyrites (fool’s gold), plus any other items which might be present in that location which have a high specific gravity-like gold and platinum.
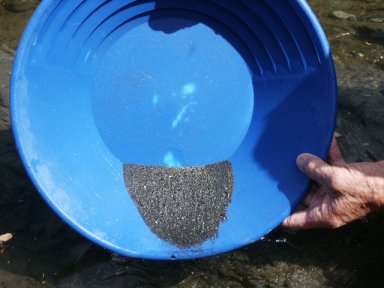
Once down to the heaviest black sands in your pan, you can get a quick look at the concentrates to see how much gold is present by allowing about a half-cup of water into the pan, tilting the pan forward as before, and shaking from left to right to place the concentrates in the forward-bottom section of your pan. Then, level the pan off and swirl the water around in slow circles. This action will gradually uncover the concentrates, and you can get a look at any gold that is present. The amount of gold in your pan will give you an idea how rich the raw material is that you are sampling.
A magnet can be used to help remove the magnetic black sands from the gold pan. Take care when doing this. While gold is not magnetic, sometimes particles of gold will become trapped in the magnetic net of iron particles which clump together and attach to the magnet. I prefer to drop the magnetic sands into a second plastic gold pan, swish them around, and then pick them up once again with the magnet. Depending upon how much gold this leaves behind, I might do this several times before finally discarding the magnetic sands.
Many beginners like to stop panning at this point and pick out all the pieces of gold (colors) with tweezers. This is one way of recovering the gold from your pan, but it is a pretty slow method.
Most prospectors who have been at it for awhile will pan down through the black sands as far as they feel that they can go without losing any gold. Then they check the pan for any colors by swirling it, and pick out any of the larger-sized flakes and nuggets to place them in a gold sample bottle. Then the remaining concentrates are poured into a small coffee can or bucket and allowed to accumulate there until the end of the day, or week, or whenever enough concentrates have been collected to make it worthwhile further process them. This is really the better method if you are interested in recovering more gold, because it allows you to get on with the job of panning and sampling without getting deeply involved with a pair of tweezers. Otherwise, you can end up spending 25% of your time panning and up to 75% of your time picking out small colors from the pan!
Panning Down All The Way To Gold
It is possible to pan all the way down to the gold-with no black sands, lead or other foreign materials remaining in the pan. This is often done among prospectors when cleaning up a set of concentrates which have been taken from the recovery system of a larger piece of equipment-like a sluice box or suction dredge.
Panning all the way down to gold is really not very difficult once you get the hang of it. It is just a matter of a little practice and being a bit more careful. When doing so, most prospectors prefer to use the smooth surface of the gold pan, rather than using the cheater riffles. The key is to run the concentrates through several sizes of classification screens and pan each size-fraction separately. Use of a smaller-sized pan (“finishing pan”) makes this process go easier.
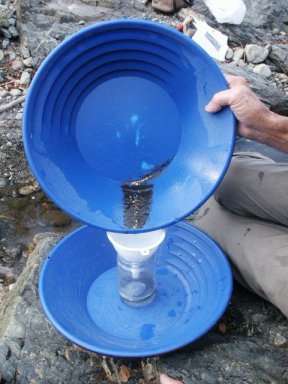
When panning a set of concentrates all the way down to the gold-or nearly so, it is good to have a medium-sized funnel and a large-mouthed gold sample bottle on hand. This way, once you have finished panning, it is just a matter of pouring the gold from your pan into the sample bottle through the funnel. Pill bottles and baby food jars can make good gold sample bottles for field use, because they are usually made of thick glass and have wide mouth. Plastic bottles are even safer.
Another method is with the use of a gold snifter bottle. This is a small hand-sized flexible bottle with a small sucking tube attached to it. Squeezing the snifter bottle creates a vacuum inside. Submerged gold from the pan can consequently be sucked up through the tube.
If you do not have a snifter bottle or funnel, try wetting your finger with saliva and fingering the gold into a container, which should be filled with water. The saliva will cause the gold and concentrates to stick to your finger until it touches the water in the container. This works, but the funnel method is faster.
Practice Gold Panning
If you are not in a known gold-producing location, but want to do some practice panning to acquire some skills before going out into the field, you can practice in your own backyard. Use a washtub to pan into and some diggings from your garden (or wherever) to simulate streambed materials. I recommend that you throw in some rocks and gravel along with the dirt so that it takes on an actual streambed consistency. Take some pieces of lead, buckshot or small lead fishing weights, cut them up into various sizes ranging from pellet-size down to pinhead-size, and pound some of them flat with a hammer. This puts the pieces of lead in the same form as the majority of gold found in a streambed-flake form. They will act in much the same way as will flakes and grains of gold. Leave a few of the pieces of lead shot so that gold nuggets can also be simulated.
When panning into the tub, place some of these pieces of lead into your pan, starting off with the larger-sized pieces first. Keep track of how many pieces of lead you use each time so that you can see how well you are doing when you get down to the bottom of the pan. Practice panning in this manner can be very revealing to a beginner, especially when he or she continues to put smaller pieces of lead into the pan as progress is made.
If you can pan small pieces of lead successfully, then you will not have much difficulty panning gold (higher specific gravity) out of a riverbed. And, who knows? You may end up with gold in your pan-right out of your own backyard! It wouldn’t be the first time.
Bags of real panning material are also available from different sources within the industry. These bags usually contain some real gold along with the type of materials you would commonly encounter when panning out in the field. Practice panning with the “real thing” is the best way to get started!

