It takes more water velocity to move larger-sized material than it does to move the smaller-sized material through a sluice box. Yet, to the degree that the water velocity over a sluice box is increased, there may be a loss of fine gold recovery. Or, to the degree the water velocity over a sluice box is slowed down, there is likely to be an increase in fine gold recovery–as long as there is still enough flow over the box to keep the riffles concentrating.
When larger rocks are pushed through a sluice box by water force, they also create greater turbulence behind the riffles as they pass over, which may cause an additional loss of fine gold.
To improve gold recovery, it is common practice to run material through a screen to classify out the larger rocks before running the material through the recovery-portion of a sluice box. In this way, less water velocity is needed through the box, which allows for a more orderly flow, and an increase in fine gold recovery. The action of screening materials is called “classification.” Materials which have been passed through a classification screen are called “classified materials.” The following video segment demonstrates this very important point:
The size and depth of riffles within a sluice box play an important part of this. A slower water flow might not keep a deeper riffle concentrating. A greater water flow can sometimes “boil-out” a lower-profile riffle. So as water flow is slowed down to catch finer-sized gold, it is generally necessary to use shorter riffles.
Half-inch mesh screen is commonly used for primary classification in small and medium-sized sluicing operations, because the screen is large enough to allow classification to take place quickly, yet no materials greater than half-inch in size will get into the sluice. Therefore a slower-velocity of water can be directed through the box, and fine gold recovery will be improved.
Classification for a sluicing operation can be done in any number of ways. One is to place a piece of strong half-inch mesh screen over a bucket, and shovel or pour through the screen into the bucket while sweeping the larger material off to the side. Once the bucket is filled with classified material, it can be poured into the sluice box at a uniform rate. It is better to not dump the whole bucket into the sluice all at once! This is because too much material is likely to overload the riffles and cause a loss of gold recovery.
In a situation where it is necessary to haul material a short distance to the sluice box, sometimes it is easiest to classify the material directly into a wheelbarrow and transfer only the classified material to the sluice.
Perhaps one of the best screening methods is to build a classification device that you can shovel into, and which will stand directly over the top of, and drop the classified materials into, the head of your sluice box.
The device should be built with the screen set at an angle. This way, larger material is helped to roll off of the screen as the pay-dirt is shoveled onto it. Smaller materials should fall through the screen and be directed into the head of your sluice box. This is actually a miniature model of the big classifiers used by large-scale heavy equipment bench-mining operations. A classification device such as this is rather easy and economical to build and will speed up a production-sluicing operation while screening is being done to improve gold recovery.
Any recovery system will only recover gold effectively down to a certain size-range. Most gold particles smaller in size than that will be lost with the tailings. Classification is one effective way of increasing the amount of gold that will be recovered out of the material that will be processed. As demonstrated in this following video segment, this is especially true of suction dredges; because dredges are able to increase the volume of production over other types of hand-mining activity.
Here is a substantial explanation of the system which we have developed to effectively recover more fine gold on our conventional suction dredges. It combines two classification screens to more-effectively separate material-feed into three size-fractions, each which is directed into a different recovery system. The smallest gold particles (which are most difficult to recover) are directed into low-profile riffles along the bottom of the sluice box which have long been proven to be very effective at trapping fine gold.
Here is where you can buy a sample of natural gold.
Author’s note: This story is dedicated to Alan Norton (Alley), the lead underwater mining specialist who participated in this project. Under very difficult conditions, Alan made most of the key dives which enabled us to make this a very successful venture. Alan lost part of his ear to a hungry fish one day; and the following day, Alan was making a key sampling dive again because we needed him to. There are very few people I know, if any, with more courage, dedication and enthusiasm to successfully complete a difficult mission than Alan.First came several Toyota Land Cruisers. Then, a couple of Isuzu Troopers, followed by a number of small pickup trucks. These were just in front of two large Russian troop carriers, all filled with armed troops. They came in on us fast, carrying along a big cloud of dust from the dirt road. Even before the vehicles came to a stop, soldiers were jumping out of trucks and running out to secure perimeter positions. They were carrying AK-47 machine guns, M-79 grenade launchers and Chinese rockets. I had seen these guys before. I had fought with them, and I had fought against them. They had that unmistakable look in their eyes. They would kill with little or no provocation.
Once the perimeter was secured, three generals stepped out of their Land Cruisers and enthusiastically approached us, their personal bodyguards close behind. The generals looked friendly. Their bodyguards looked seriously unfriendly! The generals, whom we had not met until now, hurried right up to me and each of my men and gave us big hugs, hand shakes and slaps on the back, like we were long lost sons. The bodyguards stood there with machine guns pointed in our general direction, doing what they were supposed to do to ward off any potential menacing threat to their leaders–which, by the way, never crossed our minds. We did the natural thing; we acted like long lost sons!
We had not been in Cambodia even for one hour before we were packed into Land Cruisers of our own and driven to Kampong Saom on the coast–which was almost half way across Cambodia. The end of the dry season had caused the water levels in the Mekong River to drop so low that deep-water ships were no longer delivering cargo to Cambodia’s capital, Phnom Penh. Therefore, it was necessary for us to go to Cambodia’s only other deep-water port in Kampong Saom to take delivery of five full ocean shipping containers of mining and additional equipment, supplies, boats and vehicles that had been shipped over there from America to support our project.
Since nothing happens immediately in Cambodia, we ended up spending about a week at a gorgeous beach while waiting for the shipping containers to be released by Cambodian Customs. Our hosts were taking good care of us. The hotel was comfortable, the beer was cold and the crab meat was freshly cooked on the beach–and it was all we could eat. In fact, we were just about getting bored. That’s when the generals showed up.
Isn’t it amazing how fast boredom can turn to fear? After hugs and handshakes, the generals agreed it was time for target practice. They had their bodyguards throwing beer cans out into the water so they could shoot at the cans. Pretty soon, lots of people were shooting at them. The few civilians that had been enjoying the beach scurried off quickly and respectfully. Everyone was laughing and having a good time except us. We were laughing, but not sure if we were going to be the next targets! It was all too much at once. We didn’t even know these people and they were all enthusiastically shooting their guns off. We were surrounded!
Pretty soon, one of the generals handed me some kind of machine gun I had never seen before and challenged me to shoot a fresh beer can. It was the only beer can remaining on the beach! This was a tough position for me to be in; those guys were not the best shots. I calculated whether I should try to out-shoot them, which might cause the generals a loss of face in front of their men, or to miss the can and perhaps lose their respect? On an impulse, I clicked the machine gun over to full automatic and fired a short burst to find a mark, adjusted slightly, and hit the can, knocking it up into the air on the second burst. No one had used automatic fire–probably to conserve bullets. All the generals burst out in a roar of laughter, followed by all their men. Deciding to quit while I was ahead, I handed the machine gun back to the general with the clip still half-full of bullets. That was the end of target practice and the beginning of my very warm friendship with that general. About a week later in Phnom Penh, this general and his very kind family, with great ceremony, adopted me as their number-one son.
The beach was just the beginning of 60 days of non-stop adventure which took me and three of my men from one end of Cambodia to the other in search of gold and valuable gems.
As it turned out, the generals were directly involved with this exploration project–which, by the way, was the first precious metal exploration project in Cambodia since the United Nations returned control of the country to a Cambodian coalition government in late 1991. During the course of the project, it became abundantly clear that our presence, and our successful venture, was very important to these generals and the Cambodian government. Cambodia is just getting back on its feet after decades of war and agony. The country is hungry for capital investment from the east and west. Successful ventures such as ours would help facilitate that.
Our project took place in northeastern Cambodia on one of the three main tributaries of the Mekong River. We were hired to help this operation put its suction dredging equipment into production and to help find high-grade mineral deposits.
The area is remote. In fact, it is the same area America bombed in the early 1970’s (with B-52’s) to prevent the Viet Cong from moving supplies on that portion of the Ho Chi Minh Trail. You just would not believe the number of bomb craters; I have never seen anything like it. In fact, up until the time of our project, I don’t believe a single bulldozer had visited that section of Cambodia since we bombed it! While these conditions probably never did slow down the Viet Cong very much, they certainly did slow us Americans down a lot! It took literally weeks for us to transport our equipment to the work-site. Trucks and trailers would disappear into craters and then come back out, one after the other, like a big roller coaster ride–only in slow motion–for hundreds of miles! It was one of the most amazing things I have ever seen!
All the while, our security troops were worried about being ambushed by Khmer Rouge rebels–roving bands which were still occasionally shooting up taxis, burning bridges, robbing various business establishments and causing other acts of terror around the countryside. Our generals were very concerned to make sure there were no embarrassments on this operation. Therefore, they sent along a 300-man military force to provide security. Each of us was also assigned several personal body guards. They also issued each of my men and me our own machine guns–which we gladly took. You kind of feel naked without a weapon when everyone else is walking around with some kind of heavy fire power! Here follows some video segments that I captured of our interaction with our bodyguards and some of the troops that were assigned to our project:
By the way, the people of Cambodia are the kindest-natured people I have ever associated with. Everyone is very polite and friendly. Unless it is worth dying over, you never see an argument in Cambodia! During the entire 60 days of our project, there was not a single person I smiled at that I did not receive a heartfelt and sincere smile in return. They seem to genuinely like Americans. In fact, any product or item that says Made in America is in great demand in Cambodia–especially hats and insignia which carry American flags and symbols.
One night, we had to make an emergency dash through rebel-held territory so that we could meet a production deadline. We were driving like madmen through bomb craters, up and down, with grenade launchers and machine guns hanging out windows. Our security people were very concerned we would be ambushed. Better to be safe than sorry, I suppose. But, I never saw any direct sign of danger. Even so, the eminent concern–with guns and grenades pointed out windows, with everyone on moment-to-moment alert–created a charged atmosphere which we usually only experience on television in America.
We received incredible hospitality from native villagers in every community that we passed through or stopped to visit. Many villagers had never seen white men before. You have to remember that Cambodia, for the most part, lost an entire generation of people to the Khmer Rouge regime. Locals told us the ratio of women to men in Cambodia is five to one, because the men were either killed in war or murdered. That ratio is about how it appeared to me.
The equipment we sent there to use for sampling took a very heavy beating during the trip across Cambodia. The axles we mounted on the dredge platforms were badly bent from being dragged through hundreds of craters, and there was quite a lot of other damage, too. So we found ourselves staged for about a week in the last town before we would reach the river. This was a place where various supplies and services were still available. There, my men and I supervised final repairs and preparations for our sampling program. It is very challenging to do this sort of thing in an environment where most of your helpers do not think the same as you do, and do not speak any of your language:
Between the delays at Customs, the painstaking trip across war-torn Cambodia with the equipment, and the time we had to spend repairing gear at the final staging area, we only had about 2 weeks remaining to accomplish what we went to Cambodia for in the first place. A final distance to the river of 35 kilometers does not sound like very far; but in Cambodia, where anything and everything can go wrong; this last 22 miles still seemed like a long way to go. Even so, there was a lot of excitement when we had everything ready and began our final journey to the river from the last bit of civilization that we would see. The following video segments demonstrate the excitement that we were all feeling to finally get started on our dredge sampling program:
Along the way to the river, we started seeing lots of diggings alongside the road. We thought the holes were water wells at first, because they were perfectly round and uniformly about 2 ½ feet in diameter. Then we realized they must have been something else, because there were so many, and they were positioned so closely together. We stopped to take a look as soon as we saw some locals actively working inside one of the holes. These turned out to be sapphire miners! They were digging about 10 meters down to bedrock and recovering handfuls of pretty blue stones from the bottom gravels. These miners were selling their gemstones for mere pennies (Me and my guys were buying!). We found out these miners were from the Cambodian hill tribes; jungle dwellers that pretty-much are the same as they have been for hundreds or thousands of years. A number of humanitarian groups are now present in Cambodia attempting to prevent the modern world from impacting too dramatically upon these ancient tribal people. The following video segment captured some dialog that we had with a few of the sapphire miners. It presents a good example of how simple and kind the people are from the Cambodian hill tribes:
Immediately upon our arrival at the river, we realized that we had 2 serious problems to overcome. The first was that there was about a 10-meter drop from the bank down to the active river. There was no ramp or other simple way to launch the 10-inch dredge and special recovery platform that we brought with us for this job. Not wanting to use our security force for this, we immediately set out to hire around 30 men from the local hill tribe village to dig a ramp. That exercise took about 6 days to accomplish. So we were not going to have use of the big dredge until the final week of our project.
Our second serious problem was that the (sizable) river water was running mud-brown. We did not know it at the time, but there was some active dam construction happening upstream in Vietnam. The ongoing construction was turning the river to mud-water. That meant that we were not going to have any visibility underwater. There is a way to get the work done in dirty water; but besides the serious safety problems associated with dredging blind on the bottom of deep tropical rivers, you have to do everything by feel. This slows you down to just a fraction of what you can accomplish with some underwater visibility. This was going to be a difficult mission to accomplish!
All travel on the river from our base camp had to be accomplished by boat. The boat that we arranged broke down on our first trip downriver to survey the area. As it was just before dark on our return to camp, and the mechanical problem seemed pretty serious, we actually started making plans to sleep on a sand bar that was located out in the middle of the river, maybe 5 miles away from our camp. With no dinner and no shelter from the mosquitoes, it was a pretty bleak feeling out there. I captured the following video segment just as our guide was suggesting that we spend the night there on the sand bar. Fortunately, they got the boat motor operating just as darkness was almost complete. It sure felt good to finally arrive back at camp that night where there was a hot meal and perfectly good tent waiting for each of us:
While we were doing our initial survey downriver, we came upon a local river mining operation that was using a long-handled (about 15 feet long) shovel, suspended by a floating platform made of bamboo. This dredge was being used to excavate sand off the bottom of the river. The locals called this a “Vietnam dredge,” because the river mining technology had been imported by miners across the border in Vietnam. Almost the entire dredge was made out of materials from the jungle. Even the lines being used to tie off the dredge out in the river were made from jungle vines. The only part of the dredge we could see that was from our modern world was the head of the shovel. That looked to be fashioned from the car hood of a bombed-out jeep. This river location was part of the Ho Chi Minh trail. So there were plenty of bombed-out jeeps around, and some ruined Vietnamese tanks, too. In fact, there was a lot of painful history here!
Author and several team-members trying out a “Vietnam Dredge,” made from bamboo, which local miners use to bring gold off the bottom of the river.
Upon discovery of the local river mining program, we immediately took the opportunity to make friends with the local miners and the elders of their village. This is standard procedure anytime we are performing an preliminary evaluation in a new area. While their methods might sometimes be somewhat primitive compared to ours, I have found more often than not that hundreds (or thousands) of years of local mining experience has given the miners who occupy an area a strong perception of where the richest gold areas are located. We did not have much time remaining to make a rich discovery for our clients. Any head start the locals could give us would surely be a welcome development! Ultimately, the locals told us that their dredge was positioned along the strongest line of gold that they knew of in the river. That was a big help!
To get an idea of how much gold they were talking about, we accepted their invitation to go down and operate their Vietnamese dredge for a little while. The following video segment captured my guys running the local production equipment. It worked by pushing the shovel down into the sand, and then using a make-shift windless to raise the river-bottom material to the surface. There, local wooden gold pans were used to process the material:
While the local miners were recovering a fair amount of gold from the river-bottom sand deposits, their success did not appear to help us very much. This was because we wanted to sample for the high-grade gold deposits which are almost always located at the bottom of hard-packed streambed layers. In working their Vietnamese dredge for awhile, it did not take very long for us to realize that the long-handled shovel would not penetrate the hard-packed streambed material that was under the sand. Too bad!
5″ Pro-Mack Sampling Dredge
Still, knowing where local miners were supporting their villages with gold from the river gave us a starting point. The following day, we moved two 5-inch special sampling dredges onto the river some distance downstream from where the locals were mining, but directly in line with them so that we had a better chance of sampling on the strongest path of gold in the river
My guys were initially quite challenged by going down into the pitch blackness along the bottom of a muddy, tropical river. Because there is zero visibility down there, everything must be done by feel. This is not easy to do, because your imagination cranks up into overdrive about what might be lingering around down there to bite or eat you in the dark. Remember those horrific nightmares you had when you were a kid? That stuff doesn’t ever go away. The terror is still present; it is just buried. Going by yourself down to the bottom of a tropical river in total darkness, and having to feel your way around to figure out what is down there, energizes all you nightmarish fears right back to the surface. It is difficult to do what you are supposed to do down there with all this internal fear playing out inside of you! It takes courage and a lot of discipline.
So my guys challenged themselves with acquiring some preliminary sample results using the 5-inch dredges, while I was pulling the 10-inch dredge together and installing a special shaker table in the base camp that we would be needing to process large samples. The table needed to be anchored in concrete. All of this took several days. Time was running out!
On the second day of sampling, our lead diver, Alley Norton, touched down in some hard-pack and came up with a pretty good showing of gold. The following day, I encouraged Ally to go back down and open up the hole (get a bigger sample). We had to keep dredgers separated while sampling, to avoid someone getting smacked with a cobble being tossed in the dark. There simply is no way to tell where anyone else is when you are dredging in muddy water. Alley’s hard work and enthusiasm paid off. Considering how small his sample actually was because of the dirty water, he recovered a lot of gold! We had located high-grade!
I captured these following video segments towards the end of the third day of sampling:
As we had less than a week remaining to accomplish our mission, we all focused the next several days placing the 10-inch dredge and platform into the water. The local help had completed our launch ramp according to plan. Wow, was thatalotof work! Once the big dredge and recovery system were floating in the river, we still had to dial it all in to get it working right. This was particularly important with the sophisticated recovery system that we had brought along for this job.
Before opening up Alley’s discovery with a production sample, we needed to make sure the recovery system was working right. This all took another two days, because the large volume of sand from the bottom of the river was overwhelming the gravel pump that was supposed to transfer classified material to the recovery system. This problem required us to get very creative in the middle of the jungle. Through some trial and error, we constructed several water blasters to inject water into the feed of the gravel pump. This made sure that enough water was going into the feed to keep sand from packing up in there. While all of this took up valuable time, we had to get the big dredging system fully functioning before using it to perform the final production samples in Alley’s rich discovery
We only had 2 days remaining on the project when we finally floated the big dredge over Alley’s rich discovery. Talking about racing against the clock! So while Alley went down in 6 meters of underwater darkness to suck up the sample, I stayed up on deck to fine tune the dredge’s recovery system. You can only put one diver down on a big, powerful dredge in dark water. So our other guys helped where it was needed. Alley spent several hours opening up a large hole through about 2 meters of loose sand. Our plan was to first pump most of the sand off the hard-packed streambed material where Alley had found the gold. Then we were planning to flush the sand completely out of the recovery system before dredging up the pay-dirt. This was to minimize gold losses because of too much sand overwhelming the system at once.
We were making good progress on our plan. But about half way through the day, Alley climbed back onto the dredge with a lot of blood flowing down the right side of his head and face. A pretty sizable chunk of his right ear was missing and it was bleeding profusely! Blood was actually squirting out with the pulse of his heart! He said while operating the dredge’s suction nozzle on the bottom of the river, it felt like a submerged log with rough bark brushed by his head, scraping his ear. When he reached up to touch where the pain was coming from, he could feel that a part of his ear was gone. That’s when he came to the surface. Seeing all that blood and the bite out of Alley’s ear was very dramatic for everyone that was present.
Back at camp, we bandaged Alley up as best we could. We always bring a substantial medical kit with us on these projects. We applied antibiotics just to be safe. Alley said the pain was not too bad. He was mostly worried about how ugly it was all going to look later. I would have been worried about that, too! There wasn’t anything else we were going to do about that situation out in the jungle, though. So we decided to set aside that problem for another time. We were going to depart Cambodia in a few days, anyway.
Collectively, my guys and I decided it was wise to not do any more diving in the river until we found out what bit Alley. Whatever it was, there was a chance that we could still salvage the sampling project by wearing more protective gear while underwater. We still had one more day available to perform a final production sample!
As none of our bodyguards or the other military guys in camp seemed to have any idea what bit Alley, we decided to drive the motor boat up to the hill tribe village where the Vietnamese dredge was operating. We had already made friends with the villagers and elders there. Once there, we removed the bandage from Alley’s ear to show the elders, and they immediately knew what bit him. They told us that there is a fresh water blow fish that lives on clams at the bottom of the river. Apparently, this type of fish must have come alongside Alan’s head; and in the very poor visibility, thought his ear was a clam. One bite and there it went. The villagers assured us we would have no further problem with that fish if we started wearing hoods, gloves and full face helmets in the river while it was muddy.
Afterwards, we heard the story of one of our military men bathing naked in the river and losing his vital organ. Apparently, the man had just been married several weeks before. Luckily, we had been taking our showers up on the bank!
When we arrived at their village, the local people were busy preparing for a “grand celebration” that was to take place that evening. All of us were invited to attend, and it would have been impolite for us to decline their kind hospitality. The celebration turned out to be a funeral ceremony for one of their important elders who had died 3 years before. I have seen similar traditions in Madagascar, where the big celebration of someone’s life happens by the whole village several years after the person dies. These hill tribe people were busy decorating a whole shrine that would be dedicated to the person, carving all sorts of symbols relating to the important things the person lived through. Interestingly, the biggest symbols I recognized were American military helicopters and B-52 bombers. No doubt, the later part of the Vietnam war must have been a very traumatic time for these very simple hill tribe villages, with the Viet Cong using their river for a highway, and the Americans dropping thousands of tons of bombs all around.
These people seemed nothing but pleased to have us Americans present, so we accepted their invitation to participate in their party that evening. Indeed, the party turned out to be one of the most interesting events I have ever been part of. A center covered circle had been built for the people who wanted to express their grief over the loss of a loved one. Inside that area, there were around 20 people who were crying and almost howling in deep grief. Outside the circle, the rest of the village paraded round and round in a dance in joyous celebration of the person’s life.
My guys and I jumped in with the outer group. They were beating on different-sounding chimes to make their traditional music. The sound was so interesting that I captured it on tape. The occasion was something I am sure that none of us will ever forget. We were honored that they allowed us to participate in such an important tribal event. They were honored that we joined in with them. It was a wonderful bonding experience between us and remote villagers of the deep jungles of Cambodia. The following video segment and audio segment capture some of our hill tribe friends as they were preparing for the party, and then capture some of the music and feelings that we shared together that evening:
The following morning found our team back on the 10-inch dredge, preparing to perform one last production sample. This was our last day to accomplish what we went there to do. So much effort and money had been invested to transport this fantastic equipment halfway across the world, through some of the most difficult circumstances on the planet; only to finally arrive on our last day right over top of what appeared to be a very rich gold deposit.
It was so important that we get the best possible production sample, Alley insisted that he take the first dive. He had started the sample on the previous morning, so he knew the layout of the hole in the total darkness of the river bottom. Total darkness down there would have required either of my other two guys to spend valuable time figuring out what Ally had already done. As this gold deposit was really Ally’s personal discovery, we agreed that he would take the first dive of the day to open up his hole. I would spend that time dialing in the recovery system as well as I could. Then I would finish the sample during the afternoon with a second long dive. My other two guys were content to support us from the surface. I don’t think they were quite over the emotional shock of Alley’s blood and guts from the day before. Who could blame them?
As I knew this would be a memorable occasion that none of us would ever forget, I captured some video of Alley bravely overcoming his fears and going back down into the deep black hole that attacked him on the previous day, something very few people would do. You will see from the following video segments how good the production dredging equipment was that we managed to place on top of that rich gold deposit. I believe the recovery system was the most sophisticated that had ever been used with a suction dredge up until that time. It was truly a miracle that we ever got the equipment there, or that we found such a high-grade gold deposit under those difficult conditions. With all that we had been through, in my world, there was no other choice but to perform that final production sample:
After a few hours of diving, Alley came to the surface; because his ear was throbbing in so much pain, that he said he could no longer focus on what needed to be done on the bottom of the river. By then, the recovery system was dialed in as well as we were going to get it. So I suited-up and went down into Alley’s deep, black hole. This was actually my first dive on this entire project. During the week or so that we had been on the river, there were just too many other things that needed to be accomplished which only I could do to bring everything together in time for this final production sample. So there I was, taking the last and most important dive of the whole project!
I will never forget in military jump school, the first time I bailed out of an airplane. It was one of those situations where I really did not have much of a choice. But looking way down there at the ground made jumping feel totally wrong. My body did not want to do it. So it was necessary for me to flick some internal emotional switch, override my natural instincts, and just force the body to make the jump. Going down into deep muddy water ismuchthe same; the body doesnotwant to do it!
I have actually done quite a few dredging projects where it has been necessary to perform the underwater work in muddy water. It is never easy! Especially when the water is deep! It was around 6 meters just to the bottom of this dirty river. That is a long way to go down in the dark. I worked my way down there slowly by following the suction hose, which is where I knew that Alley had left off. When I reached the suction nozzle, I rotated my body around it in a circle, feeling around with my legs and feet to try and find Alley’s dredge hole. Letting go of the nozzle was something I was not prepared to do, because it was the only thing that gave me a reference point down there in the total darkness. Also, feeling around tentatively with steel-tipped work boots felt safer than reaching out in the dark with my hands!
I soon found that Alley’s hole was just off to one side of the nozzle. Experienced dredger that he is, Alley knew better than to leave an unattended suction nozzle down inside of a dredge hole in the sand. The walls never stop sliding in on sand-excavations or loose gravel. If you leave a suction nozzle down inside of one, within just a short time, the suction nozzle and hose will be overwhelmed and buried. That would have been the end of this project. There was not enough time remaining to dig a hose out of the sand in the dark!
Once I found Alley’s hole, I memorized where the suction nozzle was positioned several feet away, and then I followed the edge of the hole all the way around to get some idea how big it was. This was the hard part, because it meant that I had to reach out and feel everything with my hands. All that blood pouring down the side of Alley’s face the day before was vividly on my mind! There were creatures down there with serious teeth! Here is where I had to flick another fear-switch off and just do the work. These fear switches are not really turned off. They are just suspended. I speak from bad experience. Depending upon how many of your internal fear-switches are in suspension, it just takes one small event to turn them all back on into nightmarish panic and terror. I have been there. It is not fun!
Reaching out meant feeling out as far as I could outside the outer edge of Alley’s hole to make sure there were no boulders up there that would roll in on me in the dark. I did not find any. Slowly but surely, I explored all of Alley’s hole by feel. It was pretty big; maybe 30 feet in diameter at the surface, funneling down to a center point about 2 meters deep. Alley had pumped a lot of sand! Before I went down, he told me that he touched down on the hard-pack streambed at the bottom of his hole, but that the sand kept sliding in on him. So he had not been able to get a sample of the hard-pack, yet. This was for me to do!
I invested about 2 hours into taking a sizable cut off the front and one side of Alley’s hole, working the sand back step-by-step in the darkness. I wanted to uncover enough surface area of the hard-pack as possible. This was so that further sand-slides would not prevent me from getting a good sample of the hard-pack. With time, I started uncovering the hard-pack. This is where the loose sand met the cobbles, boulders and gravel that were tightly compacted together. Though I could not see it, it felt just like the hard-pack we dredge along our properties in California.
While the dredge was plenty powerful enough to pull apart the compacted streambed material, my progress was slow. This is because I could not see the oversized rocks that had to be moved out of the way, and I could not put my hands out in front of the nozzle in the dark without getting them hurtfully banged up. Mainly, I just poked around down there in the dark to suck up anything that would go up the nozzle. Each time a loose cobble would block the nozzle opening, I would wrestle it off and put it behind me. It was not long before I had more loose cobbles behind me than I could manage. It was too far to throw them out of the hole, and trying to pack them out would have caused more sand to slide in. So I just juggled everything around down there the best I could, determined to get as much of that hard-pack up the nozzle as possible. Ultimately, my progress became overwhelmed by loose cobbles in the hole and sand sliding in from the sides. I had not reached bedrock, but I did get a fair sample of the material that Alley had touched down upon with the 5-inch dredge several days before. By my measurements in the dark, I estimate that I sampled less than a cubic meter of hard-packed material. That was all we were going to get under those difficult circumstances. It was a good feeling to finish what we had traveled so far to do.
The guys turned the dredge down when I reached the surface. I had to wait at the ladder for the longest time to allow my eyes to adjust to the bright sunny day. As I was waiting, my guys were making a lot of enthusiastic noise about visible gold in the recovery system. When I finally was able to see again, I climbed up onto the dredge to see that the entire recovery system was inundated with a thick layer of small golden flakes. It was, by far, the most gold I have ever seen recovered out of such a small volume of gravel. This place was rich!
We had just enough time before dark to run our concentrates over the shaker table back at camp. Everyone there experienced an incredible feeling of pride. Under very difficult circumstances, against all odds, we stuck it out right until the last hour to make this project a success. Watching all that rich gold flow across the shaker table had all of us in awe about how rich this river is. Who would have ever guessed? Right there on the Ho Chi Minh trail! While I am sorry to have missed capturing the gold-laden recovery system on the dredge, I was able to recover myself enough to capture the following video segment of the final clean-up. To put it in perspective, our small sample caused that shaker table to flow gold like that for a full 15 minutes!
We returned to civilization the following morning, and departed Cambodia a few days later.
Follow ups:
A short time later, our clients met with some serious misfortune by aligning themselves with the losing side in a power struggle over who would control the government in Cambodia. While they survived the events, they have been banned from the country forever.
Shortly after my clients found themselves in big trouble, all of the equipment and supplies we sent over (that they paid for in advance) were taken away. The only thing remaining there today that shows we were ever even present is part of a steel frame from one of the large floatation platforms. Everything else is long gone.
The wars in Cambodia are now long over. The people there are very friendly. You do not see guns there anymore. People are focused on getting ahead in business. They want to be like America. The government is trying hard to attract foreign investment.
Nothing since our project has been done to develop the deposit that we located. Although the government of Cambodia has offered to make an exploration license available, I have yet to raise the high-risk capital necessary to go back over and do something about what we found
I made a special trip back to the site of our discovery 2 years ago. The bad roads have been replaced with a highway! Schools have been built in the village communities. The people out there were happy to see me. Most importantly, dam construction in Viet Nam was finished and the river was running clear!
While I was out there, I hired a local boat to take me downriver to see if anyone was doing anything with our deposit. Nobody was there. Even the Viet Nam dredges were gone! It appears that my guys and I were the only ones whoever really understood the significance of what we found there. Local miners cannot access the rich material using their technology. With clear water, we could process hundreds of times more hard-pack in a day than what I sampled down there in the dark.
The following video segment was taken in the very place where the earlier segment showed us operating the dredge:
Alley and his brother are now managing a successful concrete business in Phoenix, Arizona. He never did anything to fix the bite out of his ear. Now he says the tattered look gives him personality and character. Since nobody will believe he had his ear nearly bitten off by a clam-eating fish while prospecting for gold at the bottom of a muddy river in the jungles of Cambodia in the middle of a war along the ancient Ho Chi Minh trail, he now just tells people that his ear was bitten off by someone while fighting in a bar on the north side of Phoenix. That’s already more adventure than most people can handle!
Note: This story was pulled together from the non-proprietary portion of an initial report from a preliminary evaluation of a potential production dredging project in Northeastern Cambodia. The opportunity to do something with this prospect still exists.
Here is where you can buy a sample of natural gold.
The main thing to remember about the use of a gold pan is that while it is very effective as a gold-catching device, it can only process a limited volume of streambed material. For this reason, the gold pan is normally not used as a production tool in commercial use, other than in the most remote locations where it would be very difficult to haul large pieces of equipment, and where there is only a small amount of streambed material present — which is paying well enough to make the panning worthwhile.
The gold pan is most commonly used to locate a richer paying area by sampling, so that larger production equipment can be brought into that location to work the ground to recover more gold.
There are stories in the old mining records about the ground being so rich during the 1849 gold rush that as much as 96 ounces of gold were recovered from a single pan. That is $100,000+ at today’s rate of exchange, and must have been some very rich ground indeed!
Stories like that are rare and pay-dirt like that is not run across very often. However, it is not too uncommon to hear of prospectors today who are able to consistently produce better than an ounce of gold per week with a gold pan in the high country, and have the gold to show for it. Some do better, but these prospectors have usually been at it for awhile and have located hot spots. I personally know of two guys who support themselves with a gold pan, and one of them lives pretty well. As mentioned earlier, the gold pan gives you unlimited accessibility, and these prospectors look around to find the pockets in the exposed bedrock along the edges of the creek-beds in their areas, picking up a few pieces here, a few there, and a little pocket of gold once in awhile. It adds up, and to them it is better than punching a time clock.
There is still plenty of rich ground to be found in gold country if you are willing to do the work involved in finding it.
Gold Panning Procedure
Panning gold is basically simple, once you realize that you are doing the same thing that the river does when it causes gold to concentrate and deposit during flood storms.
The process basically consists of placing the material that you want to process into your pan and shaking it in a left to right motion underwater to cause the gold, which is heavy, to work its way down toward the bottom of your pan. At the same time, the lighter materials, which are worthless, are worked up to the surface of the gold pan where they can be swept away. The process of shaking and sweeping is repeated until only the heaviest of materials are left-namely the gold and heaviest black sand.
Once you are out in the field, you will notice that no two people pan gold exactly alike. After you have been at it awhile, you will develop your own little twists and shakes to accomplish the proper result.
Here follows a basic gold panning procedure to start off with which works well and is easy to learn:
STEP 1: Once you have located some gravel that you want to sample, place it in your gold pan-filling it about 3/4 of the way to the top. After you have been at it awhile, you can fill your pan to the top without losing any gold. While placing material in your pan, pick out the larger-sized rocks, so that you can get more of the smaller material and gold into the pan.
STEP 2: Choose a spot to do your panning. It is best to pick a location where the water is at least six inches deep and preferably flowing just enough to sweep away any silty water that may be washed from your pan. This way, you can see what you are doing better. You do not want the water moving so swiftly that it will upset your panning actions. A mild current will do, if available.
It is always best to find a spot where there’s a rock or log or stream-bank or something that you can sit down upon while panning. You can pan effectively while squatting, kneeling or bending over, but it does get tiresome. If you are planning to process more than just one or two pans, sitting down will make the activity much more pleasant.
STEP 3: Carry the pan over to your determined spot and submerge it underwater.
STEP 4: Use your fingers to knead the contents of the pan to break it up fully and cause all of the material to become saturated with water. This is the time to work apart all the clay, dirt, roots, moss and such with your fingers to ensure that all the materials are fully broken up and in a liquid state of suspension whithin the pan.
The pan should be underwater while doing this. Mud and silt will float up and out. Do not concern yourself about losing any gold when this happens. Remember: gold is heavy and will sink deeper in your pan while these lighter materials are floating out and away.
STEP 5: After the entire contents of the pan have been thoroughly broken up, take the pan in your hands (with cheater riffles on the far side of the pan) and shake it, using a vigorous left and right motion just under the surface of the water. This action will help to break up the contents of the pan even more and will also start to work the heavier materials downwards in the pan while the lighter materials will start to surface.
Be careful not to get so vigorous in your left and right shaking that you slosh material out of the pan during this step. Depending upon the consistency of the material that you are working, it may be necessary to alternate doing steps four and five over again a few times to get all of the pan’s contents into a liquid state of suspension. It is this same liquid state of suspension that allows the heavier materials to sink in the pan while the lighter materials emerge to the surface.
STEP 6: As the shaking action causes rocks to rise up to the surface, sweep them out of the pan using your fingers or the side of your hand. Just sweep off the top layer of rocks which have worked their way up to the pan’s surface.
Don’t worry about losing gold while doing this, because the same action which has brought the lighter rocks to the surface will have worked the gold deeper down toward the bottom of the pan.
When picking the larger rocks out of the pan, make sure that they are clean of clay and other particles before you toss them out. Clay sometimes contains pieces of gold and also has a tendency to grab onto the gold in your pan.
Note: Working the raw material through a classification screen into the gold pan during Step 1 or Step 3 will eliminate the need to sweep out larger rocks in Step 6. This will also allow you to pan a larger sample of the finer-sized material(which contains all the gold you will find in a pan sample).
STEP 7: Continue to do steps five and six, shaking the pan and sweeping out the rocks and pebbles(if present), until most of the medium-sized material is out of your pan.
STEP 8: Tilt the forward edge of your pan downward slightly to bring the forward-bottom edge of the pan to a lower position. With the pan tilted forward, shake it back and forth using the same left and right motion. Be careful not to tilt the pan forward so much that any material is spilled over the forward-edge while shaking.
This tilted shaking action causes the gold to start working its way down to the pan’s forward-bottom edge, and continues to work the lighter materials to the surface where they will be more easily swept off.
STEP 9: Carefully, by using a forward and backward movement, or a slight circular motion just below the surface of the water, allow the water to sweep the top layer of worthless, lighter materials out of the pan. Only allow the water to sweep out a little at a time, while watching closely for the heavier materials to be uncovered as the lighter materials are swept out. It takes some judgment in this step to determine just how much material to sweep off before having to shake again so that no gold is lost. It will just take a little practice in panning gold before you will begin to see the difference between the lighter materials and the heavier materials in your pan. You will develop a feel for knowing how much material can be safely swept out before re-shaking is necessary. When you are first starting, it is best to re-shake as often as you feel that it is needed to prevent losing any gold. When in doubt, shake! There are a few factors which can be pointed out to help you with this. Heavier materials are usually
darker in color than the lighter materials. You will notice while shaking the pan that it is the lighter-colored materials that are vibrating on the surface. You will also notice that as the lighter materials are swept out of the pan, the darker-colored materials are uncovered.
Materials tend to get darker (and heavier) as you work your way down toward the bottom of the pan, where the darkest and heaviest materials will be found, they being the purple and black sands, which are usually minerals of the iron family. The exception to this is gold, which is heaviest of all. Gold usually is of a bright and shiny metallic color and shows out well in contrast to the other heavier materials at the bottom of the gold pan.
One other factor to keep in mind is that the lighter materials sweep out of your pan more easily than do the heavier materials. As the heavier materials are uncovered, they are increasingly more resistant to being swept out of the pan, and will give you an indication of when it is time to re-shake.
As you work your way down through your pan, sometimes gold particles will show themselves as you get down to the heavier materials. When you see gold, you know it is time to re-shake your pan.
There is another popular method of sweeping the lighter materials out of the top of your pan which you might prefer to use. It is done by dipping your pan under the water and lifting it up, while allowing the water to run off the forward edge of the pan, taking the top layer of material along with it.
STEP 10: Once the top layer of lighter material is washed out of your pan, re-shake to bring more lighter materials to the top. By “lighter materials,” I mean in comparison to the other materials. If you continue to shake the lighter materials to the top and sweep them off, eventually you will be left with the heaviest material of all, which is the gold. It does not take much shaking to bring a new layer of lighter material to the surface. Maybe 5 or 6 seconds of shaking will do it, maybe less. It all depends upon the consistency of the material and how much gold is present.
Continue to pluck out the larger-sized rocks and pebbles as they show themselves during the process.
STEP 11: Every few cycles of sweeping and re-shaking, tilt your pan back to the level position and re-shake. This keeps any gold from being allowed to work its way up the forward-edge of your pan.
STEP 12:Continue the above steps of sweeping and re-shaking until you are down to the heaviest materials in your pan. These usually consist of old pieces of lead and other metal, coins, BB’s, old bullets, buckshot, nails, garnets, small purple and black iron rocks, and the heavy black sand concentrates. Black sands consist mainly or in part of the following: magnetite (magnetic black sands), hematite (non-magnetic black sands), titanium, zircon, rhodolite, monazite, tungsten materials, and sometimes pyrites (fool’s gold), plus any other items which might be present in that location which have a high specific gravity-like gold and platinum.
Once down to the heaviest black sands in your pan, you can get a quick look at the concentrates to see how much gold is present by allowing about a half-cup of water into the pan, tilting the pan forward as before, and shaking from left to right to place the concentrates in the forward-bottom section of your pan. Then, level the pan off and swirl the water around in slow circles. This action will gradually uncover the concentrates, and you can get a look at any gold that is present. The amount of gold in your pan will give you an idea how rich the raw material is that you are sampling.
A magnet can be used to help remove the magnetic black sands from the gold pan. Take care when doing this. While gold is not magnetic, sometimes particles of gold will become trapped in the magnetic net of iron particles which clump together and attach to the magnet. I prefer to drop the magnetic sands into a second plastic gold pan, swish them around, and then pick them up once again with the magnet. Depending upon how much gold this leaves behind, I might do this several times before finally discarding the magnetic sands.
Many beginners like to stop panning at this point and pick out all the pieces of gold (colors) with tweezers. This is one way of recovering the gold from your pan, but it is a pretty slow method.
Most prospectors who have been at it for awhile will pan down through the black sands as far as they feel that they can go without losing any gold. Then they check the pan for any colors by swirling it, and pick out any of the larger-sized flakes and nuggets to place them in a gold sample bottle. Then the remaining concentrates are poured into a small coffee can or bucket and allowed to accumulate there until the end of the day, or week, or whenever enough concentrates have been collected to make it worthwhile further process them. This is really the better method if you are interested in recovering more gold, because it allows you to get on with the job of panning and sampling without getting deeply involved with a pair of tweezers. Otherwise, you can end up spending 25% of your time panning and up to 75% of your time picking out small colors from the pan!
Panning Down All The Way To Gold
It is possible to pan all the way down to the gold-with no black sands, lead or other foreign materials remaining in the pan. This is often done among prospectors when cleaning up a set of concentrates which have been taken from the recovery system of a larger piece of equipment-like a sluice box or suction dredge.
Panning all the way down to gold is really not very difficult once you get the hang of it. It is just a matter of a little practice and being a bit more careful. When doing so, most prospectors prefer to use the smooth surface of the gold pan, rather than using the cheater riffles. The key is to run the concentrates through several sizes of classification screens and pan each size-fraction separately. Use of a smaller-sized pan (“finishing pan”) makes this process go easier.
When panning a set of concentrates all the way down to the gold-or nearly so, it is good to have a medium-sized funnel and a large-mouthed gold sample bottle on hand. This way, once you have finished panning, it is just a matter of pouring the gold from your pan into the sample bottle through the funnel. Pill bottles and baby food jars can make good gold sample bottles for field use, because they are usually made of thick glass and have wide mouth. Plastic bottles are even safer.
Another method is with the use of a gold snifter bottle. This is a small hand-sized flexible bottle with a small sucking tube attached to it. Squeezing the snifter bottle creates a vacuum inside. Submerged gold from the pan can consequently be sucked up through the tube.
If you do not have a snifter bottle or funnel, try wetting your finger with saliva and fingering the gold into a container, which should be filled with water. The saliva will cause the gold and concentrates to stick to your finger until it touches the water in the container. This works, but the funnel method is faster.
Practice Gold Panning
If you are not in a known gold-producing location, but want to do some practice panning to acquire some skills before going out into the field, you can practice in your own backyard. Use a washtub to pan into and some diggings from your garden (or wherever) to simulate streambed materials. I recommend that you throw in some rocks and gravel along with the dirt so that it takes on an actual streambed consistency. Take some pieces of lead, buckshot or small lead fishing weights, cut them up into various sizes ranging from pellet-size down to pinhead-size, and pound some of them flat with a hammer. This puts the pieces of lead in the same form as the majority of gold found in a streambed-flake form. They will act in much the same way as will flakes and grains of gold. Leave a few of the pieces of lead shot so that gold nuggets can also be simulated.
When panning into the tub, place some of these pieces of lead into your pan, starting off with the larger-sized pieces first. Keep track of how many pieces of lead you use each time so that you can see how well you are doing when you get down to the bottom of the pan. Practice panning in this manner can be very revealing to a beginner, especially when he or she continues to put smaller pieces of lead into the pan as progress is made.
If you can pan small pieces of lead successfully, then you will not have much difficulty panning gold (higher specific gravity) out of a riverbed. And, who knows? You may end up with gold in your pan-right out of your own backyard! It wouldn’t be the first time.
Bags of real panning material are also available from different sources within the industry. These bags usually contain some real gold along with the type of materials you would commonly encounter when panning out in the field. Practice panning with the “real thing” is the best way to get started!
Here is where you can buy a sample of natural gold.
A “sluice box” is a trough-like gold recovering device which has a series of obstructions or baffles, called “riffles”, along its bottom edge. While a steady stream of water is directed to pass through, streambed material is shoveled into the upper-end of the box. The flow of water washes the streambed materials through the sluice and over the riffles, which trap the gold out of the material.
The reason a sluice box works is that gold is extremely heavy and will work its way quickly down to the bottom of the materials being washed through the box. The gold then drops behind the riffles and remains there, because there is not enough water force behind the riffles to sweep the gold out into the main force of water again.
A sluicing operation, when set up properly, can process the gold out of streambed material about as fast as it can be shoveled into the box. This can be many times more material than a panning operation can handle, yet with similar efficiency in gold recovery. How much material can be shoveled into a sluice box greatly depends upon the consistency and hardness of the material within the streambed itself, and how easily it can be broken away.
A sluice requires a steady flow of water through the box to operate at its best efficiency. Most often, the box is placed in a stream or creek where water is moving rather swiftly, with the sluice being placed in such a way that a stream of water is directed through the box.
In locations where water is available, but is not moving fast enough to be channeled through the box for sluicing purposes, the water can be pumped or siphoned to the box with excellent results (covered later). How much water is available, and whether or not it will need to be transported to your sluice box, is something that needs to be considered during the planning stages of a sluicing operation.
Because so much more material can be processed with a sluice, than with a gold pan, streambed materials which contain far less gold values can be mined while recovering just as much or more gold. Therefore, if the streambed material had to pay a certain amount in gold values in to be worked with a gold pan to your satisfaction, gravel containing only a fraction of as many values can be worked with the same result using a sluice box. This is an important factor to grasp; because it means the modern sluice box opens up a tremendous amount of ground that can be profitably mined by an individual.
Motorized sluicing (also often called “high-banking”) is an activity similar to sluicing, except that sluicing is almost always accomplished with the water-flow from the creek or river keeping gravel moving through and over the riffles. As demonstrated in the following video sequence, a motorized sluice (also called a “hydraulic concentrator”) is usually set up with a water pump that supplies water for the sluice box:
Motorized sluices are usually equipped with a recovery system that is set up with adjustable-length legs. This allows the box to be adjusted from side to side and front to back on uneven ground. This allows the water flow to be created for optimum gold recovery. Most motorized sluices available on today’s market also include a screening device over the top of the feed-section of the sluice box. Screening the larger-sized rocks out of material to be sluiced is one of the primary methods for improving fine (small) gold recovery. Any time you can screen larger rocks out, you can slow the water down through the sluice, which will allow even smaller particles of gold to become trapped inside the riffles.
In normal sluicing, the operators must find a location alongside of a creek or river where the water is flowing just right, at the proper depth, to set up the sluice so the proper amount of water can be directed through. Once the sluice is set up, gold-bearing material must be carried to the sluice, screened separately, and carefully fed through the sluice box.
With a motorized sluice, all you need is a supply of water within several hundred feet of where you want to dig. The screen and sluice assembly can be set up directly at the work site so that pay-dirt can be shoveled directly onto the screening section. The pump/engine assembly will pump water from the water source, through a pressure hose, to the sluice.
Another advantage to the motorized sluice is that in some areas today, it is not legal to wash silt directly from the bank into an active waterway. With a motorized sluice set up some distance from the stream or river, you have an opportunity to utilize natural contours up on the land to slow the water down enough to allow the sediments to settle before (if ever) the water re-enters the creek or river.
In many places, there is more gold up on the banks than you will find in the river. This can sometimes be true on the Klamath River in northern California. Actually, it is not only that there is more gold on the banks than in the river. The gold on the banks can sometimes just be easier to get at for a small operation.
What happened along the Klamath River, and in many other areas, is not difficult to understand. The old-timers started mining down in the creek or river, and moved uphill, allowing gravity to carry the water and tailings back down towards the creek or river. As the old-timers worked further up into the banks, often the gravel became deeper and more difficult to remove by conventional hand methods. In time, the old-timers developed hydraulic mining. This is where they directed large volumes of water from nearby (or sometimes distant) creeks under great pressure through monitors (huge pressure nozzles). The high-pressure water was used to wash large volumes of gravel through large sluice boxes placed on the banks of the creeks and rivers. As the sluicing operations cut further up into the banks, the sluice boxes were moved forward, which left tailings deposited on the banks.
It is estimated that as much as 50-percent of the gold washed right through the sluice boxes in hydraulic operations because of the large volume and velocity of water which such operations used. Hydraulic operations did not lose gold in the same amounts all of the time. Much of the gravel that these operations processed contained little or no gold. The concentrations of gold were found along bedrock or at the bottom of lower strata flood layers. So, valueless top-gravels were processed at volume speed, and they would try to slow down when getting into pay-dirt materials. Sometimes, however, they would cut into pay-dirt materials at volume speed–before having a chance to slow down. This is where large volumes of gold would wash directly into the tailing piles.
Since the time of large-scale hydraulic mining, there have been several occasions of extreme high water. The 1964 flood in the western United States is one example. Floods of such magnitude, all throughout gold country, re-deposited old hydraulic tailings piles into newly-formed streambeds up on the banks and within the active waterways. Places where gold was lost from hydraulic operations formed into new pay-streaks–often only inches or a few feet from the surface. This is true all up and down the banks of the Klamath River–and probably many other rivers as well–which has created a wonderful and exciting opportunity for modern small-scale gold miners.
Contrary to popular belief, many pay-streaks today are not found down along the bedrock. In fact, many of the pay-streaks surface miners are finding along the Klamath River are situated in a flood layer (1964 flood) within two feet of the surface. This flood layer is often resting directly on top of undisturbed hydraulic tailings.
We are also finding similar pay-streak deposits inside the active river with the use of suction dredges.
Finding pay-streaks with a surface digging project is usually done by setting up the sluice in several different locations, and giving each sample a large enough test hole to obtain an idea of how much gold the gravel is carrying. Sample holes should be taken to bedrock if possible. However, if the gravel goes deep, you have to avoid getting in too far “over your head.” At the point where you start digging deeper than 3 or 4 feet with a pick and shovel, any pay-streak is going to have to be exceptionally rich to make the effort worthwhile. Richer deposits are more scarce; and therefore more difficult to find. So it is important to stay within effective digging/sampling range, and not get yourself into a full-scale production operation before you have found a high-grade gold deposit.
Sometimes you can learn valuable information before you start sampling. If other miners in the immediate area are finding gold deposits along a specific flood layer, you should be sampling for gold along the same flood layer while digging around in the nearby vicinity. Gathering information such as this is one of the many benefits of belonging to an active mining club or association. Active mining organizations will include others who are actively pursuing the same type of mining activity that you are engaged in.
While sampling with a pick and shovel, it is very seldom that you will actually see gold in the gravel as it is being uncovered. Usually, you do
not see the gold until it is time to clean-upthe sluice box after the sample is complete.
If you finish a sample hole and end up with a good showing of gold, the next step is to find out exactly where the gold came from. In other words, did it come off the bedrock, or did it come from a particular layer in the streambed? You must know where the gold is coming from to evaluate the value of the pay-streak. For example, digging two feet into a paying flood layer requires much less time and effort than digging four feet and having to clean rough bedrock. If you do not know for certain where the gold is coming from, and you assume it is coming from the bedrock underneath four feet of hard-packed streambed, you might decide it is not rich enough to work and walk away from a very rich deposit located at the two-foot flood layer
At the same time, if you are able to reach bedrock, you always want to get a good sample there by thoroughly cleaning the surface and any irregularities there. Sometimes that is where the richest deposits are found.
Pinpointing the source of gold is reasonably easy once the sample hole has been opened up. It is likely that the gold will be concentrated either along the bedrock, along the bottom of a flood layer, or at both locations. Sometimes, there is more than one flood layer that carries gold. You can run small production samples of each stratum separately to see which is paying. Or, sometimes you can simply take pan-samples in the different contact zones between the layers
Some pick & shovel miners are using metal detectors in their prospecting activities. Some of the new gold metal detectors will sound out on pieces of gold as small as the head of a pin! But in gravel deposits, metal detectors can also be used quite well to locate the concentrations of magnetic black sand. Black sand tends to concentrate in pay-streaks, just like gold. Therefore, locations sounding out heavy concentrations of magnetic sand on metal detectors are excellent places to follow up with pick & shovel sampling.
One question commonly asked about sluicing procedure is the proper slope-setting for a sluice box. A sluice box generally requires about an inch drop per each linear foot of sluice. This is just a guideline. Basically, you need enough water velocity to keep the material active in the sluice behind the riffles, but not so much that you are washing most of the material out from behind the riffles. I like to get enough water flow to keep the larger material moving through and out of the box. If I see lots of rocks building up in the sluice, I know I do not have enough water velocity. An occasional rock needing to be helped along is alright in a sluice (although maybe not a dredge sluice!). In surface sluicing (non-dredging), I would rather toss out an occasional rock and have the peace of mind that I am also achieving maximum possible fine gold recovery.
A common practice in sluicing is to also to set up a second sluice behind the primary sluice. The plastic Le’Trap sluice works exceptionally well for this because it recovers fine gold so well, and for its ease in cleanup. The idea is to have a safety check on your primary recovery system to make sure it is working properly.
And if all else fails, you can always do some pan-testing in your tailings to see if your sluice might be losing any gold.
One mistake that beginners often make is in thinking that the recovery system is at fault because they are not recovering very much gold. Most often, however, it is not the recovery system. It is the lack of a good-paying pay-streak! The answer to this is to hustle around with more sampling. Ask around to see what and where it is working well for others in the area. Use their operations as a model.
Flood layer pay-streaks are often easier than bedrock pay-streaks to clean up with pick & shovel surface mining operations. There are several reasons for this. One is that a flood layer pay-streak is closer to the surface. This means less gravel to shovel to reach the gold. Another reason is that it takes more effort to clean the gold off of a bedrock surface when you are not using a dredge. You can only do so much with a shovel. After that, you must resort to a whisk broom and/or a motorized vacuum cleaner. This is why portable dry land dredges are also becoming so popular. They give you the ability to clean bedrock surfaces and cracks with minimum effort. If the gold is coming off bedrock, you must invest the extra effort to clean it off well. Otherwise, you stand the chance of leaving an important portion of the gold behind as you mine forward on the pay-streak.
Many pick & shovel miners today also are equipped with an optional suction attachment. To use it, the pressure hose from the water pump is attached to a suction nozzle that directs the water and material through a suction hose into the sluice. So after an initial hole is dug up out of the water, the hole can be filled with water and material can be sucked into the sluice box. The recovery system can be positioned so that the water discharge can run back into the hole– keeping the hole from running out of water.
So you can dig a hole up on the land, and then begin a suction mining operation outside of the active waterway. This is great!
In California, dredging permits are only required when dredges are operated inside of the active waterway. Therefore, my personal understanding is that suction miners up on the land are not required to have a dredging permit as long as they are not dredging inside the active waterway.
Some surface miners also sample for the gold-path up on the bank by pan sampling the moss. Sometimes, how well the moss is producing gold at the surface can also be an indication of how well the gravel is paying underneath.
When moss, roots, clay and other types of materials are producing good quantities of gold, it is always a good idea to break up the material as much as you can before running it through a sluice box. This is usually done by pulling it apart over the top of a classification screen, or breaking it up inside a bucket of water before running it through the sluice. This slows down production, so the additional work must be rewarded by the recovery of more gold.
Once you find a pay-streak in pick & shovel mining, you want to give some thought to how you are going to develop the deposit with a minimum of wasted effort. For example, you will have to pile the cobbles (rocks too large to pass through your recovery system) and tailings somewhere. Preferably, cobbles and tailings would not be placed upon some other section of the pay-streak. Otherwise they might need to be moved twice, or you might be forced to leave behind high-grade areas that have been further buried. So it is worth some extra sampling to get an idea of the pay-streak’s boundaries. Then you can deposit the tailings material in a location where you will not need to move them again.
Placing tailings is, and always has been, one of the most important aspects of a mining operation–of any size. Yet, it is one of the most neglected aspects of mining by a substantial portion of small-scale miners. In fact, we have a standing principle, true as it may be, along the Klamath River: “Dowsing works: just look where a successful pick & shovel miner or dredger has been throwing his or her cobbles. It is almost guaranteed there will be excellent gold underneath!”
This usually comes back to a simple case of gold fever. The miner starts getting a good showing of gold, gets excited, and never slows down to define the boundaries of the deposit. This almost guarantees an important portion of the deposit will end up underneath cobbles.
Pay-streaks up out of the water are often different from those found in the river or creek. What I mean by this is that they do not always follow the same gold path. When you find a pay-streak in the river, you can usually line it up with the next river bend and make a pretty fair guess where the next several pay-streaks are likely to be. This is because river pay-streaks usually form from gold that has washed down the river along its own gold path during major flood storms.
Pay-streaks outside of the river often were formed from gold out of tailings from old hydraulic mining operations. So you can find a small pay-streak up on the bank, follow it until it plays out, and then not find any sign of it further upstream. This is because the source of the gold deposit was not from a point further up river. Then you can find another pay-streak on another path altogether. In other words, pay-streaks up on the bank might not follow a specific single gold path, as they usually do in the river.
Pick & shovel mining is a lot of fun – when you are finding gold. A healthy portion of our miners along the Klamath River mine out of the water. The reason for this is that it gives them an opportunity to find pay-streaks without having to commit to an underwater dredging operation.
We manage Group Mining Projects just about every other weekend during the spring, summer and fall months in Happy Camp You can find this year’s schedule HERE. You have my personal invitation to come out and get some firsthand experience. We always send participants home with a sample of gold that they help recover–that is, those who go back home. Many join up with us. Watch out–the biggest challenge in gold mining is not in finding the gold; it is getting over the “fever” after you have found it!
Here is where you can buy a sample of natural gold.



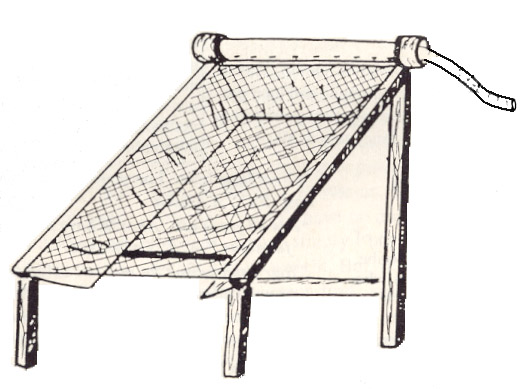 When larger rocks are pushed through a sluice box by water force, they also create greater turbulence behind the riffles as they pass over, which may cause an additional loss of fine gold.
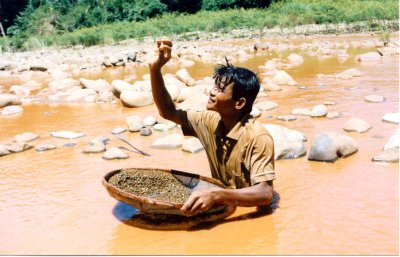 Author’s note: This story is dedicated to Alan Norton (Alley), the lead underwater mining specialist who participated in this project. Under very difficult conditions, Alan made most of the key dives which enabled us to make this a very successful venture. Alan lost part of his ear to a hungry fish one day; and the following day, Alan was making a key sampling dive again because we needed him to. There are very few people I know, if any, with more courage, dedication and
 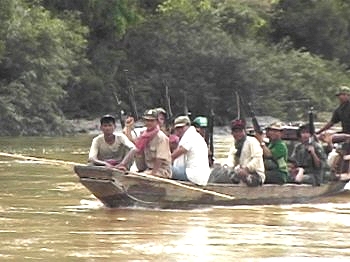 Once the perimeter was secured, three generals stepped out of their Land Cruisers and enthusiastically approached us, their personal bodyguards close behind. The generals looked friendly. Their bodyguards looked seriously unfriendly! The generals, whom we had not met until now, hurried right up to me and each of my men and gave us big hugs, hand shakes and slaps on the back, like we were long lost sons. The bodyguards stood there with machine guns pointed in our general direction, doing what they were supposed to do to ward off any potential menacing threat to their leaders–which, by the way, never crossed our minds. We did the natural thing; we acted like long lost sons!
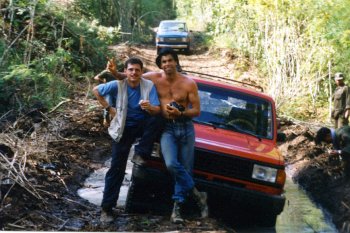 The area is remote. In fact, it is the same area America bombed in the early 1970’s (with B-52’s) to prevent the Viet Cong from moving supplies on that portion of the Ho Chi Minh Trail. You just would not believe the number of bomb craters; I have never seen anything like it. In fact, up until the time of our project, I don’t believe a single bulldozer had visited that section of Cambodia since we bombed it! While these conditions probably never did slow down the Viet Cong very much, they certainly did slow us Americans down
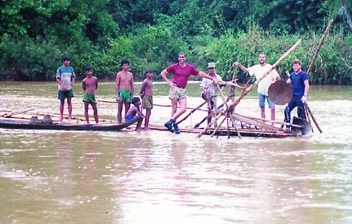
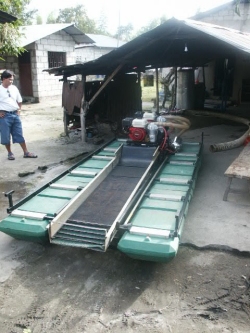
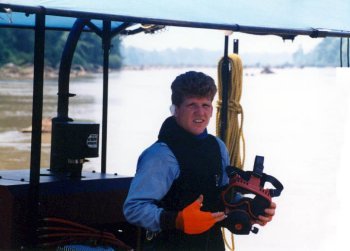 Back at camp, we bandaged Alley up as best we could. We always bring a substantial medical kit with us on these projects. We applied antibiotics just to be safe. Alley said the pain was not too bad. He was mostly worried about how ugly it was all going to look later. I would have been worried about that, too! There wasn’t anything else we were going to do about that situation out in the jungle, though. So we decided to set aside that problem for another time. We were going to depart Cambodia in a few days, anyway.
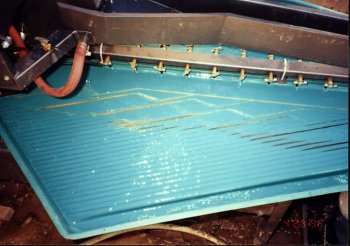 We had just enough time before dark to run our concentrates over the shaker table back at camp. Everyone there experienced an incredible feeling of pride. Under very difficult circumstances, against all odds, we stuck it out right until the last hour to make this project a success. Watching all that rich gold flow across the shaker table had all of us in awe about how rich this river is. Who would have ever guessed? Right there on the Ho Chi Minh trail! While I am sorry to have missed capturing the gold-laden recovery system on the dredge, I was able to recover myself enough to capture the following video segment of the final clean-up. To put it in perspective, our small sample caused that shaker table to flow gold like that for a full 15 minutes!
 A short time later, our clients met with some serious misfortune by aligning themselves with the losing side in a power struggle over who would control the government in Cambodia. While they survived the events, they have been banned from the country forever.
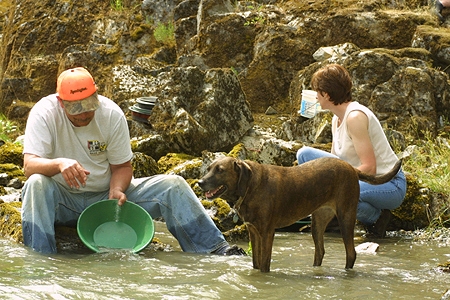
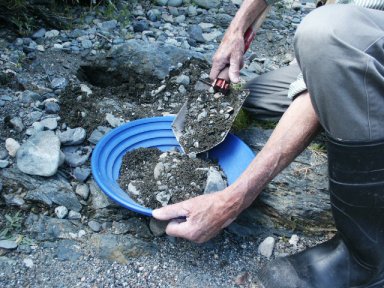
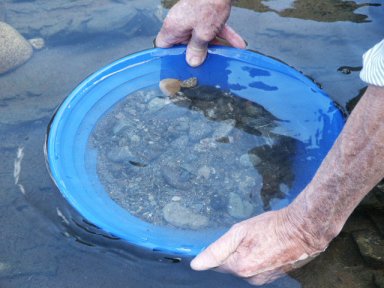
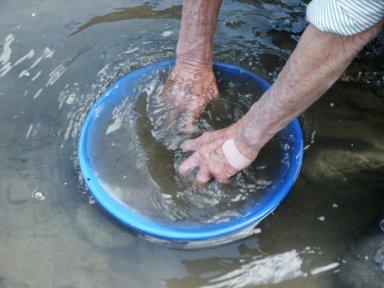
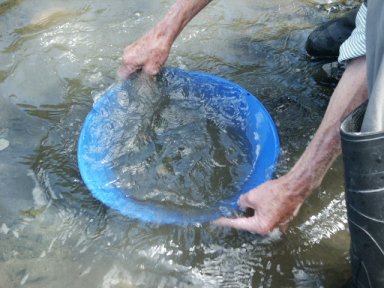
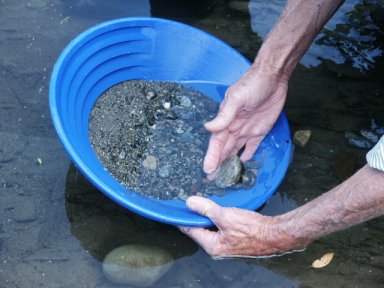
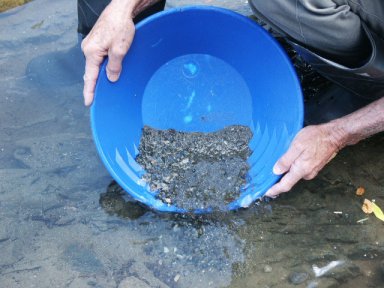
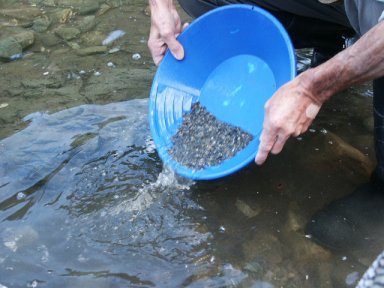
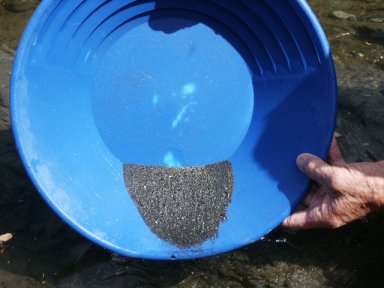
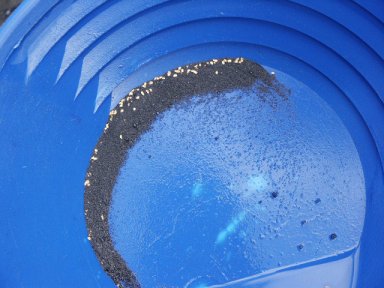
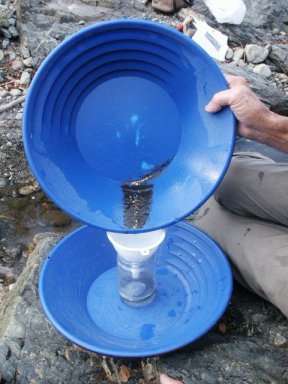
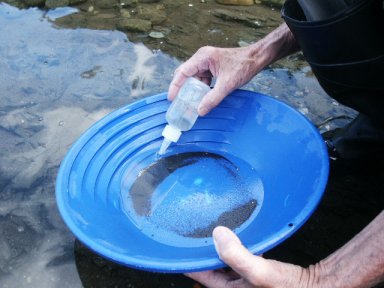
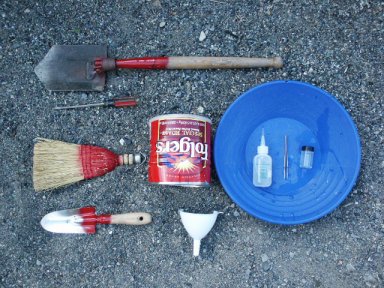
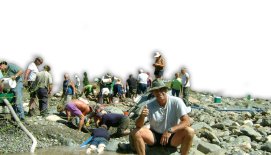
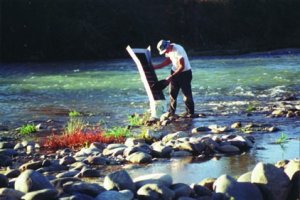 A “sluice box” is a trough-like gold recovering device which has a series of obstructions or baffles, called “riffles”, along its bottom edge. While a steady stream of water is directed to pass through, streambed material is shoveled into the upper-end of the box. The flow of water washes the streambed materials through the sluice and over the riffles, which trap the gold out of the material.
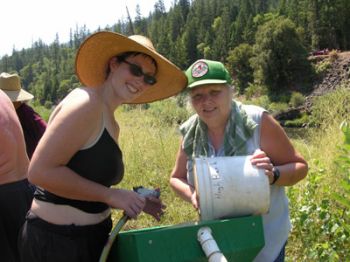 Motorized sluices are usually equipped with a recovery system that is set up with adjustable-length legs. This allows the box to be adjusted from side to side and front to back on uneven ground. This allows the water flow to be created for optimum gold recovery. Most motorized sluices available on today’s market also include a
 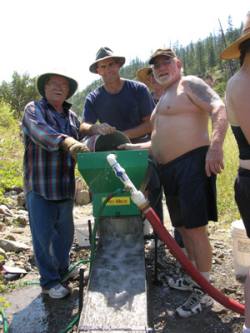 Another advantage to the motorized sluice is that in some areas today, it is not legal to wash silt directly from the bank into an active waterway. With a motorized sluice set up some distance from the stream or river, you have an opportunity to utilize natural contours up on the land to slow the water down enough to allow the sediments to settle before (if ever) the water re-enters the creek or river.
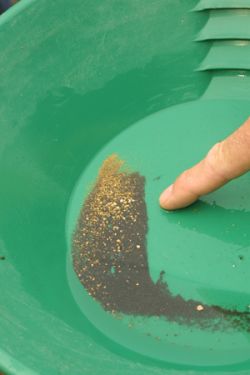 It is estimated that as much as 50-percent of the gold washed right through the sluice boxes in hydraulic operations because of the large volume and velocity of water which such operations used. Hydraulic operations did not lose gold in the same amounts all of the time. Much of the gravel that these operations processed contained little or no gold. The concentrations of gold were found along bedrock or at the bottom of
 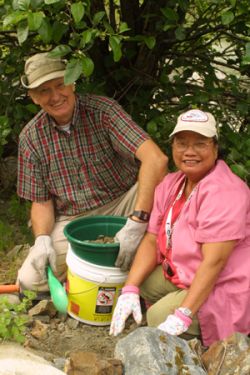 Finding pay-streaks with a surface digging project is usually done by setting up the sluice in several different locations, and giving each sample a large enough test hole to obtain an idea of how much gold the gravel is carrying. Sample holes should be taken to bedrock if possible. However, if the gravel goes deep, you have to avoid getting in too far “over your head.” At the point where you start digging deeper than 3 or 4 feet with a pick and shovel, any pay-streak is going to have to be exceptionally rich to make the effort worthwhile. Richer deposits are more scarce; and therefore more difficult to find. So it is important to stay within effective digging/sampling range, and not get yourself into a full-scale production operation before you have found a high-grade gold deposit.
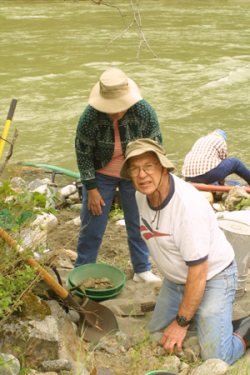 One mistake that beginners often make is in thinking that the recovery system is at fault because they are not recovering very much gold. Most often, however, it is not the recovery system. It is the lack of a good-paying pay-streak! The answer to this is to hustle around with more sampling. Ask around to see what and where it is working well for others in the area. Use their operations as a model.