By George Mullen


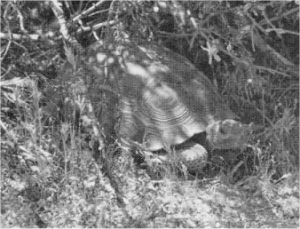
Desert tortoiseMost traditional methods for recovering gold from gravels require an ample supply of water. However, an old prospector’s adage has it that gold is where you find it. In the southwest, the “where” is all too frequently situated miles from even a trickle of water. Dry-washing of gold-bearing soil or gravel provides an effective solution to this dilemma.

Click here for a more thorough explanation of dry-washing techniques.

The Spaniards used a scheme similar to the winnowing of wheat from chaff and straw. Two men would grab the comers of a blanket, upon which a small quantity of classified gold-bearing material had been placed, and they repeatedly would toss it upward into the air. The wind would blow away the lighter fraction, and any gold and black sands, which are heavier, would fall back onto the blanket. Wool blankets worked best, because the static electrical charge generated by the wool tended to attract fine-sized gold on the blanket’s surface.

The modem prospector uses an efficient tool called a dry-washer to extract the ever-elusive gold particles from screened gravels or other material. Dry-washers can range in size and complexity from hand-shovel-fed models, to large machines serviced by wheeled or tracked front-end loaders.

All dry-washing machines require a low-pressure, high-volume source of air. At the low-cost end, this can be provided by a bellows which is linked to a hand-operated crank or motor-driven fly wheel. At the higher-cost end, the air source is typically provided by a gasoline engine-driven blower. The remaining components of a dry-washer combine to construct a sloped classification screen (or “grizzly”), which routes fine-sized material to a pneumatic sluice box, where a mechanically-modulated flow of air accomplishes the separation of gold from the lighter-weight material which contains no value.

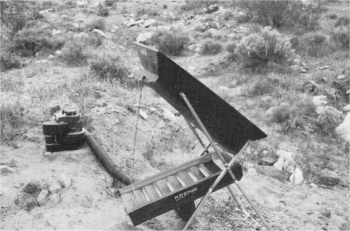
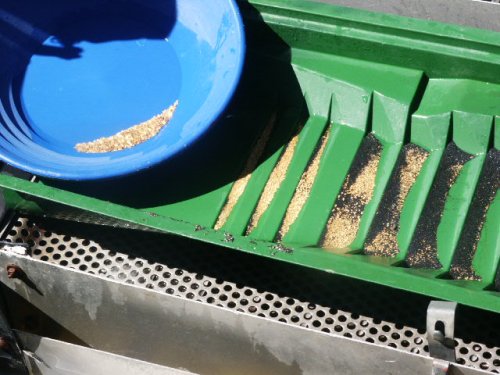
Dry-washing for goldA dry-washer for small-scale prospecting might consist of a rectangular screen with 1/2 inch openings over a sloped trough. The screened material would pass from the lower-end of the trough to the head-end of a sloped riffle tray consisting of cotton fabric stretched over an inner frame. The tray includes sides to contain the flowing material, and its surface is interrupted by five crosswise riffles. Under the tray is a hollow box and the mechanism which modulates air flow through the tray at a rate of about 200 puffs per minute. The rate of air flow is designed to be sufficient to lift lighter material over the riffles, while the gold remains trapped. When everything is working right, the flow of material through the riffle tray resembles water flowing through a conventional sluice box.

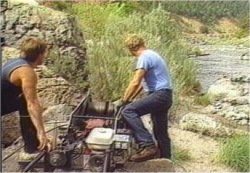
My dry-washer was built from a plan published by Carl Fischer. It is mostly constructed of wood and is extremely portable. A small gasoline engine drives the air box via a belt and pulley speed reducer, producing the required 200 puffs of air per minute. The end result is an efficient separator which saves even the finest particles of gold. I have checked the tailings on numerous occasions and have yet to find any significant amount gold in them.

Prospecting for gold in the desert uses techniques similar to those that are used to locate placer gold on flowing streams or within old stream channels. You want to sample dry-washes on pediments to mountains, feeder-canyons in the mountains and ancient streambeds.

Another old prospector’s adage suggests that one should look for gold where it has been found before. This is still sound advice!

Very fine gold is abundant at many sites in the northwest, and the usual methods of final gold recovery do not always work very well. I have found that the screening and drying of dredge or high-banker concentrates, and then running them through my dry-washer, really works well. I use a metal detector to monitor both the feed and the tailings.

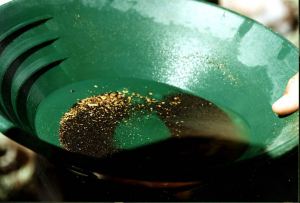
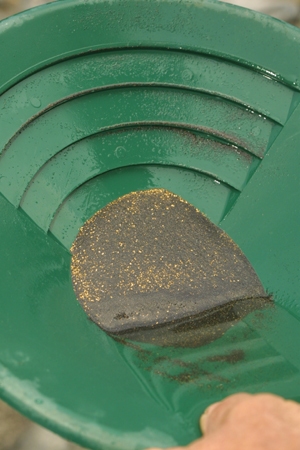
After processing pay-dirt material for about an hour, I suggest it is usually a good idea to clean-up the riffles to check your recovery. I use a plastic gold pan and small wash tub for the final clean-up and have operated all day on just a few gallons of water.

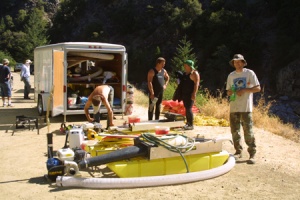
My wife, some friends and I operate suction dredges and high-bankers on the extensive New 49’er properties near Happy Camp, California during the summer months, where there is always an abundance of water. Our dry-washer allows us to remain active during the winter, usually around Quartzsite, Arizona. These gold prospecting and mining activities provide enjoyable activity, along with an extra source of income when we need it.


video subscription graphic

By Dave McCracken

Under many circumstances, it is wise to first verify that a viable deposit exists on a property before a substantial investment is made into production equipment.

Dave Mack


How to outfit a suction dredging project, to a large degree, comes back to how you would answer the following questions:

1) What am I trying to accomplish; (sampling, production, or both)?

2) Where?

3) In what period of time?

4) How much of a budget is available for acquisition of equipment and for operational start-up costs?

A gold (and/or gemstone) mining project basically should to be looked at in two separate steps: First you sample to locate a viable deposit. Then you launch into a production program to recover the gold or other valuable minerals from the deposit. Generally, the idea is to minimize investment into a particular mining property until a viable deposit has been located and verified.

Production-equipment is commonly larger and is more expensive to purchase and move around. The logistical infrastructure to support a production operation is usually more substantial and costly than what would normally be required to just go in somewhere for a short sampling program. . So generally-speaking, a production operation costs more to set up and involves more gear and supplies to move around and put into place. Therefore, under many circumstances, it is wise to first verify that a viable deposit exists on a property before a substantial investment is made into production equipment. The idea behind sampling is to minimize risk.

Prospecting Equipment & Supplies

The following video sequence will provide you with a visual demonstration of this very important point:

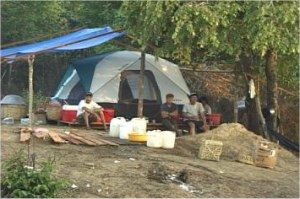
A typical camp to support a preliminary sampling operation usually would involve just the basic necessities.

The answers to “Where?” and “For how long?” also impact upon your decision about what kind of gear to buy. For example, if you are not tied to just one mining property, and you are prepared to launch a sampling program onto different properties until you find what you are looking for, then it would be a good idea to invest in good sampling equipment that is portable enough to move around the properties which are available to you. In this case, the capital expenditure is not tied to a single property, but rather into a portable sampling infrastructure that can be used for an extended period of time in many different places.

While sampling-gear is more portable, the smaller the size of a dredge, the less volume of streambed material it will process (in the same experienced hands), and the less-deep it will effectively excavate a sample into the streambed. Therefore, you trade-off productive effectiveness and the capability to make meaningful, deeper samples as you reduce dredge-size and gain in portability.

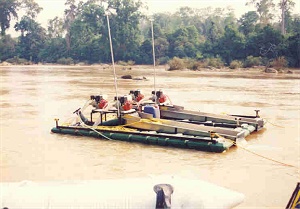
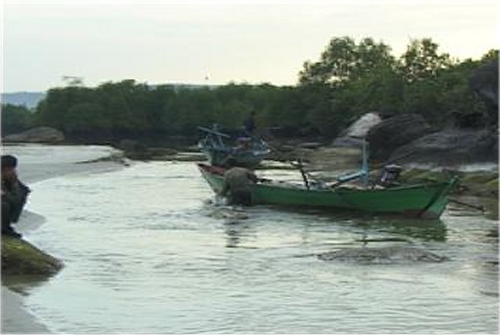
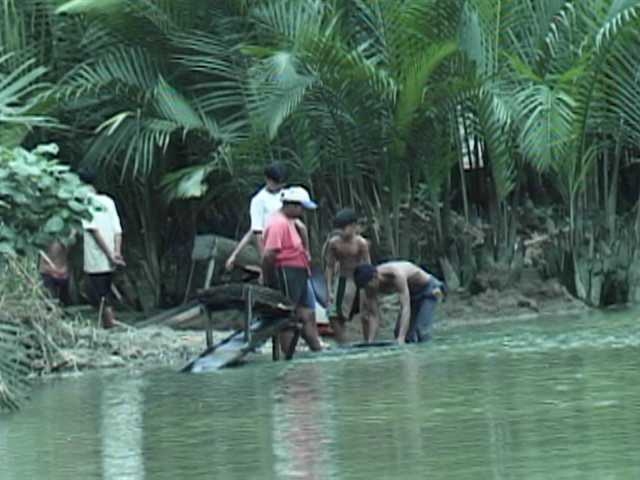
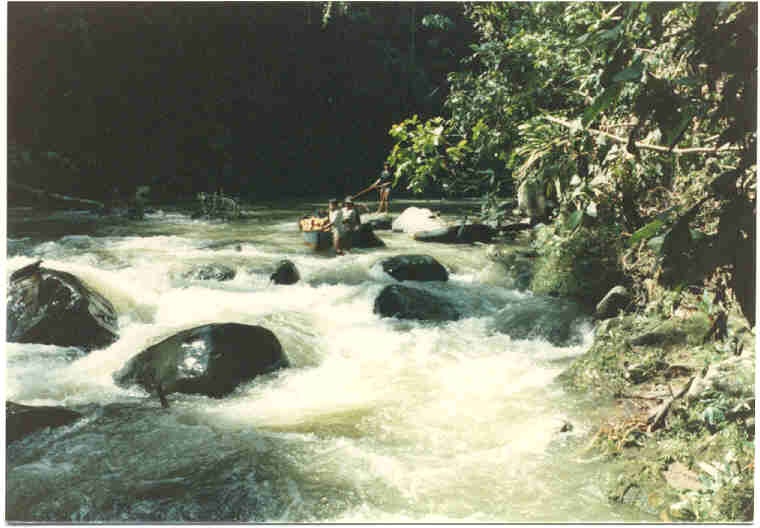
Two Pro-Mack 5-inch dredges were used to find rich deposits on this river in Cambodia, before a 10-inch production dredge was brought on line.

As an example of this, a 4-inch dredge can effectively sample down to around 4-feet deep in hard-packed streambed material). A 5-inch dredge can excavate about twice the volume of a 4-inch dredge down to around 5-feet of material. But the bulk of gear to move around is about twice as much.

A 6-inch dredge can excavate about twice the volume of a 5-inch dredge down to around 6-feet of hard-packed streambed. But the bulk of gear to move around is about twice as much.

An 8-inch dredge can excavate about twice the volume of a 6-inch dredge down to around 8-feet of material. But the bulk of gear to move around is about twice as much.

Here follows a video segment of a typical commercial dredge operating on the Klamath River in Northern California:

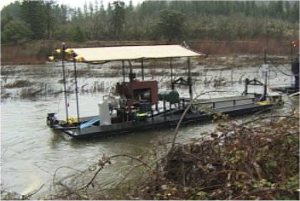
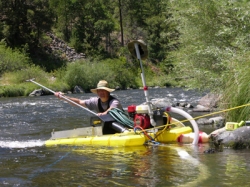
Ten-inch Pro-Mack dredge operating on New 49’er properties in Northern California.

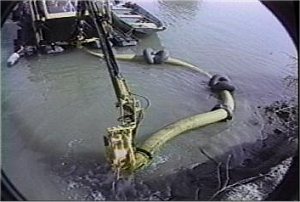
A 10-inch dredge can excavate about twice the volume of an 8-inch dredge down to around 10-feet of material. But the bulk of gear to move around is about twice as much. By now, we are talking about a pretty substantial platform. But it still remains portable enough to place inside of an ocean shipping container, and can be towed around on wheels behind a small truck. For example, watch how this recovery platform for a 10-inch production dredge can be moved around by a normal-sized truck. This particular platform was built to ship overseas inside of an ocean shipping container:

These are just guidelines, because conditions change from one location to the next. It does not mean you cannot dredge deeper into the streambed using smaller-sized dredges. You can! But it generally does mean that the deeper you go beyond these guidelines, the less effectively your time will be invested. This is mostly a matter of over-sized rock management. All rocks that are larger than the intake-size of the dredge’s suction nozzle must be moved out of the way by hand. When dredging in an average hard-packed streambed, at the point where an experienced operator gets down through 5-feet of material using a 5-inch dredge, he has so many rocks to get out of the dredge hole that he is lucky to spend half his dredging-time operating the suction nozzle!

Bigger dredges get more accomplished primarily because they will suck up larger-sized rocks.

Under most circumstances, there are a proportionate greater number of smaller-sized rocks in a hard-packed streambed, than larger-sized rocks. So this is really a discussion about effective time-management. Since a larger dredge will suck up a larger rock, it means the operator will not have to move smaller-sized rocks from the excavation by hand. So he or she will spend his time moving even larger rocks out of his way, of which there are proportionally-fewer. This means he will get more done faster, and be able to dredge deeper into the material, before he reaches the point that there are just too many rocks to move out of the way.

Using a 5-inch dredge will mean having to move many, many more rocks by hand that would more-easily be sucked up the nozzle of a larger dredge.

This important reality cannot be overcome by positive thinking or an abundance of enthusiasm (as important as these are to have). We are talking here about the physical reality of how an excavation is accomplished. The size of the dredge-nozzle determines what size of rock can be sucked up (which is fast and easy), and what must be moved out of the hole by hand (which takes more time and effort).

The following video sequence demonstrates this very important point, and also explains why you must be very careful about projecting the true volume capability of different-sized dredges during feasibility planning:

By the way, when conditions allow for it and you want to increase the productive capacity of your equipment, you can also organize two or three separate teams to take shifts using the same production equipment. As demonstrated in the following video sequence, lights can even be set up to do a night shift:

So when deciding what to acquire for sampling or production equipment, it is necessary to balance the desire to get more productive activity accomplished (bigger dredge), with the necessity to remain portable (not so big that you cannot move it around to find what you are looking for). This must be decided on a case-by-case basis.

Here is my advice: Go as big as you are able to without forfeiting the portability that is required for your particular situation. I suggest these important decisions can only be wisely made after at least a preliminary evaluation of the project-area is completed.

Once you have proven-out your deposit(s) by sampling, you can feel more comfortable investing in production equipment and support-infrastructure to develop the project. In that case, bigger is not always better. Sometimes it is. A lot will depend upon the depth of water and streambed where you will be dredging. For example, a 10-inch dredge might not be as productive as a 6-inch dredge in a shallow-water and shallow-streambed area where a larger dredge cannot be floated around easily.

Another example is where shallow streambed material is made up largely of boulders that must be winched out of the way. In this case, some of your money might be better invested into a good mechanical or hydraulic winch, rather than a larger-sized dredge.

A well-done preliminary sampling program should result in a good production plan, based upon what type of equipment will be required to obtain optimum production under the conditions which exist where the gold deposit is located.

I am not going to discuss sampling, production or recovery systems here, because they have been covered in other articles. But since the type of equipment you should acquire is directly related to these subjects, I suggest it is a good idea to review that material very closely.

Some dredges are made to operate from the surface with the use of an automated cutter-head device at the nozzle. These are generally ineffective in hard-packed streambeds that are mostly made up of oversized rocks.

Some dredges are available with hydraulic-powered cutter-heads to help with the excavation. These are mechanical devices that help feed material evenly into the nozzle. They are most productive in doing channel-work in harbors or making navigation channels deeper or wider. Hard-packed streambeds which are made up mainly of oversized rocks and boulders will usually destroy a cutter-head device in short order.

Here follows the normal steps in the development of a mining program:

1) Preliminary evaluation: This is where you take a hard look at the available information about a potential project. Then you go out and have a direct look at the specific location(s) and surrounding area. You are looking at the potential for commercial gold (and/or gemstone) deposits. You are also looking at what it would take to accomplish a preliminary sampling program, based upon all of the information and observation you can bring together. A preliminary evaluation will often result in a preliminary sampling plan.

2) Sampling Program: Depending upon what the objectives are, sometimes sampling is accomplished in several stages. Generally, the purpose of a sampling program is to locate and verify the existence of a commercial deposit that is valuable enough to justify a production operation. Sampling should work out the recovery method upon which the deposit may be developed efficiently. A sampling program can evolve into feasibility planning to develop a mineral deposit.


3) Production Operation: Is full or partial development of the deposit.

While there can be some overlap, equipment needs are usually different in each phase of a mining program.

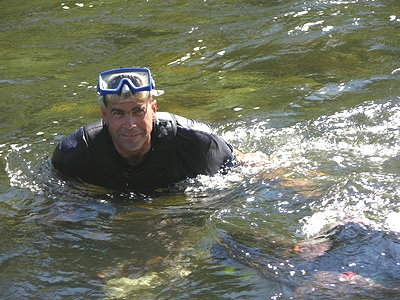
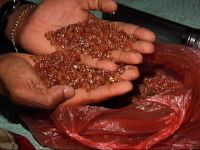
While each project is different, during a preliminary evaluation, I personally always at least bring along a face mask (so I can have a look at the underwater environment where we would sample), a gold pan and classification screen, zip-lock sample bags and marker pen, map, GPS, camera equipment, local money in small denominations (to buy mineral samples from local miners), a dozen bright-colored ball-caps (gifts for local miners), a bottle or two of whiskey (gift for the village chief in non-Muslim communities), and the other basic things I will need to visit that particular environment.

A sampling program will basically require the same things as will be required in a full production operation, but usually on a smaller and more portable scale. Here follows a basic outfitting list:

Dredging Equipment:
Dredge
Boat (and motor?) and ores
Winching gear and rigging?
Pry-bars
Rope (floating)
Fuel containers
Complete set of tools needed to service the gear

Diving Equipment:
Face mask
Air reserve tank and fittings
Air line(s) & regulator(s)
Wet-suit?
Weight belt & weights
Protective foot ware (steel tips?)
Rubber work gloves (bring spares?)

Clean-up Gear:
Wash tubs
Classification screens
5-gallon buckets
Scraping tool and/or hand scoop
Final concentrating equipment?
Gold pans
Steel finishing pans
Magnet
Portable gas stove
Weight scale
Zip-lock sample bags and marker pen

Support Gear:
Vehicle-support?
Shelter
Cooking & eating utensils
Wash tub for kitchen
Cook stove
Toilet facilities?
Portable chairs & table
Medical kit
Waterproof bag(s)
Ear infection preventative
Maps, GPS and camera equipment
Electric generator?
Camp lights
Paper and pens
Communication equipment?
Flashlights & batteries
Knife
Firearm?

Supplies:
Drinking water and/or filters
Food supplies and containers
Fuel & motor-oil for all motors
Dish washing detergent
Chlorine for sanitizing cleaning water
Laundry wash tub and soap
Hand-wash soap
Tissue paper
Cook stove fuel or canisters
Duct tape
Nylon line (plenty)
Plastic trash bags
Zip-lock bags & plastic containers for food

Spare Parts (priority often depends upon how remote the project location is):
Tune-up replacement parts for all motors
Extra water pump seals and bearings
Extra compressor & alternator belts
Rebuild kit for air compressor
Extra air compressor?
Rebuild kits for dive regulators
Extra dive regulators?
Repair kits for diver air lines
Extra diver air lines?
Extra air fittings
Extra water pressure and intake hoses
Extra water hose fittings
Extra rubber hose seals (each size)
Extra foot valve(intake for water pumps)
Extra suction hose?
Extra face mask(s)
Extra starter & alternator & fuel pump for dredge motor?
Spare tire (if dredge has removable wheels)


video subscription graphic
This story first appeared in Gold & Treasure Hunter Magazine Nov/Dec, 1989 on Page 20.
This issue is still available! Click here.

By Dave McCracken

The efficiency with which the over-sized material is moved out of the way has a direct impact upon how much gravel and gold will be directed up the suction nozzle!

Dave Mack


Dredging technique in gold-bearing streambeds mainly is focused upon removing the over-sized rocks (any rock which is too large to be sucked up the suction nozzle) from the work area of the dredge-hole. In most hard-packed streambeds, this removal of the over-sized material is the bulk of the dredger’s work. From a production stand­point, a large portion of this work has to do with freeing and removing the over-sized rocks from the stream­bed in an orderly fashion.

Hard-packed streambeds are laid down in horizontal layers during major flood storms. Generally, the streambed is put together like a puzzle, with different rocks locking other rocks into place. Usually, because of gravity, rocks higher up in the streambed (laid down later) are locking lower rocks (laid down earlier) into their position within the streambed.


Because of this, we have found the best means of production is to dredge the hole down a layer at a time. We call this a “top cut.” If you take down a broad horizontal area of the streambed all at once, you uncover a whole strata of rocks which are interconnected like a puzzle. Then, you can see which rocks must be removed first so that you can free the others more easily. This really is the key to production dredging!

Generally, there are two things that drastically slow down the production of less-experienced gold dredgers: (1) plug-ups and (2) “nitpicking.”

The time and energy spent freeing plug-ups from the hose and power-jet cuts directly into how much progress will be made in the dredge-hole.

Plug-ups are caused by rocks jamming in the dredge’s suction hose or power-jet. Everyone gets a few of these. Inexperienced dredgers get many! This comes from not understanding which types of rocks, or combination of rocks, to avoid sucking up the nozzle. Basically, this knowledge comes from hard-won experience in knocking out hundreds or thousands of plug-ups until you reach the point where you become more careful about what goes into the nozzle. I have covered this area quite thoroughly in my “Gold Dredger’s Handbook”

During the past several years, some dredge manufacturers have started building dredges using over-sized power-jets. This means that the inside-diameter of the jet-tube is not reduced in size from the inside diameter of the suction hose, helping to greatly reduce the number of plug-ups a dredger will get while in production. Because of this, an oversized jet would be high on my personal priority list if I were in the market for a dredge!

So, the combination of some practice in learning which types of rocks to avoid sucking up the nozzle, and the over-sized power-jet on modern dredges, will eliminate most of the plug-ups that would otherwise hinder production.

The other main loss of production, which we are all guilty of to some extent, comes from a poor production technique which we call “nitpicking”. Nitpicking is when you are trying to free rocks from the streambed which are not yet ready to come out. Nitpicking is dredging around and around rocks which are locked in place by other rocks that need to be freed-up first. Nitpicking is when you are doing things out of the proper order!

When you find yourself making little progress, the key is almost always to widen your dredge-hole.

Production dredging means moving gravel through the nozzle at optimum speed. This is accomplished by making your hole wide enough to allow the over-sized rocks to be easily removed. As soon as you find the rocks are too tight to come apart easily, it is usually time to widen the hole again or take the next top cut. “Top cut” is the term we use to describe when we take a bite off the top-front section of a dredge hole to move the working face forward. “Working face” is the portion of the excavation that we are mining.

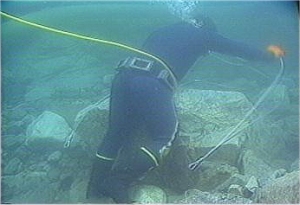
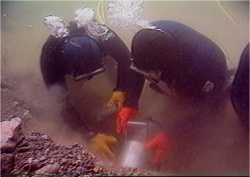
An underwater dredging helper can be a big help to remove over-sized material from the dredge-hole. Basically, there are two completely different jobs in an underwater mining operation: (1) nozzle operator (N/O) and (2) rock person (R/P). The nozzle operator is responsible for getting as much material up the nozzle as possible during the production day. Therefore, it is his or her responsibility to direct how the dredge-hole is being taken apart. The rock person has the responsibility to help the nozzle operator by removing those rocks that are immediately in the way of production.

Since there are plenty of over­sized rocks that can be removed from a production dredging operation’s work area, it is important that the R/P have some judgment as to which rocks ought to be moved first. Ideally, he will pay attention to what the N/O is doing, and focus his or her efforts primarily on those rocks which are immediately in the nozzle’s way.

The rock person should be moving the very next rock that is in the nozzle’s way.

Silt is usually released when a rock is moved out of the streambed. So an R/P must be careful to not “cloud-out” the hole (loss of visibility). This can be avoided by concentrating on (a) moving those rocks that are near to where the N/O is working (this is the first priority), or (b) moving those rocks that have already been freed from the streambed, but not yet removed from the hole.

On occasion, an R/P unwittingly takes over the production operation by randomly moving whatever rocks he or she happens to see. This then causes the N/O to have to follow the R/P around, sucking up the silt which would otherwise cloud-out the dredge hole. This generally results in slowing down production. We have found that it is much better if the R/P accepts the position of being the N/O’s assistant, which allows the latter to direct the progress of the dredge-hole.

The nozzle-operator should communicate with his helpers where he wants to take a cut off the front of the hole.

Since production is controlled by how efficiently rocks can be removed from the dredge-hole, it is important to understand that they must also be strategically discarded in a manner which, if possible, will not require them to be moved a second or third time. Generally, this means getting each rock well out of the hole–as far back as necessary. Good judgment is important on this point. You only have so much time and energy available. How far that over-sized rocks will need to be removed from the hole is somewhat dependent upon how deep the excavation is going to go. Early on, we often must guess about this. Sometimes, the streambed turns out to be deeper than we thought it would be. Then, we find ourselves turning around and throwing all the cobbles further back away from the hole. This is not unusual.

We also must use our best judgment to not waste our limited time and energy resources. We really do not want to move all those tons and tons of rocks any further than necessary to allow a safe, orderly progression in the dredge-hole.

As we move our hole forward, and as we dredge layers (“top cuts”) off the front of the hole, we try to leave a taper to prevent rocks from rolling in on top of us. This is an important safety factor. Also, since the N/O’s attention is generally focused on looking for gold, the R/P should be extra vigilant in watching out for safety concerns. Any rocks or boulders that potentially could roll in and injure a team-mate should be removed long before they have a chance to do so.

The rock-person’s attention should always be on safety. If there is danger, he or she should point it out immediately to the Nozzle-operator.

Some rocks will be too large and heavy to throw out of the hole. Therefore, it is good technique to leave a tapered path to the rear of your hole so that boulders can be rolled up and out. If you cannot remove boulders from your hole, the hole may become “bound-up” with over-sized material. This can create a nitpicking situation. It is important to plan your excavation to allow you a certain amount of (safe) working area along the bottom of your dredge hole so you can stay in balance while working.

If you see boulders being uncovered which are too large to roll out of the hole, you should immediately start making room for them on the bedrock at the back of your hole. You normally accomplish this by throwing or rolling other rocks further behind. This takes planning in advance.

Winch Operator Watching Closely For Diver Signals

Boulder In Sling

Sometimes winching is necessary to remove large boulders or an abundance of large rocks from a dredge-hole. However, because winching takes additional time, the pay-streak usually must contain more gold to justify the time and effort that is required.

The amount of streambed material that you are able to process through a gold dredge will determine the volume of gold that you will recover. Actually, this volume-to-recovery ratio is true of any type of mining operation, whether it is a large-scale lode mine, a small-scale miner using a gold pan, or anything in-between.

The smaller the amount of material that a dredging program has the capacity to process, the richer the pay-dirt must be to recover the same amount of gold. Consequently, a smaller-volume operation often needs to invest more time and energy into sampling to find the more-scarce, higher-grade pay-streaks. For this reason, smaller-volume operations generally spend more time sampling, less time in production; and, therefore, usually recover less gold. But not always!

Having said that, I should also say that successful gold recovery depends upon more than the size of the dredge. A lot has to do with the skill of the operator(s).

As a general rule, gold mining on any scale is volume-sensitive. If you can dredge twice the volume of streambed material, not only can you recover twice the amount of gold, but you may find (many) more lower-grade gold deposits which can be productive when developed. You can also dredge deeper sample holes. This allows you to reach deeper pay-streaks. This is why we always advise beginning gold dredgers to go out and find an easy location where they can practice their basic gold dredge production techniques to improve their speed before they begin a serious sampling program.

It is a good idea to practice your dredging skills, so that you can operate the nozzle efficiently while moving your own oversize material out of the way.

An inexperienced dredge-miner will sometimes be so slow in volume-production, that he or she may miss valuable pay-streaks simply for lack of being able to process enough gravel, or lack of ability to dredge his or her sample holes large or deep enough during sampling. An inexperienced dredge operator also may not even be aware this is the problem.

When you dredge a sample hole, you must evaluate how much gold you recover against the amount of time and work it took to complete the test hole. If you are only moving at 20% of your potential production speed, you easily can make the mistake of walking away from excellent pay-streaks just because you will believe they are not paying well enough.

When we run larger-sized (8-inch or larger) gold dredges, we almost always have at least two divers working together underwater. The reason for this is because running an eight or ten-inch dredge in six feet or more of streambed material requires that an overwhelming number of over-sized rocks must be moved all the way out of the dredge-hole by hand. This varies from one location to the next. But generally, in hard-packed, natural stream-beds, somewhere between 60 and 75 percent of the material is too large to process through an eight-inch dredge. This is where second and third persons become a big help. A sole-operator in this type of material, when it is deeper than five or six feet, is going to spend a great deal of time throwing rocks out of the hole, rather than operating the suction nozzle.

The smaller the dredge, the shallower the material that a single operator will be able to manage efficiently. Also, some hard-packed streambeds require that most of the over-sized rocks be broken free with the use of a pry bar. This further decreases the amount of nozzle-time on a single-person dredging operation.

In the final analysis, it is the volume of material that is sucked up the nozzle (in any given location) that determines gold production. However, the efficiency with which the over-sized material is moved out of the way has a direct impact upon how much gravel and gold will be directed up the suction nozzle. So, gold production ultimately is controlled by how well the over-sized material (rocks too large to pass into the suction nozzle) is managed. The nozzle-operator’s focus, therefore, should be on directing the nozzle to suck up the gravel that will make it easier to free more over-sized rocks, rather than indiscriminately sucking up any gravel in the hole. In other words, the Nozzle operator should be actively pursuing a plan that keeps the Rock person busy right there where the action is happening!

If a rock person(s) is added to the operation, he or she must increase the program’s efficiency by at least as much as the percentage of gold which he/they is going to receive. This is not difficult to accomplish if conditions are right and the dredging team is organized.

On the other hand, if you are operating a dredge in two or three feet of hard-packed streambed, adding a second person may not increase your production speed enough to make it worthwhile to pay him for his time. This is because the material is shallow, and you may not have to toss the over-sized rocks very far behind in the dredge hole (less effort required to make progress).

When I am operating a production dredge in five or six feet (or more) of streambed material, I can literally bury a rock person with over-sized rocks, and make my helper work like an animal all day long. I also have to work like an animal to accomplish this. The result is a good-paying job for my helper and a substantial increase in my own gold recovery.

When I find myself working in eight or ten feet (or more) of material, I must have at least one or two (or more) rock person(s) to help me. Otherwise, I will be completely buried with cobbles and over-sized rocks all day long and will get in very little nozzle-time.

All of this also applies to smaller-dredge operations. Your ultimate success will be directly proportional to how much material you can get up the nozzle of your dredge in the right locations. The more efficiently you can make that happen, the quicker you will get your nozzle into pay-dirt.

Large-rock management is important! Since most of the material in a natural, hard-packed streambed will be too large to go through the suction nozzle, the progress and speed of your operation will directly depend upon how quickly and efficiently the oversize (cobbles and boulders) materials are moved out of the N/O’s way. Dredging is not just a matter of sucking up some gravel; at least not in the places where most pay-streaks are found.

As shown in the following important video segment, in most pay-streaks, the only gravel that gets sucked up is that which is found between the over-sized rocks. So the key to continued progress depends upon management of over-sized material:

A cutter-head consists of a rotating series of hardened-steel blades that are designed to cut into sand, clay or classified gravel. It does not have the capability to cut through hard-packed streambeds that are made up of over-sized rocks and boulders.This is the reason that cutter-head dredges do not work well in hard-packed streambeds; because they are continuously up against rocks that must be moved out of the way by divers. But it is too dangerous to put divers in a dredge excavation where a cutter-head is operating.

So, there is a lot of good to be said about organizing a system to get the rocks moved out of your way as quickly and efficiently as possible. This is true in dredging on any scale and regardless of whether you are working alone or with a team.

The reason why larger dredges can get more accomplished in gold-bearing streambeds is usually not because they will suck up more gravel. It is because a larger hose and nozzle will suck up a bigger rock. Every rock that can go up the nozzle is a rock that does not need to be packed out of the dredge-hole by hand. This is the primary factor that speeds things up with a larger dredge.

Another major advantage of a two-person team is the substantial amount of emotional support which a second person can add to the operation—especially when you are dredging in deep material, or when you are sampling around for deposits and have not found any in awhile.

On the other hand, the wrong person can inhibit the operation, either physically or emotionally. So, you must be especially careful to select teammates who have work ethics, moral standards and emotional endurances that are similar to your own.

In my own operations, we have found that the key to good teamwork is in establishing standard operating procedures for nearly everything we do. We also work out standard underwater signals. This takes quite a bit of planning and communication in advance, and it is an ever-continuing process. We have standard procedures for removing plug-ups from the hose and jet. We have standard procedures for moving the dredges forward and backward during operation. And, we have standard procedures for every facet of the underwater work — from moving the raw material that is in front of us, to the placement of tailings and cobbles behind our dredge-hole.

As noted above, volume is the key to success—at least to the degree of success. We take this aspect of the work quite seriously in my own operations — to the point where every single moment and every single physical effort is regarded as important to the operational-moment while we are dredging. You will never find the members of my team socializing or goofing-off during the underwater production hours. We allow ourselves to relax during the off-work hours and lunch break. But during production-time, we are entirely focused on the needs of the operation. We treat the dredging-portion of the operation like a competitive team athletic sport. We are not competing against each other. In a team effort, we compete against the barriers that Mother Nature has constructed for us to overcome so that we can recover volume-amounts of gold. To us, our teamwork is kind of like running a relay race. It is rewarding this way when we really synchronize our efforts.

We try to spend a minimum of six hours doing production-dredging or sampling each day. In our operation, this is normally done in two three-hour dives. Other commercial operators prefer three or four shorter dives. I know one commercial dredger in New Zealand who prefers a straight six, seven or eight- hour dive. What an animal!

I like lunch. But, I also agree with the concept of long dives; the reason being that it takes a while to get a good momentum going underwater. Every time you take a break, you need to get that momentum going all over again. What do I mean by “momentum?” Momentum in dredging is very similar to the beat of the drum in driving music. It is the continuous flow of gravel up the nozzle, with the over-sized rocks being moved out of the way in their proper order at just the right moment so that the flow of material into the nozzle is never slowed down. It is everyone doing whatever is necessary to keep that flow happening. It is about synchronizing the right rhythm at optimum speed, and keeping the beat going!

In fact, team-dredging can be kind of like an art form. It is similar to playing music. Only, instead of notes being played on several instruments to form a harmonious melody, the team produces a stream of coordinated effort, using their bodies to move the suction nozzle and the over-sized rocks, in concert, so that all of the effort works together to achieve optimum momentum and harmony.

In his or her initial enthusiasm, an inexperienced R/P may, rather than move the next rock in the path of the N/O, instead, move the wrong rock and cloud-out the dredge-hole with silt. This causes the N/O to be slowed down (1) because of the decreased visibility, and (2) because he or she must now take the time to move the proper rock out of his own way. This is the equivalent of “playing off key,” or playing the wrong musical selection. Everybody else is playing one song, while the new guy is doing something entirely different. The bottom-line for your dredging operation: less volume through the suction nozzle, and less gold at the end of the day.

On the other hand, there is enormous personal and team-satisfaction to operating within a well-structured team-dredging system. Such a system functions best when the N/O is the conductor, and the R/P plays a supporting role, anticipating in advance and taking every possible action to contribute to the N/O’s momentum.

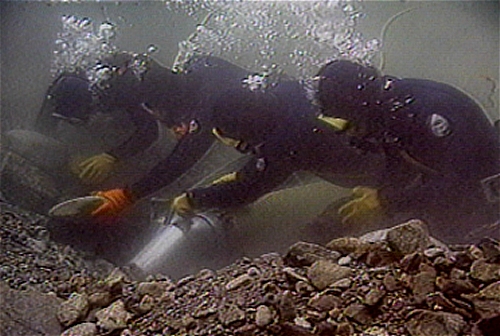
Four-man team on Author’s commercial operation. Notice how everyone is involved up where the action is happening at the suction nozzles.

This is not just about the next rock which is in the way of the nozzle. It is also about moving the dredge forward a bit as necessary to give the N/O a little more suction hose when it is needed. It is also about the dozen or so other things that are necessary to keep the flow going without a lag.

Volume-momentum is lost every time the N/O has to put the nozzle down to take care of something. That will impact directly upon the success of the operation. Every effort should be made to keep this “down time” to a minimum.

Since volume is really the key, in my own operations, we try to treat dredging pretty-much like a team sport – competitive and physical! When I give my R/P the plug-up signal, he races to the surface to quickly clear the obstruction. He doesn’t just mosey on up there. He moves up there, like running for a touchdown or rounding the bases for the winning home run. This is also the sense of urgency with which he returns to the hole as soon as the plug-up is free. When he sees that rocks are stacking up in the hole, he doubles his pace to catch up. When caught up, he looks around to see where other cobbles might be moved out of the way, without clouding the hole. Or, he might grab the pry bar and start breaking rocks free for the nozzle operator. At the same time, when I am operating the nozzle, I am doing my own job—getting as much material through the nozzle as humanly possible while uncovering new rocks to be moved by the R/P, with the minimum number of plug-ups. And, I do not stop for anything if I can help it. If something else needs to be done, I delegate it to my R/P or other helpers so that I can keep pumping gravel up the nozzle. That’s my job! Everyone’s gold-income depends directly upon how much material is sucked up.

While this statement is also true when you work alone, every effort counts for something in production team dredging. Therefore, everyone needs to pay attention to what is going on in the dredge-hole. R/P’s particularly have to be able to switch gears quickly. At one point, there may be a pile of rocks which needs to be thrown out of the way. The next moment, even before the R/P has moved many of those rocks, he or she may notice something else that is directly impeding the N/O’s progress—like a boulder that needs to be rolled out of the way, or a particularly-difficult cobble which needs to be broken free with the pry bar. The main objective in everyone’s mind should be to support the N/O’s progress. Whatever impedes his progress should be the priority and get immediate attention.
The key to a productive underwater support person is having him or her work to help keeping gravel flowing into the suction nozzle.

The only time I intentionally slow things down is when I am uncovering the gold. I have to keep an eye on that to follow the pay-streak. However, as explained in the following important two video segments, you can also slow down too much by looking. You have to find the proper balance between looking and getting volume up your nozzle:

If the pay-streak is good, I also point out the gold to my helpers as I uncover it. There is emotional gain from this. Everyone deserves the boost. The gold eventually gets spent or hidden away. The memories last your entire lifetime! As demonstrated in the following video sequence, there are few things in life that will give you a bigger emotional boost than finding one of Mother Nature’s rich golden treasures:

As the following video segment demonstrates, once you locate a high-grade pay-streak, it is also very important to invest enough time to locate the downstream and left and right outside boundaries of the deposit. This is to make sure that you are able to develop the whole deposit without burying part of it under tailings or cobbles:

When things get too confused inside the dredge-hole, sometimes the N/O must put down the nozzle and help organize in the hole (move cobbles and boulders out of the hole). But, everyone should be keenly aware of the operational situation that actual production momentum (gravel up the nozzle) has stopped and that it needs to get underway again just as soon as possible.

As noted earlier, and demonstrated in the following video sequence, we take top-cuts off the front of the dredge-hole in production dredging, and we take the material down to the bedrock in layers. We do this because it is the fastest, safest, and most organized method of production dredging:

Sometimes, when conditions are right for it, an R/P may be working right next to the nozzle, breaking the next rock free and quickly throwing it behind in the hole. However, on every top-cut, there comes a time when the N/O decides to drop back and begin a new cut to take off the next layer. The R/P has to pay close attention to this and follow the N/O’s lead. Otherwise, he or she might finish breaking free a rock up in the front of the hole when there is no-longer a nozzle there to suck up the silt. That would be an error.

In other words, the R/P has to keep one eye on what the N/O is doing all the time. Because, if the N/O is a dynamic and energetic person, he or she certainly will not be following the R/P around the dredge-hole. The N/O has to orchestrate the effort. So all of the support-players should be paying close attention and assisting in the N/O’s next move. A good nozzle operator takes apart the hole with an organized method that is easy to follow by the others.

Teamwork also extends up to the dredge-tender on the surface, if you have one. The dredge-tender should continuously monitor the water-volume flowing through the sluice box. If it visibly slows down, he should suspect a plug-up and take steps to locate and clear it. Sometimes, the water-volume has been reduced simply because the N/O has temporarily set the nozzle down over a large rock in the hole. But, on the occasions when there is a plug-up, it is a mark of great teamwork to have a tender handling the problem immediately without having to be told. Volume through the sluice box should also be continuously on the tender’s mind. When gravel stops flowing, he or she should be thinking that something might be wrong.


When the flow slows down through the recovery system, the tender should just assume there is a plug-up that needs to be freed up from the surface.

That same level of anticipation and teamwork should also apply in other areas, as well. When the tender sees that the dredgers are moving forward in the hole, he should ensure that the dredge is being moved forward accordingly. This is so the N/O will always have a comfortable amount of suction hose to work with. As demonstrated in the following video sequence, different-sized dredges require different lengths of suction hose to allow the nozzle operator a comfortable amount of movement and flexibility:

Good teamwork involves a lot of close observation and timely anticipation to minimize the number of actual orders that need to be given and the consequent amount of down-time. Most of the activity is handled by standard operating procedures which require some planning and communication in advance.

As you might imagine, there are some different opinions about all of this. Some people are simply not running any races. This is fine; but they must understand that they do not have the same gold-recovery potential as others who are working at a faster pace—or, with a more organized system.

Generally, you will not hear anyone on my team complaining—especially when it is time to split-up the gold that we have recovered.

There is not anything difficult to understand about successful gold dredging techniques. The process is quite simple. Serious dredging on any scale is a lot of hard work. Volume is the game! The faster, deeper and more efficiently you can dredge the sample holes, the faster you will find the pay-streaks—and, the better you will make them pay. Even with smaller dredges.

At the times when you are not finding commercial amounts of gold, there is at least the satisfaction of knowing that you are accomplishing optimum performance. And, when you do locate the deposits, the sky is the limit!


By David R. Toussaint

Professional Gold Hunter’s Strategy Leads to Pockets of Gold


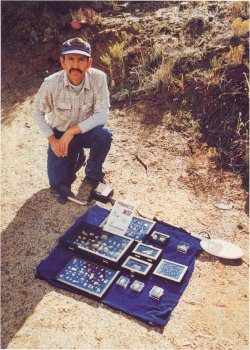
PrestonPreston poses with his collection which came from a pocket in northern Nevada.

A professional electronic gold prospector in Arizona has developed a gold-hunting strategy that has led to the discovery of more than 100 ounces of gold during the past few years. Preston Vickery, 42, of Kirkland, Arizona has used his gold-hunting strategy, which he calls “pocket hunting,” to find in-place gold in hard-hunted areas that have only frustrated other electronic prospectors. Now he’s ready to share his strategy with the world:

“Most others are stuck in the (placer) nugget mode,” says Vickery about other electronic prospectors. “They should be doing the whole area when they hunt for gold. You do placer and you do hardrock hunting.” Vickery has the right credentials to create his own method of gold hunting. While not a graduate of any mining school, Vickery got his education in prospecting from real-life experience and a family tradition. He’s been a professional gold prospector since his early-20’s and has also worked every facet of mining. “I’ve made a living,” Vickery says modestly. “I haven’t gotten rich, and I haven’t been on welfare.”

You might say prospecting is in the Vickery blood. Preston’s father was also a professional gold prospector and miner. The elder Vickery taught his son all he could about prospecting, including the geological indicators associated with gold formations. Now in his 90’s, Preston’s father is too old to get out much, but he still has a few things to teach his son about gold prospecting. Tracing the Vickery bloodline back even further, Preston’s grandfather was also a professional miner and prospector. Grandpa-Vickery spent much of his life working in lead and gold mines, and he wasn’t shy about passing on his knowledge to his son. Thus, Preston’s grandfather started a family tradition that has created three generations of prospectors and miners.

Now, when Preston goes prospecting, he uses the accumulated gold-hunting wisdom of three generations. Preston has been fairly successful over the years, but his gold-finds began to dwindle during the mid-1980’s. Most of the good nugget-hunting areas were being hunted-out, and it became harder and harder to make a living as a prospector.

It was about that time that Vickery bought a Fisher Gold Bug metal detector. “Once I saw what a Gold Bug could do, it wasn’t long before I bought one,” he remembers. One time out on the Arizona desert, Vickery watched a famous nugget shooter amaze a group of electronic prospectors. This top-notch nugget shooter waited until the other prospectors in the group were satisfied that a nugget patch they were hunting was thoroughly cleaned out. After asking permission, he swept the patch one more time with his Fisher Gold Bug, finding another two or three small nuggets. “He was the best I’ve ever seen,” says Vickery.”He worked quickly but thoroughly. He taught me how to clean out a nugget patch.”

Even though Vickery learned how to clean out a patch in the late ’80’s, fewer and fewer nugget patches needed cleaning out. It seemed like every place the old-timers found gold had already been hunted to death. Vickery could spend all day hunting and only find one or two nuggets. These finds might excite a weekend prospector, but they were not enough for someone whose livelihood depends upon finding nuggets. There had to be a better way. Contemplating his predicament, Vickery began to piece together things his father had taught him and things he had learned himself. The result was a new approach to gold hunting that he calls “pocket hunting.”

Using this new method, Vickery’s luck began to change; and he soon found three nice pockets of gold. What is a “pocket” of gold? “To understand this, you must first understand how gold ‘makes,’” says Vickery. The story begins thousands, maybe millions, of years ago. First, the earth splits, forming cracks and fissures. These fissures form an intricate structure of veins that sometimes reach a hundred miles across the earth’s surface. A second movement of the earth, such as an earthquake, is required to create the right conditions for gold to form within this system of cracks. If this second movement occurs, an “intrusive” can be formed, allowing chemicals and minerals to enter the crack. Gold forms if the right chemicals and minerals are present in the right concentrations. “Gold is just a quirk in the way nature works,” says Vickery. “All it is, is a big break in the earth’s surface. These cavities are usually cracks that develop into veins. Small veins sometimes pocket-out into kidneys. These fill up with solutions and sometimes gold is formed.”

These “kidneys” or “pockets” along the cracks in the earth are what Vickery looks for when he hunts for gold. He says that it is possible to predict the location of these pockets by visualizing the structure of cracks in which gold has a chance to form, or “make,” as Vickery says. These pockets of hardrock gold do not usually contain as much gold as the main vein that the old-timers mined, but 30 or so ounces of gold is nothing to sneeze at.

These cracks in the earth’s surface, which develop into veins, usually form along parallel lines, all traveling in roughly the same direction. To find the pockets of gold, Vickery extends the boundaries of his search area away from the historical diggings. He tries to visualize the system of cracks that gave the gold places to “make.” Many small pockets of gold could have formed along this system of cracks, sometimes up to 500 or more feet away from the original outcropping. “You go in the area where gold has already been found. Then you look for the way the structure (of veins) is running,” Vickery says. “You just try to put yourself in the area where gold has a chance to’ make.’”

“Smaller veins that formed parallel to the main vein were difficult for earlier generations of miners to find, especially without metal detectors,” Vickery says. The old-timers followed a vein by digging. If they did not see any more gold in their pan, they gave up and stopped digging the vein. If the vein picked up again farther on, or if a splinter vein made a small pocket of gold away from the main vein, the old-timers had no way to find it. “The old-timers would have dug along the vein for some distance to see if it would ‘make’ again,” Vickery explains. “The old-timers couldn’t get all the tiny splinter veins. Sometimes they were too far away. They didn’t have the technology to find them like we have today.”

Using his metal detector, Vickery found a nice pocket of hardrock gold on a prospecting trip to northern Nevada. But the trip did not start out on a happy note. Two days of hunting a well-known area near some historical diggings had produced only a few small nuggets. Putting his pocket-hunting strategy into service, Vickery found a 30-ounce pocket of in-place gold just a couple-hundred feet away from the hard-hunted old-time diggings. About four feet deep, the pocket had formed along a smaller vein that ran parallel to the primary vein which the old-timers had mined. Hidden four feet below the surface, the pocket gave off a strong signal when he passed his detector coil over it.

So what is the first step when pocket hunting for gold? The first thing Vickery does when he starts hunting an area is to climb a hill. Using binoculars, he studies the entire area and draws a map with reference points to provide bearings while he hunts. Next, he looks for gold indicators, cubes or clods of iron oxidation that form an “oxide zone” around the historical diggings. Patterns in the oxide-zone, like strings of red earth, that suggest a crack in the earth where iron formed, can also indicate a vein. Often times, if iron formed in a crack, gold also could have formed in another nearby spot along the same crack.

In particular, Vickery looks for any place that the red oxide lines shifted, forming a broken line. This shift could have created an intrusion that allowed gold to form a pocket within the crack. Visualizing the system of veins in the earth, he starts hunting, by searching right on top of the main vein, tracing about 400-to-500 feet to see if it picks up again in a spot unknown to the old-timers. If it doesn’t, he then drops downhill about 20 feet from the main vein and begins hunting in a line parallel to the main vein, now attempting to discover any pockets in splinter veins. Again, he hunts to a distance about 400-500 feet away from the original diggings. If his detector remains silent, he drops down another 20 feet and repeats the process.

If he finds any gold nuggets while searching, Vickery marks the spot and searches uphill to find the in-place pocket where the nuggets originated. If he finds a concentration of gold nuggets, he carefully works out where the concentration begins, where it occurs in the highest concentration and where it thins out. Then, using the edges of the concentration as two points of a triangle, he knows the third point of the triangle will be somewhere directly uphill where the nuggets originated. So he begins searching directly uphill from the highest concentration of nuggets. Vickery says he picked-up this method of triangulation in “Gold Canyon,” a novel by Jack London.

Pocket hunting for gold takes considerable concentration; it isn’t as easy as simply locating an old-time mining operation and swinging your metal detector around. You have to keep your hopes up, and not let yourself become discouraged. Pocket hunting provides the electronic prospector with a strategy for gold hunting that can result in more than an occasional placer nugget.


By Dave McCracken

You have a substantial prospecting-advantage with a modern gold detector!
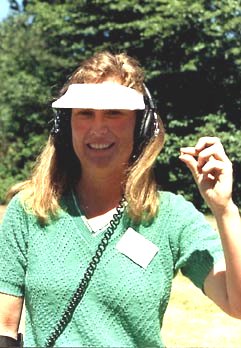
Dave McCracken


woman with a gold nuggetI highly recommend The Fundamentals of Electronic Prospecting be read before reading this article.

All the rules of placer and desert geology apply to gold nugget hunting, and this knowledge should be utilized to establish where gold deposits and nuggets are most likely to be found.

Particular attention should be paid to locations which have little or no streambed or other material present, so the detector’s coil can search as closely as possible to bedrock or false bedrock layers. Also, exposed tree roots along the edges of the present streams, rivers and dry-washes have been proving successful, especially along the smaller tributaries in the higher elevations of known gold country.

Some of the most productive areas for electronic prospecting in the dry regions are in the near vicinity of old dry-washing operations. The old-timers were only able to make dry-washing work in very high-grade areas. They seldom recovered all the high-grade gold out of an area, because they did not have the means or equipment to prospect extensive areas. You have a substantial prospecting-advantage with a modern gold detector. Natural erosion over the years has likely uncovered more high-grade in the immediate area, or concentrated other spots into new high-grade gold deposits.

When prospecting old dry-wash workings, it is always worth a little time to rake back some of the old tailings piles and scan them with your detector. Dry-washers, today and during the past, almost always used a classification screen over the feed area. The screen was commonly around half-inch mesh. An operation shoveling onto the screen at production speed in dry high-grade gravel might have missed larger nuggets as they rolled off the top of the screen. Sometimes, when working a layer of caliche, if the material was not broken-up well enough, it would roll off the screen with nuggets still attached. A metal detector reads out strongly on these kinds of targets. Make sure to ground-balance to the tailing pile. One nice thing about prospecting in these tailing piles is that they usually are not filled with iron trash targets.

When dealing with natural streambeds above the water, you generally do not find too many other reading metallic objects besides gold, unless the spot which you are scanning is near an inhabited location, like a park or an old dump. So it is reasonably safe to dig any target that gives off a metallic reading in a streambed.

However, some locations have lots of trash and small iron targets. Sometimes, iron targets seem to accumulate heavily in the same areas as gold. This presents a big challenge! Once you have been scanning a particular area for a while, you will gain an understanding of how much “trash” (metallic objects of no value) exists within the vicinity. With some experience on gold objects, you will learn to distinguish the different tone changes between most gold objects and most trash targets. Pay particular attention to the very faint readings, as is often the case with natural gold targets.

One of the main keys to successful electronic prospecting is to slow down your sweeping action. You cannot do it fast like when hunting for coins. You almost have to crawl across the ground. Remember, you are listening for even the faintest whisper of a sudden increased threshold hum. A gold target may sound like a coin—only a quieter signal.

Different types of detectors have special non-motion or pinpointing settings which allow the coil to be moved very slowly and still pick up targets. This means you are able to slow down your sweep to almost a standstill and still hear a target as the coil moves over it. On the other hand, these settings may be too sensitive to use for nugget hunting on some detectors, depending upon field conditions and how fast you are sweeping. When in doubt, experiment while using a test-nugget on or in the ground you are searching.

Another important point is to overlap your coil sweeps. The area covered by the search-field under your coil is similar to a triangle. Directly underneath the coil, the search area is about the same size as the diameter of your coil. The search area becomes narrower as it penetrates the ground further away from the coil.

However, the size of this triangular search-field is not constant underneath the coil. It changes as mineralized conditions change in the ground below your search coil. If you do not overlap your search strokes, you can leave as much as 50 percent or more of the area below the search coil behind, without being adequately searched.
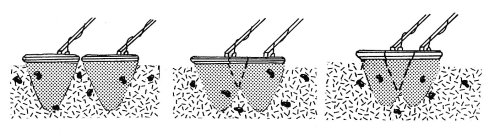
Image 1

You have to use your own judgment about how to discriminate between which targets to dig, and which to leave behind. This comes with practice and experience. Discrimination of any kind, whether by electronic circuitry or the audio sounds given off by the target, has limited accuracy. The depth of a target and the degree of ground-mineralization in that particular location can confuse any discriminator. In some places, you will want to dig every target. In other places, where there is lots of trash, you may find it more productive to discriminate your targets by sound and/or in combination with electronic discrimination features on your detector. In this case, you have to balance the need to leave some small pieces of gold behind, with not wanting to dig a bucket full of trash and valueless iron targets; and therefore, less gold.

When in doubt, dig! Or at least toss your sample nugget down and get a comparative reading.

With lots of practice in the field, you will eventually reach the point where your metal detector is like an extension of your arm—like an extension of your perception and knowingness. You will gain the ability to look down into the ground and have a pretty good idea of what is there.

Big nuggets are generally not too difficult to find. In most areas, however, there are hoards of smaller gold targets in ratio to each large nugget found. Small pieces of gold are your bread and butter! Most gold is small gold, but it has to be large enough to be worth your while. Some of the modern gold detectors will pick up pieces of gold so small that you could be finding them all day long; and at the end of the day, not have accumulated very much gold by weight. In this case, you may want to move to a different area.

Just like in other forms of gold mining, electronic prospectors have to set standards for themselves. Someone pursuing the activity to make money will be motivated to recover volume-amounts (by weight) of gold. Another person pursuing electronic prospecting as a part time activity may receive his or her best thrills by recovering the smallest-sized targets.

One interesting development in the electronic prospecting field, which I have not seen happen in other gold mining activities, is the tremendous emotional success gained from finding extraordinarily-small pieces of gold. Normally, in gold prospecting, we get excited to find a big nugget or a rich deposit. These are easy to locate when scanned over by a metal detector. The big challenge with a metal detector is in locating the smaller pieces. Experienced prospectors know that if they are finding the small pieces, they will easily-find the big pieces.

When scanning, keep your coil as close to the ground as possible. It takes a coordinated arm and wrist-action to keep the bottom of the coil parallel and close to the ground throughout the full sweeping action. Allowing the coil to move one or two inches away from the ground during the outside of a sweeping motion will also reduce depth-penetration by one or two inches. This will certainly result in lost gold targets. You have to practice keeping the coil close to the ground. Shorter sweeps is usually the answer.

Sometimes it helps to kick rocks out of the way, or use a garden rake to remove multiple smaller obstructions before you search an area. This allows you to keep the coil close to the ground with minimum obstructions.

During your prospecting activities, it is possible that you may find occasional targets which could potentially be classified as artifacts. The Archaeological Resources Protection Act defines just about anything you might find as a “protected” artifact. There are criminal penalties for disturbing or removing artifacts. What constitutes a protected artifact is primarily up to the judgment of local bureaucrats. Searching for natural gold targets is legal. Messing around with old junk and trash may be illegal. Sometimes, it is better to just leave old items where they lie. You will have to decide.

The main suggestion I commonly give to beginners about electronic prospecting is to not give up. With practice and by working in the right area, you will surely find some gold!

PINPOINTING

When you do have a reading target, its exact position in the ground should be pinpointed. This can be done by noting when the detector sounds out while scanning over the target in fore and aft and left to right motions. A steel or iron object can be often be distinguished by noting the size and shape of the object during the pinpointing process. Sometimes trash objects are large and/or lengthy in size.

Sometimes a stronger-reading target will seem to cover a larger area than it actually does. If you are having trouble getting an exact location, continue to lift the search coil higher off the ground while scanning with an even back and forth motion. As the coil is raised higher, the signal will become fainter; but the position of the metal object will sound-out at the very center of the search coil.

PINPOINTING WITH THE GOLD PAN IN WET AREAS

Once you have pinpointed the exact position of a target in an area near water, one way of recovering the object is to carefully dig up that portion of ground, using a shovel or digging tool, and place the material in your gold pan. Here is where a large plastic gold pan comes in real handy. Be careful not to cause any more disturbance or vibration of the streambed than is necessary while you are attempting to dig up a target. It is possible to miss the target on the first try and cause it to work further down into the streambed because of its greater weight in the wet environment. Sometimes you can lose the target, and not be able to locate it again with the detector.

Sometimes the ground is hard and needs to be broken up or scraped with a small pick. Keep in mind that a sharp blow from a pick can destroy a coin or disfigure a gold nugget, reducing its value. Digging and scraping is better than pounding, if possible. In hard ground, sometimes it is easier to loosen the material up and shuffle it into several small piles. These can then be flattened out and scanned to see which contains the target.

Once you have dug up that section of material where the target was reading, place it in your plastic gold pan and scan it with your detector. If the contents of the pan do not make your detector sound-out, scan the original target area over again. If you get a read in the original location, pour the contents of the pan neatly into a pile out of your way, pinpoint the target all over again, and make another try at getting the target into your gold pan. Continue this until you finally have the target sounding out in your pan. If you cannot see the target, and water is immediately available, pan-off the contents until the target is visible.

There is a good reason why you should not ever throw away any material from the target area until after you know for certain exactly what the reading target is. If you are looking for placer gold deposits and it happens that your detector is sounding out on a gold flake or nugget, the chances are pretty good of additional gold being present in paying quantities within the material which has been dug out of the hole, even if it does not sound-out on your detector. Remember, small particles of gold often do not make metal detectors sound-out. Therefore, the possibility exists that there could be hundreds of dollars worth of gold in a single shovelful of material not tightly-concentrated enough to cause your detector to sound-out. So wait until you have seen the reading target before you start throwing any material away.

If you dig for a target and then cannot get any further reads on the detector from either the pan or in the original target area, quickly pan-off the pan’s contents. There is always a possibility of a concentrated gold deposit which is no longer concentrated enough to read-out on your detector. In this case, you are most likely to have some of the gold deposit in your gold pan, which will quickly be discovered when you pan off the contents.

There is also another reason why you save the material from a hole until you have recovered your target. Because of the shape of a gold pan, and depending upon the size and shape of the coil you are using, if the gold target (especially a small target) ends up in the bottom of your pan, your coil may no-longer be able to scan close enough to the bottom of the pan to sound-off on the target. Because of this problem, gold pans have limited workability as a pinpointing tool in electronic prospecting. Sometimes, you can have better luck scanning the bottom-side of a gold pan.

DRY METHODS OF PINPOINTING

There are several popular methods of pinpointing reading targets in the dry regions where water is not available for panning. Some prospectors use a plastic cup. Material from the target area is scooped up and passed over the coil. If the contents of the cup do not sound-out on the detector, the target area is scanned again until the target is located. Take another scoop, pass it over the coil for a signal, and repeat until the target is in the cup. Then pour some of the contents into your hand. Pass the cup over the coil, then your hand, until you locate the target. Put the rest away in a neat pile, and repeat the process until you recover the object.

One important point to mention is that most search coils have equal sensitivity to targets both above and below the coil. In other words, during pinpointing, you can pass material over top of the coil and obtain the same results as if you turn the detector upside down and pass the material across the bottom of the coil.

Your handy magnet can be a big help when you are having difficulty finding a faintly reading target. Sometimes it is just a small piece of iron.

There is also the hand-to-hand method of pinpointing a target. You can reach down with your hand and grab a handful of dirt or material. Pass your hand over the coil to see if you are holding the target. Continue until you have the target in one hand. Then pass half the material in that hand to your other hand. Use the coil to find which hand has the reading target. Discard the material from the other hand and pass half the material from the reading hand to the second hand, again. Keep up the process until you only have a small amount of material in the reading hand. Carefully blow off the lighter material to locate the target.

Another procedure is to grab a handful and pass it over the coil as explained above. Once you have a reading handful, toss it in a pouch for later panning.

Some prospectors prefer to sprinkle a handful of reading material slowly on top of the detector’s coil. There are different ways to do this. One effective way, which requires some practice, is to sprinkle material over a slightly slanted coil while you vibrate it so that material slowly sweeps across and off. When the target drops onto the coil, the detector will sound-off with a distinctive bleep. Then, all you have to do is gently blow the dirt off the coil, or recover the target from the top of the pile where the material is landing. This method is nearly impossible in wet material.

One important thing about using your hands to pinpoint and recover gold targets, is that some of today’s most sensitive high frequency gold detectors react to the salt (mineral) content on or in your hand. When this occurs, your hand will give a reading when passed over the coil by itself, sometimes even a strong signal. This makes hand pinpointing methods more difficult. In this case, the plastic tray or cup works just fine, or the method of pouring material onto the coil.

If you find a gold target, be sure to scan the hole again. Sometimes it is worth doing a lot of digging and/or raking, with alternate scanning of the immediate area. Gold targets almost never travel alone! I have seen dozens of gold flakes and nuggets come from within a one-foot square area on bedrock. Many times!

HOT ROCKS

Sometimes you get soft or strong signals from your metal detector when the coil is passed over rocks which contain heavy mineralization. These rocks are called “hot rocks.” This needs to be clarified. It isn’t necessary for a rock to have an extraordinary amount of mineralization to sound-off as a hot rock. It just needs to have more than the average ground which your detector is ground-balanced to. The opposite of this is also true. A rock containing less mineralization than the average ground will change tone on a detector in the opposite way. These are called “cold rocks.” A hot rock from one location could be a cold rock in another location containing higher mineralization in the average ground.

Put another way, when your detector is properly ground-balanced to the average ground, it will sound-off on rocks containing condensed heavier mineralization. Often, the signals given off by these hot rocks can be mistaken for signals which might be given off by gold targets in the ground. Some locations have lots of hot rocks. Naturally, since gold travels with other heavy mineralization, you can expect to find hot rocks in the various gold fields.

Hot rocks come in all sorts of colors and sizes. A big hot rock, depending upon the degree of mineralization over the average ground, can sound very similar to a gold target. The same goes for small hot rocks.

Quite often, most of the hot rocks within a given area will be similar in nature, color and hardness, but not necessarily in size. After searching an area for a while, you will know what most of the hot rocks look like. This makes pinpointing targets a little easier, especially when dealing with small hot rocks. When receiving signals from rocks which are dissimilar to the average-looking hot rock of the area, check them out closely, especially when they have quartz. Some of these may not be hot rocks at all, but gold specimens.

If you are finding hot rocks on top of the ground, you will almost always find them buried, as well.

Metal targets gradually lose signal-strength in proportion to the increased distance from the coil. Hot rocks rapidly lose their signal-strength as they are scanned further from the coil. Also, a metal target tends to create a more specific, sharper signal as the coil is passed over. The signal given off by most hot rocks is not as sharp. It is more of a mushy sound which doesn’t have as clear a change in tone-intensity as the coil passes over the target.

When uncertain about a reading target, one way that some hot rocks can be identified is by passing the coil over the target from different directions. If the target only sounds out when being swept from one particular direction, then it is nearly certain that the target is not a gold nugget.

Sometimes, when lowering the sensitivity on your detector a few numbers, the signal given off by a nugget will continue, but weaker. A hot rock signal will quickly disappear by lowering the sensitivity. You can get a better idea how your detector is reacting to sensitivity changes by running it over your test-nugget.

Another test is to slowly raise the coil further away from the reading target as you are scanning. The signal of a metal object will become progressively fainter as the distance is increased. The signal given off by a hot rock will rapidly die away as just a little distance is put between the target and the coil. Most hot rocks in a given area will have a very similar sound, the intensity depending upon size and distance from the coil. Sometimes, you will find that a gold nugget gives off a much sharper signal. But not always. Much also depends upon the size of a gold target, its distance from the coil, and the amount of mineralization interference in the ground that is being scanned.

Each area is different. The hot rocks in some areas are reasonably easy to distinguish. In other areas, it is necessary to dig every signal.

Larger hot rocks are easier to detect. Many can simply be kicked out of the way. It is the smaller pebble-sized hot rocks which create faint signals. In some locations, these signals are so similar to the signals given off by gold nuggets that you have no other choice but to dig them up.

If lots of hot rocks are making it difficult for you in a particular area, you might try experimenting with smaller coils. Smaller coils are more sensitive to smaller pieces of gold. Therefore, the sharpness of the signal over gold targets is also intensified. This may give you the needed edge in distinguishing the slightly-different signals being given off by hot rocks in that area.

Some gold prospectors go so far as to ground-balance over top of a hot rock until it no longer gives off a signal. This will eliminate a large portion of the hot rocks in the area, but it is also likely to eliminate a large portion of the small and marginal signals given off by gold targets. This procedure may work well in areas containing just large nuggets. However, most areas I am aware of have dozens or hundreds of smaller pieces of gold for every larger piece that you will find.

Since cold rocks are made up of a lesser-concentration of iron than the average material which your detector is balanced to, they give off a negative reading signal on your detector. Ground-balancing over a cold rock will cause your detector to react positively to the average ground within the vicinity.

PRODUCTION

Once you find a location which is producing gold targets, you will want to thoroughly work the entire area. This is commonly accomplished by carefully gridding the site. By this, I mean creating parallel crisscross lines on the ground, usually about four feet apart. You can do this by drawing light lines in the sand with a stick. Grid lines allow you to keep track of where you are, and what has already been searched.

If there are obstructions in the producing area (“nugget patch”), they should be moved or rolled out of the way if possible. The smaller rocks and materials on the ground can be raked out of the way. This allows you to keep the coil closer to the ground. In a proven area, this will surely mean more recovered gold targets.

Some areas produce quite well on the surface. Then, by raking or shoveling several inches off the surface and scanning again, sometimes you can find even more targets. I know of numerous small-scale mining operations in many different parts of the world, using metal detectors as the only recovery system. They use a bulldozer to scrape away material which has already been scanned, two or three inches at a time. A layer is removed; the area is scanned thoroughly with metal detectors to locate all of the exposed gold targets. Then, another layer is removed and scanned. This process is done all the way to bedrock. They make good money at it!

I have heard of others doing the same process on a smaller-scale by attaching plow blades to four-wheel drive vehicles. Some even do it using ATV’s!

While hunting over a proven nugget patch, be sure to keep your detector properly tuned all the time. Otherwise, you will certainly miss gold targets.

PROSPECTING OLD HYDRAULIC MINING AREAS

Perhaps the most productive areas of all to prospect with metal detectors are areas which were already mined by the old-timers using hydraulic methods. Many of these areas are left with a large amount of bedrock exposed. This allows immediate and easy access for search coils to get close to old gold traps. Sometimes, the exposed bedrock has been further-deteriorated because of direct exposure to the elements. Once a nugget patch is located, raking away decomposed bedrock sometimes can produce remarkable results.

While searching such areas, pay attention to the color of dirt which covers and surrounds nugget patch. You might discover a pattern. In our area of operation, it is a white powder which often signifies the possible presence of a good spot. Perhaps in other areas, it might also be this white powder, or something else.

PROSPECTING OLD MINING TAILINGS

It is usually possible to find piles and piles of old mining tailings throughout most proven gold-bearing country.

Many of the larger earlier gold mining operations (the ones that were set up to move large volumes of material), concentrated on recovering only the fine and medium-sized values from the material being processed. This meant that the larger material was classified-out so the smaller material could be processed through controlled, slower-moving recovery systems. On the larger operations, classification was usually done either with mechanical vibrating classification screens, or with the use of a “trommel.” A trommel is a large circular screening classifier which rotates and tumbles material through, allowing the smaller classification of materials to pass through the outer screen and into a channel which directs them to the recovery system. The larger materials are passed down the inside of the trommel to be discarded as tailings.

In many of the larger operations, there were no means to recover the larger pieces of gold which were screened-out along with the other large materials. As a result, larger nuggets were sometimes discarded along with the waste material as tailings.

Anywhere you see large tailings piles, especially near the present waterways, it is evidence of a large volume operation where it is possible that the nuggets were discarded with the waste and are likely to still be there. Some large tailing piles still have large goodies inside them, which sing out very nicely on the proper metal detectors. One way to distinguish the right kind of tailing pile to be looking through is there should be a pretty wide range of material sizes in the tailing pile. Tailing piles which consist only of the larger rocks (cobble piles) were most likely stacked there by hand during a smaller surface-type operation.

Scanning tailing piles with a metal detector is proving to be highly-productive in some cases, and should not be overlooked as a possibility for finding nice specimen-sized gold nuggets. VLF ground-cancelling detectors are usually best-suited for this, because tailings almost always also contain a large quantity of mineral content, which is likely to cause interference on a BFO-detector.

PROSPECTING OLD MINING SHAFTS

Even the most experienced cave explorers shy away from entering declining mine shafts because of the dangers involved.

CAUTION: The first thing to say about prospecting in old mine shafts is that they are dangerous! There are different things that can go wrong when prospecting around in such places, one main danger being a potential cave-in. The shoring beams in some of these old shafts may have become rotten and faulty over the years. So it is best not to lean up against or bump any of the old wooden structures situated in old mine shafts. Loud, sharp noises should also be avoided.

Shafts which extend down into the earth on a declining angle are particularly dangerous; because if the ladders or suspension systems are faulty and collapse while you are down inside, you may not have any way to get out again. It is never a bad idea to bring along a caving rope, and use it, when exploring declining-type old mine shafts. Caving rope is different than mountaineering rope in that it is made not to stretch nearly as much. But I suppose, when going down in dark holes, any rope is better than no rope at all!

Another potential danger involved with exploring old mine shafts is encountering poisonous or explosive gasses. Entire mines were shut down because of such gasses—even when they were good-producing mines. These, however, were usually caved in and closed off to prevent unsuspecting adventurers from entering at a later date and getting into trouble.

Before you enter any old mine and start sorting through its low-grade ore piles, or pecking samples off the walls of the mine, it is a good idea to make sure the mine is not already owned by someone else. Or, if somebody does own it, it is wise to get the person’s permission first. There is probably nothing more dangerous in a mine shaft, cave-ins and poisonous gases included, than some old cantankerous miner who catches you, uninvited, in his mine and thinks you are stealing his gold!

There is probably more danger in prospecting old shafts than in any other gold prospecting activity.

After all that, just in case I have not succeeded in scaring you out of the idea of entering old mine shafts in your prospecting adventures, here are a few pointers about how and where you might find some rich ore deposits, or rich ore specimens, with the use of your metal detector:

But first, let me recommend that if you do go into such places, you bring along a buddy and leave another one at the surface with explicit instructions to not enter the shaft under any circumstances, but to go get help in the event that you should get into trouble within. It is also a good idea to let a few others know where you are going, just in case your outside-man doesn’t follow orders and you all become trapped inside.

There are two main sources of possible gold and silver in an old mine:

1) High-grade ore specimens that may have been placed in the low-grade ore piles and left as waste material.

2) High-grade ore which has yet to be mined.

With the exception of the largest production hardrock mines, there is always a certain amount of rock (ore) which has been blasted away from the wall of the tunnel that was not milled and processed. This was because some ore is of such apparent low-grade value that it is not worth the expense to process.

Sometimes the vein being followed into the mountainside was not as wide as the tunnel needed to be in order to progress into the mountain. Therefore, that rock material which was not part of the vein itself, or the contact zone, that looked to be of lower-grade value, was also discarded into the waste piles.

Crushing and milling ore is, and always has been, somewhat of a timely and expensive process. For this reason, a good many mines only processed what appeared to be the highest-grade ore that was blasted from the ore body. The rest was usually piled out of production’s way inside or outside of the shafts.

In the smaller operations, the kind where the ore was crushed and milled by hand and then processed with a gold pan to recover the values, only the highest of high-grade ores could be processed at a profit. The rest was usually laid aside out of the way.

The sorting of a higher-grade ore from lower-grade ore has always been a matter of judgment on the part of the person who was doing that part of the job. And, until the more recent breakthroughs in electronic detecting equipment, sorting needed to be done by eye or by feel (weight). There simply was no other way.

The interior of mine tunnels was often poorly lit with miner’s candles during earlier days, and the air inside the shaft was often foul after the powder explosions used to blast ore from the interior of the mountain. As a result of all this, it is not difficult to imagine that some higher-grade ore was likely discarded as waste material in most mines.

How rich the ore was in a mine will have a lot of bearing on whether or not a present-day prospector will find high-grade ore in the waste piles of that mine. The size of a mine does not necessarily have anything to do with how high-grade its ore was, although it may have a bearing upon how much waste ore will be available to test.

County reports can be looked over to locate the old mines within an area. Many of these reports also include information about the grade of ore being extracted from some of the mines.

When you are testing ore samples from a mine with a metal detector, and you do not come up with any specimens, try a few different piles. If you still do not come up with any specimens, it was probably not a high-grade mine. Try another.

Keep in mind that the floor of a mine shaft is likely to have some iron, brass and other metallic objects which will cause your detector to read-out.

One of the fastest and most effective ways of thoroughly checking out samples of ore is to lay the detector down on the ground or upon a makeshift bench with the search coil pointing upward so individual ore samples can be quickly passed by the most sensitive portion of the coil. The 3-inch diameter search coils are probably best-suited for this kind of work, because of the increased sensitivity, and because there is seldom great need for increased depth-sounding when testing ore specimens.

The most sensitive portion of the search coil is usually located near the center of the coil. It can be easily pinpointed by passing a coin back and forth across the coil while the detector is in tune, and by finding that spot where the coin causes the loudest and sharpest reading. The most sensitive area should be marked brightly with a Magic Marker so it will be easier for you to move ore samples directly past it. It is worthy to note that the top of the coil should have similar sensitivity to targets as does the bottom.

Ground-balancing would probably best be achieved by tuning to the overall ore pile. But, you may need to experiment. A lot will depend upon the grade of ore you are looking for. High-grade gold specimens will require the surrounding mineral to be cancelled out. On the other hand, sometimes high-grade ore is full of fine particles of gold which would not sound-off on a detector. In this case, the high degree of mineralization in the ore specimen might sound-out like a hot rock. Therefore, you would not want to ground-balance out high mineralization. So, depending upon the nature of the ore in a mine, you will need to use your own best judgment regarding the proper way to ground-balance.

Bring along a bucket, canvas bag or a knapsack so you will have something to carry your specimens as you find them.

Both BFO and the VLF ground-cancelling metal detectors can be successfully used to locate high-grade ore specimens. For the individual who is interested in finding a wider range of high-grade ore specimens rich enough to be worth milling on a small-scale for the gold and silver values, perhaps a BFO is the better type of metal detector to be used for the job. This is because the BFO does exceptionally well at picking up highly-mineralized ore. When you are dealing with hardrock veins, high mineralization is a good index of gold being present, especially when you are working with the ore that was blasted out of a previously-successful gold mine. Ore which contains large amounts of locked-in values or lots of fine gold that is thoroughly dispersed throughout the ore is not likely to read-out as a metal on any kind of conventional metal detector, although the high degree of mineralization which usually goes along with such ore probably will sound-out on a BFO-detector as a mineral. So the BFO-detector is handy in finding rich ores which might otherwise be undetectable.

By placing a BFO-detector on its mineral setting and keeping the pieces of ore which sound-out, you can accumulate a lot of good-paying ore. With the use of a BFO as such, the perimeters of ore piles can be scanned first to find a pile that has a lot of mineralization.

Portable rock crushers and mills and processing plants are available on the market. Perhaps by combining these with the use of a good BFO-detector to pick out the highly-mineralized, discarded ore, a small operation could be quite profitable without having to invest the higher costs associated with developing a lode mine from scratch.

LOCATING RICH ORE DEPOSITS

When prospecting around in an old mine with a metal detector, don’t discount the idea of searching the walls of the various shafts to locate rich ore deposits which may have been overlooked by the miners who originally developed the mine. With today’s market value of gold and advanced milling techniques, a small-scale mining operation can be run profitably in ore producing about ½-ounce to the ton in gold values, or perhaps even less. Abandoned mines which will pay this well and even better are scattered all over the west. If a person were really interested in locating a lode mine that he could work at a profit, one way would be with the use of a BFO-detector to prospect the various abandoned mines within the area of his or her interest. In using the BFO to scan the walls of such mines, highly-mineralized ore deposits can be located, samples can be taken for assay, and a person could find the mines having the richer-paying ore deposits. When prospecting like this, it is a good idea to bring a can of spray paint, a pen and paper and some zip-lock bags, so samples can be accurately marked as to where they came from, along with their respective deposits being marked with the spray paint.

If you are not interested in starting up a lode mine, but are just prospecting around for a bonus, again, the VLF detector is good for looking through mineralization and detecting the richest deposits. If, however, you do locate a reading metal inside the wall of a mine shaft with a VLF detector, and you have determined that it is not some falsely-reading mineralization, it could be well worth your while to investigate further. This is because the chances are pretty good that you have located some bonanza paying ore. I know of one highly successful high-grade gold mine in the Mother Lode area of California that is using VLF detectors as its sole method of determining where to blast. At this writing, they have located and recovered millions of dollars in gold during the past two years, in a mine which was failing prior to the use of metal detectors.

MEDICAL

Bring along some mosquito repellent during electronic prospecting ventures. Otherwise, if bugs are around, sometimes it is difficult to put your full attention on listening to what your detector is trying to tell you.

In some areas, you also have to be careful of ticks. Some ticks carry Lyme disease. Some insect repellents will keep ticks off of you. DEEP WOODS, TECNU 10-HR INSECT REPELLENT, and OFF seems to work pretty well. Spread the repellent on your boots, pants and other clothing.

In the hot climates, you should bring along the proper sunscreen and apply it to exposed body parts.

It’s always a good idea to bring along a good first aid kit, and at least leave it in your vehicle in case of emergencies.

Extra clothing and water is also a good idea. You can leave it in your vehicle. You never know…

 

video subscription graphic

By Dave McCracken

“Good organization always comes back to having some understanding in advance of what conditions you will encounter when it is time to complete the mission.”


Assuming legal access to the property has already been arranged, and company executives intend for us to proceed in this way, here are the primary objectives that we try and accomplish during the preliminary evaluation of a potential mining project:

1) Meet with company executives to gain an understanding of what the mining program is about, what the overall objectives are, the timing and the budget. Review the information which they have accumulated so far. Make plans for a departure-date.

2) Obtain the very best maps of the area that we can get our hands on.

3) Locate and study as much information as we can find concerning the mining history of the area, and the areas surrounding where the project will take place. Plot this information on the map. This includes finding out the type of mining methods that were being used, and what kinds of values have been recovered.

Click On Thumbnails To Enlarge


4) Study background information about the geology, weather, culture, politics and economics of the area. This includes a look at the public information released by the U.S. State Department . Follow up with Internet research to see what others have to say about the people, events and mining activity within the area – and anything else of interest.

Is the political situation stable?

5) Establish a preliminary idea of how and where the potential project-area is located in relation to local communities, potential sources of supplies, emergency support, political structure and access. Bring together an early idea of what we want to see when we get there.

6) I always recommend that at least one representative (preferably one of the company directors) of the company accompany us through the full preliminary evaluation of the area where the potential project would take place. It is in the company’s best interest to have someone from existing management present to confirm our observations, and to help evaluate our conclusions.

7) Travel to the potential project area and:

A) Get a feel for the local politics in general, and in relation to the potential project. Will the locals ignore, support or object to the program? Are there pre-existing problems that will need to be fixed before beginning a sampling program? For example, the following video segment shows local campaigning on political issues within Madagascar that soon thereafter evolved into civil strife that disrupted all productive activity in the country for at least 6 months:

B) Find out the different ways of gaining access to the project site. Try and make contact with those people who would provide the transport service (if needed), and establish timing, cost and dependability. How can we make contact with them from the field? For example, the following video segments demonstrate boat transport services we needed to rely upon to support a dredging project in Cambodia :

Click On Thumbnails To Enlarge


C) Locate sources of food, fuel, supplies and personnel to support the mining program. This would include any special needs, like local guides and boat operators out at the project-site. Establish the cost of things and dependability of the supply and/or services. Are there periodic shortages of supplies or services?


D) Locate the nearest place for competent medical assistance. Do they have any kind of emergency evacuation service? If not, perhaps they can provide a referral to the nearest large medical facility which does provide such a service. Develop a viable plan to provide competent medical care in the event that it may be needed, and how to mobilize the service from the field.

E) Establish support in local communities within the vicinity of where we would conduct the mining operations.

Click On Thumbnails To Enlarge


F) Locate local miners and gain as much information as possible from them about what is being done, where and what results are being accomplished. Purchase samples of the values if possible and carefully log where they came from. Take a hard look at the gold, gemstones or other values being recovered. It is important to verify the activity and results. Look at how much value the locals are recovering, in relation to the volume of their production. Relate that back to what can be accomplished in production with suction dredging or other modern equipment.


Click On Thumbnails To Enlarge

For example, the following video segment demonstrates a primitive hand-mining program that I stumbled upon along the border of western Viet Nam just a short while ago. These miners were breaking very small volumes of hard-rock ore free from the surrounding country rock with a hammer and chisel. The pieces of ore were being crushed by hand, and then surprising amounts of free gold were being panned in the river where we were sampling. While the amount of gold actually being recovered was not a lot, it was very rich compared to the very small amount of ore that was being processed by their primitive methods. Modern equipment and technology would turn this into an extremely valuable deposit:

The best local mining operations to observe are the ones that are actively processing the gravels within the waterway where our dredging would be done in a follow-up sampling operation.

For example, I captured the following video sequence where active gold mining was being done by local miners alongside and inside of the river where we were considering a suction dredge program in Africa several years ago. As the local miners were recovering a lot of gold in proportion to the volume of river gravels being processed, we decided that a follow-up dredge sampling program was justified:

G) Find out if there are special concerns about dangers in the water, within the surrounding area, sanitary problems, health concerns, or security worries. How will they be dealt with? Will there be any special needs for this?

For example, the following two video sequences were captured during a dredge sampling project that we completed in Cambodia several years ago at a time when there was an active (brutal) civil war in progress. The dangerous situation at the time required us to bring along a substantial contingent of security forces and also arm each of the specialists on our team:

Is the waterway full of big rocks that will require specialized equipment to winch out of our way?


Click On Thumbnails To Enlarge 

H) Free-dive in the river and/or probe from the surface to gain a good perception of what equipment will be needed to perform a preliminary sampling program. How deep and fast is the water? How deep is the streambed material to bedrock? Is there a lot of material too large to move by hand? Are submerged trees going to interfere with the sampling process? Are there excessive amounts of mud or sand that will overwhelm the recovery system?

It is often possible to bring up smaller-sized samples to pan from the bottom of the river, to get a better idea what a dredge sampling program will find.

I) Decide if special recovery methods will be required to perform a preliminary sampling program. If conditions present will mean that more portable equipment will be required, this may require a floating container be constructed to fully catch the samples, so they can be carefully processed on shore.

Or it may be that you can refit your sampling dredge so that it will effectively capture the fine gold from your samples. Here is a substantial explanation of the system which we have developed to effectively recover more fine gold on our conventional suction dredges. It combines two classification screens to more-effectively separate material-feed into three size-fractions, each which is directed into a different recovery system. The smallest gold particles (which are most difficult to recover) are directed into low-profile riffles along the bottom of the sluice box which have long been proven to be very effective at trapping fine gold.


J) Establish the potential for a commercial mining opportunity, based upon evaluation of pre-existing information and direct observation of ongoing local mining programs, along with whatever limited sampling can be accomplished using the resources that are immediately available.

K) Document all important details as well as possible by logging names, phone numbers (or email addresses) and locations of important contact persons, along with how much things will cost. Obtain digital images of everything important..

L) If appropriate, conceptualize a preliminary sampling program. This includes how the sampling program would be performed, supported, and how long it would take to complete. The concept should be consistent with the company objectives and budget.

8) Write a report which includes all of the important details of our findings. Include a photo-library with explanations for each image. The report should conclude with a recommendation. For example, Here is an example of the non-proprietary portion of a completed Report.

For a better understanding of why a preliminary evaluation is so important, I strongly encourage you to read about some of the sampling projects that we have accomplished in remote locations outside of America. The full list of the adventures I have written about can be found here . When reading these stories, it should become very clear to you that the potential success of any sampling program will largely come back to how well it is organized in advance. Good organization always comes back to having some understanding in advance of what conditions you will encounter when it is time to complete the mission.


By James B. Wright

Learning to interpret sound anomalies on your metal detector.


Noise comes to those who would use an electronic metal detector in three different basic forms:
1) Locally generated sounds (such as motors, river rapids, people talking, etc.).

2) Equipment-generated sounds (whistles, squawks, buzzes, etc., from equipment maladjustment or defects).

3) And a third noise, which is the sound of a good piece of equipment operating the way it should.

The counter-measures which must be taken against the first two types of noises should be obvious. Kill the engine, stop the talking or wear headphones which prevent outside noises from entering the ear. And, of course, adjust the equipment properly, or have it fixed, and learn to adjust it properly.

The third type of noise is the good type. It is the noise that is created when a good instrument is set up right and working most-efficiently. This noise is a “frying” sound, kind of like rain on a quiet lake, the wind through the pines, a gentle rapid on the river or a crowd at a ball game. It is a good, clean steady hiss. On a meter, it may be a steady deflection of 25-40% of full-scale.

Unfortunately, you cannot have sensitivity without this type of noise, simply because noise is built into all physical processes and all of nature.

What is “noise” as used in this context? One good example is the sound you get from your television set when it is tuned to an unused UHF channel. This is when you see snow on the TV screen. What you are seeing and hearing is the composite of a large number of random electrical impulses, all continuously being generated by the very atoms which make up the television, as well as those which make up the earth, the atmosphere, the sun and the rest of the cosmos. This is the sound of Nature doing her thing!

So, what’s the point of all this?

When you send a signal into the ground and try to detect a response from bits of gold, or from other types of deeply-buried chunks of metal, you are usually dealing with a very weak return-signal amid a sea of pre-existing natural “noise.” The detector must identify and amplify the desired signal and try to discriminate against the unwanted noise.

This is where the user becomes a part of the detection system. Because human hearing is able to pick out signals buried in noise better than any piece of electronic gear (except for certain radar equipment which is gawdawful expensive).

Why then must we not only tolerate noise but appreciate it? Because, if your equipment is so sensitive that it will sense the intrinsic “noise” of Nature, it will sense an equally-weak signal from your target. If your detector sounds-off on hot rocks or black sands, it is alive and well and doing its job.

Your job is to learn to hear and interpret the anomalies in the noise, the “whisper” that is just slightly different, the smallest change in the pitch of tone.

This is what weeds out the expert from the rest of the pack. He (or she) is like a good sonar-man, picking out the submarine while ignoring the chatter of the whales, the fish and the other noises of the sea.


By Dave McCracken

There is always action and controversy of some kind going on in the gold mining business. I guess that’s why most of us like it so much!

One thing about participating in gold mining or prospecting, is that it is never boring. Nor is any part of the administration of the gold mining industry boring. There is always some action going on!

This is one of the things which makes our industry so interesting. People who participate tend to be non-conformists by nature, or at least on a temporary non-conformist quest of some kind.

Some people get involved in gold prospecting as an escape from the humdrum of their normal, everyday existence; get up early, go to work, come home, watch TV and go to bed, try and pay the bills on time, etc.

Getting out into the great outdoors on a quest for adventure, even on the most remote possibility that something of value may be found, is enough of a lure for many to pursue prospecting activities. In some cases, it is not the gold which is of primary importance. When found, the gold is just a bonus to many participants. The real treasure is the opportunity to get physically and emotionally free of our normal, everyday existence. This is refreshing and revitalizing. It gives us a chance to put things back in a more balanced perspective.

It’s been said that the best way to solve a problem is to get outside of the problem and view it from the outside. Sometimes it’s not enough to take a walk or go for a drive. Sometimes, the best way to get out of a problem, or to be able to view a whole existence from the outside, is to launch yourself into a new adventure or a new existence. After a few days on a quest, or in a complete new environment, or after a few days in a brand new dramatic activity, you can often look back at earlier problems, or your normal life, and see them far more clearly. Everyone can gain from an exciting vacation or experience.

Different people gain different things from being involved with our activity. While one person might get back in touch with the basics of nature, another might connect with the historical values of those who were there many years ago. Others enjoy the search and the excitement of the potential find. Some are emotionally disappointed in not finding what they are looking for. But everyone is touched in some way. These activities are never dull.

Even the guy that wasn’t able to find any gold this time, while perhaps disappointed at this moment, at the same time he is not all caught up in the problems at the office. He stopped thinking about the office last week. Right now, he is planning his next adventure in such a way as to improve the amount of gold he will find.

There can be more to life than normal survival routines, raising the family, earning the pension and paying off the house. This is where dreams come in. Take a person’s dreams away and you have destroyed that person. It is not only about how much gold the person finds. It is the fact that the person desires and is interested in going out looking. This is therapy; a person pursuing his or her dreams, no matter how silly or inconsequential those dreams may be to others with dissimilar interests.

Being involved with the administration of the industry is not dull, either! People associated with this business are either friendly and supportive, or they are out to do us in. The controversy over the 1872 Mining Law is just one example; those people who are against us will invent just about any lie or excuse why all mining should be stopped. There is no middle ground. There is no reason. But there is drama; plenty of it!

And this is the way our whole industry is. Some people are excited. Some people are disappointed. Some people like us. Some people hate us. Some people want to tell you the whole story about the rich gold deposit they are looking for. Some people are incredibly secretive. Some people want to share the gold deposit they located with all the other miners and friends in the area. Others want to keep all the gold for themselves. Some people want to argue and complain about what the problems are that face our industry. Others are willing to pitch in and give a hand to help resolve problems. But there is always action and controversy of some kind going on. Gold mining is never boring. I guess that’s why most of us like it so much!


BY STEVE HICKS

Placer miners at work

Placer mining is relatively simple as long as you don’t expect to make a profit; but it becomes much more difficult if your intention is to make some money. If you want to make some money, it’s a lot easier and cheaper to learn from other people’s mistakes, than to put yourself through the school of hard knocks. By far, the most common mistake I see is inadequate or improper sampling, which is often due to gold fever. Other mistakes are: not properly cleaning up bedrock, not researching the past mining history of your area, and starting a mining venture under-funded.

Placer miners diggingFirst, we will cover sampling. A common remark I hear is why put the time, effort, money, etc. into sampling when it can be better-spent on actual mining and making some money? All too often, individuals lose thousands of dollars on their mining ventures; but had they done some sampling and found out that the ground was too low-grade to mine profitably, they would have only spent hundreds of dollars. I have seen an individual go broke trying to mine ground containing less than $2 of gold per yard when there was un-mined ground about 300 yards away running slightly over $100 per yard. That is not a typographical error; it is one hundred dollars. This is, of course, an extreme example; but all too often rich ground is missed. Even before sampling, a literature-search is in order to get an idea of the ground’s value.

Another common mistake is not separating overburden from pay gravels. Novice miners frequently like to run low-grade overburden. This is because the more gravel they mine, the more gold they recover. While mining everything on a property will maximize the amount of recovered gold, it could bankrupt a person at the same time. If the overburden only contains $2 of gold per yard, and your mining cost is $5 per yard, then you are losing $3 for every yard put through the wash plant.

On the other hand, if you can strip low-grade overburden for $1 per yard, then you have saved $2 per yard which can be directed toward mining the pay gravels.

Gold sample in panOften, new miners leave a lot of gold values in the bedrock. Some highly-fractured bedrock may have values several feet below the surface. The deepest I have ever read about was a Canadian mine going down nine feet into bedrock to get all of the values.

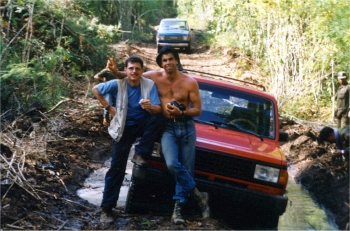
Most often, the bedrock values will be in the top two feet of bedrock. Once you mine the top six inches, check the next six inches to see if there are still enough values to make it pay. Once again, you must evaluate your mining costs for ripping up bedrock to determine if the effort will pay adequate dividends.

Starting a placer operation under-funded is another common mistake of novice miners. It is a mistake to count on finding some profitable ground to pay off debts right away and carry you through the rest of the season. Unforeseen problems have a way of cropping up, such as equipment breakdowns or a severe water shortage later in the season.

Even though most individuals reading this article won’t be running a large-scale mining operation, these tips should help you toward a more profitable operation even on a smaller-scale. Maybe, with some increased sampling or more efficient mining, you just may find that big nugget this season!

About the Author: Steve Hicks is a geologist specializing in sampling gold placers. He has previously worked a number of years as a mineral examiner for the BLM in Alaska and Montana. Presently he is doing placer consulting work and residing in Livingston, Montana.


By Dave McCracken

Sometimes, you will find that you are as close to winning as you can be, even though things have never looked worse!

Dave Mack
 
A short time ago, my dredging partner and I were sampling in a new section of river. We were looking for high-grade pay-streaks, dredging test holes, and hadn’t had any luck from five very well-done samples. We floated down to a new section of river, where the water was very fast. It was on the inside of the tail-end of a bend of the river–an excellent place to find a high-grade pay-streak.
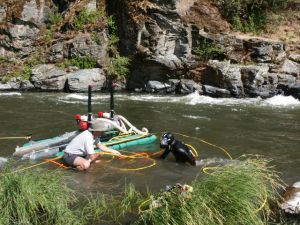
The problem was that we hadn’t found a single speck of gold in the previous five sample holes. This was uncommonly-bad! Usually, we at least find some showing of flood-gold in every test hole in river-dredging. For the most part, I had decided that this section of river must have been very low-grade. We had about a half-mile left downriver to the next river access–where we would be able to pull the dredge back out of the river. So, we decided it was worth a few more sample holes as we drifted down in that direction.

This new section of river had slow water towards the bank. I had it figured that the pay-streak would be located out under the fast water — which is often the case. I don’t know why, but mother-nature often has a knack for hiding her natural treasures in areas which are more difficult to get into!
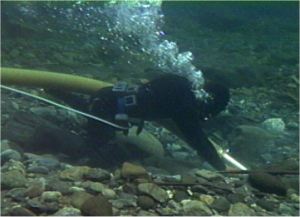
We set up the dredge in the slower water alongside the bank, got everything running, and I started the sample hole right out on the edge of the fast water. Once the hole was down far enough to protect me from the current, I pushed the hole out under the fast water where I figured the pay-streak would most likely be. This was very difficult, because the force of water was pushing very hard against the suction hose and my airline. I just muscled the work through against the current, but it took a great deal of effort. I was in that zone where heavy effort, physical pain, and emotional stress are all the same?

The suction hose was swept back into the current several times, which required me to go back, drag the hose over towards the bank, pull it back upstream, and get it back out into the sample hole. All this, to keep pushing the hole further out into the current, and deeper towards bedrock.

When I reached bedrock, I uncovered it slowly to see if there was any visible gold in the cracks. All I saw was a few small flecks–nothing to get excited about. It was gold, however; and seeing it on the bedrock was encouraging. It was the first gold we had seen in that section of river. Seeing the flecks on the bedrock meant that I was beginning to dial into the right wavelength!

Having it in mind that the best gold would be further out into the current, I pushed the hole in that direction. The further I pushed, the more difficult it was. The bedrock out there showed no gold. My arms felt like spaghetti!

So I pulled back into the original place where I spotted the gold flecks on bedrock, took another small cut off the front of the hole, and worked it down to bedrock slowly so I could see if there was anymore gold. I did not see any. So I assumed this area must also be low-grade and decided to call it quits.

As I was dragging the dredge’s suction hose in towards the bank, the thought crossed my mind that I ought to test the inside of the dredge hole–over towards the slow water.

If the streambed material had been deeper, it is likely I would not have tested toward the inside. Why? Because I had it in my mind that the pay-streak was out under the fast water; not under the slow water. But, because the streambed was shallow, and I had seen some gold on the bedrock where I first touched down, I decided to take a quick cut off the inside of the sample hole.
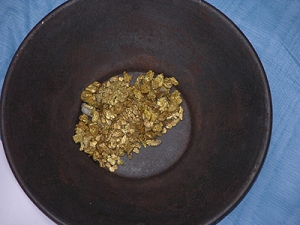
Sure enough, I spotted several small flakes of gold on the bedrock. So I took a larger cut off the inside, pushing towards the bank. About halfway down to bedrock, I started seeing flakes of gold in the gravel–kind of like Christmas. On the bedrock, I uncovered a pothole full of gold; it was about eight ounces in all–about half of it was jewelry gold. And that began one of the richest pay-streaks we ever found!

There is a lesson in this!

Everything we do, everywhere we go, is the result of the decisions we make. Sometimes we get going on a path which is just not the right direction! This is not just in gold mining. Sometimes the signals are there, telling us we are going the wrong way — often by the amount of pain and discomfort and effort it is taking to keep moving in the wrong direction. Have you ever found yourself in a major difficulty — only later, sometimes much later, to realize that it was one of the best things that ever happened to you?

The lesson is to never give up hope! Never say die! Sometimes, you will find that you are as close to winning as you can be, even though things have never looked worse. This is especially true in gold mining.

This is not to say that you should keep pushing hard in a direction that is not working. It is to say that if one direction does not seem to work, take it a little further, and then look around for another way to go. Don’t get fixed in one mind-set. Ask yourself what you are trying to accomplish, and keep your awareness open and your imagination working to find the available opportunities to accomplish your goal.

We manage group gold mining operations in northern California just about every other weekend during the spring, summer and fall months. During these operations, it is my personal responsibility to make sure that silt, sand and gravel are not washed back into the river off the bank from our tailings-water. This requires continuous effort to keep tailings water directed along the natural contours on the land outside of the river. Sometimes I spend a lot of time running up and down the bank trying to stop the water or slow it down. One thing for sure, if you stop the water in one place, pretty soon it is running down the bank somewhere else! Gravity is a force of energy that never stops.

In many ways, this is not dissimilar to a person’s intention to accomplish a goal. Sometimes, we will find our immediate progress slowed down or stopped altogether. But if we maintain our intention, and study the barriers to our progress, we can usually find other ways to make progress. The key is in maintaining the intention, keep pushing along, and having a little patience.

The best things in life usually take a little time to accomplish. And the best memories often come from the accomplishment of difficult goals.


Tags