BY GORDON ZAHARA

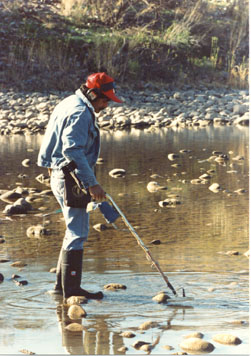
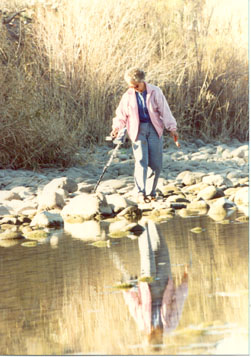
Several years ago, I decided to devote my time entirely to nugget hunting in northern California, giving up the other methods I was using. Being retired at a relatively early age, I had plenty of time. And so, I spent approximately six hours a day, four days a week, during the next two years, learning by trial and error what equipment to use, how to use it properly, and where to go to be the most effective with it.

After numerous requests, I have decided that this web site would be an appropriate place to pass along some of the helpful tips I’ve learned–things that will make it easier for someone who wants to get started, or improve their methods in the rewarding activity of detecting for gold nuggets.

Also, during the past several years, technology in the field of nugget detecting equipment has been improving rapidly. With the advanced technology and capabilities they put into the new designs, a prospecting metal detector (one designed specifically for finding gold nuggets) is capable of finding a piece of gold at greater depths than ever before, and some people can detect pieces weighing as little as 1/10 of a grain with ease.

When deciding on the metal detector of your choice, a few good points to remember are:

1) Seek out friends or other qualified individuals who can answer questions and show you how to use metal detectors designed for gold nugget hunting. Nugget detecting is a specialized field in itself.

2) Find a reputable equipment dealer who has a good selection of prospecting detectors. Note: All metal detectors have the capability of finding gold nuggets. But a detector designed specifically to find gold will give you a far better edge in your quest, make it easier, and more fun.

3) Have your friend or dealer bench-test various detectors for you. This will allow you to compare the depths and capabilities of the various detectors. (Please keep in mind that the degree of mineralization in the soil you’ll be working is going to affect the detector’s sensitivity and therefore your ability to find the same sized pieces. You won’t be able to find them at the same depth in the soil as you’re able to in the air.) Therefore, it is also of extreme importance to choose a detector that is going to be able to handle the heaviest mineralization possible.

4) Another helpful tip to use when selecting your detector is to know that in recent years we have generally found that the higher the operating frequency or kilohertz (khz) of a detector, the smaller the gold that can be found with that detector.

5) Upon choosing your new detector, make sure your dealer instructs you in the use of your new machine. This can be done in various ways. The best ways are by either using a test-patch (area with gold and other metal targets buried in mineralized soil), or by having the dealer take you to a gold bearing area and give you hands-on training with your new detector. You should never test a detector solely inside a building. Because the results will not be accurate, due to the materials in the walls and floors. In addition, exclusive testing there will result in your finding yourself alone in the field with your new detector and not knowing how to effectively make use of it. Because a detector’s response in the field is completely different from a “bench test.”

The following is a list of some of the metal detector accessories and tools you will need to be successful, as well as the purposes they serve to facilitate your quest:

1) Earphones: A necessity for nugget hunting. You will lose 80% of your detector’s sensitivity if you try to detect without them. They should be well padded, allowing for long periods of usage. It is also a good idea to have some type of built-in booster which adds to the depth capabilities of your detector and enhances the metallic sound of the gold.

2) Coil Cover: A small item, but quite important. It will protect the bottom and sides of the coil and give it a much longer life.

3) Digging Tools: There are many types to choose from, so find the one, or ones that best suit you.

4) Plastic Cup: To be used to separate a target from the soil by process of elimination. It should be about 4×3 inches, and slightly flexible.

5) Rake: Any type of heavy-duty rake will work. The rake is often used to eliminate soil from a paying area, a few inches at a time. This enables an electronic prospector to find deeper nuggets. Using the raking system, I have found many nuggets that I would have otherwise missed. Note: Gold nuggets are often found in patches. So where one nugget is found, many more may be located.

I feel that the above items are the most important accessories you will need. There are a great number of other products on the market, and you can determine if you need them or not after you have been detecting awhile.

Where to hunt? The best answer I can give to this question is, hunt anywhere that gold nuggets have been found in the past. In other words, any gold bearing area. Almost any research books on past mining operations and other related topics can help you locate prospective metal detecting areas. After you have located an area, you must make sure that it is not private property or already under mining claim.

Many people have trouble finding areas to metal detect for nuggets. If this is your problem, you might consider joining a mining organization.

Here are a few pointers that may help you after you have found the areas you want to metal detect.

For Desert Areas, check the following:

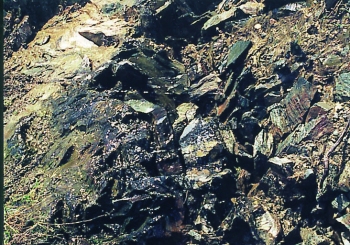
1) Exposed Bedrock: Gold can usually be found on bedrock, or in exposed crevices.

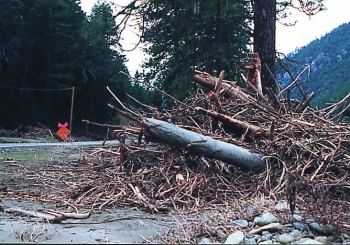
2) Washes: Desert gold is moved by flash floods, which create washes that may be gold bearing. The banks of washes also sometimes pay well, with nuggets that are in the process of being washed down by the infrequent flash flooding.

3) Old Dry-washing Tailings: Dry-washing equipment misses gold many times when the dirt is screened into the machine. A dry-washer does not separate wet dirt well and the gold can often flows right out into the tailings.

4) Any other desert areas where prospectors have found gold in the past. Remember–GOLD IS WHERE YOU FIND IT–AND WHERE OTHERS HAVE FOUND IT!

For Mountain Areas, check the following:

1) Rivers & Streams: Detect all exposed bedrock on the sides of rivers and streams.

2) Old Mines: Look through tailings piles and around old stamp mills. Check roads that were used for hauling ore. Caution: Do not enter any mining tunnels. These can be extremely dangerous.

3) Hydraulic Areas and Ancient River Channels: Metal detect all exposed bedrock. Look under rock piles (watch for snakes!) Check areas where old sluice boxes were used. I’ve found that gold can be anywhere in a hydraulic area, so be sure to search these areas very carefully.

For the beginner, desert metal detecting should be considered as an excellent learning area. Since the desert has mostly flat terrain and very little mineralization in the soil, a new metal detector can be mastered more-easily here.

My last tip is to keep up-to-date on new metal detectors and accessory equipment. The metal detecting industry now realizes that the electronic prospector who hunts for nuggets is a viable public. New and even better equipment is on the horizon for us out there.

I hope this article aids you in getting started detecting for gold nuggets.

The following is a list of recommended books that can provide further information on nugget hunting: 1) “Finding Gold Nuggets With a Metal Detector,” by Jim Normandi. 2) “Follow The Dry-washers,” by Jim Straight. 3) “Magnificent Quest,” also by Straight. 4) “Modern Electronic Prospecting,” by Lagal and Garrett and 5) “Successful Nugget Hunting,” by Pieter Heydelaar.

 
video subscription graphic
This story first appeared in Gold & Treasure Hunter Magazine May/Jun, 1997 on Page 22.
This issue is still available! Click here.

By Dave McCracken

“It takes a huge amount of streambed in motion to cause large portions of the river to form new high-grade deposits.”

Dave Mack

It only takes a small amount of water force to move sand-sized particles downstream in a riverbed. It takes more water force to move pea-sized gravel downriver, and even more force to move baseball-sized rocks, and so on. It also takes a greater amount of water force to move larger particles of gold, than it does to move smaller ones – just like other streambed materials.

There is a massive amount of gold in gold-bearing waterways which is so small in particle-size that it floats in a state of suspension in the river-water itself. Some amount of gold is moving downstream in any gold-bearing river at any given time. An increase in water-flow increases the amount of streambed material and gold that is moved downstream.

Normal winter storms, for the most part, can move large amounts of fine and ultra-fine gold down the gold-bearing rivers. But this gold is likely to be so widely dispersed throughout the overall river that it is of little value to the modern river-prospector.

Today’s modern river-prospector is mostly interested in that gold which lies inside and underneath naturally-formed streambeds. For the most part, this gold will remain locked in place until a storm of major proportions comes along. Such a storm can cause so much water force in the river that large sections of pre-existing streambeds, and the gold that is within them, are swept up and washed downstream.

When a storm or snow-runoff of huge dimensions comes along and creates so much force of water flow that large portions of the riverbed are torn up and washed down along the bedrock, large portions of the bedrock will also get pounded loose, and any gold which was trapped in that bedrock will become washed further downstream along with the rest of the streambed material.

“Rough bedrock makes the best gold traps.”

The amount of gold still sitting inside streambeds of proven gold-bearing rivers is incalculable; there is a whole lot of it! Much was left behind in low-grade deposits which the early miners were not capable of mining at a profit. While there may been a lot of gold in some sections of river during the gold-rush years, it might also have been too widely dispersed or sitting underneath too much overburden to make the gold worth mining in those days. Other very rich deposits were missed because they were out of sight. Without processing every bit of streambed (which they did not have the capability to do), the old-timers simply could not find all of the gold deposits that existed during their time. A lot of gold that was excavated was never recovered. It was washed out of the high streambed deposits, through sluice boxes, and right back into the present rivers and creeks. This was particularly true of hydraulic mining, where an estimated 59% of the gold was missed by many of the large and small operations alike.

Also, the last 150 years of erosion has washed more gold into the present rivers and streams out of higher and older streambeds, and out of some lodes that are still in existence.

In taking all of this into consideration, we are talking about a lot of gold still existing in these gold-bearing rivers. In some cases, there is more gold present now than the amount that has already been mined out of them.

When a major storm occurs in a gold-bearing area and tears up large portions of streambed, a great deal of gold is set free and put into motion downriver. A fair amount of this newly-released gold, because of its superior weight, will be deposited in common areas along the riverbed. This is the type of gold that the modern gold prospector should be sampling for. The same major storm which causes enough force to tear up large portions of streambed material will also deposit most of that material into newly formed natural streambeds-even in those same areas which were once mined by the early miners.

During full flood stage, when streambed material and gold are moving free in the waterway, because it is so heavy, most of the gold will travel along a rather narrow path. This path is often referred to as the “gold line” by prospectors. Almost all high-grade pay-streaks will be located along this specific path. Therefore, the first step in prospecting is to locate where the common gold path is within the waterway. This very important principle is demonstrated by the following two video segments. Please take careful note of how the gold is attracted to the common line in the simulated river, regardless of where it is fed into the waterway:

For the most part, normal winter storms occurring in gold country do not create enough water force to do this. A winter storm might be enough to sweep up small portions of streambed in faster-moving sections of river and redeposit new streambeds in those areas, but this small amount of movement is not likely to put paying quantities of gold into play in the riverbed. It takes a huge amount of streambed in motion to place substantial amounts of gold into movement. This causes large portions of the river to form new placer deposits. Such storms occur occasionally, and are the main cause for a streambed cutting deeper into the earth as time goes along. Most gold-bearing areas have had at least one of these major storms since the early 1960’s. Alaska has major storms along with massive snow runoffs. So flood forces like this happen more often there.

When millions and millions of tons of rocks, cobbles, and boulders are being swept downstream along the bedrock foundation during a huge storm, the ground shakes and vibrates, and the river rumbles like a huge loaded freight train. After a major storm has been through an area, the plant growth, underbrush and weeds which normally grow along the river gravel bars, will be washed away. This will also be true with a lot of the growth, including trees, along the riverbanks.

It takes an incredible amount of water force to cause an entire riverbed to move downstream, but this is what it takes to form many new placer deposits in the river.

The following video was taken during the major flood storm that took place along the Klamath River in Northern California during early 1997. If you watch the footage closely, you will see places where the river is flowing down river with the full force of the storm, and you will see other places right alongside where the water is flowing in a reverse direction. This is important! Take note of the incredible amount of boiling which takes place between the different directions of flow. These are pay-streaks in the making; places within the waterway at flood stage where the river is not really flowing in either direction; but rather is boiling like a kettle of superheated water between opposing forces. Gold concentrates within these areas because there is not enough water velocity to keep it moving along. Each place along the common gold line within the waterway that a boil like this is created by the interplay of reverse-flows is where a prospector will find the high-grade pay-streaks. See how big the boiling areas are?

The earlier idea that gold drops into the river and simply is vibrated down through already formed streambeds to eventually reach bedrock and form a placer deposit is very limited in its workability. This theory does not lead a prospector into paying deposits of high-grade gold

Sometimes a storm will have enough force to move large amounts of gold, but will only move a portion of the entire streambed, leaving a lower stratum in place in some locations. When this happens, the gold moving along at the bottom of the flood-layer can become trapped by the irregularities of the unmoving (false bedrock) streambed layer lying underneath. The rocks along the surface of a lower stratum can act as natural gold traps.

Streambed layers caused by different flood storms are referred to as “flood layers.” Flood layers within a streambed are easily distinguished, because they are usually of a different color, consistency and hardness from the other layers of material within the streambed. Sometimes the bottom of a flood layer will contain more gold than is present on bedrock. Sometimes, when more than one flood layer is present in a streambed, there will be more than one layer of flood gold present, too. Gold deposits can often be found in the contact zone between the layers.

Flood layers that are caused by major flood storms are almost always found in a compacted state where the rocks and material hold together tightly and require tools to help pry them apart. In mining, we call this “hard-pack.” There is a big difference between hard-packed streambed and tailings from earlier mining activity or loose streambed material. Almost all high-grade pay-streaks will be found at the bottom of a layer of hard-pack. So it is very important that you know what it is. Please note how hard I have to work to break apart the hard-pack in one of the following 2 video segments:

The larger that a piece of gold is, the faster it will work its way down toward the bottom of a flood layer as it is being washed downstream during a flood. The finest-sized particles of gold might not work their way down through a flooding layer at all, but might remain dispersed up in the material.

So, you can run across a flood layer which has a line of the heavier pieces of gold along its bottom edge, or a flood layer which contains a large amount of fine gold dispersed throughout the entire layer. You can also run across a flood layer which contains a lot of fine gold dispersed throughout, in addition to a line of heavier gold along the bottom edge.

Not all flood layers contain gold in paying quantities for the small-sized mining operation. But in gold country, all flood layers do seem to contain gold in some quantity, even if only microscopic in size.

Some of the best areas to test for paying quantities of flood gold are where the stream or river widens out, or levels out, or changes the direction of its flow. Such places always cause the flow of water in a storm to slow up in certain locations. This can allow concentrations of gold to collect either on bedrock or in the contact zones between layers. These following important videos demonstrate the most common areas where pay-streaks are formed:

Gravel bars, especially the ones located towards the inside of bends, tend to collect gold. Flood gold in bar placers is sometimes consistently distributed throughout the entire gravel bar. Often the lower-end of a gravel bar is not as rich as the head of the bar, but the gold there can be more uniformly distributed throughout the material.


By Sam Radding


Sam RaddingTime, like the river in front of our camp, takes some interesting twists. Some years back, I sat on a boulder by a small creek with a fishing rod in one hand and a gold pan in the other. I can still remember wondering whether I looked as foolish as I felt. Was I actually going to put some dirt into the pan and try my hand at gold mining? — Or was I just going to go fishing?

I guess most would-be miners come to a point like this. Although there was a lot to learn about gold prospecting, the knowledge did seem to come easily to me. I have always been a do-it-yourself person; and within two years, I was already building small-scale mining equipment for several shops in southern California.

Sniping 1For me, building the equipment, and showing others how and where to use it, widened the pleasures found in our gold mining adventures. Since then, some part of every prospecting trip has been devoted to showing at least one beginner how it all works.

A case in point happened over our last three sniping trips to the Mother Lode. Sniping has two related meanings in a mining sense. To the old-timer, sniping meant using light, portable equipment to work the high-grade deposits along the banks of gold-bearing streams and rivers. These banks were sampled quickly. When a suitably-rich deposit was found, it was worked as fast as possible and the miner was off to the next spot.

Today, sniping also means working gold-bearing waters with a mask and snorkel and a few hand tools. Higher-grade spots are still worked quickly and the miner is off to the next hot spot. The equipment must be light, because the sniper usually has to cover a large area.

Sniping 2Over the years, I have gravitated to this type of mining. There is nothing quite like the thrill of spotting gold sitting on the exposed bedrock, right there for the picking. This is where my love of sniping, joy in teaching, and my friend Howie all came together.

We first met Howie at the Mineral Bar Campground on the North Fork of the American River. We pulled into our camp spot and within an hour there was Howie, the itinerant camp-greeter. He was living out of his old Dodge van and finding a little gold with his gold pan.

Sniping 3Over the next few days, Howie watched me don my wetsuit and head up the river. In the evening, he would watch me clean up the gold. On the third evening, I asked if he would like to try his hand at sniping. I would supply the tools and a day’s instruction. As it turned out, we worked together for about four days. In that time, Howie learned to look for bedrock cracks, but not just any cracks. We wanted cracks that were fed by other features surrounding them. Low spots and shallow channels were examined for cracks. Areas downstream from large obstructions, like trees and boulders, were worked. Any patch of broken or rough bedrock was investigated. We hand-fanned away shallow overburden, looking for hidden gold-bearing spots. There were a lot of places to look!

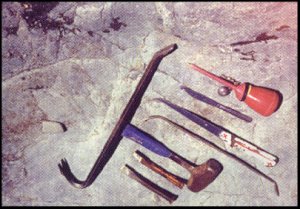
Sniping 4We found lots of flake-gold and a few small gold nuggets by splitting small cracks with my four-pound hammer and a one-inch chisel. We cleaned other spots with small hook tools. At times, we just picked the flakes off the bedrock with our fingers.

By the end of the fourth day, Howie had the basics down, but he was still leaving a lot of gold in the spots he worked. The best I could do was to tell him to be more thorough in the areas that showed good potential. Those tiny cracks can hold as much gold as the larger, easier ones do; and there are a lot more of them.

One year later, we met again. Howie’s old van was now a truck, but camping still was home. We worked together for a few days, and I did see progress. He was finding better spots and working them more diligently, but he was still leaving some easy gold for me to find when I checked his spots.

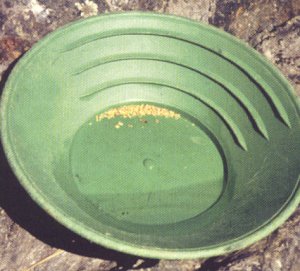
Gold from snipingThat was last year. This year, Howie is an accomplished sniper. A few hours spent together in the water proved that. Somehow, between this year and last, Howie got thorough. At an evening get-together, Howie turned to me and quietly said “I really have gotten better at sniping.” I already knew that. The gold in his bottle said a lot.

If this type of mining seems appealing, don’t just sit on a boulder with a fishing rod in one hand and a pan in the other. Find yourself an old wetsuit, mask, snorkel, crack hammer, a few crack hooks, and jump in. As soon as you uncover your own first piece of gold, you will know how I feel about sniping.

If you find me out mining on the river, I will always have a little time to talk. See you out there!

 
video subscription graphic
This story first appeared in Gold & Treasure Hunter Magazine Jan/Feb, 1992 on Page 21. This issue is still available! Click here..

By Dave McCracken

“Team dredging is very similar to playing music, except that you are playing little notes of effort in unison, so that all of the effort combines together to achieve optimum momentum.”

Pro-Mack Team

The amount of streambed material that you are able to process through a gold dredge will determine the volume of gold which you will recover. Actually, this is true of any type of mining operation, whether it be a large-scale lode mine or a small-scale gold prospector using a gold pan.

The smaller the amount of material which an operation has the capacity to process, the richer the pay-dirt must be in order for the operation to recover as much gold. Consequently, a smaller operation often needs to sample more to find the higher-grade pay-streaks which are more scarce. So smaller-scale operations generally spend more time sampling and less time in production.

To summarize this, gold mining on any scale is a volume game. If you can move twice the volume, not only can you recover twice the gold, but you will find more than twice as many lower-grade gold deposits which you can make pay adequately enough to meet your minimum standards. You can also reach deeper into the streambed to find more pay-streaks.

This is why we always advise beginning gold dredgers to go find an easy location and practice their basic gold dredging production techniques for a while to bring their speed up to par, before they get very serious about sampling for pay-streaks. A beginner will sometimes be so slow in volume-production that he or she will likely miss valuable pay-streaks simply for lack of being able to process enough gravel during sampling. This is because when you dredge a sample hole, you have to evaluate how much gold you recover against the amount of time and energy that it took to complete the test hole. If you are only moving at 20% of your potential production speed, you are likely to walk away from excellent pay-streaks just because you will believe they are not paying well enough.

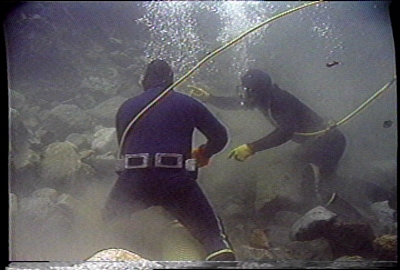
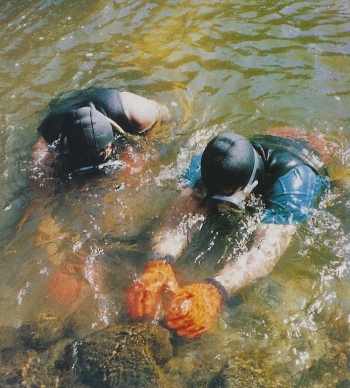
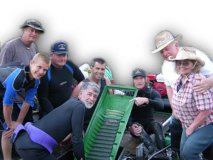
When we run larger-sized gold dredges, eight inches or larger, we almost always have at least two men underwater. The reason for this is that operating an eight-inch dredge in six feet or more of streambed material requires that a large number of oversized rocks must be moved out of the dredge hole by hand. This varies from one location to the next. But generally, in hard-packed natural streambeds, somewhere between 60 and 75 percent of the material is too large to process through an eight inch dredge. This is where the second person comes in. A sole operator in this type of material, when the material is deeper than five or six feet, is going to spend a great deal of time throwing rocks out of the hole, rather than operating the suction nozzle. Some hard-packed streambeds require that most of the oversized rocks be broken free with the use of a pry bar. This further decreases the amount of nozzle-time on a single-person dredging operation. This extremely important concept is demonstrated in the following video segment:
In the final analysis, it is the volume of material which is sucked up the nozzle that determines final gold production. However, it is how efficiently the oversized material is moved out of the way which determines how much gravel and gold is sucked up the nozzle.

If a rock-person is added to the operation, he or she must increase the efficiency of the operation at least as much as the percentage of gold which the added person is going to receive.

If I am running an eight inch dredge in two or three feet of hard-packed streambed, chances are that a second person would not increase my speed enough to justify paying the second person a fair percentage of the gold for his or her time. The reason is that I do not have to toss the oversized rocks very far behind me when dredging in shallow material.

If I am dredging in five or six feet or more of streambed, I can literally bury a rock-person with oversized rocks and make the person work like an animal all day long. I also have to work like an animal to accomplish this. The result is a good paying job for my helper and a substantial increase in my own gold recovery.

And when we start talking about working in ten, twelve or more feet of material, I absolutely must have a rock person to help me. Otherwise, I myself am completely buried with cobbles all day long and get very little actual nozzle-time accomplished.

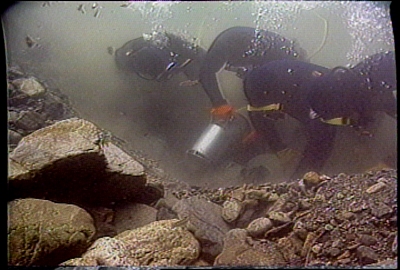
As we move our hole forward, and as we dredge layers (“top cuts”) off the front of the hole, we try to leave a taper to prevent rocks from rolling in on top of us. This is an important safety factor. Also, since the nozzle operator’s attention is generally focused on looking for gold, the rock person should be extra vigilant in watching out for safety concerns. As demonstrated in the following video segment, any rocks or boulders that potentially could roll in and injure a team-mate should be removed long before they have a chance to do so:

One main advantage to a two-person team is the enormous emotional support which a second person can add to the operation-especially when you are dredging in deep material, or when you are sampling around for deposits and have not found any in awhile.

On the other hand, the wrong person can inhibit the operation. So you must be especially careful to find someone who has a similar work, emotional and moral standard as yourself.

In my own operations, we have found that the key to good teamwork is in establishing standard operational procedures for almost everything. This takes quite a bit of planning and communication, and is an ever-continuing process. We have standard procedures for removing plug-ups from the suction hose and power jet. We have standard procedures for moving the dredges forward and backward during operation. And, we have standard procedures for every other facet of the underwater work of moving the material from in front of us, to placement of the tailings and cobbles behind our dredge hole.

The following video segment demonstrates a well-orchestrated underwater dredging team. Notice how the rock-persons are working to free the very next over-sized rocks that are impeding progress of the suction nozzle:

Most importantly, we have standard underwater communication signals. These are demonstrated in the following important video segment:

As we discussed earlier, volume is the key to success — or the degree of success. We take this quite seriously in my own operations, to the point where every single second and every single physical effort is important to the operation. You will seldom find the members of my team socializing or goofing off during the underwater production hours. During the rest of the time, maybe. But during production time, we are entirely focused upon the needs of the operation. We treat the dredging-portion of the operation kind of like competitive team athletic sports. We don’t compete against each other. We compete against the barriers that Mother Nature has constructed for us to overcome to recover volume amounts of gold.

We try to spend a minimum of six hours doing production dredging each day. In our operation, this is done in two 3-hour dives. Other commercial operators prefer three or four shorter dives. I know one commercial dredger in New Zealand who prefers a straight six, seven or eight-hour dive. What an animal!

Personally, I like lunch. But I do agree with the concept of long dives; the reason being that it takes a little while to get a good momentum going. Every time you take a break, you need to then get the momentum going again. What do I mean about momentum? Momentum in dredging is very similar to the beat of the drum in rock n’ roll. It is the continuous flow of gravel up the nozzle, with the oversized rocks being moved out of the way in their proper order at just the proper time so that the flow of material into the nozzle is not slowed down.

In fact, team dredging can be like an art form. It is very similar to playing music; only instead of notes being played on several instruments to form a harmonious melody, you are playing little notes of effort using your bodies to move the suction nozzle, or the oversized rocks, in unison, so that all of the effort works together to achieve optimum momentum.

An inexperienced rock-person will often move the wrong rock, which will cloud the hole out with silt, rather than move the next rock which is immediately in the way of the nozzle operator. In this case, the nozzle operator is slowed down because of the decreased visibility, and is further slowed down because he or she must then move the proper rock out of the way. This is similar to playing off key, or playing the wrong tune, in music. Everybody else is playing one song, and the new person is doing something else. This all amounts to less volume through the suction nozzle.

On the other hand, there is enormous personal and team-satisfaction to operating within a well structured team-dredging system. This is where the nozzle-operator is the conductor, and the rock-person or rock-persons make the extra effort to stay on the nozzle-operator’s wavelength, to play his tune at his pace, to do everything possible to contribute to his momentum. This is where the rock-person is always paying attention to the needs of the nozzle-person in order to keep things moving along; not just the next rock which is in the way, but moving the dredge forward a bit when necessary to give the nozzle-person a little more suction hose when it is needed, and the hundred other things that are necessary to keep the flow going with minimal restrictions upon the effort being expended to get the job done.

We treat it like a team sport. Everything in dredging is physical. When I give my rock-person the plug-up signal, he or she races to the surface to do his part to clear the obstruction. He doesn’t just mosey on up there like he is on vacation. He goes like he is running for a touchdown or home run. And he gets back to the hole just as fast, once the plug-up is free. When he sees that rocks are stacking up in the hole, he doubles his pace to catch up. When caught up, he will look around to see where other cobbles might be moved out of the way without clouding the hole. Or, he might grab the bar and start breaking rocks free for me. At the same time, I am doing my job, which is to get as much material through the nozzle as humanly possible, with the minimum number of plug-ups. And I don’t stop for anything if I can help it. If something else needs to be done, I delegate it to my rock-person so that I can keep pumping material up the nozzle. That’s my job! Everyone’s gold share depends on it.

Every effort counts in production-team-dredging. This requires everyone to pay attention to what is going on in the dredge hole. Rock-persons particularly must be able to remain flexible and be able to switch gears quickly. At one moment, there may be a pile of rocks which needs to be thrown out of the way. The next moment, even before the rock-person has moved several of those rocks, he may notice something else which is directly impeding the nozzle-operator’s progress-like a boulder that needs to be rolled out of the way, or a particularly difficult cobble which needs to be broken free with the pry bar.

The main objective in everyone’s mind must be to support the nozzle-person’s progress. Whatever the next thing in the way is, deserves the most immediate attention.

When things get too confused, sometimes the nozzle-person needs to put down the nozzle and help organize (move cobbles and boulders out of the dredge hole). But everyone should have it in mind that actual production-momentum (gravel through the nozzle) has stopped and needs to get going again as soon as possible.

We take cuts off the front of the dredge hole in production dredging, and take the material down to bedrock in layers. We do this because it is the fastest, safest and most organized method of production dredging. Sometimes, when conditions are right for it, a rock-person may be working directly at the nozzle, breaking the next rock free and quickly throwing it behind the hole. However, on every cut, there comes a time when the nozzle-operator decides to drop back and begin a new cut to take off the next layer. The rock-person has to pay close attention to this and follow the nozzle-operator’s lead. Otherwise, he or she may finish breaking free a rock up in the front of the hole when there is no nozzle there to suck up the silt. In other words, the rock-person has to keep one eye on the nozzle-operator all the time. Because if he is a dynamic and energetic nozzle-operator, he certainly will not be following the rock-man around the dredge hole.

Teamwork extends up to dredge tender, as well, if you have one. A dredge tender should always immediately attempt to remove a plug-up when the water velocity slows down through the sluice box. Many times, this effort is done for nothing, because the nozzle-operator has set the nozzle down over a large rock in the hole for one reason or another. However, on the occasions where there is a plug-up, it is great teamwork to have a tender handling the problem immediately without having to be told. Volume through the sluice box should also be heavy on the tender’s mind. When gravel stops flowing, something is wrong.

And the same thing goes for other support activities. When the tender sees that the dredgers are moving forward in the hole, he or she should be also making sure the dredge is being moved forward proportionately to insure the nozzle-operator has a comfortable amount of suction hose to work with. Good teamwork minimizes the number of orders that need to be given. Most of the activity is handled by standard operating procedures which require a bit of planning and coordination in advance.

There are different opinions about all of this. Some people are simply not running any races. This is fine, but they must understand that they do not have nearly the same gold recovery potential as others who are working at a faster pace or with a more organized system.

I hear the occasional comment that I am a slave driver. Slaves do not last very long with me because they have too little personal judgment and require constant orders! I choose to work with hardworking, ethical, highly-motivated individuals who enjoy the challenge of optimum physical team production. I prefer to think of myself more as a production manager. And, generally, you won’t hear those on my team complaining, especially during split-off time.

There is not anything difficult to understand about successful gold dredging techniques. The process is quite simple. However, the activity, as a commercial endeavor, is a lot of hard work. The faster, deeper and more efficiently you can dredge the sample holes, the faster you will find the pay-streaks, and the better you will make them pay.

Even when you are not finding commercial amounts of gold, there is at least a satisfaction to knowing that you are accomplishing optimum momentum. And, when you do locate the deposits, the sky is the limit!

 

BY TOM BRYANT

Helpful Tips on Dealing with Big Rocks Underwater

Dredgers underwater

Every experienced dredger has had at least one close call with a rock that decided to ruin his (or her) day, despite the precautions he was, or thought he was using. It comes with the territory. Just like a close call in traffic, you have a while of silent thankful prayer vowing to never let that happen to you again, and then you get on with things like nothing ever happened.

If you have ever been trapped by a boulder while dredging, and are still alive to tell about it, then you will likely have a tale to tell that would make people sit up and listen.

For those of you that have never experienced it, let me try to tell you what it is like:

There is no noise, and very rarely is there any warning. A horrible, crushing weight comes down on you, like “Jaws,” and you get a sick feeling in the pit of your stomach as you instinctively try to pull yourself free. You try to tell yourself to keep calm, but the shock of the pain as the boulder crushes your leg or arm, joined with the realization that you have very few escape-options, makes you hyperventilate. You cannot seem to get enough air through your hookah regulator.

If your airline is also pinned under the rock, you might find yourself with no air at all! You try to pull yourself free, but there is no place to push against; and the rock is not moving. If you have not already drowned by now, or been so badly hurt that you can no longer function; reason will slowly return, and you will start thinking hard about what your resources are and what remaining options you have. “How much gas do I have left?” “Am I caught, or is a piece of my equipment caught?” “Can I use the dredge to suck away a channel to free myself?” “Where the heck is my diving partner?”

The biggest danger facing the trapped diver is time. How long until the air runs out? Your whole life is tied to your hookah airline and the dredge motor. This is a good reason to take suction dredging on with the right approach in the first place, making sure to keep all your dredging gear in a good state of maintenance and repair.

Dredgers moving bouldersA trapped diver needs time. As long as he has air and has not sustained a fatal injury from the accident, he can wait it out underwater until he starves to death. Here follow some good ideas when you find yourself dredging around big rocks. Some of these ideas will buy you time. Some will help you avoid serious problems in the first place. Some will help get you out of trouble if you are having a bad day:
1) It is always a good idea to work with a buddy.

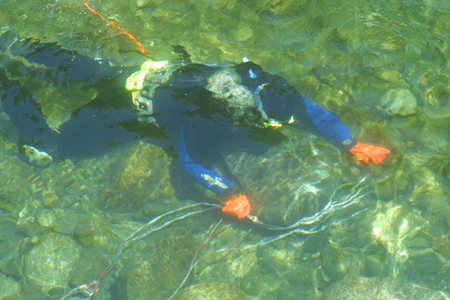
2) Your buddy should have a source of air. If you are dredging in water that is too deep for your buddy to stand waist deep, how else can the person stay underwater to help you? This could involve an extra hookah line on the dredge and/or even a scuba tank with regulator which is ready to go in the event of an emergency.

3) Unless your buddy is the incredible hulk, you should have the basic tools for moving large rocks. At the very least, a long pry bar and a few wedges. Few people realize the great advantage that a wedge can provide. Wood and plastic wedges can sometimes be hard to use underwater, because they try to float away. I suggest having a metal wedge or two on the dredge site.

The difference between freedom and drowning can be a fraction of an inch. A wedge, hammered alongside a diver’s trapped limb, could lift or move the rock just enough for the person to break loose. A wedge can be used to prop-up the rock as you try to dredge some material away to create more room under the boulder. A wedge can be used to create a pivot-point for your pry bar. I have even heard that a wedge was used once to break-up a large rock that had trapped a gold miner. This was on dry land, but it would work underwater, as well.

4) Never leave a large rock above you in the open working face of a dredge excavation. This is a rule Dave McCracken promotes in his books and videos; it is one of the best safety tips that you can have. As long as that rock is up there hanging over you, it can work loose and do you harm. If you expose a large rock in your working face, and you do not have the ability to winch it out, then you will have to drop back and clear some bedrock where you will place it in the back of your dredge hole. Then you can dredge away material so that the rock will roll down the face of the cut and end up back in your previously-dredged hole. Follow number 5 when cutting this rock out.

5) If you must dredge away material from around a large rock that has the potential to move, then work from above the rock if possible. This can be awkward; but if you can float on the surface and move material away, you know the rock will fall down away from you. If you are above it, the rock cannot swim up and get you. Put one hand on the rock as you work around it. If that thing even moves a hair, you can feel it and will have a better chance of moving back out of range. If you have to move, move fast upwards and downstream letting the current help carry you out of range. The rock will be going forward and down. Drop the dredge nozzle! Trapped dredge nozzles cannot drown, but they can anchor a diver that is trying to get clear of danger. Keep in mind that you should not have any section of the dredge hose over or across your body when working around big rocks.

6) If you are working a cloudy hole, and you expose the large face of rock, let the water clear so you can get a good look at the thing. Alert any other divers in the hole with you to a possible dangerous rock! You might not get caught by a falling boulder, but your cobble-man further down the cut might get caught.

7) Rig up an emergency signal with your buddy up top. There are all sorts of ingenious setups for controlling the throttle on the dredge from the dredge nozzle. This is a practice which I personally believe is detrimental to fine gold recovery as a rule, but that is another article altogether. It would not be difficult to rig up an electronic or mechanical alarm system to alert someone topside. Tugging on your air hose is a common signal sys- tem, but is impractical if your buddy isn’t holding onto the hose or in view of it at all times. I have seen floating buoy systems used that do have a potential, as long as you can reach it in an emergency. It is good practice for the top-side person to put on a mask and snorkel every once in a while to check on the dredger.

Slinging Boulders 8) When winching a rock, never stay near it, especially lower in the hole than it is. Sometimes a pry bar is needed to help move the rock while winching. This is a dangerous practice. But if you think you have no other choice, then try to stay above the rock while prying. Do not winch or pry blind. Keep your eyes on that rock. If it shifts in any manner whatsoever in a way you didn’t expect, back off and wait for it to settle.

9) Sometimes a dredger will expose a section of a large rock and feel it is too risky to work around until later, when the hole is clearer or whatever. This is good common sense; but if you are in fast water, keep in mind that by exposing a portion of the rock, you have opened it up for increased erosion. You have also removed some of the structure that was holding the rock in place. The fast current could eat away the critical portion of the gravel you left to hold the rock up. If you turn your back on the rock, you could be wearing it! Always treat an exposed rock like a loaded gun. Keep your eyes on it, and unload it as soon as possible by moving it safely or working around it in such a way that it will not come down on you.

10) Never try to prop up a boulder and work under it. I have seen where a diver will dredge out sections of gravel from under a large rock, and then stick a cobble under the rock so it won’t drop as he continues to dredge away more of the supporting material. It is better to dredge a ramp down into your cut that you can roll the boulder down or winch it into. Propping boulders was a specialty of the Chinese miners in the old days, but even they lost sometimes. And, they weren’t working underwater while they took risks. The added risk is just not worth it.

11) Quite often, when working with a large dredge in shallow gravel on bedrock, a dredger will just rest the nozzle on the rock and let the face of gravel cave in and flow to the nozzle. It is easy to get so involved in watching the material flowing into the intake and trying to keep large cobbles from flowing onto the nozzle that you forget to look up at the face you are working. A large boulder stuck part way up the face can be exposed and drop in on you as you dredge away its support. Always watch the full face of your cut.

12) In some deep dredging operations, lift bags or 45-gallon drums are used to lift rocks and float them downstream out of your excavation. A 45-gallon drum is common because of the low cost. One end is cut out and cables are strung down from the open-end. When moving a rock, the drum is filled with water and allowed to sink down to the rock. The cables are attached and the drum is set up so the closed-end faces the surface. Air from an extra hookah rig is fed into the drum, and the lift created by the air-filled drum lifts the rock and floats it downstream.

It sounds easy; but in practice, it can be a lot harder than it reads. An air-filled drum will lift at least 300 lbs. It is supposed to lift 400-plus if you use mathematics. If you lift a 300-pound rock from the bottom, you have a couple of problems. How to keep it from getting away from you as it heads downstream, and how to stop it once it gets where you want it to drop — and how to do this all very safely. First, tie a line to the drum and anchor it to shore. The line may act as your steering system and will pull the drum in an arc towards the shore. This may or may not be the place you want it. To drop the rock, you want the safest way possible, and in my experience, that is a stop cock valve on the closed end. When you have the rock where you want, just crack open the valve, and the trapped air will leak out, allowing the drum and the rock sink to the bottom. You are well out of the way by floating on the surface or at least above the drum. Never swim directly above a drum full of air, as it has enough power to hurt you if it gets loose.

13) When placing the cables around the boulder for lifting, use a length of wood to push cable ends under the rock. Do not risk being caught by placing your hands down there. You may have to dredge away a couple of channels under the rock to pass cable through. Follow the above rules when doing so. When lowering the rock into place, try to set it down so you can pullout the cable. You may have to set the rock down on a couple of cobbles, but keep in mind the support may be wobbly as you try to remove cable. Post a warning sign at your dumpsite to warn divers away from potential loose rocks at least for the first season. The spring floods will have a tendency to settle the rocks into more stable configurations. The air-filled drums are great as long as you have deep enough water, and are not fighting the current as you wrestle them into place. If you have any sort of current, you will have to winch boulders. Post your pile of winched rock too, as it can be unstable for the unwary. When working underwater around your rock dump, keep the potential for instability in mind. Do not stand on any rock that could slide or move or you could be right into the situation which you were trying to avoid.

The above rules are a few that I have used and I have not had a problem, yet. Close calls do not count! There are others that could apply to specialized dredging situations, and it would be a real benefit to hear other people’s ideas for good safety practice. If we had enough input, a small manual could be compiled which would benefit all of us dredgers.

For those of you foolish enough to work around big rocks solo, the question is: “Why the heck didn’t I bring a buddy?”


By Dave McCracken

To recover finer gold more efficiently, it is necessary to direct finer-sized materials into more-shallow riffles, that require milder water flows to keep them functioning when filled with concentrated material.

Dave McCracken


In gold mining, when we talk about gravity-recovery systems (as opposed to chemical-recovery systems), we are basically talking about the creation of a suspended medium. A suspended medium is a condition of fluidity where materials are allowed to separate because of their relative weights.
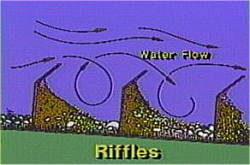
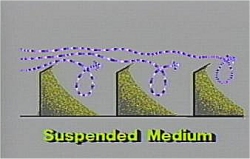
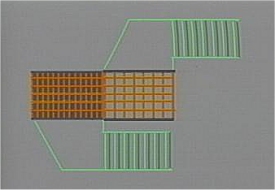
Since gold is around six times heavier than the average of other materials which make up a streambed, if you pass raw streambed material through the right kind of suspended medium, you are able to drop the gold to the bottom, and direct the lighter materials off the top as tailings.

As an example of this, if you dropped some gold onto the hard ground, even though the gold is much heavier than the material making up the ground, because the ground is somewhat hard and compacted, it would probably take a very long time for the gold to work its way through to the bottom of the material in that compacted state.

But if you dug up all that ground (and gold), and dumped it into a raging river during a major flood storm, the material would all get churned into a liquid slurry as it is washed downstream in the river, and the gold would very quickly work its way down through to the bottom of the slurry. This is because the slurry is in a liquefied state of suspension, where heavier particles can easily penetrate downward, because gravity is pulling on them much harder than the lighter materials.

There are different ways to create suspended mediums so that gold can be recovered from streambed materials. Mechanical jigs create a pulsating medium within a chamber that keeps water and material in a state of fluid suspension. Oscillating sluices create a left and right movement (similar to panning) as material is washed over top by a mild flow of water. Shaker tables use a finely-tuned vibrating action, with a very mild flow of water, to separate material by weight. Because these systems use mechanics to help keep or create a suspended medium, we refer to them as “mechanical recovery systems.”

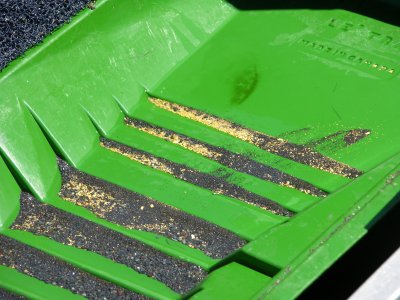
Most recovery systems on suction dredges use fixed riffles to trap gold out of lighter streambed materials as they are washed through a sluice box by a flow of water. Riffles are baffle-like obstructions, fixed in place along the bottom of the sluice box. They are designed and positioned so that there is a back-pressure created that sucks water and material behind the riffles from the flow over top. When the correct water-flow is directed over a riffle, the back pressure keeps the area just behind the riffle in a state of continuous fluid suspension. This creates a medium where the heaviest material (gold) is allowed to concentrate.

Gold recovery systems that use a flow of water over riffles are called “fixed recovery systems.”

Classification (sizing of material) is the key to fine gold recovery. This is true in both fixed and mechanical-type recovery systems. In general terms, this means that the finer (smaller) in size that you want to recover gold efficiently, the more closely the material must be sized, and the more finely-tuned the suspended medium must be to facilitate the separation.

As an example to put this in perspective, the water flow it would take to move a 5-inch (diameter) rock will likely be violent enough to wash away a fine particle of gold. And vise-versa: A suspended medium tuned so gentle as to allow fine particles of gold to efficiently separate from lighter streambed materials would be completely overwhelmed by a 5-inch rock.

The general idea is that if you want to efficiently recover finer-sized gold, you have to first separate it from larger-sized material. This is accomplished by screening. The process of screening is called “classification.” Classified material(s) can then be directed into a recovery system that has slower water and more gentle suspended medium(s).

What do I mean by a “gentler suspended medium?” In this discussion, I am mainly talking about the size of riffles. Because, the bigger (deeper) the riffle, the greater (and more violent) water-flow required to maintain a suspended medium of water and material behind the riffle.

Let’s talk a little about what happens behind the riffle in a sluice box. If you only run water over the box, it does not take very much water-flow to maintain fluid movement behind the riffle, because there is nothing solid to obstruct the flow. But the average streambed material (rocks, gravel and sand) weighs around 4 times more than water. This means water-flow and turbulence must be dramatically increased to keep material in a suspended state behind a riffle. The deeper the riffle, the greater the volume and weight of material which must remain suspended – so the greater the water force (and violence) needed to keep a riffle from packing up.

What is “packing up?” That is when you overwhelm a riffle with too much weight of material (rocks, sand, silt), and the suspended medium is lost. When the suspended medium is lost, most of the riffle will no longer concentrate the heaviest materials as they are washed over the sluice box.

Keep in mind that when a riffle is operating correctly, it will continue to concentrate the heaviest materials that are passed through the suspended medium.

At the beginning of a production-run, the specific gravity of the average material behind a riffle will be similar to the average specific gravity of the raw material found in the streambed. For the purposes if this discussion, let’s say this is around 4 times the weight of water. But as other heavier materials like iron (specific gravity of around 8) flow into the riffles, the heavier materials will displace lighter materials, and the materials behind the riffle (called “concentrates”) will become heavier. Each area is different, but it generally does not take long to accumulate concentrates in a sluice box that are around twice as heavy as the average raw material being processed. Heavier materials are usually associated with iron, and dark-colored by nature. These are often referred to as “black sands.”

The heavier the concentrate behind a riffle, the more water-flow and turbulence is required to maintain a suspended medium. The deeper the riffle, the more it will become overwhelmed by the increased accumulation of heavy material. So a deeper riffle requires a faster, more violent flow to keep it working as the concentrated material behind the riffle becomes heavier.

On the other hand, the shallower the riffle, the less water-force it takes to maintain a suspended medium behind the riffle. Less water force and violence will allow smaller particles of gold to settle.

But a shallow riffle also requires that the water flow be reduced. This is because a shallow riffle will not create enough protection behind it to prevent turbulent flows from boiling fine gold away. What do I mean by “boiling?” I mean that if you put too much water-flow over top of any riffle, the suspended medium becomes so violent that even the heaviest particles can be washed away.

Here is what I am saying: If you want to recover finer gold more efficiently, then it is necessary to direct finer-sized materials into more-shallow riffles, that require milder water flows to keep them functioning when filled with concentrated material.

But the problem with suction dredges is that we are sucking up a lot of rocks! Let’s just use the example of a 5-inch dredge. The nozzle-restriction will allow a 4.5-inch rock to be sucked up into the sluice box. And there must be enough water-flow through the sluice to keep the 4.5-inch rocks, and everything else that is being sucked up, flowing through and out as tailings. Otherwise, the material will build up on the dredge and sink it in very short order!

So initially, we are dealing with a water-force through the sluice box that will wash 4.5-inck rocks all the way through. That is a lot of force. And the force is turbulent.

Part of the reason why a rock is moved by a water-flow is because it is being pushed along by the water. A nearly-equal reason is that it is also being pulled along by the vacuum that is created behind the rock as the water flows around it. The vacuum behind a rock creates enormous turbulence that will affect anything it comes in contact with – including small particles of gold. The turbulence associated with the movement of a 4.5-inch rock is a lot, compared to the mild state of suspension necessary to allow a fine-sized particle of gold to settle behind a short riffle.

Since we must suck up rocks in dredging, the bigger rock we can suck up, the fewer we have to move out of the way by hand. Therefore, the first priority in the recovery system is to separate the big rocks away from where we want to recover the fine-sized gold. We do this by dropping the smaller-sized materials through a classification screen, and then directing them into slower-moving recovery systems. Sometimes, we are even able to screen two different sized products, and direct each into a separate recovery system, where the suspended mediums can be adjusted accordingly.

But the one mistake I often see is that the pre-sized materials are usually being directed into slower-moving recovery systems that are using deep riffles. As these riffles do not have enough water-flow directed over them to create the required suspended medium, they pack up and don’t work very well. What I mean by this is that most of the space behind a larger riffle can pack up. Sometimes it is only the surface area behind a big riffle that is working, while the rest of the area behind the riffle is packed solid.
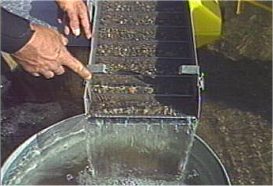
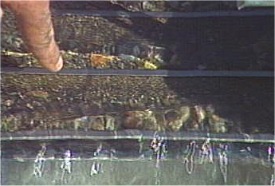
Bigger is not better when it comes to riffles in a fine-gold recovery system. In fact, it can be worse.

Here is a substantial explanation of the system which we have developed to effectively recover more fine gold on our conventional suction dredges. It combines two classification screens to more-effectively separate material-feed into three size-fractions, each which is directed into a different recovery system. The smallest gold particles (which are most difficult to recover) are directed into low-profile riffles along the bottom of the sluice box which have long been proven to be very effective at trapping fine gold.

Here are some things to look for to get a better idea if a riffle is working for you:


1) The material behind a riffle should be visibly dancing during normal operation. You should be able to see that all of the material there is in a continuous state of vibration and movement. This can be deceiving, however. Because sometimes, only the surface of the material behind a riffle is in movement. Everything under the surface can often be packed up.

This is almost certainly the case; if after you shut down, you scrape behind the riffle and find that just below the surface of black sand, it is all packed up with lighter, blond-colored material. In this case, you will have to decide if you need to increase the water flow and violence (which will make it harder to settle fine gold) or shorten the riffle.

Shortening the riffle is usually the best solution.

Please don’t get me wrong here. I am not talking about the riffles that get big rocks passed over top of them. I am talking about the riffles where you direct pre-sized, smaller material.

2) Do some controlled tests at production-speed (meaning while someone is sucking material into the dredge’s suction nozzle or feeding material into a sluice), while feeding a pre-weighed amount of fine-gold into the system. You can either catch and test the tailings, or you can process the gold from the recovery system (or both), to evaluate how well your recovery system is working.

Here is where you can buy panning ore which contains fine gold.

If you are losing gold from a fixed recovery system, it will come down to either a screening system that is not working very well (to separate the fine gold from the big rocks that must be washed away using heavy force), or a bad relationship between the flow of water and depth of riffles in the fine-gold recovery system.

The answer is to just keep working at it until you get it right.

Okay; so, if bigger and deeper riffles are not the answer to recovering fine-gold from pre-sized material, how small and shallow should you go? Weight and shape-characteristics of the average streambed material in each area may be a little different. For example, crystalline, angular-type material requires more force and turbulence to keep it moving along. So there is not a fixed answer that will work perfectly in every single situation.

However, as a general guideline, I would say that the depth of a riffle should not be much more than the maximum size of material that is being directed there. In other words, if a 3/8-inch screen is being used to pre-size material, you probably don’t want to use riffles much deeper than 3/8-inches. Then you set the water-flow to keep those riffles fluid when there is an accumulation of concentrated material behind them. This is not a fixed formula. You will have to use your own best judgment to dial it in right based upon your local conditions.

Remember: If you use shorter riffles, you must slow down the flow over top of them to keep from boiling-out your fine gold. Slower water, and less violence, allows for finer particles of gold to settle – as long as a suspended medium is maintained behind the riffle. If you can keep the black sand in movement, without boiling out the riffles, you will have a great recovery system. Because gold is around 2.5-times heavier than iron, fine particles of gold will displace the iron behind the riffles, as long as there is movement there.


By John Cline

Sniping1As young kids growing up in the country, we would play a joke on the new kids from the city. We would take them “snipe hunting”, or “sniping.” You see, sniping is a way of catching a small, but very tasty bird.
These types of birds only come out at night, with little or no moonlight, and always in a wooded area. It takes several kids to catch snipes. Some of us would spread out in the area and herd the snipes toward the new kid waiting by himself with a gunnysack. We always had the new kid holding the bag so he wouldn’t get lost in the woods. It’s rough being the new kid…

These were the thoughts racing through my mind when I was invited to go “sniping” for gold this past summer. I was told it was easy and fun. Oh sure, I’ve been there, done that; and I was even the one left holding the bag one night…

Finally, someone explained to me that sniping or crevicing for gold was really about working crevices in exposed bedrock. They told me stories about several people who snipe throughout the summer months, recovering ten-to-fifteen ounces of small (and sometimes large) gold nuggets per season. Was this a joke, or was it for real?

On the first morning, a friend and I were off on a sniping adventure, I took my wet-suit, a face mask and snorkel, a crevicing tool, hammer, small bar, small shovel & hand trowel, gold pan, my “Super Nugget Sucker,” and a bulb-snifter with me. My wet-suit was necessary, because the water was a little cool until about midday! Everything fit into my backpack and; surprisingly, weighed not more than 20-25 pounds.

We went to an area where the creek was wide and shallow, with exposed bedrock running across the water-flow. I could see material in the crevices and cracks in the bedrock. Also, I could see the bedrock cracks running from one side of the creek to the other, not in a straight line, but across the creek, with no real pattern. Where the bedrock wasn’t exposed, the streambed material (overburden) was no more than a couple of feet, if that.

Getting started in one place, I removed the top six-inches of overburden with the shovel. This is when the fun starts! You need to “fan” the remaining material away. This is accomplished by waving your hand back and forth in a fanning motion. It’s kind of like doing a dog-paddling motion, sweeping the remaining streambed material away with water-force. It only took me a moment to realize that it is much easier to work with the water flow, rather than against it. Yes, one must learn the hard way sometimes!

Fan or paddle an area about a foot or so, wait a moment for the water to clear, and hope to see that beautiful yellow glimmer—Gold! After an hour or so of not finding anything, I began thinking back to that night in the woods when I was left holding the sack… But I felt reassured when I looked up and saw my friend still there working in the creek.

Then it happened. There was a beautiful, small golden flake sitting right on top of the exposed bedrock! Not really expecting to find any gold, I almost overlooked it!

Using the bulb-snifter, I sniped my first piece of gold along the edge of a crevice, not really at the bottom of the bedrock crack where I had expected it would be. What a wonderful feeling! The joke wasn’t on me, after all.

Within three or four feet of that spot, I found several more really nice flakes of glimmering gold. Encouraged, I followed the crevice to the other side of the creek, but I didn’t find anything else. So I moved up to the next crevice and started the procedure all over again. This time, I found a bigger piece of gold in a crack along the side of the bedrock. Breaking the bedrock with a pointed-bar and hammer, I found that a large golden flake was trapped in the crack. Wow, what a great feeling when that piece of gold first popped into view!

During the day, I found several pieces in this manner. Working another crevice, I used the super-sucker, because the crevice was about three feet deep. By using the super nugget sucker, I could stand with my face in the water and remove the material with no problem. Several times, I pumped water out of the super sucker, thus blowing material away, like fanning. I recovered several nice nuggets about the size of small rice-grains.

By the end of my first day, I had found about 2.5 pennyweights of gold. Not bad!Sniping 2

Seeing all that gold was enough to lure my wife out on the creek on my second day. As I was fanning an area, I turned-up five nice flakes of gold in about a one-square-foot area. This was fantastic! So I invited my wife to put on a mask, and she came down and ended-up recovering about a dozen pieces of really nice gold, including one beautiful nugget weighing about 10 grains! That’s a big one! We had spent almost an hour together, having the time of our lives! It is a wonderful feeling every time you uncover more gold at the bottom of a waterway! It was really great sharing this experience together!

On the following weekend, a couple of friends and I went into a whole new area. We found several locations where exposed bedrock was visible along the bottom of the creek. I found a long and narrow slot (crevice) that ran in the same direction as the water-flow. This seemed like a great place to start, so I suited-up and got busy. I spotted some flood gold as I was removing the overburden by hand (not using a shovel). I carefully placed that streambed material in my bucket, so I could pan it off after my dive.

After removing about a foot of overburden, I discovered the crevice was a foot deeper than I had originally estimated. The streambed material along the bottom of the crevice was a reddish-colored hard-pack. Using my dog paddling, fanning motion, I uncovered several nice flakes of gold. Working very carefully, enjoying the excitement, I found two small, really nice quartz-gold nuggets. What a thrill!

Everyone found gold. Some found more than others did, but we all enjoyed this new experience.

My last visit up there was late in the season. The leaves on the trees covering the creek had turned color, and the water was colder. Squirrels were busy gathering the last of the pine cones along the edges of the creek. The birds were singing what could be one of their last songs for the year before the snow. I had been sniping for about an hour, having a great time and finding gold.

As I sat on a rock in the sun, warming myself and enjoying the sounds of nature, its beauty and tranquility, I heard a noise from not far upstream. A small bear cub came out of the brush and started to cross the creek. By the time the cub had reached the middle of the stream, the mother-bear stepped from the brush onto the stream’s edge. The cub was looking downstream toward me. It stood up onto its hind legs. With its head held high in the air, it was trying to smell me, or probably did smell me! I just sat there quietly, trying not to move, captured by the moment. The cub slowly dropped onto all fours and crossed the creek with the mother-bear close behind. Up the hill they went. This was a rare moment that I will never forget! I then went back to sniping, finishing the day with almost 2 pennyweights of gold to add to my ever-growing collection.

Sniping is an inexpensive way to mine for gold. It can be done alone, with friends or with your entire family. Kids get real excited about it as soon as they begin finding their own gold! There is no heavy or noisy equipment to pack in or out (Well, maybe your kids and their day-packs, but you know “what I mean.”). Sniping is a safe and fun activity for the whole family. I really did enjoy sniping this past summer! Each time was an exciting and educational experience. On my best day of sniping, I found 7 pennyweights of gold. In total, I found almost an ounce of gold. How about that for a beginner?

I know an old-timer who found more than 20 ounces of gold this past summer, sniping. He told me that on his best day, he found 11 pennyweights, plus a one-ounce nugget. He said most of it came out of a single crevice in the bedrock. Can you imagine?

As for next year, David, my oldest son, and I are talking about an adventure into the Wild and Scenic area of the Feather River to do some sniping for a long weekend. That will be another story!


BY LEROY HARDENBURGER

Have you ever seen gold in a hairline crack and reached for your crevice tool, screwdriver, or rock hammer; and then spent the next 20 minutes prying, scraping, and/or prodding to get it out of that crack, wishing all the while that this tiresome process wouldn’t take quite so long? Well, the answer to quick gold removal from hairline cracks as suggested and demonstrated by veteran miner Dan Fifer is to go to your local auto parts store and purchase a muffler/tailpipe air chisel. Prices vary from $39.95 to $89.95, chisel included.

Using an air chisel, you can rip up a four-foot crack containing gold in one to five minutes, and then move on to either pumping more overburden or to the next uncovered crack. The amount of time spent depends on how deep the crack is and/or how hard the bedrock is.

My partner Chuck and I found that the speed of our operation dramatically increased when we began using our air chisel. If you do decide to use a chisel, be sure to oil it once every day. We use Marvel Mystery oil each evening after we’ve finished dredging. In our dredging operation, we use a Pro-Mac 8-inch dredge with VW power plant, two pneumatic 100 PSI air compressors as standard equipment, and have two divers down at all times.

We added one additional air tank and 50 feet of air line to power the air chisel and provide extra air for the divers when the chisel is not in use. With the extra tank, we have yet to run out of air. The only draw back in using the chisel underwater is that the noise is quite loud, but you get used to it. So save time and bring in more of the yellow stuff each day; invest in an air chisel. You will be glad you did!


video subscription graphic

By Dave McCracken

“It is vital that you design your recovery systems from the beginning to make certain they will actually do the job!”

Dave Mack

 Rubies and sapphires from Cambodia.

Over the many years, my various partners and I have experimented a lot with secondary recovery systems to catch fine gold and gemstones that get sucked up the suction nozzle of a floating dredge. There are numerous issues involved, each which must be carefully resolved to make it all work out right. I strongly advise you to study these issues for yourself as much as possible before deciding how to acquire accurate samples, and what to do for a production dredge if you decide to move forward with a mining program.

If these problems are not carefully considered and resolved in the construction of the equipment, the problems will definitely have to be dealt with in the field, where it becomes much more difficult to fix them!

Since the purpose of sampling is to accurately determine the real value of gold (and/or gemstones) in the river gravels, it is important how you acquire the samples. And if the samples turn out well, it is vital that you design your production dredge and recovery system from the beginning, to make certain they will actually do the job. The reason I stress this point so strenuously is because my team has been called in so many times to help with projects that did not acquire equipment that would efficiently recover fine gold and/or gemstones in the first place.

I also advise you to please not take for granted that gemstone-dredges advertised by various dredge-builders within the industry will recover diamonds or other gemstones efficiently just because the builders advertise that they do. I encourage you to review the points that I will outline here. Then you will have a foundation of understanding from which to ask questions and make your own judgments at the time when you will need to make pivotal decisions.

Gemstones are not heavy like gold. Therefore, they are much more difficult to recover.

Conditions must be set up to near-perfection to effectively recover gemstones from the volume of sand and gravel which passes through a dredge nozzle. This is especially true of production dredges in the hands of experienced operators!

Any enquiry into gemstone-recovery on suction dredges should certainly lead you to the subject of “mineral jigs”. A mineral-jig is a mechanical device that can be adjusted to create a specific suspended medium inside. As raw material flows into a jig which has been set up properly, different minerals are separated according to their specific gravity. Minerals that are lighter than a specific weight-range are allowed to flow off the top of the jig as tailings. Minerals that are heavier are allowed to settle to the bed, or to the bottom of the jig. The heaviest finer-sized materials (mostly gold and iron) are allowed to (flow) bleed out the bottom of the jig to keep it from concentrating with heavy material. Heavier materials are then collected elsewhere, or are directed to even more finely-tuned recovery systems.

The following video segment will demonstrate a mechanical suspension medium that can be created by a mineral jig:

Any and every enquiry into suction dredges and jigs should prompt a series of important questions:

1) classify and separate the smaller-sized raw material that is sucked up through the dredge’s suction nozzle?

2) What size-classification and how much volume of material will feed the jig?

3) How much volume and velocity of water will be included with the feed to the jig?

4) What will you do with the heavier material that is bled from the bottom of the jig?

Let’s please take these important questions up one at a time:

1) Classification: You cannot direct large-sized materials (rocks) into a mineral jig and expect it to perform well. This is actually true of any recovery system being set up to recover gemstones or fine-sized gold. Some method of screening is necessary to “classify” the size-range of materials that you want to direct into each type of recovery system. The more that different size-fractions of material are separated from each other, the easier it is to separate gold or gemstones from the other materials by their differences in weight.

Since dredges have limited space to work with (usually on a floatation platform or two), classification systems must be kept reasonably simple and portable.

Most suction dredges are set up with a fixed (not mechanical) classification screen which material and water flow across inside the sluice box. Riffles and various types of traps are constructed below the screen to trap gold and other valuable minerals out of the flow of water. All of the material that passes over top of the classification screen, or that is not trapped by the riffles under the screen, is allowed to flow out of the box and be discarded as tailings. For lack of a better term, let’s call this a “hydraulic classification and recovery system,” because it depends entirely upon water-flow to move raw material across the classification screen and through the riffles. This is the type of system that you can expect to receive as standard dredging equipment on today’s market.

Hydraulic classification and recovery systems have evolved over the years to the point where they generally recover gold and platinum with a reasonable degree of efficiency down to size-fractions relatively small in size. How fine in size depends upon various factors, like the purity of the gold, its average shape (round, flat or crystalline), and the nature of the material (slurry) that is flowing through the recovery system along with the gold or platinum.

It is reasonably safe to say that any recovery system is efficient down to a certain size-fraction of gold or platinum in any given area. The size-fraction might vary from one place to another. The reason for this is that the specific gravity of gold and platinum is generally 5 to 6 times greater than the average of other materials which commonly exist within a streambed. This incredible difference in weight will generally allow pieces of the heavier metal to penetrate the screen and drop behind the riffles in a sluice box – even though there is a strong force of water present to wash larger-sized material (rocks) over top of the screen.

It is also reasonably safe to say that the smaller a piece of heavy metal is (gold or platinum), the more it will be influenced by the fast, turbulent flow of water that is required to wash larger-sized material through a sluice box. For example, it requires a violent force of water to wash 9-inch rocks over top of a screen in the recovery system of a 10-inch dredge. So the smaller it is, the less likely that a piece of gold will drop through a hydraulic screen and get trapped behind a fixed riffle. Therefore, hydraulic classification and recovery systems lose efficiency as the particle-size of a heavy metal becomes smaller.


It is important to understand this: Because gemstones are only slightly heavier than quartz, and are within a similar weight-range as the average materials generally found in a streambed, hydraulic classification systems on dredges are not an efficient method of sizing raw material. This means that probably more gemstones wash across the top of a stationary classification screen (into tailings), than drop through it into the recovery system.

Furthermore, hydraulic recovery systems (fixed riffles and baffles) are actually designed to discard gemstones.

Because gemstones are light, it is unreasonable to expect them to drop through a classification screen that has a torrent of water passing over top. And then, because riffles will quickly accumulate a concentrate of material behind them that is heavier than the average specific gravity of a gemstone, you should not expect to recover gemstones efficiently using fixed riffles.

As far as I know, Pro-Mack is the only dredge-builder that has accomplished mechanical classification on a suction dredge. We do it by placing a shaker-screen (powered by a hydraulic pump) in place of the sluice box. Raw material from the suction nozzle is directed onto the shaker-screen. Minus-size raw streambed materials drop into a hopper under the screen and are then pumped to a recovery system – usually on a second platform. The following two video segments demonstrate this very important principle:

Summary: On suction dredges, there are basically 2 kinds of classification systems:

(A) A fixed screen which a flow of raw material is washed across by the force of water, with some portion of minus-sized raw streambed material dropping through. This system works relatively well on heavy metals down to a certain size-fraction. Efficiency is lost below that size, and there is poor efficiency on gemstones (they are too light).

(B) Mechanical classification, when set up properly, can be depended-upon to provide nearly 100% of the size-fraction that you want to separate out from the raw material, then to be directed into a recovery system. Please take a look at the following free video segment to see how we recently worked this out on a Pro-Mack commercial dredge system that is being used on a diamond recovery project in India:

Since it is impractical to refit smaller-sized dredges (which must remain portable for sampling) with mechanical classification, here is a substantial explanation of the system which we have developed to effectively recover more fine gold on our conventional suction dredges. It combines two classification screens to more-effectively separate material-feed into three size-fractions, each which is directed into a different recovery system. The smallest gold particles (which are most difficult to recover) are directed into low-profile riffles along the bottom of the sluice box which have long been proven to be very effective at trapping fine gold.

2) Size and volume: Jigs are available in different types and sizes. Generally, a certain size of jig is designed to process a given volume of material. Each manufacturer will have their own set of guidelines.

I say “guidelines” because there are variables that will change from one location to the next. The main consideration is the difference in weight between the mineral you are trying to save, and the medium that it is mixed with.

For example, because the weight-difference is so great, it is relatively easy to drop a particle of gold (19.6 times heavier than water) through a suspended medium of pre-sized quartz crystals (only 3 times heavier than water), because the difference in weight is more than 6 times. Therefore, with heavy metals, there is greater margin to introduce a larger variation of size-fraction (different sized material) into the jig, or a larger volume of pre-sized raw material, without forfeiting recovery.

If you are trying to drop gold particles through a raw material made up of iron (8 times heavier than water), you will be required to tighten-up the sizing and slow down the feed to the jig. This is because the weight-difference between what you want to retain and what you want to discard is only around 2 ½ times.

Sizing and volume are critical in the recovery of gemstones (usually only around 3.5 times heavier than water), because there will be only the smallest weight-difference between the valued material and the other streambed materials which must be rejected by the recovery system.

Summary: Sizing and volume requirements for jigs are largely affected by the difference in weight between the type of material you are trying to recover, and the raw material you want to discard as tailings. This becomes critical as you try and recover gemstones with efficiency.

3) Water feed: Most suction dredges operate on a “venturi” system, where a stream of high-pressure water is pumped into a power-jet at an angle to create a vacuum through the suction hose and nozzle. In this way, gravel and rocks can be sucked up from the bottom of the river and directed to a screening or recovery system floating at the surface, without having to pass them through a water pump. This allows a suction dredge to be manufactured at a small fraction of the cost to produce a dredge of the same size which must pass rocks and material through a pump.

But venturi-dredges are limited, in that they cannot lift streambed material and water more than about a foot (or less) above the water’s surface. Therefore, anything that is going to initially be done to raw material excavated by a suction dredge must be accomplished directly at the water’s surface. This is the reason why almost all standard suction dredges are equipped with hydraulic classification and recovery systems; because there is very little room at the water’s surface to do much else.


Men installing the Catch-hopper which mounts under the shaker-screen on a 10-inch commercial Pro-Mack dredge.


Classification systems used on a suction dredge almost always drop the minus-sized gravels into a sump or hopper that is located below the water’s surface. Therefore, to get the classified material up into a recovery system, it will need to be pumped.

Any jig is designed to allow only so much water-flow with the feed. The reason is that too much water velocity can wash sized-material across the top of the jig before the suspended medium has an opportunity to place particles where they should go.

Water-flow through a jig is highly critical in the recovery of gemstones because they are so light.

Therefore, important consideration must be given to how classified materials will be directed into the feed of a jig. We use hydraulic-powered gravel pumps on the Pro-Mack design, because we have found that venturi-elevators (using a high-pressure water flow) usually deliver too much water volume with the feed. For example, check out the water and raw material feed into the rougher jig (Preliminary jig) on one of the commercial dredges we were operating in the following video segment:

4) Bleeding off the heavy material: One of the reasons why jigs work so well, is that they are allowed to keep bleeding off the heaviest materials from the bottom. These otherwise would accumulate inside the jig and alter the suspended medium which creates the desired separation of your target-mineral from the other streambed materials. For example, if your target mineral is an average weight of 3.5 (times the weight of water), you must bleed enough heavy material from the bottom of the jig to maintain a suspended medium that is lighter than 3.5. Get the idea? If the suspended medium in the recovery system is heavier than your target mineral, the system will then be set up to discharge your target mineral along with tailings.

What you should do with the heavy materials from the bottom of a jig depends entirely upon what they contain.

On the production dredges we build at Pro-Mack, it is common to have a series of three jigs. The first (called a “rougher”) accepts the classified raw material from the sump under the dredge’s screen. The rougher accepts a larger classification of material at volume speed. Its purpose is just to make an initial classification and trap the largest gemstones and heavy metals on top of a bed (smaller classification screen) inside the jig. Large materials and the lightest small materials flow off the top of the rougher-jig as tailings. Heavier, classified materials are bled off the bottom and directed into a “secondary-jig.”

The secondary-jig can be more finely-tuned to further separate a finer-classified, slightly-heavier material at a slower speed. Then the finer-classified, heavier material from the bottom of the secondary jig is fed into a “finishing-jig” – which can be tuned to complete a final separation.

The following video sequence demonstrates how these systems harmonize together:

Most or all of the gemstones will become trapped on top of the jig-beds (classification screens) inside of the jigs. If there are fine-sized heavy metals present, the bleed from the bottom of the finishing-jig usually is directed into a final concentrating device – commonly a centrifugal bowl. The final concentrate is then separated in camp, often with the use of a mechanical shaker table. This final step is demonstrated by a video segment included in an article that I wrote about a sampling project we performed in Cambodia.

As all of these mechanical recovery systems are very sensitive to sudden jerking movements, changes in water pressure and other factors, we have found that it is much better to set up the recovery system for a production dredging operation on its own independent flotation platform. This includes the water pumping system that supports the recovery system(s). Here are a few reasons why we have found this works better:

1) Dredge platforms jerk around a lot as the suction nozzle is managed underwater. The suction hose is flexible, so there is an accordion-affect when varying amounts of suction are used at the nozzle. This causes the dredge to bounce around. The bouncing can throw off critical settings on mechanical recovery equipment.

2) Demands made upon the dredge’s main water pump fluctuate widely, depending upon how much suction is being used at the nozzle. If the dredge’s water pump is being used to supply water to mechanical recovery systems, the pressure-fluctuations can throw off the criticle suspended mediums that make the systems work.

3) A production gold dredging platform has a constant parade of divers, managers and tenders moving about while doing their various jobs. Most recovery systems are designed to be fastened down to a level, stable platform. The movement of numerous people around a dredge platform can throw off important settings.

4) Security: The final product(s) on a commercial mining operation should accumulate in a safe location where traffic can be carefully controlled.

5) These mechanical recovery systems have a lot of moving parts. It is better to keep wet, slippery divers and all their gear clear of the machinery.

In my view, the best way to do it is to set up two platforms:
A) A dredge platform that you can move around, put divers and tenders on, pump raw material to; and pump classified materials from.

B) A recovery platform that receives the classified materials and processes them. This system needs to be carefully engineered, and large enough to manage the volume of raw, classified material that is directed to it from the dredge. You only need to have one or two operators on this platform, so as to not upset the delicate balances that can be easily offset by people walking around changing the way the platform is sitting in the water.

Please take a closer look at the point I am trying to make here by viewing the following video sequence. See how much more organized it is to have a separate platform to contain an advanced recovery system. Just picture trying to combine all of that equipment onto a single platform and still retain some mobile flexibility:

I have found that when you try and put it all on one platform, you are forced to ignore several vital factors which can ultimately add up to a dredge-package that does not do the job very well.


By Ron Wendt

“I have found some bedrock so rich, it has averaged
over $300 an hour for half a day”


Bedrock gold 1With each scoop of dirt and piece of bedrock I dumped into the bucket, it was tempting to glance over my glasses to try and catch a glimpse of gold in the pay-dirt. But having learned from experience, if I panned-out every little spoonful or trowel full of bedrock dirt, my production of bedrock gold would be sparse.

Working bedrock on most Alaskan creeks is working the cream of the crop. It is where the best pay usually is. At times, when pay-streaks become concentrated, the only good way I know of to work bedrock is by old fashioned scraping. Although you can go over the top of bedrock with a metal detector; or if it is underwater, you can dredge bedrock, there is only one way I know of to work on bedrock located high and dry, and that’s with old-fashioned hand tools.

During recent years, a lot of bedrock I have worked has been the stuff that is up high and dry. It has usually been cleared away by bulldozers, where massive amounts of the pay-streak have already been washed through sluice boxes. You would be amazed how much gold remains in bedrock cracks in places where the large equipment has already gone through. It is just a matter of finding the right pocket to dig in, and here lies the key to success.

Working bedrock can be a life of leisure. I have found some bedrock so rich it has averaged over $300 an hour for half a day, and I laid down to do it.

Obviously, the first step to take if you want to gain access to a nearly-guaranteed pay-streak is to go where the gold has already been found before in large quantities. If you have an opportunity to get out to the goldfields, and you find out who owns some of the mining claims, ask if you can do some sniping of mining ground where bedrock has been exposed and worked on an industrial scale. The nuggets usually won’t be big; but if you find the right pocket, it is possible to take out several pennyweights or even ounces of gold from bedrock traps that were missed by the heavy earth-moving equipment.

Bedrock gold 2 B&WIf it is convenient, sometimes I am able to drive my pickup truck close to the golden spot that I have chosen. I carry a five-gallon jug of water, a small plastic tub big enough to pan into, and a few tools for crevicing. Without having to walk down to a stream, I can pan-out my pay-dirt into the tub with water from my five-gallon jug. This makes working bedrock a lot easier.

There are several types of bedrock in the north. Once you gain enough experience, you can eventually read bedrock like a book. Alaska has some unique formations of bedrock. There are the limestone bedrock formations in Livengood, where one old-timer used to tell me about scraping gold off its surface with a candlestick.

There is the Birch Creek schist of the Circle Mining District, which can be interspersed with granite bedrock.

The slate bedrock of the Kenai Peninsula’s gold-rich creeks is some of the most fascinating to work, and contains some very rich pockets.

Bedrock off the Koyokuk River area creeks in the Brooks Range contains unusual bedrock formations where the schist stands on end and can be peeled apart with a crow bar.

The bedrock on Jack Wade Creek in the Fortymile District contains quartzite schists, graphic schists and garnet-hornblende schists. Quartz seams are common on this creek. The gold is found not only in the bedrock, but in gravels as much as two feet above the bedrock. In the original pay-streak on Wade Creek, gold is found as deep as 1 1/2 feet into the bedrock. The origin of the gold is supposed to have been from the quartz stringers in the schists. The gold becomes black toward the head of Wade Creek. This is the result of a manganese stain in the surrounding gravel.

Canyon Creek in the Fortymile has some bedrock with a makeup of marble, schist and quartzite with occasional granite dikes running through it.

Over on Franklin Gulch, the bedrock includes micaceous, garnetiferous, hornblendic schists, and crystalline limestone. Though the gulch has a width of only 50 feet at the bottom, the bedrock has folded up considerably, and the gold is found in the bedrock at a depth of about two feet. The bedrock is so versatile in this vicinity; that over in the Chicken area, the bedrock is made up of dark-jointed shale with gold-bearing quartz and calcite seams. Clay is also known as a gold-robber in these areas, a curse to the miner; because it has a tendency to ball-up in the sluice boxes and roll on out.

When working these bedrock areas, it is always good practice to break-up all the clay that you find. Though this can be a tedious task, it may be worth doing in the long run. I have found some pretty nice little nuggets after kneading my fingers through a wad of slimy clay!

When prospecting, you do not have to become an expert in rock identification; but it does help to become aware of the essential types of rocks and bedrock that you will encounter in the field. Learning to read these rocks and layers can greatly enhance your ability to find gold.

It also helps to locate portions of the original pay-layer that were not worked by past miners. These can often prove to be very rich. Finding portions of an original pay-streak from past rich and historical creeks in Alaska can be a real and enriching thrill.

Panning out your take of pay-dirt from bedrock cracks can tell the tale of a lot of the mineral-types that are on the creek or gulch where you are prospecting. The little stones and sands that are left in the bottom of your gold pan are your heaviest minerals. If you are planning to spend an extended length of time on a creek, it might be good to save these heavies and study them. Also, if you have a small hand microscope (available at most mining supply or lapidary shops), take a closer look at the small rocks and iron sands in your gold pan. You may be surprised at how much gold is clinging to the sands or small pieces of stone!

In a lot of cases, the deepest portion of a bedrock crack or crevice will contain the most value. It is amazing how deep gold will actually penetrate.

Gold-bearing bedrock found off the Koyukuk River in the Brooks Range is generally mica-schist and slate, is uplifted, and stands on edge. Gold is found on the bedrock and inside the cleavages and crevices.

If you are in a gold-bearing area, I suggest you don’t waste too much of your time digging around smooth bedrock. Back through the eons of time when old streambeds once washed higher up on the hill or bench, most of the gold would wash right across smooth bedrock. Very rarely will gold occur on a regular basis on top of a smooth surface. The more rugged, and the more cracks in bedrock, the better your chances are of striking a rich crevice. This is generally true anywhere you go to find gold.

Once you make friends with local miners on the creek where you are going to snipe or crevice, ask the miners which side of the creek the pay happens to be most abundant, and also which stream bend or portion of the valley or gulch seems to contain the most pay. Some areas are better than others. And gold does tend to follow its own path down the waterway.

In some places, you can use a metal detector to scan the surface of the bedrock, finding occasional nuggets. But the crevices might also have many ounces of gold scattered throughout, too disbursed to sound-out on a metal detector.

If you prospect with the right approach, you will figure it out on your own. Plan to spend some time when exploring bedrock. Finding gold does not always happen on the first pan. It takes a lot of patience, and you must possess a keen interest in what you are doing and keep your hopes kindled.

Tags