The amount of streambed material that you are able to process through a gold dredge will determine the volume of gold which you will recover. Actually, this is true of any type of mining operation, whether it be a large-scale lode mine or a small-scale gold prospector using a gold pan. 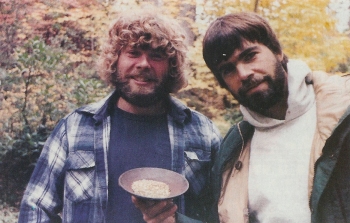
The smaller the amount of material which an operation has the capacity to process, the richer the pay-dirt must be in order for the operation to recover as much gold. Consequently, a smaller operation often needs to sample more to find the higher-grade pay-streaks which are more scarce. So smaller-scale operations generally spend more time sampling and less time in production.
To summarize this, gold mining on any scale is a volume game. If you can move twice the volume, not only can you recover twice the gold, but you will find more than twice as many lower-grade gold deposits which you can make pay adequately enough to meet your minimum standards. You can also reach deeper into the streambed to find more pay-streaks.
This is why we always advise beginning gold dredgers to go find an easy location and practice their basic gold dredging production techniques for a while to bring their speed up to par, before they get very serious about sampling for pay-streaks. A beginner will sometimes be so slow in volume-production that he or she will likely miss valuable pay-streaks simply for lack of being able to process enough gravel during sampling. This is because when you dredge a sample hole, you have to evaluate how much gold you recover against the amount of time and energy that it took to complete the test hole. If you are only moving at 20% of your potential production speed, you are likely to walk away from excellent pay-streaks just because you will believe they are not paying well enough.
When we run larger-sized gold dredges, eight inches or larger, we almost always have at least two men underwater. The reason for this is that operating an eight-inch dredge in six feet or more of streambed material requires that a large number of oversized rocks must be moved out of the dredge hole by hand. This varies from one location to the next. But generally, in hard-packed natural streambeds, somewhere between 60 and 75 percent of the material is too large to process through an eight inch dredge. This is where the second person comes in. A sole operator in this type of material, when the material is deeper than five or six feet, is going to spend a great deal of time throwing rocks out of the hole, rather than operating the suction nozzle. Some hard-packed streambeds require that most of the oversized rocks be broken free with the use of a pry bar. This further decreases the amount of nozzle-time on a single-person dredging operation. This extremely important concept is demonstrated in the following video segment:
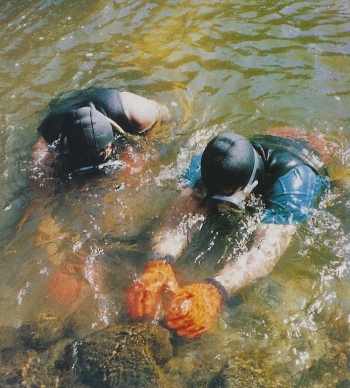
In the final analysis, it is the volume of material which is sucked up the nozzle that determines final gold production. However, it is how efficiently the oversized material is moved out of the way which determines how much gravel and gold is sucked up the nozzle.
If a rock-person is added to the operation, he or she must increase the efficiency of the operation at least as much as the percentage of gold which the added person is going to receive.
If I am running an eight inch dredge in two or three feet of hard-packed streambed, chances are that a second person would not increase my speed enough to justify paying the second person a fair percentage of the gold for his or her time. The reason is that I do not have to toss the oversized rocks very far behind me when dredging in shallow material.
If I am dredging in five or six feet or more of streambed, I can literally bury a rock-person with oversized rocks and make the person work like an animal all day long. I also have to work like an animal to accomplish this. The result is a good paying job for my helper and a substantial increase in my own gold recovery.
And when we start talking about working in ten, twelve or more feet of material, I absolutely must have a rock person to help me. Otherwise, I myself am completely buried with cobbles all day long and get very little actual nozzle-time accomplished.
As we move our hole forward, and as we dredge layers (“top cuts”) off the front of the hole, we try to leave a taper to prevent rocks from rolling in on top of us. This is an important safety factor. Also, since the nozzle operator’s attention is generally focused on looking for gold, the rock person should be extra vigilant in watching out for safety concerns. As demonstrated in the following video segment, any rocks or boulders that potentially could roll in and injure a team-mate should be removed long before they have a chance to do so:
One main advantage to a two-person team is the enormous emotional support which a second person can add to the operation-especially when you are dredging in deep material, or when you are sampling around for deposits and have not found any in awhile.
On the other hand, the wrong person can inhibit the operation. So you must be especially careful to find someone who has a similar work, emotional and moral standard as yourself.
In my own operations, we have found that the key to good teamwork is in establishing standard operational procedures for almost everything. This takes quite a bit of planning and communication, and is an ever-continuing process. We have standard procedures for removing plug-ups from the suction hose and power jet. We have standard procedures for moving the dredges forward and backward during operation. And, we have standard procedures for every other facet of the underwater work of moving the material from in front of us, to placement of the tailings and cobbles behind our dredge hole.
The following video segment demonstrates a well-orchestrated underwater dredging team. Notice how the rock-persons are working to free the very next over-sized rocks that are impeding progress of the suction nozzle:
Most importantly, we have standard underwater communication signals. These are demonstrated in the following important video segment:
As we discussed earlier, volume is the key to success — or the degree of success. We take this quite seriously in my own operations, to the point where every single second and every single physical effort is important to the operation. You will seldom find the members of my team socializing or goofing off during the underwater production hours. During the rest of the time, maybe. But during production time, we are entirely focused upon the needs of the operation. We treat the dredging-portion of the operation kind of like competitive team athletic sports. We don’t compete against each other. We compete against the barriers that Mother Nature has constructed for us to overcome to recover volume amounts of gold.
We try to spend a minimum of six hours doing production dredging each day. In our operation, this is done in two 3-hour dives. Other commercial operators prefer three or four shorter dives. I know one commercial dredger in New Zealand who prefers a straight six, seven or eight-hour dive. What an animal!
Personally, I like lunch. But I do agree with the concept of long dives; the reason being that it takes a little while to get a good momentum going. Every time you take a break, you need to then get the momentum going again. What do I mean about momentum? Momentum in dredging is very similar to the beat of the drum in rock n’ roll. It is the continuous flow of gravel up the nozzle, with the oversized rocks being moved out of the way in their proper order at just the proper time so that the flow of material into the nozzle is not slowed down.
In fact, team dredging can be like an art form. It is very similar to playing music; only instead of notes being played on several instruments to form a harmonious melody, you are playing little notes of effort using your bodies to move the suction nozzle, or the oversized rocks, in unison, so that all of the effort works together to achieve optimum momentum.
An inexperienced rock-person will often move the wrong rock, which will cloud the hole out with silt, rather than move the next rock which is immediately in the way of the nozzle operator. In this case, the nozzle operator is slowed down because of the decreased visibility, and is further slowed down because he or she must then move the proper rock out of the way. This is similar to playing off key, or playing the wrong tune, in music. Everybody else is playing one song, and the new person is doing something else. This all amounts to less volume through the suction nozzle.
On the other hand, there is enormous personal and team-satisfaction to operating within a well structured team-dredging system. This is where the nozzle-operator is the conductor, and the rock-person or rock-persons make the extra effort to stay on the nozzle-operator’s wavelength, to play his tune at his pace, to do everything possible to contribute to his momentum. This is where the rock-person is always paying attention to the needs of the nozzle-person in order to keep things moving along; not just the next rock which is in the way, but moving the dredge forward a bit when necessary to give the nozzle-person a little more suction hose when it is needed, and the hundred other things that are necessary to keep the flow going with minimal restrictions upon the effort being expended to get the job done.
We treat it like a team sport. Everything in dredging is physical. When I give my rock-person the plug-up signal, he or she races to the surface to do his part to clear the obstruction. He doesn’t just mosey on up there like he is on vacation. He goes like he is running for a touchdown or home run. And he gets back to the hole just as fast, once the plug-up is free. When he sees that rocks are stacking up in the hole, he doubles his pace to catch up. When caught up, he will look around to see where other cobbles might be moved out of the way without clouding the hole. Or, he might grab the bar and start breaking rocks free for me. At the same time, I am doing my job, which is to get as much material through the nozzle as humanly possible, with the minimum number of plug-ups. And I don’t stop for anything if I can help it. If something else needs to be done, I delegate it to my rock-person so that I can keep pumping material up the nozzle. That’s my job! Everyone’s gold share depends on it.
Every effort counts in production-team-dredging. This requires everyone to pay attention to what is going on in the dredge hole. Rock-persons particularly must be able to remain flexible and be able to switch gears quickly. At one moment, there may be a pile of rocks which needs to be thrown out of the way. The next moment, even before the rock-person has moved several of those rocks, he may notice something else which is directly impeding the nozzle-operator’s progress-like a boulder that needs to be rolled out of the way, or a particularly difficult cobble which needs to be broken free with the pry bar.
The main objective in everyone’s mind must be to support the nozzle-person’s progress. Whatever the next thing in the way is, deserves the most immediate attention.
When things get too confused, sometimes the nozzle-person needs to put down the nozzle and help organize (move cobbles and boulders out of the dredge hole). But everyone should have it in mind that actual production-momentum (gravel through the nozzle) has stopped and needs to get going again as soon as possible.
We take cuts off the front of the dredge hole in production dredging, and take the material down to bedrock in layers. We do this because it is the fastest, safest and most organized method of production dredging. Sometimes, when conditions are right for it, a rock-person may be working directly at the nozzle, breaking the next rock free and quickly throwing it behind the hole. However, on every cut, there comes a time when the nozzle-operator decides to drop back and begin a new cut to take off the next layer. The rock-person has to pay close attention to this and follow the nozzle-operator’s lead. Otherwise, he or she may finish breaking free a rock up in the front of the hole when there is no nozzle there to suck up the silt. In other words, the rock-person has to keep one eye on the nozzle-operator all the time. Because if he is a dynamic and energetic nozzle-operator, he certainly will not be following the rock-man around the dredge hole.
Teamwork extends up to dredge tender, as well, if you have one. A dredge tender should always immediately attempt to remove a plug-up when the water velocity slows down through the sluice box. Many times, this effort is done for nothing, because the nozzle-operator has set the nozzle down over a large rock in the hole for one reason or another. However, on the occasions where there is a plug-up, it is great teamwork to have a tender handling the problem immediately without having to be told. Volume through the sluice box should also be heavy on the tender’s mind. When gravel stops flowing, something is wrong.
And the same thing goes for other support activities. When the tender sees that the dredgers are moving forward in the hole, he or she should be also making sure the dredge is being moved forward proportionately to insure the nozzle-operator has a comfortable amount of suction hose to work with. Good teamwork minimizes the number of orders that need to be given. Most of the activity is handled by standard operating procedures which require a bit of planning and coordination in advance.
There are different opinions about all of this. Some people are simply not running any races. This is fine, but they must understand that they do not have nearly the same gold recovery potential as others who are working at a faster pace or with a more organized system.
I hear the occasional comment that I am a slave driver. Slaves do not last very long with me because they have too little personal judgment and require constant orders! I choose to work with hardworking, ethical, highly-motivated individuals who enjoy the challenge of optimum physical team production. I prefer to think of myself more as a production manager. And, generally, you won’t hear those on my team complaining, especially during split-off time.
There is not anything difficult to understand about successful gold dredging techniques. The process is quite simple. However, the activity, as a commercial endeavor, is a lot of hard work. The faster, deeper and more efficiently you can dredge the sample holes, the faster you will find the pay-streaks, and the better you will make them pay.
Even when you are not finding commercial amounts of gold, there is at least a satisfaction to knowing that you are accomplishing optimum momentum. And, when you do locate the deposits, the sky is the limit!


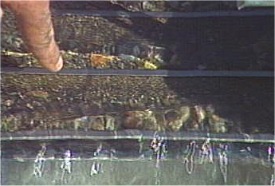
 Time, like the river in front of our camp, takes some interesting twists. Some years back, I sat on a boulder by a small creek with a fishing rod in one hand and a gold pan in the other. I can still remember wondering whether I looked as foolish as I felt. Was I actually going to put some dirt into the pan and try my hand at gold mining? — Or was I just going to go fishing?
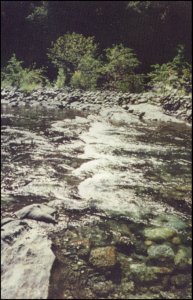 For me, building the equipment, and showing others how and where to use it, widened the pleasures found in our gold mining adventures. Since then, some part of every prospecting trip has been devoted to showing at least one beginner how it all works.
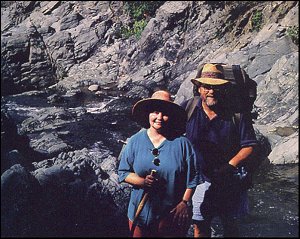
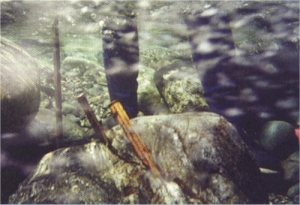 Over the years, I have gravitated to this type of mining. There is nothing quite like the thrill of spotting gold sitting on the exposed bedrock, right there for the picking. This is where my love of sniping, joy in teaching, and my friend Howie all came together.
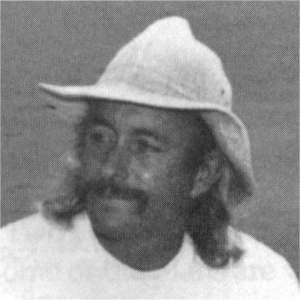
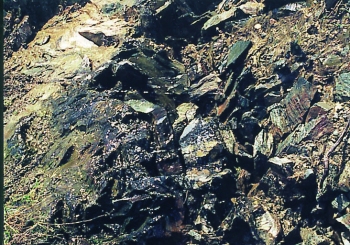
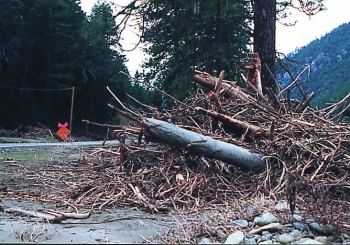
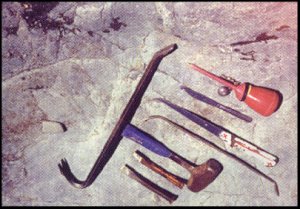 Over the next few days, Howie watched me don my wetsuit and head up the river. In the evening, he would watch me clean up the gold. On the third evening, I asked if he would like to try his hand at sniping. I would supply the tools and a day’s instruction. As it turned out, we worked together for about four days. In that time, Howie learned to look for bedrock cracks, but not just any cracks. We wanted cracks that were fed by other features surrounding them. Low spots and shallow channels were examined for cracks. Areas downstream from large obstructions, like trees and boulders, were worked. Any patch of broken or rough bedrock was investigated. We hand-fanned away shallow overburden, looking for hidden gold-bearing spots. There were a lot of places to look!
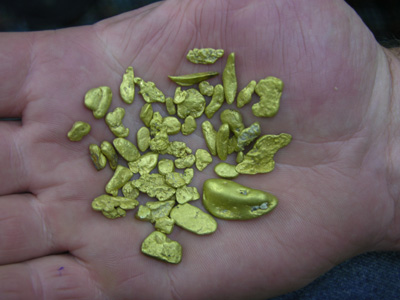
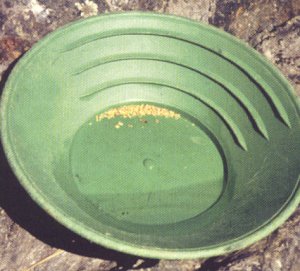 We found lots of flake-gold and a few small gold nuggets by splitting small cracks with my four-pound hammer and a one-inch chisel. We cleaned other spots with small hook tools. At times, we just picked the flakes off the bedrock with our fingers.
 That was last year. This year, Howie is an accomplished sniper. A few hours spent together in the water proved that. Somehow, between this year and last, Howie got thorough. At an evening get-together, Howie turned to me and quietly said “I really have gotten better at sniping.” I already knew that. The gold in his bottle said a lot.

 No matter what the size or nature of our mining operations, we all have one common procedure to deal with—the
 Several years ago, I decided to devote my time entirely to nugget hunting in
  1) Seek out friends or other qualified individuals who can answer questions and show you how to use metal detectors designed for gold nugget hunting. Nugget detecting is a specialized field in itself.
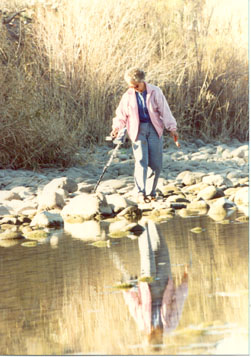


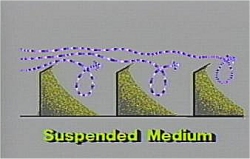
 In gold mining, when we talk about gravity-recovery systems (as opposed to chemical-recovery systems), we are basically talking about the creation of a suspended medium. A suspended medium is a condition of fluidity where materials are allowed to separate because of their relative weights.
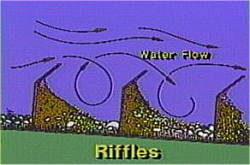
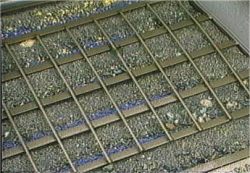
 But the one mistake I often see is that the pre-sized materials are usually being directed into slower-moving recovery systems that are using deep riffles. As these riffles do not have enough water-flow directed over them to create the required suspended medium, they pack up and don’t work very well. What I mean by this is that most of the space behind a larger riffle can pack up. Sometimes it is only the surface area behind a big riffle that is working, while the rest of the area behind the riffle is packed solid.
 As young kids growing up in the country, we would play a joke on the new kids from the city. We would take them “snipe hunting”, or “sniping.” You see, sniping is a way of catching a small, but very tasty bird.
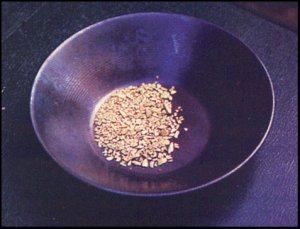
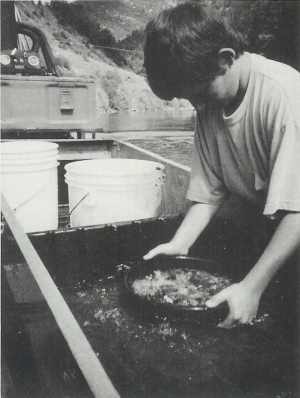
 With each scoop of dirt and piece of bedrock I dumped into the bucket, it was tempting to glance over my glasses to try and catch a glimpse of
 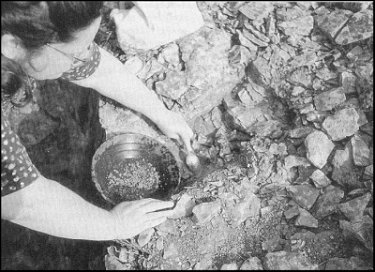 If it is convenient, sometimes I am able to drive my pickup truck close to the golden spot that I have chosen. I carry a five-gallon jug of water, a small plastic tub big enough to pan into, and a few tools for crevicing. Without having to walk down to a stream, I can pan-out my pay-dirt into the tub with water from my five-gallon jug. This makes working bedrock a lot easier.
 The day is just beginning–you and Carl are in the dredge hole. Carl is on the nozzle, and it is your turn to heave cobbles and boulders downstream and out of the hole.