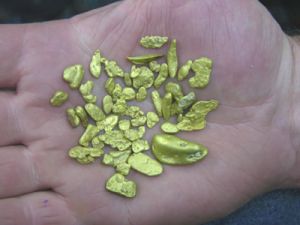
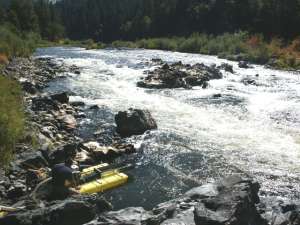
By Dave McCracken

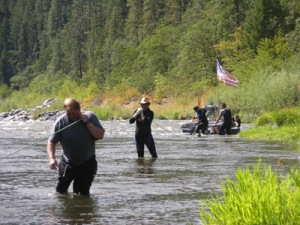
To succeed at gold dredging, you should be willing to take a rather athletic approach toward the work, especially during the sampling stages.

Dave Mack

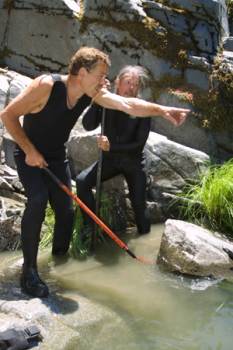
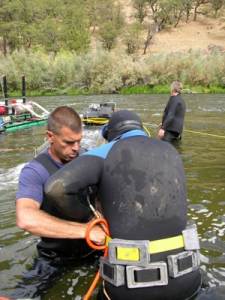
Gold dredging consists mostly of physical activity. Heavy gear has to be carried around from place to place. Much of your time is spent wrestling with a suction hose, picking up and tossing cobbles as fast as you can, shoving against boulders, fighting to hold your position against the water’s current, packing 60-plus pounds of lead around your waste, swimming back and forth across the river, and pulling dredges around on ropes. There just never seems to be an end to the physical work! This is not bad. Unless you don’t like hard work.

If you have a distaste for hard, strenuous work, if you don’t enjoy it and are generally looking for ways to avoid it, you need to find some line of work other than gold dredging. To succeed at gold dredging, you should be willing to take a rather athletic approach toward work, especially during the sampling stages.

Some people are physically-inclined by nature, and they enjoy hard work. Other people are not so physically inclined, but they are willing to work hard and do whatever it takes to succeed. Such people can be very successful at gold dredging. But, no matter what your inclination, gold dredging requires hard work. There is no getting around it.

I have found, to be most effective, it is best to attack a gold-dredging operation with a rigid work schedule, just like any other job or business-activity. I personally prefer to “pour on the steam” for three straight days. Then, I take one day off from dredging to allow my body to recuperate. The work is physically exhausting on the body if you really pour out the energy. You need to find the appropriate rest-interval that works best for you. Otherwise, your body will get overworked and start breaking down. I use my day-off to perform gear maintenance and the many other miscellaneous chores that are needed to keep the operation running smoothly. I try to get some much-needed free time out of it, as well.


My approach is not the only way. I know successful gold dredgers who prefer to work fewer hours each day, or work at a less-intense level of physical activity; but they put in five or six straight days at a time. If we could add up the total units of energy expended on dredging, it would probably come out about the same, either way. It is just a matter of preference and what pace you are most comfortable with. The main point here is that no matter how you cut it, you’ve got to put in the dredging hours if you want to succeed at underwater mining.

When people ask me about gold dredging as a profession, I always answer as follows: “Given the knowledge of how to do it, and the willingness to apply the knowledge, gold dredging is an easy way to make a living, if you are willing to work hard at it.” And, this is the simple truth.


By Sam Radding

How to Determine what “Good Gold” Means to You


Damp soilThe meaning of “Good Gold” is a matter of perspective and experience. This phrase is generally used in terms of quantity and ease of extraction. A couple of old-timers, sitting around the fire talking gold, will often have enough shared-experiences to know what the other means by “good.”

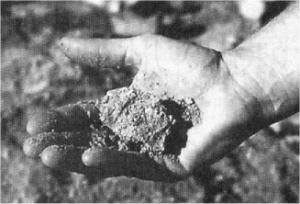
“This soil is very damp.”

The captivating nature of gold brings out different emotional responses from each of us.

The problem lies in the fact that just about every novice miner starts with little or no knowledge of the realities in the activity of gold prospecting. Our story may serve to shed some light on what to expect from your own first few mining trips.

Jean and I live in San Diego. To start with, our part of the country is very dry. So, a lot of the gold hunting is accomplished using a dry-washer. There are a few placer areas within an hour’s drive of our house, but they have very limited access and the gold tends to be pretty sparse. We tried some gold panning and found a few specks of gold; but from what we could determine from the local prospector’s club and friends, the Pot Holes would be a better-than-average place to start. This area is about a three-hour drive from San Diego, and is near Yuma, Arizona, but still in California.

Dry-washerBuilding a workable dry-washer would be a snap. I have always been good at figuring out how machines work and how they should be constructed. Ten minutes with a friends’ bellows dry-washer was enough to get me started on our own machine. A few days later, we were packed and driving to the desert with our newly-built dry-washer and an old 3-horsepower Briggs and Stratton engine. I just had to test my new creation. When it comes to gold, to me, now is always better than later.

Our maps were good, so we had no trouble finding the bridge across the American Canal along with the road to the open recreational mining area just southwest of the old 3 C’s mine. The road in had a few rough spots, but nothing that our little Vega station wagon (with three-inch ground clearance) could not make. By the way, this location still remains open to anyone; and to this day, it is still productive.

The big problem was where to start. Book gold is a lot different than real gold. The books we read were small and the maps and locations where gold would be trapped seemed fairly straight forward. The Pot Holes was huge; and of course, we wanted to work in the best spots. We wanted to find some “Good Gold!” I had read several articles about the importance of prospecting and sampling before you decide to invest the bulk of your resources to any particular area.

Jean and I do argue on occasion; and as it turned out, picking-out our first dry-washing spot was a perfect time to disagree (Thirteen years later, so we can minimize disagreements, we now have two of almost all the equipment we use.). After about fifteen minutes, we jointly settled on a small wash. There were a few tree roots and some exposed bedrock to work. This wash was about a hundred yards from where we parked the car. After packing our gear to the site, we set the engine and dry-washer in place; with the engine upwind to keep it free from the dust generated by our dry-washer. Then, with the dry-washer delivering about 90 beats per minute (possibly a little fast for the conditions we were working), we proceeded to dig and feed gravel to the dry-washer for about a half-hour. We had brought along some water for the purpose, so we practically ran back to the Vega to pan our concentrates. Much to our surprise, we had almost no gold. We just had some small specks.

Our next spot was just down from where our first little wash emptied into a slightly larger dry-wash. The opposite bank looked good to me. There was some exposed bedrock, and the overburden was only about a foot deep. The digging was very easy; and after an hour, we decided once again to check our progress. I was impressed this time. There were lots of little flakes. Jean was not so favorably-disposed. It still looked like specks to her; and after a short time, it began to look that way to me, too. Another move seemed to be in order. We spent the next two and a half days moving from place to place, from specks of gold, to specks of gold.

Jean was getting a little frazzled, and I was getting more and more frustrated. I wanted to go back to the place that impressed me on the first day. The bank on the small wash gave up about 1 pennyweight (about l/20th of an ounce) of gold in an hour, even if they were only small specks. To us, it did not look like very much gold and I didn’t know if it was good or bad; but that spot seemed far better than the other places we had dry-washed during the past few days. I really wanted to go back.

Jean went back to camp to make lunch and I picked up the dry-washer, engine and the pick and shovel and started off to my spot. After about ten steps, I heard a rumble. My first thought was that it couldn’t be thunder, not here. A quick glance over to the west set me straight. Over my head, it was sunny and blue. A few miles away, it was dark, very dark. Even I knew that it was impossible to dry-wash in wet material.

The thunderstorm might move the other direction. But at worst, I would have a little time to work. I hobbled to my spot, carrying over 75 pounds of gear and equipment, and quickly set up the dry-washer and engine. If it was going to rain, then I was going to shovel as much material through the dry-washer as it would take. I worked hard as the storm crept closer. The first big drops of rain arrived about an hour later. Ten minutes after that, our dry-washing was finished for this trip. I had kept the riffle tray dry as I had been told. Dust and moisture in the riffle tray cloth create cement, and that combination will not pass air. No air means no gold; which in turn, means stretching a new cloth for the dry-washer.

Everything else was wet. We panned-out my concentrates, and our total gold for the trip filled a two-pennyweight vial and half of another. We had over 3 pennyweights, most which came in two hours of dry-washing at my spot. It still looked like specks, but there sure were a lot of them. Our problem was that we had no yardstick by which to judge “Good Gold.” Back home, we told some mining friends about our spot in some detail and about how we had done. We thought there might be some more gold there and we were going back in a couple of weeks, after things had dried out a bit. Our more-experienced friends were impressed when we showed them our gold from our very first prospecting trip.

If you have never dry-washed, you must remember that any moisture in the pay-dirt will make any dry-washer less efficient. An easy way to check for water-content is to squeeze a handful of your pay-dirt into a ball. Then open your hand. If the ball falls apart, the material is very dry. If the ball breaks into several smaller sections and tends to crumble, you are working with slightly-damp material. Most dry-washers will run this material, but the efficiency will be diminished somewhat. If the ball stays intact or breaks into two or three parts, the pay-dirt must be dried before running through the dry-washer. On a good day, most dry-washers will lose between 10% and 20% of the finer-sized gold which remains trapped in small dirt balls. They pass right through the machine!

When we got back to our spot three weeks later, the site had already been cleaned out. We did get a little more gold, but we later found out that a few of our more-experienced friends went in there before us and recovered about two ounces of gold during our absence. From that time forward, both Jean and I had a little better understanding of what the term “Good Gold” means!

To this day, I still have a hard time keeping my mouth shut when it comes to where we are working and what we are finding. Most gold prospectors that we meet find this an endearing, if not a foolish, trait to have. I am getting the idea that when it comes to gold, you have to be careful how you conduct your business affairs!

If you are just starting out, whether you are working on a river, stream or in the desert, or whether you are using a dry-washer, sluicing system or four-inch dredge, recovering a pennyweight of gold an hour is making “Good Gold.” Two-to-five pennyweights in a day’s work is fairly good for small equipment. I personally average a little over two pennyweights per day when I am sniping (finding gold with hand tools and a face mask) on my favorite rivers in the Mother Lode area.

Over the years, I have built over a hundred dry-washers, both the bellows and constant-air types. I have written books on the home-construction of small-scale mining equipment. Jean and I spend most of every summer looking for gold. More gold is always better than less gold; but to me, I feel I have done well if my final clean-up produces over two pennyweights in a day. This is my personal yardstick for how I am doing. The amount of gold we find is important, but we are also enjoying what we are doing.

Here is where you can buy a sample of natural gold.


BY DON PADGETT

During my fourteen years of mining throughout the United States, with a variety of gold mining equipment, I’ve seen and processed a lot of black sand. And since the mining equipment I’ve used has ranged in size from gold pans and suction dredges to Caterpillars and heavy equipment, its been possible to approach “fine placer gold recovery” and its liberation from black and blonde sands from virtually every level.

Learning in any form takes time and usually a lot of practice, which all too often includes making a few mistakes. So I might as well begin this article by admitting that I’ve certainly left my share of gold on the ground, even after all the hard work of getting it out of some of nature’s most elusive hiding places.

Liberating gold from black sand can be a very difficult process, especially when the gold is extremely fine. The finer the gold, the more difficult the recovery seems to be. And whether you’re an experienced miner or a novice, it is certainly a waste to walk away from your fine gold, leaving it half processed in a pile of black and blonde’ sands at your clean-up site along the river bank or in your campground. For example, let me relate a true story of one of my own recent experiences:

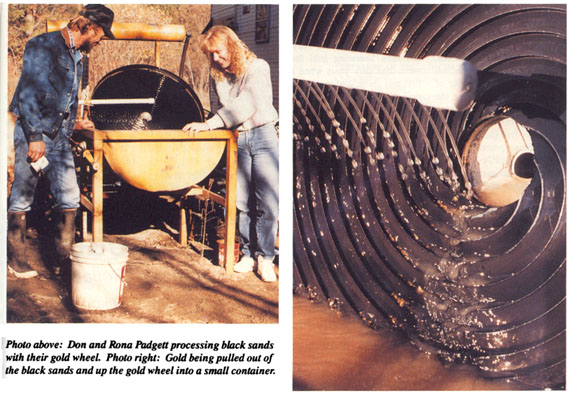
During a recent winter, after a fairly good dredging season, the cold water and my own curiosity caused me to wander around and check out some of the black sand piles (left behind by other miners) I had noticed earlier in the season. Knowing from my own experiences how miners tend to lose gold during clean-up, I took along my gold pan to test with; and sure enough, in the first pile of sand I found two nuggets (about 1/4 and ½-pennyweight) along with plenty of color. I immediately went back to camp and returned shortly with my shovel and some buckets which I used to transport the heavy black sands back to my campsite where I do my own clean-ups. I use an industrial-type spiral-wheel which is larger and faster than the typical gold wheel sold in most mining supply stores. Gold wheels will do a great job of fine gold recovery providing they are set up and used properly. And since every wheel and concentrate deposit is unique, your ability to tune your wheel and work your sands will be the critical factors affecting your fine gold recovery, not a particular brand name.

During the past few months, I’ve also been running the final clean-ups from a number of mining operations along the Klamath River in northern California. In most cases what were only five gallon buckets of “previously processed” black sands magically changed within a few hours into literally pennyweights and ounces of liberated fine gold. You can just imagine the surprise and excitement experienced by these dredge operators when they saw that the black sand byproduct they had so very often considered “nearly worthless” or “unrecoverable” was in fact valuable and could even pay a substantial portion of their operating expenses.

Most of what I’ve learned was to a large extent the result of associating with some of the best clean-up men in the gold mining fields of Alaska. They had been liberating gold for more than fifty years when I first met them, and many are probably still at it today. If there is a single and most important key to unlocking the mysteries of fine gold recovery, it is “the basics always work.” So if you’re in fine gold, and you’re not able to recover it, remember to return to the basics.

What follows is a simple step-by-step process of the basics of fine gold recovery:

Without Classification, Liberation is not Possible

Virtually every piece of modern mining equipment currently available in local mining and equipment shops has its own inherent system of material classification. To classify, in mining terminology, simply means to separate the material (rocks, gold, and sand) by size and/or weight (usually by size). It only makes sense to take this process even further in handling the clean up of your concentrates.

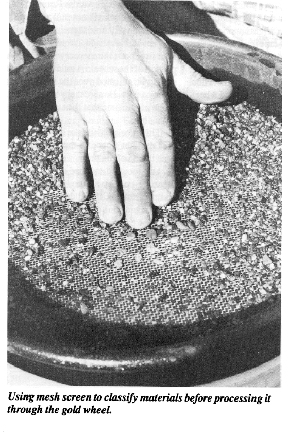
Classification is often accomplished by using screens of various sizes or meshes, and while many gold miners choose to buy these screens from their gold mining supply store, it is not unusual at all to see lint screens, window screens, and even kitchen sifters alongside a clean-up operation. Classification screens come in many sizes: 4, 8, 12, 20, 30, 50, 100, and even smaller. These numbers represent the number of openings per linear inch. For example, a 4-mesh screen has four holes per linear inch or 16 holes per square inch, and allows material to drop through which is smaller in size than about 1/4 inch smaller, actually, because the wire in the screen takes up some of the space.

With a little practice and experimentation you will find out which screen will work the best for you and your particular clean-up operation.

Beginning Your Clean-Up

Start your clean-up by removing your concentrates from your sluice box. Next, use your #4 screen to classify and remove this spectrum of material, checking closely for nuggets and large, flat flakes. Surprisingly, many miners fail to inspect closely because they are working a deposit that only seems to produce fine gold. Nuggets can be lost because they are simply thrown out in this important stage of the process. Usually this first step is done right at the river bank, making what you must carry back to your camp less cumbersome. Now screen your materials though your #8 screen. What’s left on top of this screen will be easy and quick to pan at the river. Take what falls through the screen back to your wheel for processing.

Using Your Wheel

It is very important to go through the above steps before attempting to use your wheel to process your concentrates. Remember, the wheel works on the principles of weight, angle (pitch), and water-flow. In the following steps, you’ll be first separating the blonde sands from the heavier black sands. This process is called the “first split.”

This separation should be done using your wheel’s fastest speed if you have a variable speed wheel. This split will take a little time, but remember that if you were panning this material it would probably take as much time or more, and may not be as effective for fine gold recovery. Many people purchase a wheel to reduce the amount of panning time in their clean-up operation, as well as recovering more gold.

At this stage, you’ll want to pull the black sands and gold from the blonde sands. It’s okay if a small portion of the blondes are drawn up along with the blacks in this first split.

We have found that skimming the lighter sands off the top of the material being processed in the wheel (not in the riffles) can be more effective than allowing the tailings to simply run out of the wheel with excess water.

The best demonstration of how to use a gold wheel that I have ever seen is in Dave McCracken’s video, “Modern Gold Mining Techniques.

When running this first split, the wheel will pack just like the riffles of a dredge. When this occurs, for better results, you can spoon material from the bottom of the wheel up onto the riffles. We also seem to get better results by spooning material onto the drier section of the wheel so that it passes into the flow of water as the wheel turns. Watch yourself very closely because this is the step where many of the larger flat flakes are lost simply by scooping the material out of the wheel too soon. Once this split is complete, you should find that you have cut your material in half or more.

Now you should have what we call salt and pepper sand and gold. If you have only black sands at this point, you have probably lost some of the finer gold already. Look closely; and if this is the case, stop, back up and rerun this split again. Remember, the wheel will only recover as well as the skill of the operator permits. So take your time and make sure you’re not losing your fines at each stage of the process.

Next, classify the remaining concentrates once more using a #12 screen. This time you’ll only have half as much material so it will go very fast. The material on top of the screen produces your bigger gold; and if you’re in good gold, you’ll be able to still see it lying all over the surface of the screen. Sometimes, I find it easier to dry and run a magnet through the sands. This approach will usually remove 50% to 80% of the magnetic black sands, leaving your gold and just a little material to pan or blow off. These gold particles and flakes should be bright and beautiful and can be put in your gold jar.

Now it’s time to tackle the material that dropped though the #12 screen by running it through the wheel. When using a variable speed wheel, this split should be processed at the slowest speed, and the pitch of the wheel should be set at a steeper angle. Use a moderate-to-slow water flow, adjusting the wheel to pull just a little black sand, and all the gold. Once you’ve run it through, simply adjust the wheel a bit steeper and rerun this gold-laden material once more, only this time just pull the gold.

This process will leave you with all your gold, and perhaps just a very small amount of fine black sand. I find that if you dry this final product, it is very easy to blow the remaining black sand of by sorting through it on a clean piece of paper and blowing gently. It is a nice way to end your day!

And finally, if you’re having any trouble in your clean-ups, remember to return to the basics by watching your classifications, checking what you’re about to discard on a regular basis, and by making sure that you’re not leaving your fine gold for someone else to recover simply by re-running your old sand piles. I hope these hints are helpful, and good luck with your future clean-ups.


By Dave McCracken

Specialized metal detectors will detect gold well-enough that they will sound-off on nuggets, deposits of smaller pieces of gold or even very small individual flakes of gold.
Dave Mack


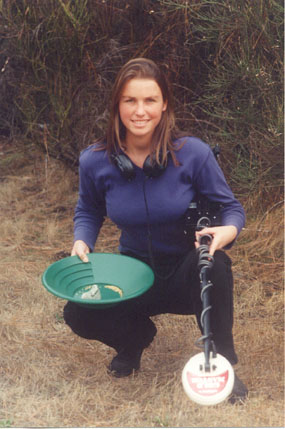
Chrissy with her gold and metal detectorThere are many different kinds and models of electronic metal/mineral detectors to be found on today’s market. This is a guideline to give you the basic knowledge to help you choose the proper detector for your prospecting needs, and to help you use your metal detector as an effective prospecting tool.

There is a lot of electronic prospecting and gold nugget hunting activity going on at the present time. Consequently, there are different tools being used, along with several different popular approaches in how to properly-tune a detector and how to achieve the best results while searching.

It is important to point out that no two gold-bearing areas are exactly alike. An approach which might work better in one area, might not work very well in a different area. So, the purpose of this article is not to tell you what I think “the best” approach is. It is to give you information about each of the different approaches, so that you can gain a larger bag of tools to use when confronted with different situations out in the field.

I should begin by mentioning that the type of electronic detector used to find gold and other precious metals is not a “Geiger counter.” A Geiger counter is an entirely different electronic tool which is used to detect radioactive elements.

The type of electronic device used to prospect for gold is called a metal/mineral detector (“metal detector,” for short). Metal detectors are quite simple to use (once you understand them), and can be helpful in assisting you to locate gold or silver deposits or specimens once you have gained some personal experience in using one properly. While they are rather simple to use, it does take some practice with a metal detector before you can use one proficiently in gold prospecting activities.

There are many different models of metal detectors being offered on today’s market, most which are more useful to the treasure hunter than the gold prospector (two entirely different fields of detecting activity and procedure). Those detectors of most use to gold and silver prospectors generally fall under two separate categories: Beat Frequency Oscillator (“BFO”), and Very Low Frequency (“VLF”).

BEAT FREQUENCY OSCILLATOR

First we will take up the BFO, which is the simpler of the two—but is less-often found these days, due to the substantial electronic advancements of VLF detectors.

The BFO detector usually has two main settings, which are “metal” and “mineral.” As far as electronic detectors are concerned, the difference between the two is that “metals” are targets which are conductive of electricity–such as copper, gold, silver or iron. And, “minerals” are targets, or target areas, consisting of magnetic non-conductive materials such as magnetic black sands (Fe304). These are also known to prospectors as “black sand concentrates.” Electronic prospectors generally refer to them as “heavy ground mineralization.”

An iron object which has been in the earth for an extended period of time, and having thoroughly oxidized, will usually read-out on a metal detector as a mineral instead of a metal object–which it no longer is.

So the two basic settings on a BFO detector are “metal,” electrically conductive targets (gold and silver), and “mineral,” non-conductive magnetic particles (magnetic black sands).

The various models of detectors have different ways of sounding-out on reading targets. Some detectors have a light which turns on and off. Some have a meter with a needle on a dial–which will also give you an idea of the intensity of the signal given-off by various targets. Other detectors have a tone which changes in volume or pitch when passed over a reading target. Some newer-model detectors have an LED display which spells-out the different types of targets being encountered. Some detectors have a combination of these features.

Generally, the best type of metal detector for prospecting purposes is the type which includes an audio tone in which the audio pitch changes when the search coil is passed over a reading target, and which also allows a set of headphones to be connected. The advantage to using headphones while prospecting is that you can shut out the background noises from the surrounding environment and concentrate more intently on even the smallest audio changes which can and do occur while searching.

On most tone-changing BFO detectors, the tone will not only raise in pitch when the search coil is passed over a target for which it is set to sound, but it will also lower in pitch when the search coil is passed over a target of the opposite setting. For example, if a BFO detector is on the metal setting and is passed over a large gold nugget, the detector’s audio tone should rise in pitch. If the detector on the same metal setting is passed over top of a high concentration of magnetic black sand, the audio tone should lower in pitch. The same thing holds true in the opposite for the BFO detector which is adjusted to the mineral setting.

One other interesting thing to know about BFO detectors is they generally sound-out on the most dominant element, either “metal” or “mineral,” whichever is most present in the ground which the detector is being passed over. For example, if you are passing the search coil over ground which contains gold (this would read as a metal), yet there is a large amount of magnetic black sand in the same ground, it is likely that the BFO detector will read-out on the black sand as a mineral while ignoring the gold. Equal reading-amounts of both metal and mineral elements in a section of ground, in any quantity, will prevent the BFO detector from sounding-out on either element.

Because BFO detectors read-out so well on highly-mineralized ground, the presence of highly-mineralized ground tends to block-out reading traces of gold which lie in or under. This is known as “interference” in the electronic detecting field. Magnetite (magnetic black sands) has such a strong affect on metal detectors, that a concentration of only one percent magnetite in the ground may create a signal-imbalance which is hundreds of times stronger than the signal which might be given off by a small gold nugget.

So, a mineral reading on a BFO detector does not mean there is no gold present, only that there is heavily mineralized ground—which may be blocking-out gold readings.

One of the problems in electronic prospecting is that gold targets are often associated with highly-mineralized ground. Therefore, as a tool, the BFO has its advantages and limitations. In some prospecting situations, it can be very helpful to have a device which is good at pinpointing areas of concentrated heavy mineralization. The BFO does this exceptionally well.

This is further-discussed in my other article on this subject: Prospecting for Gold with a Metal Detector.

Some places where nuggets and larger flakes of gold become trapped do not allow heavy concentrations of black sand. One example of this would be a location (rapids) where the water runs fast over top of exposed bedrock during major flood storms. Such areas can be well out of the active waterway and directly accessible to metal detecting. BFO detectors can be very effective at helping to locate gold targets in places where heavy mineralization is absent.

GOLD TARGETS

Unfortunately, as a metal, gold is generally not picked-up very well by metal detectors. This is a comparative statement. Gold does not sound-off on a metal detector nearly as well as an iron object of the same size and shape. However, specialized metal detectors will detect gold well-enough that they will sound-off on nuggets, deposits of smaller pieces of gold or even very small individual flakes of gold.

No metal detectors are able to detect particles of gold dust at the time of this writing. This is probably a good thing, however; because there is so much fine gold spread throughout gold country that it would probably create additional interference problems on a sensitive gold detector.

Therefore, in electronic prospecting for gold, we are looking for flakes, nuggets and accumulations of gold. These are targets which will add up more quickly to something of good value.

It is important to understand that different makes and models of metal detectors are not equal in their ability to detect gold objects. Some detectors will just barely sound-out on gold objects. Others will not sound-out at all.

I highly recommend that any person who is buying a metal detector for gold prospecting purposes should bring along some samples of natural gold to test the various detectors before deciding which one to buy.

Small samples of natural gold and small nuggets are readily available by doing a search on the Internet or contacting a prospecting shop. This is to be sure that the metal detector you do buy will sing-out well when it is passed over natural gold objects, even very small gold targets. If a specific detector will not sound-out on gold held in the air, it will most-likely never detect gold targets located in the ground.

When testing-out the various detectors, it is better to use natural gold samples—like nuggets, flakes or a sample bottle filled with smaller-sized gold,. Some detectors will, and some will not, sound-off on small bottles that are filled with fine gold. Using natural gold targets is better than using a gold ring or some other type of jewelry. Jewelry is nearly always made of gold which has been alloyed with other metals (like copper)—which may read-out on a metal detector better than natural gold objects. Therefore, gold jewelry might give you a wrong idea about how well a metal detector will sound-out on natural gold targets.

The best detectors for finding gold are not necessarily the most expensive. Varying costs in detectors are sometimes in proportion to the amount of additional electronic circuitry that is built into the detector for extra features. These sometimes have little or nothing to do with the detector’s capability of locating gold targets.

Gold targets give a solid, mellow sound on a metal detector, similar to lead or brass. Pieces of steel wire and bigger nails usually give a stronger beep—or often a double beep.

The capability of a metal detector to sound-off on a natural gold target will partly depend upon what other metals the gold is alloyed with. Silver and copper make natural gold targets sound-out stronger. Nickel, mercury and platinum alloys make natural gold targets more difficult to find.

Metal detectors read-out on gold better as the pieces become larger. As an example, an average gold detector might sound-out very well when its search coil is passed over an eighth-ounce nugget from several inches away, yet not sound-out at all when passed over three times as much fine gold accumulated in a glass jar at the same depth or distance from the search coil.

Actually, it is not just the size of the target which counts. The object’s shape also makes a difference, and also the direction which a target is facing. A larger, more solid surface-area of gold will sound-out stronger. For example, a flake-shaped nugget is likely to sound-out better on a metal detector than a round nugget of the same weight, as long as the flat-surface area of the flake is facing in the direction of the metal detector’s search coil. Also, coarse and irregular-shaped nuggets, as commonly found in dry placer areas, residual and eluvial deposits, do not generally sound-out as well as nuggets which have been worked-over and pounded by flood storms in a streambed (because these are more dense and solid).

How tightly a gold deposit is concentrated also makes a difference in how well it will cause a metal detector to sound-out. Whereas a quarter-ounce of flake-gold inside of a jar might sound-out well on a particular detector, perhaps two ounces of the same flake-gold spread-out over a slightly larger area might not read-out at all with the same detector when the targets are at the same depth beneath the surface. This is one factor which is important for the gold prospector to realize: Any metal detector wills read-out on tighter concentrations of gold better than larger amounts of gold which are more widely dispersed. Metal detectors will also read-out on nuggets (larger solid pieces of gold) best of all.

DEPTH CAPABILITIES

How deep into the ground that a specific metal detector will sound-out on an object depends upon various conditions. Surprising to many, how much a detector costs may not have much to do with its depth-sounding capability. In fact, some of the less-expensive models are able to probe deeper, and pick up on gold better, than some of the more expensive detectors. The Federal Communication Commission has put a maximum limit on the signal-strength which can be used in metal detectors. So the idea that a more expensive model puts out a stronger signal to probe deeper is simply not correct.

The type of object has much to do with how deep into the ground that it can be located with a metal detector. Different kinds of objects have varying amounts of magnetic and electrically-conductive properties. Therefore, they affect metal detectors differently. Also, some detectors will sound-out on some kinds of objects better than others. As mentioned earlier, gold is not one of the better-reading metals, so cannot be picked-up with a metal detector as deeply as an iron object of similar size and shape.

Another factor which determines how deep an object will be picked-up by any detector is the size of the object itself. Whereas a 2-pennyweight nugget (1/10th ounce) might be picked up five inches deep into the ground with a certain metal detector, a 5-pennyweight nugget (1/4 ounce) might be picked-up eight inches deep into the same ground with the very same detector.

How much an object has deteriorated and has been absorbed into the soil is another factor in how deep the object will be picked-up. Iron objects tend to oxidize and become slowly absorbed into the surrounding material. This causes the target to appear larger and read-out more strongly, so it will be picked-up at greater depth with a metal detector. Once such a target has thoroughly deteriorated as an object, it will stop reading as a metal and start reading as highly-mineralized ground. Gold does not oxidize or deteriorate, so this factor does not apply to natural gold targets.

The size of a search coil on a metal detector is also a factor in how deeply the detector will locate objects. Larger coils generally are able to detect objects at greater depth than smaller coils. But they generally do not have as much sensitivity in detecting smaller gold targets. Smaller search coils have greater sensitivity to small objects, yet do not have the depth-probing capability that larger coils do. Medium-sized coils, from five to eight inches in diameter, often combine the features of having both a reasonable amount of sensitivity for the smaller objects, and acceptable depth-scanning ability.

One thing to keep in mind is that a larger coil will also increase the size of the area being covered by each sweep.

Many nugget hunters prefer to have a smaller search coil handy, because it produces the greatest small-object sensitivity (gold flakes), and because the smaller coils can get into tighter spots—like in and around tree roots and inside of exposed crevices in the bedrock, where nuggets are most likely to be found with a metal detector.

Almost all detectors today are made so that various-sized coils can be attached, depending upon what they are to be used for. When testing a detector, do not make the mistake of assuming that if the device sounds out well on a gold sample when using a coil of one size, it will also sound-out well when using a coil of a different size. Your best bet is to test the detector with the various-sized coils to see which work best for your particular needs.

One of the most important factors determining how deep a metal detector will sound-out on a gold object is how much mineralization (interference) is present in the ground that is being prospected. More minerals equal less depth. This is especially true of BFO detectors. Because black sands usually exist, and sometimes actually concentrate, within the very same streambeds or soils where gold deposits are located, metal detectors are not always used to directly detect gold in streambeds or material of substantial depth. They are sometimes used to scan places where there is a very shallow amount of gravel or material (if any) present over top of the gold (exposed bedrock).

One excellent use of the BFO detector as a prospecting tool is to locate concentrations of black sands in a streambed. Black sands often accumulate in the very same locations that gold does (pay-streaks). From your fundamental knowledge of placer geology, after potential pay-streak locations have been pinpointed, those specific areas can sometimes be scanned with a BFO detector to locate the increases in other heavy elements. Specific sites which sound-out heavily on the “mineral” setting can then be sampled by conventional gold mining techniques.

VERY LOW FREQUENCY DETECTORS (VLF)

The VLF detector is a more recent development in the field of electronic prospecting. Very Low Frequency detectors may come under other names or descriptive abbreviations such as VLF, GEB, MF, GCD and others. These are designed with circuitry which is able to cancel-out the effects which highly-mineralized ground has on a BFO detector. VLF detectors have the ability to look through or past highly-mineralized ground and detect metal objects (gold) that may not read at all on a BFO metal detector.

The VLF, being able to cancel-out interference caused by mineralized ground, is more suited for locating gold deposits and gold specimens directly. However, it still remains true that gold targets will have to be large enough, or located close enough to the surface, or deposits will have to be tightly concentrated enough, to sound-out on a VLF, just as with a BFO detector.

Just because a particular detector is of VLF design, does not mean it will sound-out well on gold. In fact, there are some VLF detectors which have difficulty in sounding-out on gold samples at all. So this type of detector must be just as thoroughly tested using natural gold targets before buying for prospecting purposes.

The VLF detector, being a mineralization-cancelling device, sometimes does not have the ability to detect the heavy black sand concentrations the way a BFO detector is able to. Consequently, a VLF is more often better-suited for scanning directly for gold, whereas a BFO is generally better-suited in helping the prospector locate gold deposits in an indirect sort of way, by finding the highly-mineralized ground within a gold-bearing area.

MULTI-PURPOSE DETECTORS & SPECIALIZED GOLD DETECTORS

VLF detectors are sometimes also constructed with discrimination circuits that are designed to cancel or identify specific types of targets—like bottle tops, aluminum foil and pop-tops. For the most part, this type of electronic circuitry is better-suited for treasure and coin hunters. When used in prospecting for gold targets, discrimination circuitry sometimes has a tendency to also reduce the detector’s depth-probing capability, especially in highly-mineralized soil or streambed material. Since gold targets are already difficult to locate, it can sometimes be better to not utilize additional circuitry which could hamper sensitivity towards gold.

However, some conditions do exist in which discrimination circuitry may assist a gold prospector. If using such a detector, always test it against a sample-nugget planted in or on the ground that you are probing, to determine whether or not you can trust the discrimination circuitry.

There is a lot to be said about having a small natural gold target along with you at all times when you are prospecting for gold with a metal detector. This way, each time you decide to try something new to try and get the most out of your detector under changing circumstances, you can confirm the results using a target which is similar to what you are hunting for. It is common for electronic prospectors to glue a test-nugget for this purpose to a poker chip, which can be tossed to the ground and easily spotted again.

Some of the newer, specialized VLF gold detectors are utilizing specific discrimination circuitry called “Iron Identifiers.” This does not necessarily reduce the total depth capability in the detection of gold targets. In other words, the circuitry will identify iron objects which are nearly certain to be iron. The downside to the use of such circuitry is that if an iron target is too deep or too small, it might still be identified as iron. Also, if the ground is highly-mineralized, the accuracy of iron-identifying circuitry is likely to be reduced.

The best gold detectors which use a meter or other display to identify different types of objects, do not route the discrimination function through the same circuitry that produces sound variations through the headphones. In this way, you can obtain optimum depth probing and object sensitivity to your ears, along with some added visual ability to pre-identify what is sounding-out on the detector. This is all about reducing the amount of trash targets that you must dig up while looking for gold.

Some experienced electronic prospectors utilize discrimination circuitry (turning it on and off accordingly) only after a target has been located. This way, depth and sensitivity is not forfeited during preliminary searching.

Other experienced prospectors insist that no discrimination circuitry is needed. Once you are familiar with the area you are searching, and know the specific audio tone changes of gold and/or trash targets, you will form your own judgment of which targets (sounds) to dig and which targets to leave alone. Different prospectors have different methods. Also, different locations often require different methods. Some experienced electronic prospectors simply dig every target (sound).

Some VLF detectors are made with circuits designed to analyze targets. This means they are able to tell you if the target is a nail, bottle top, a nickel, silver dime or a piece of gold. Such circuitry has only limited accuracy in electronic prospecting; because highly-mineralized ground tends to interfere with the signal and can give a false reading in the analyzer. Still, the added capability can be useful.

None of these circuits are a problem with multipurpose detectors, providing the special circuits can be shut off or bypassed—and/or providing the additional circuitry does not hamper the detector’s efficiency in locating gold and silver targets.

Some VLF detectors are designed with manual ground-balancing controls, and others are designed with automatic ground-balancing circuitry. Some prospectors prefer the manual controls. Others prefer automatic ground-balancing. There is nothing wrong with automatic ground-balancing circuitry in gold prospecting, as long as it is fast enough to keep up with the rapidly changing mineralized conditions of the different areas you intend to prospect—and as long as the additional circuitry does not hamper the detector’s ability to locate gold and silver targets.

Some VLF detectors have been specifically designed as gold prospecting tools. Since most specialized gold detectors operate at a higher transmitting frequency, have extensive ground-balancing capabilities, and have special circuitry to avoid sensitivity overload in highly-mineralized ground, they definitely do have some advantages in their ability to locate small gold targets over most multipurpose detectors—or gold targets which are deeper in the ground.

The high-performance of some of today’s specialized gold detectors even make pinhead-sized gold targets recoverable.

Which detector you choose to buy will depend upon what you plan to use the detector for. If you plan to only use it for prospecting purposes, a special gold machine is probably best for you. If you intend to search for coins, caches, artifacts and lost articles, as well as prospecting for gold and silver, perhaps a multipurpose detector is best—or two separate detectors. Only you can decide.

I would suggest you buy your detector from a dealer located in the general area where you plan to prospect for gold. The local dealer will know which detectors are performing best in that area. Local dealers will also introduce you to other prospectors, and perhaps a local prospecting and/or treasure hunting club or association.

Communication with local prospectors can be a very big help in determining which detectors are best for specific areas. You can also get tips from them on productive places to prospect with your detector.

No detector made is the best for all locations. Some machines work better than others in wet or dry conditions. Some work better in hot or cold climates. Some detectors are affected by alkali “salts” in the soil or gravel more than others. When any of these examples is the case, a smaller coil might manage adverse conditions better than a larger coil. Each area is different.

Another reason to purchase your detector from a local dealer is the help and support that you will receive. Success in the field comes from understanding the workings of your detector, and perhaps receiving inside information on good places to hunt. The money saved by buying from a discount mail-order house may not be worth the loss of support you would otherwise receive from a local dealer—especially when you are just beginning.

When buying a detector which you intend to use for prospecting purposes, keep in mind that probably the most important feature is the detector’s capability of cancelling the heavy ground mineralization found in most gold-bearing areas.

Practice makes perfect. You must start with good equipment. The rest will be up to you.

ELECTRONIC PROSPECTING DRILLS

The following is a set of drills put together to give the new (or old) owner of a metal detector some practice with his tool and to allow him (or her) to get a good grasp of what the detector’s gold-finding capabilities are:

DRILL No.1: Take a file or electric grinder to a piece of iron or steel (like a nail), and allow the fine pieces of metal to fall into a container. Pour some filings onto a piece of paper and pour some glue over the filings to hold them intact. Pour more filings on top of the glue and then pour on more glue. Continue this until the conglomerate is giving off a strong mineral reading on your detector. Make three different sheets of mineralization; one giving off a very mild mineral reading, one causing a medium signal, and one which gives off a strong signal.

If you are already an experienced gold prospector, and have some black sand concentrates lying around somewhere, use a magnet to collect some magnetic black sand and use these instead of iron filings. Sometimes, you can get prospecting supply outlets to send you a small package of black sand concentrates. You can also find bags of mineral concentrates (which usually include some gold) which various sellers on the Internet market as panning sands. These are better than using a machine to create iron filings, because they are the actual material that you will encounter in the field.

These different mineralized conglomerates will give you a good idea of how your detector will react to different degrees of mineralized ground.

DRILL No.2: Acquire at least a half-ounce of placer gold, preferably more, with a variety of fine, flake, and nuggets so a wide range of testing can be done.

Carefully place the gold in a pile on a clean sheet of paper in a location where there is no other metallic object reading on your detector. Scan the gold with your detector from varying distances to get an idea of your distance-capabilities when scanning a concentrated gold deposit.

Now spread the gold out over a slightly-wider space on the paper and scan again to check distance. Continue to spread the gold out wider and wider until it no longer reads on your detector—or until you are picking up on individual flakes of gold. This drill will give you a good idea of what sized pieces and accumulations of gold will sound-out at what distances. Try different coil sizes to see what their capabilities are.

Pay particular attention to the specific sound-readings that you get when scanning over gold targets. These drills should be done with headphones. With some practice, you will start to be able to tell the difference between gold and other metallic sounds by the difference in the strength, crispness and tone of the signal. Stronger-reading metals will give a sharper and louder change in tone, whereas gold tends to cause a softer and more indistinct signal–especially when located in smaller amounts or at a distance. Do the drill and see for yourself.

DRILL No.3: Using the flake-gold and nuggets in different accumulations, as done in drill No. 2, place the different sheets of mineralization over the top of the gold and note the responses on your metal detector. If you have a VLF, practice cancelling-out the mineralized sheets and test to see what size-accumulations of gold can be picked-up while doing so. Try more and more mineralization, combining the sheets together if necessary, to see how much mineralization your VLF detector will look through and still have sensitivity to gold targets.

Notice how even a larger piece of gold puts out only an inkling of a reading when covered by heavy mineralization and/or scanned from a distance. Recognizing these very light signals is usually the difference between success and failure in electronic prospecting!

If you are doing these drills with a BFO detector, try combining different amounts of mineralization with the various-sized accumulations of gold. Determine for yourself on your own detector how much mineralization it takes to block-out the different accumulations of natural gold.

I am certainly aware that sometimes it is difficult to come by a collection of gold flakes and nuggets if you don’t already have a collection of your own. However, the time spent in locating some natural targets to practice with, or in talking a friend into lending you his collection–or in talking him into doing these drills with you—will be worth many times as much time spent out in the field with your detector.

These drills will not teach you how to prospect for gold deposits. Only practice and experience out in the field will do that. But these drills will go a long way to familiarize you with your detector and give you certainty on the use of it. They will help you with the basics that you will need to learn to prospect for gold with a metal detector.

HELPFUL TIPS ON TUNING

Each model of detector has its own set of operating and tuning instructions which you should follow. And, I highly suggest you familiarize yourself with every aspect of the manufacturer’s instructions. In addition, here are a few pointers which have proven successful in the prospecting field:

Some manufacturers recommend that their volume-changing detectors be tuned to just below the hearing range. The purpose of this is so that the slightest reading will make a sound— which can be easily distinguished from the silence. But for prospecting purposes, it usually works better if you tune your detector so the audio signal is always within hearing-range. This will use up the batteries just a bit faster, but it is much better to be able to hear the signal at all times.

The audio threshold (“threshold”) of a tone-difference sounding detector should also be set just in the hearing range. When looking for natural gold targets, just the slightest change can mean the difference of finding or missing a gold target. Changes in volume and/or audio tone also are an indication of changes in ground mineralization and let you know when adjustments are needed to ground-balance again and again.

Sometimes the detector’s audio signal will drift off to a lower volume range due to temperature changes or loss of battery life. If the audio signal is tuned into the non-hearing zone and drifts into an even lower range, you might be scanning for several minutes without having the detector tuned properly. That would just be a waste of time.

Sometimes a warming coil will cause the threshold sound to drift upwards. A cooling coil might cause the threshold to drift downward. Hunting in and out of water environments, while scanning the banks of a stream, might cause threshold changes. You should make adjustments as necessary.

The main cause for a detector’s tuning to drift is loss of battery life. When this occurs, it is time to replace the batteries with a new set so you can get the best performance out of your detector—which is needed when hunting directly for gold.

It is always a good idea to bring along an extra set of batteries into the field when prospecting. Because when they quit, you are finished until new batteries are installed. Extra batteries should be kept cool and dry. Zip-lock baggies work well for this.

Prospecting for gold targets directly with a VLF detector should almost always be done in the “all-metal” mode.

Setting Sensitivity: It is important to stress that you do not want to set the sensitivity too high on your VLF detector while prospecting in a heavily-mineralized area. A high sensitivity setting while testing a nugget in the air will show improved perception—and therefore can give you a false impression of the detector’s scanning ability for gold targets in the ground. It is better to do your settings while scanning over your test-nugget on the ground that you will be searching over.

Turning the sensitivity up too high in mineralized ground is similar to using high-beam headlights in the fog. You get lots of flashback and irregular sounds and false targets. If your sensitivity is set too high, your detector will operate in an erratic manner. There will be many false signals which do not repeat themselves (“flashback”).

Consequently, less sensitivity can give you more depth-penetration in mineralized ground. There is actually a middle ground, depending upon ground mineralization, which will give you optimum sensitivity without too many “ground noises” which are confusing and prevent you from selecting the real targets. Try and run with the sensitivity as high as possible—until the steady tone of the threshold begins to give off an uneven, wobbly sound while you are scanning.

I usually do not recommend using the factory preset marks on your detector controls. Such settings are for average conditions. Prospecting for gold targets requires continuous adjustment to ground-balancing, and the threshold and sensitivity need to be set as accurately as possible to ever-changing conditions. You need to get the most possible out of your detector to avoid missing gold targets.

“Peak Performance” on a metal detector for nugget hunting purposes in most cases is: maximum volume on detector, threshold set in minimum audio hearing range, maximum sensitivity without receiving too much flashback, and ground-balance to the average ground being scanned. When you accomplish peak performance on your detector, the rest is up to you! By this, I mean you will have to interpret which signals should be dug up.

Ground-balancing: Setting the proper ground-balance on your detector, and keeping it properly adjusted while you search, is perhaps the most important factor in successful nugget hunting. I cannot overstate this point; because without proper ground-balance, you simply cannot find natural gold targets—unless you just get lucky. All of the skills we will talk about in this article, skills and methods which will make you good at finding gold targets, all depend upon your detector being properly ground-balanced.

Always set your ground-balance to the average soil or material which you are searching. You will find the majority of gold nuggets in average ground. If you ground-balance to specialized heavier-mineralized zones which are not the average matrix, you may forfeit some depth-probing capability or sensitivity to smaller or deeper gold targets.

Detectors which come with permanently-set, predetermined ground-balance are usually not especially good for electronic prospecting.

You should hear a low hum when your detector is turned on properly (threshold sound). As the detector is raised or lowered from the ground, the threshold hum should get louder or softer. This tells you what needs to be done to get a proper ground-balance. Handling the ground-balance knob or button on your detector is similar to handling the volume control of a radio. If the threshold hum is disappearing as you lower the coil to the ground, turn the knob up. If the hum gets louder as you lower the coil, turn the knob down. The basic idea is to adjust the ground-balance knob (or press the button) until rising and lowering the coil to the ground creates little or no change in the threshold hum.

Ground-balancing has to be redone on a regular basis while prospecting. The reason for this is because placer deposits do not contain uniform amounts of magnetic mineralization. Water-flows create low pressure zones and high pressure zones from one place to the next. These different zones accumulate different amounts of mineralization during flood storms. Often, you can see changes in mineralization just by noting changes in the color or surface of the ground you are scanning. Also, changing from gravel-like material to bedrock surfaces almost always changes the amount of ground mineralization. Get into the habit of re-ground-balancing about every 15 or 20 feet, or about every five minutes, or whenever the ground conditions change.

Your detector will tell you what is going on. If the threshold hum is getting louder, it usually means there is less mineralization in the ground you are now searching. If the hum goes softer, the mineralization is increasing. With a little bit of experience, you will gain your own perception of when it is time to re-ground-balance.

It is almost never a good idea to balance a detector over top of a piece of metal in the ground. Move around until you find a non-reading area to ground-balance.

When ground-balancing, move your coil all the way down to touch the ground if possible. I say “if possible,” because you occasionally run across areas with so much mineralization that you are not able to put the coil within a few inches of the ground! “Alkali salts” in damp soil can sometimes also create so much interference that the coil of your detector needs to be raised several inches above the ground to search for targets. Naturally, depth penetration is lost by doing this. But sometimes you have no other choice. Sometimes you can also get around this problem by making adjustments to your detector’s sensitivity. This will allow you to search with your coil closer to the ground; but the reduced sensitivity will likely eliminate some perception of smaller or deeper gold targets.

Sometimes, you can obtain better results by ground-balancing your detector a little on the positive side. A slight positive ground-balance increases the detector’s sensitivity to smaller gold targets when hunting in an area of lighter mineralization. This means that the threshold makes a slightly louder hum as the coil is lowered to the ground. When operating this way, be sure to keep the threshold in the audio hearing range. You don’t accomplish this by adjusting the threshold; reset the ground-balance as necessary to remain in the audio hearing range when lowering the coil to the ground. Just a slight positive ground-balance boost is all that is needed. Some experienced prospectors like to operate in a positive range all the time.

However, you may find instances when working around highly irregular ground, vegetation and/or rocks when a slight positive ground-balance creates a problem. Lifting the coil up and down and around with a positive ground-balance setting can create a similar situation as with too much sensitivity.

In highly-mineralized ground, when there are too many flashback signals which could be real targets, you can try ground-balancing your detector to a slightly negative setting with the coil on the ground. This may reduce your sensitivity to some of the smaller gold targets. But it is likely to settle-out your machine, and it might make it possible to locate targets which otherwise would not be accessible.

Always bring along your small sample natural gold target (about the size of a match head). This should be glued to a bright colored poker chip, or something similar, to keep it from being lost. Some prospectors go so far as to drill a hole and tie a string to the poker chip to avoid losing valuable time searching for lost poker chips! When in doubt about your tuning, toss down the sample gold target, cover it over with the ground in question, and see how your detector reacts. It might not be necessary to cover the test-nugget. Just placing it on top of the ground may be enough to test the tuning of your detector over that type of ground.

One thing which should be mentioned is that while you are searching around, your threshold hum is likely to change. The answer is usually not to reset the threshold; it is to adjust ground-balance and sensitivity as necessary to challenge the changes in ground mineralization. Your sample gold target will be the final test of whether or not your adjustments are working. If you don’t have a small natural gold nugget, you really should get one! Otherwise, a small piece of lead will create a similar target.

Other Tips on Tuning and Setting up a Metal Detector for Prospecting: When you are operating a metal detector, it is good practice to remove all rings, bracelets, watches and other jewelry from your hands and arms (ankles and toes). They can give a false read on the detector. This is especially true when you are testing a detector before buying, or when you are tuning your detector to sound-out properly on a special metal target while passing it over or under the search coil with your hand. Sometimes, belt buckles, canteens, knives and other digging tools or large metal objects carried on a belt can create false signals when using the more sensitive and specialized gold detectors. Even metallic eyelets on boots can cause problems when scanning too close to your feet. It doesn’t take much practice to figure out how to solve these problems.

Make sure to adjust the shaft-length on your detector to a comfortable position. Bending over too far will create uncomfortable back strain when hunting for extended periods.

Also, when the angle of the search coil on the shaft is changed to fit a new set of search conditions, the detector must always be re-tuned to correspond with the new relationship between the coil and the metal shaft.

Some prospectors prefer to mount the control box of their detector on their belt or hip. This lightens the arm-load during longer periods of prospecting activity.

It is also a good idea to wind the coil connection cable firmly to the shaft. This way, it is not flopping around, giving false signals or getting caught on objects and vegetation. Be careful not to pull the cable so tight as to break inner wires and create irregular operation of the detector.

OTHER IMPORTANT FACTORS TO CONSIDER WHEN BUYING

If you are looking over a metal detector you are interested in buying, test it to make sure that its tuning does not drift on its own. This test can be done by placing a good set of batteries into the device, turning it on, allowing it to warm up for a minute, tuning it in, and allowing it to sit and run for 5-to-10 minutes. If the audio tone drifts during this time, you ought to look around for a similar detector which has better electronic stability.

CAUTION: Wetness and dampness are not good for the control box of any type of electronic detector. Be careful to avoid getting yours wet when working around water. If you intend to use a detector out in the field on a damp or rainy day, you can cover the control box with a clear, loose-fitting plastic bag and secure it to the shaft of the detector. The bag should be loose enough so you can work the various control knobs without having to untie the bag and take it off to setup or re-tune the detector.

HEADPHONES

It is important in electronic prospecting to use quality headphones. This point cannot be over emphasized. Some detectors work just fine with the headphones which come from the factory.

There are different types of headphones. Some are heavy and cover the ears thoroughly. Some are light. What is best for you will depend largely upon the conditions where you are going to search. For example, the heavy type which thoroughly covers the ears might not be very practical in the hot, quiet desert environment. But they might work exceptionally well in a cooler environment—say along the bed of a creek where running water is making lots of background noise.

Areas which include the company of occasional rattlesnakes might require the use of lighter, less sound-proofed headphones!

The proper headphones for a specific hunting environment are another area where the local dealer or members of the local prospecting club can make valuable suggestions.

It is a common practice for prospectors to shorten the length of cable on detector headphones to about 3 1/2 feet. This helps prevent the cable from snagging on branches and other obstructions when working in brushy areas or climbing over uneven terrain.

Some detectors have volume controls and others do not. Volume on a detector while prospecting should normally be turned to maximum. Don’t confuse this with threshold hum, which should be set near minimum audio level. If maximum volume on the detector is uncomfortable to you, obtain a set of headphones which have volume control. Then, turn your detector’s volume all the way up and use the headphone controls to turn the volume down if you must.

Many electronic prospectors highly recommend “sensitivity enhancers”—like those made by DEPTHMASTER. These help enhance the soft target sounds from gold, while lessening the noisier signals caused by trash and iron targets.

OTHER HELPFUL EQUIPMENT

A plastic cup or tray is sometimes necessary to recover gold targets, even in dry terrain. A plastic gold pan is helpful to work down material where water is present. Sometimes a portable garden rake is helpful for moving smaller rocks and obstructions away from a productive hunting area. A small G.I. shovel is helpful in some hunting environments. A canteen filled with liquid; tweezers, needle-nose pliers for removing gold from bedrock traps; and a small pick for digging and scraping. Sometimes the ground can be very hard. This is especially true when finding gold on hard caliche layers in the desert. A wide belt with a carpenter’s loop (for holding hammers) comes in very handy for a small pick. This keeps it out of the way, but also makes it quickly accessible.

A lot of your gear can be left at your vehicle, or carried in a backpack which can be set down at the hunt site. It is usually better to not load yourself down too heavy while prospecting with a metal detector.

Many electronic prospectors are using empty 35mm film containers to contain recovered gold targets. These are unbreakable, and the large mouth makes it easy to get a piece of gold inside. Zip-lock baggies are also helpful.

A magnet can be a very big help while electronic prospecting. Sometimes you can recover a faint-reading iron target right out of the dirt with a pass of a magnet. Otherwise, you might find yourself losing valuable minutes picking through the material, looking for a small piece of gold. Animal feed stores commonly stock a special magnet used for cows (traps small iron particles, preventing them from entering and damaging intestines). These magnets are powerful, yet inexpensive. You can mount one on the end of your small digging-pick or tape it to the handle of a plastic or stainless steel garden trowel. This way, the magnet is handy when you need it. Some prospecting picks are available which already have a magnet attached; very convenient!

A serrated-edge on a garden trowel also is helpful when you find yourself digging around roots or brush. Some prospectors keep one edge of their trowel sharpened just for this reason.

When working bedrock areas, a small crevice tool can be a big help to open cracks and crevices which are sounding-out on your detector.

Some kind of pouch or pocket creates a location to dispose of small pieces of trash and iron which you dig up. You only want to dig it up once! It is much better to remove all small trash targets from the playing field. With the continuous improvement of electronic prospecting tools, you could find yourself going back over the same areas again at a later time!

Some prospectors are using fishing or photography vests—lots of pockets. These come lightweight or heavy, depending upon the environment where you plan to hunt.
 

By Dave McCracken

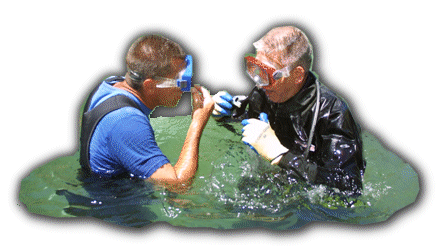
A good challenge forces you to reach down deep inside and raise yourself to the occasion!

Dave Mack

The yawns being given off by my friend permeated the room so heavily that they clearly placed an uncomfortable shadow over the enthusiasm all the rest of us were feeling. We were on one of the most exciting treasure hunting expeditions I have ever been engaged in, and I was thanking my lucky stars just to be part of the expedition. All of the people involved were very good at their jobs and were enthusiastically involved with this project except my friend. He was bored. In fact, he was so caught up in his own personal boredom, that he was certain everyone else, and the whole world, was also seeing the world in the same mundane way. Talk about being on a different wavelength!
After our planning meeting was over, I gently approached my friend about his outlook. He agreed wholeheartedly with my observation. His viewpoint was because of some unknown factor that he could not quite pin down; he just was not able to take on the project (or life) with enthusiasm like the rest of us.

I asked if someone was sick in his family, or if he had financial or other personal problems that were holding him back. He said there was nothing like that holding him back. To him, for as long as he could remember, he was not able to experience real enthusiasm.
I don’t think any of us can expect to get more out of life than what we invest of ourselves into it. Wouldn’t it be wrong to take more than we give? How can we expect our passion to come from something outside of ourselves?

If we put passion in, perhaps we can get more passion and excitement out of it, whatever the endeavor.

My friend was waiting for some influence outside of himself to give him something to be passionate about. He was looking for some hidden reason why he was not feeling enthusiasm. I suggest that all of this might be a “backwards” approach.

I suggest the impact of life upon us (how we end up being affected by it) is exactly as we choose it to be. If we decide that the way we are going to feel most of the time is due to some (or lack of) outside or hidden influence or the way others have treated us (or not treated us) in the past, naturally, that’s the way it will be for us.
But it does not have to be that way. It can be any way we choose it to be. There are any number of responses we can choose for every given situation.

You do not have to win every battle to be a winner. If you win every time, you are not putting yourself to the real test. That’s not really winning, is it?

You do not have to be “rich” to be successful. Money is not life’s measuring stick.

Life must have worthwhile challenges for life to be interesting. A good challenge requires a fair chance (perhaps even likelihood) that you could fail in the endeavor. Real challenges make you fear the consequences of failing. A good challenge puts you to the real test. It forces you to reach down deep inside and raise yourself to the occasion. It makes you improve yourself. It makes you become more passionate, more brave, more tolerant of others and more secure in yourself.

A real challenge forces you to live life more fully!

I suggested to my friend that perhaps if he took on something more challenging he might discover his own personal enthusiasm. This thought brightened him up considerably.

Some philosopher once said that if taking on something is really difficult for you, try taking on twice as much. Then, the first limit you set for yourself will not seem like too much, anymore. There is certainly some profound wisdom in this philosophy. We do indeed set our own limits for ourselves by the decisions we make or the decisions of others that we agree to.

Ironically, my consistent observation has been that those people who are most challenged in their lives are happiest, most passionate and most enthusiastic even if there is a great deal of pain and misery in their lives. This is true in war-torn Cambodia. It is true in the remote portions of Madagascar where there is no medicine to save a sick child and where people work their guts out just to eat. In all their pain and suffering, those people really have passion in their lives. They are truly thankful for the little they do have. They are happy to be alive today. The few comfortable, good moments really have meaning to them.

“Perhaps we need the challenge of an occasional crocodile in our lives!”

Please do not misunderstand the point I am trying to make. I am not saying that pain and suffering are good. The point I am trying to make is that it is perhaps difficult to experience real passion and enthusiasm in our lives if we are so comfortable that the only adventure we experience is on the television.

Yes, we experience television with a passion. But what about life?

Perhaps, in the end, it is not about rich or poor — or about winning or losing. Just maybe, it is about experiencing everything out of life you can make happen. My guess is that this comes from putting in as much as you have to give. And that comes from being truly challenged in life, maybe even taking some chances.

We each set our own limits for ourselves. If we are not passionately trying to overcome those limits, then maybe we are cheating ourselves out of the best that life has to offer.

We easily forget this lesson in the West, where day-to-day life is not as dangerous as it might be. In many of the Third World countries I have visited, people have to face actual physical dangers in their everyday lives such as crocodiles. Let’s face it; there is not a lot of time to worry ourselves about petty concerns when we are concerned about getting eaten by a crocodile. Perhaps we need the challenge of an occasional crocodile in our lives!


It is getting pretty close to dredging time, and if you are anything like me and the many other dredgers I know, you are probably just itching to get started.

My partners and I, from past experience, now spend the necessary time and energy, before the dredging season starts, in getting all of our equipment repaired-to avoid the otherwise often confrontations with Murphy’s Law.

Some of the standard things we go through are as follows:

Engine and Pump: We always replace the spark plug, motor oil, points and condenser and air filter at the beginning of every season. We also pull the pump impeller to make sure it is not worn or damaged, and to make sure nothing is lodged in it. And we check the pump seal and replace it if it looks the least bit worn.

Air Compressor System: All of the compressors I have seen on gold dredges have reed valves. These are stainless steel plates which allow air to only flow one way through a chamber. These reed valves ought to be cleaned, polished and straightened at the beginning of every season. Some compressors have rubber diaphragms and some have piston rings. These ought to be checked and replaced if necessary. Rebuild kits are generally available for each type of compressor-usually from your local prospecting equipment dealer.

We always open up our regulators and blow them out with compressed air. You will want to check to make sure there are no holes in the rubber diaphragm, and make sure the rubber exhaust seal is working properly. If you have problems with water getting inside your regulator, it is almost always because of a worn out rubber exhaust valve. These are easy to obtain and replace.

It is especially important to open up and clean any check (one-way flow) valves in the air system. We also always soak our air lines in a very mild bleach-water solution before starting a season. We let the airline sink in a tub of the solution to allow the bleach to kill off any fungus which has grown inside the airline. This is to avoid potential respiratory problems from the fungus. The line needs to be thoroughly rinsed with fresh water afterwards.

We check all of our airlines and fittings to make sure everything is working properly-no leaks, and no weak connections!

We thoroughly clean out our air reserve tank to make sure there is no rust, fungus or other substances which could potentially cause problems.

Dredge (Structural): And, of course, we go over the sluice boxes, dredge frame and jets to make sure there are no holes, cracks or other structural problems. And if we find problems, we fix them on the spot. No need to wait until it becomes a more serious problem during the season.

We hit all of the steel with a wire brush and follow up with a fresh paint-job every spring. It’s nice to start the season off looking good!

We go through all of our rope and make sure all of the weak points are cut out and spliced back together, and all of the ends are spliced or melted so there are no frayed ends.

Diving Gear: We go through all of our diving gear, replacing anything that is worn out, patching holes in suits, etc. No need to be any colder than necessary during the early spring!

While fixing up the dredging equipment is not as good as using it, I personally gain a great deal of satisfaction getting it all prepared for the season. And, it’s always a good feeling when I do get out on the river when I have it all together the way it should be. And when “Mr. Murphy” comes knocking at my door, at least I know it wasn’t because I failed to plan ahead.

 
video subscription graphic

By Dave McCracken

“When to do a clean-up”

Some miners like to “clean-up” their sluice boxes after every hour of operation. Some prefer to do clean-up at the end of the day. Others will go for days at a time before cleaning up. This is all a matter of preference and seldom has much to do with the actual needs of the sluice box.

More commonly these days, a dredger only cleans-up the “high-grade” section of riffles in his or her dredge after each sample or at the end of a production day. That is a special small section of riffles which catch most of the gold near the head of the sluice. The full recovery system is usually only cleaned-up when enough gold has accumulated to make the effort worthwhile, or it is time to take the dredge out of the water.

There is a method of determining when a sluice box needs to be cleaned up, so that you can keep it operating at its utmost efficiency. If the majority of gold is catching in the upper-third section of the sluice box, then the recovery system is working well.
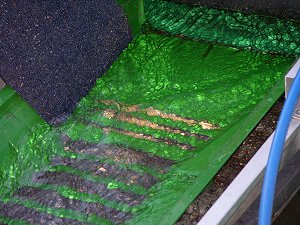
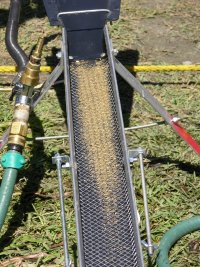
After a sluice box has been run for an extended period of time without being cleaned, the riffles will be substantially concentrated with heavy materials behind them. Sometimes an abundance of heavily-concentrated material in a sluice box can reduce the efficiency of the riffles. This is not always the case. Much depends upon the type of riffles being used and how they are set up in the box. The true test of when a set of riffles is losing its efficiency because of being loaded down with heavy concentrates is when an important amount of gold starts being trapped further down the length of the box than where it normally catches. When this occurs, it is definitely time to clean up your box. Otherwise, clean the box when you like.

Expanded-metal riffles, being short, will tend to load up with heavy black sands faster than the larger types of riffles. Still, a large, visible amount of black sand being present is not necessarily a sign that you are losing gold. Gold is about four times heavier than black sand. As long as there remains fluid action behind the riffles, the black sand might have little or no effect upon gold recovery. The best way to evaluate your recovery system is by direct observation of where the gold is being trapped.

DUMPING OFF

The concentrates which have accumulated in a sluice box can be removed by unsnapping the riffles, carefully removing the carpet underlay, and washing everything into a washtub or bucket. The contents can easily be rinsed out of the carpet underlay inside the washtub.

A medium-wide plastic putty knife can be very helpful in removing lingering concentrates from the high-grade section of a sluice box when that is the only place in the recovery system being cleaned-up.

The concentrates can then be screened into another wash-tub or into a bucket, depending upon what type of screens you are using. Classification of the concentrates into several sizes will allow you to process each more efficiently. The size-classifications that you want to use will depend largely upon how you will process the final concentrates. No matter how you process the final material, you almost always want to begin with a ½-inch or ¼-inch screen, just to eliminate all the larger-sized material from your concentrates. The following video segment demonstrates this preliminary screening, reminding you to carefully remove any gold nuggets which stay on top of the screen before discarding the larger-sized material:

There are several types of final clean-up devices on the market which can help you process the final concentrates, including different kinds of wheels, bowls and miniature sluicing systems. They all work pretty well when set up properly. Here is a video sequence demonstrating the use of a gold wheel to facilitate final clean-up:

Each device has its own instructions about the proper classification-size of concentrates for optimum performance. So you will want to buy or make your screens accordingly. The following video sequence demonstrates a second screening through a common sieve about the size of window screen – which is about normal for splitting concentrates into two sizes:

In my own operations, when we accumulate more than just a small amount of concentrates to clean-up, we have had very good results by first running the concentrates through a plastic Le Trap Sluice. First, though, we screen the concentrates through 8-mesh or 12-mesh screen to remove larger material. The following video sequence shows the Le Trap being used to help with a final clean-up:

Or, rather than use a special device (wheel, bowl, etc), you can work your concentrates completely or nearly down to the gold with the use of a gold pan. In this case, I would suggest that you first classify the material through 8-mesh (8 openings per linear inch) and then through 20 mesh (20 openings per linear inch) screens to break it up into three sizes: 1) the material which stays on top of the 8-mesh screen; 2) the material which passes through the 8-mesh screen but stays on top of the 20-mesh screen; 3) and the material which passes through the 20-mesh screen.

Under normal circumstances, the larger two classifications of concentrate will pan down to gold by themselves quite fast. Because of this, even a final clean-up device is usually only used in the field on that material which will pass through the smallest classification screen.

I have thoroughly demonstrated the panning process in a separate article, so I won’t repeat that here.

FINAL DRY SEPARATION

These final clean-up steps can be done at camp, preferably in a dry environment, where the wind is not blowing much and where there is a table top or some other flat surface available to you for a work space.

Important: Before you do the first step of this process, it is best to work your concentrates down as far as possible, to remove all of the black sands that you possibly can. The more black sand you can remove while the material is wet, the less you have to deal with after it is dried. Sometimes you can remove more black sand with the careful use of a finishing pan (small steel gold pan about 6-inches in diameter) inside of a small wash tub.
A Gold Extractor will allow you to work all of your gold down with no loss, and only about a tablespoon of black sands remaining.

Important Note: The best finishing device I have ever seen for working concentrates down to only about a tablespoon of remaining black sand, with zero loss of your gold, is called a “Gold Extractor.” Once your final concentrates are worked down to a very small amount of black sand remaining, you are ready to go on to the next step.

STEP 1: First dry out your final concentrates. This can be accomplished by pouring them into a small metal pan (finishing pan is best) and slowly heating them over an open fire or gas stove-whichever is at hand.
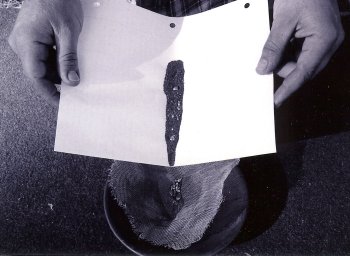
Dry out the concentrates.

CAUTION: Heating the concentrates from a gold mining program should not be done inside of a closed environment. Heating should be done outside and/or in a well-ventilated location, where any and all vapors given off by the various steps will be swept away from you and other bystanders.

You do not want to heat the concentrates too much at this stage. This is because they may still contain some lead. Excessive heat can melt the lead onto some of the gold within the concentrates. Pay attention to heat just enough to thoroughly dry out your concentrates. Be careful that boiling or bubbling during heating is not allowed to spatter gold out of the pan. The following video segment demonstrates this step:

STEP 2: Once the concentrates have cooled enough that they can be handled, they should be screened through a piece of window screen (about 12-mesh). A small piece of window screen, about 6-inches square, is handy to use for this purpose.
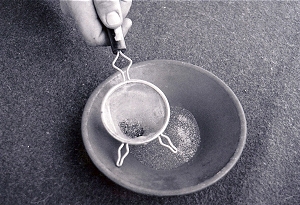
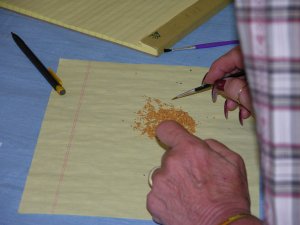
STEP 3: Take the larger-sized concentrates (the material which would not pass through the window screen), and pour them onto a clean piece of paper. If there is a lot of this sized concentrate, this step will have to be done in stages, handling a little at a time. Once the concentrates are poured onto the paper, it is easy to separate the pieces of gold from the impurities. The impurities should be swept off the paper and the gold should be poured into a gold sample bottle. This is where a funnel comes in handy.

STEP 4: Once the larger-sized concentrates have been separated, the remaining concentrates can be classified through a finer-mesh screen. A stainless steel, fine tea strainer (about 20-mesh) works well for this. Tea strainers can be found in just about any grocery store.

STEP 5: Take the larger classification of concentrates from the second screening, pour them onto a clean sheet of paper, and separate the gold from the impurities in the same way that it was done with the larger material in Step 3 above.

Use of a magnet on each size-classification of concentrates can be very helpful to remove those impurities which are magnetic.

Some prefer to use a fine painter’s brush to separate out the non-magnetic impurities. Separation can also be accomplished by using your fingers. This step goes faster if you only do small amounts of concentrate at a time. Pour the gold recovered in this step into the gold sample bottle.

STEP 6: Take the fine concentrates which passed through the final screening and spread them out over a clean sheet of paper. Use a magnet to separate the magnetic black sands from these final concentrates. The magnetic black sands should be dropped onto another sheet of clean paper, spread out, and then gone through with the magnet at least one more time. The reason for this is that some gold can be carried off with the magnetic black sands. They tend to clump together. Once the magnetic black sands have been thoroughly separated from the gold to your satisfaction, pour them into your black sand collection. There may still be some small gold values left with them which can be recovered by other methods at another time.

NOTE: There is a really nice set of final clean-up screens on the market that are made just for the purpose of separating your final concentrates into the ideal size-fractions for final dry separation. I highly recommend them, because they separate your final material into multiple size classifications which make the final dry process go even faster.

STEP 7: Now, all that should be left is your fine gold, possibly some platinum, and a small amount of non-magnetic black sand. These final black sands can be separated by blowing lightly over them while vibrating the sheet of paper. Since the sand is about 4 times lighter than the gold, it will blow off the paper a little at a time, leaving the gold behind. Once all the black sands are gone, you can pick out the pieces of platinum if present, and separate them from the gold. Pour the gold into the same gold sample jar used in the earlier steps.

This dry process (Steps 1-7) goes very quickly if an effort was made during the final wet stages to get as much black sand and other waste material as possible separated from the gold.

CLEANING GOLD

Sometimes placer gold just out of a streambed is very clean and shiny. If this is the case with your gold, after the final dry cleanup procedure is completed, your gold is ready to be weighed and sold or displayed or stored away in a safe place.

Sometimes, gold will come out of a streambed with some impurities attached to it. When this happens, it will be necessary to perform a final cleaning process to make the gold’s natural beauty stand out.

If your gold is not clean and shiny, and you want to get it that way, place it in a small non-breakable water-tight jar about half full of water and add a little dishwashing liquid. It does not seem to matter what kind is used. Fasten the top on the jar and shake the contents vigorously until the gold changes to somewhat of an unnatural glittery color. Sometimes this happens quickly and sometimes it takes a little longer. This mostly depends upon how much gold is in the jar. The more gold, the faster the process. This is because it is the friction of gold against gold which facilitates the cleaning process. Once the gold is glittery, rinse the soapy water out of the jar, pour the gold into a small (metal) finishing pan, and heat it up (outside and down wind) until the gold takes on a deep, natural, shiny luster. It is important to make sure that all of the soap has been rinsed away from the gold using clean water before you dry the gold.

Gold has a tendency to turn a dull color after having been stored in an airtight container for an extended period of time. For this reason, some gold miners and dealers store their gold in water-filled jars, and dry it out just before displaying it or making a sale.

If you should happen to store your gold in an airtight container and notice that its color does not seem to be as bright as it once was, wash it with soap and water and re-heat it, as in the above steps. This process will bring back the beautiful color and luster of the gold.

The best time to weigh your gold to get the most accurate measurement is after you have completed all of the final cleanup steps.

SELLING GOLD

There are numerous markets where you can sell your gold. Refineries will pay you for the fineness (purity) of the gold itself and subtract a few percent for refining charges. In this case, you will receive a little less than the actual value of the gold. Refineries usually will not pay for the silver and platinum contained within your placer gold unless you are delivering it in large quantities. Refineries prefer that you bring your gold to them in large amounts. They will often charge less for refining, and sometimes pay just a bit more for the gold, when it is brought to them in larger quantities.
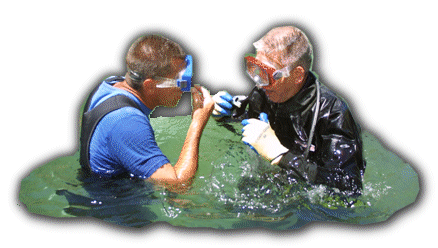
Flakes of gold and nuggets have jewelry value on a different market. If marketed to the right buyers, flakes and nuggets can usually bring in more than a refinery will pay-or sometimes even much more.

If you are in gold country and ask around, you can nearly always find someone who is buying placer gold from the local miners. These individuals usually pay cash. Unless the fineness of the gold within the area is lower than normal, there is no reason to settle for less than 70% of the market-value of the gold for that day. This means that the gold is weighed and the buyer pays you for the weight of what you deliver. Impurities are never calculated into this type of deal. If you enquire around, you can usually find someone who is willing to pay 75% of weight. Sometimes you can find an 80% straight-out buyer-which is good.

There are also people out there who are ready to gyp you out of your gold if they can get away with it. It is wise to bring your own pocket calculator along when dealing with a new buyer.

If you go to a dealer who starts figuring a certain percentage of the fineness, and his final figures end up lower than a straight out 70% of the bulk weight of your gold as it is, go find another dealer. This is not to say that 70% is the going rate. You can do better if you look around. Although, you should never have to accept less than 70% of the going market price for your gold. If a dealer starts to tell you all sorts of reasons why your gold is not worth what you want for it, go find someone else. There are plenty of gold buyers around who will at least admire your gold. So there is no reason to hang around and listen to someone who is trying to steal it from you.

Local miners will know who pays the most! Or go up on our web forum and ask. Someone there is sure to turn you onto a good deal!

Cleaning your gold well before you take it somewhere to be sold can help a lot.

Sometimes dentists will give you a good price for your gold, and a phone call or two can pay off. Also, some lawyers and businessmen like to invest in gold. Sometimes you can get up to 100% of spot for your fines (fine gold) when dealing with them.

Some jewelers will pay well for your flakes when they have a demand for them. It is not uncommon to get as much as 90% or better when you make such contacts.

The best way to get top dollar for your gold is to do a lot of inquiring, always with the intention to find more and better markets. Then, when you need some cash, you can sell to the buyer who pays the most.


By Dave McCracken

It is common to find rich gold deposits in shallow streambed material out under the fast water where nobody has ever ventured before!

Dave Mack

Something we have known for quite some time is that pay-streaks, often very rich pay-streaks, exist in the fast water.
At first, this may seem contra­dictory to our general understanding that high-grade gold deposits form in areas of the waterway where the water slows down. However, we must keep in mind that pay-streaks are created during major floods. During a major flood, a sudden drop in the bedrock can cause a very good gold trap, like the riffles in a sluice box, but on a very large scale.

If you turn on a garden hose at slow speed, the fast-water area is found directly where the water flows out of the hose. But when you turn the water-pressure up, momentum forces the water farther out. This condition also occurs within the river during a major flood. Areas where the water runs fast during low-water periods are likely to be drop-zones for gold during high water. The heavy momentum/velocity area will be forced farther downstream, leaving a drop-zone for gold just below the bedrock drop. This explains why you can often find pay-streaks under rapids when the river is flowing at low-water levels. It also explains why you seldom find pay-streaks within the first slow-water area below a set of rapids when the river is running at low levels.

Another reason why you are likely to find gold in fast water is because dredging in fast water is more difficult. Therefore, others are less likely to have mined there before you – including the old-timers. For this reason, fast-water areas can often be virgin territory — meaning places where the original streambed material remains in place from thousands of years of natural geologic activity.


What exactly is “fast water?” This depends upon each individual person’s viewpoint. It is primarily a matter of the diver’s comfort level. To some people, if the water is moving at all, it is already too fast to dredge. Other dredgers are able to dredge in water moving so fast that the air bubbles created by the turbulence eliminate all visibility. After diving in really turbulent water, a person’s equilibrium can become so disoriented that he/she can hardly stand up without weaving around, as if intoxicated.

Several years ago, a friend and I were operating a five-inch dredge in some very fast, shallow water. Because of the extreme turbulence, one of us would work the nozzle, while the other would hold onto the dredge to keep it from flipping over. The water was so swift that my friend was swept out of the dredge hole time after time. Once, he was carried away so fast, he didn’t have time to untangle himself from his air line before he reached the end of it. The air line was tangled around his neck! There he was, flopping around in the current, like a flag snapping in a stiff breeze, tethered by the air line around his neck and struggling, unsuccessfully, to regain his footing in three feet of water. After he got safely to the bank, we both laughed so hard that tears were streaming down our faces. That was emotional stress blowing off. Fifteen minutes later, I was the one bouncing in the current behind the dredge, facing backwards at the end of an air line caught between my legs. Needless to say, my friend thought this was pretty funny, too! Dredging in fast water can be fun and exciting (not to mention the gold you can find). But, you must be aware of and prepared for the dangers involved. There is very little margin for error if you get into a situation that is beyond your ability to manage. We all have our limits!

SAFETY

Notwithstanding all the excitement and gold, safety should always be the most important personal consideration. You are the one out there in the field with the responsibility for using good judgment about what you can safely do, without cutting your margin for error too close. The river does not have any sympathy for people who “get in over their heads.” I’ve known several dredgers who lost their lives by over-stepping their personal safety boundaries. It only takes a single mistake. The rest can happen very quickly. Even I have come close to drowning on more than one occasion! All the gold in the world is not worth dying over!
For the sake of safety, it makes good sense for you to not dredge in water that is faster than you are comfortable with. You will have to decide what that is. It is best to practice first in slower water, to gain experience and confidence.

One important thing you should remember about working underwater: Everything may be calm and under control right now; but five seconds later, you can find yourself in the most life-threatening emergency you have ever experienced! This is even true in slow water. But, fast water gives you less margin for safety if you make an error or anything goes wrong. You should not dredge in fast water if you are unable to control the various problem-situations that could develop. You need to anticipate each problem that could possibly arise and work out your response, in advance.

Contrary to what many people believe, being swept down river by the current is not the major concern. This is a normal-happening in fast-water dredging. As long as you have your mask clear and your regulator in your mouth, being swept down river by the current is generally no big deal. That is, of course, unless you are dredging directly above a set of falls or extremely fast water.

In most cases, the “fast water” you are in is not a steady flow of current. It is usually turbulent, varying in direction and intensity. A swirl can hit you from the side and knock you off balance. Or, sometimes it can even hit you from underneath and lift you out of the dredge-hole and into the faster flow. If you get swept down river in fast water, you usually just need to grab hold of the river bottom and work your way over to the slower water, nearer to the stream bank. This movement is normally best-done by continuing to face upstream, into the current, while you point your head and upper-body towards the river-bottom. That posture will nearly always drive you to the bottom where you can get a handhold on rocks or cobbles to anchor yourself down. Then, you can work your way upstream, through the more slack current near the stream bank, and back out to your work-site again. This is all pretty routine in fast-water dredging.
Getting a hole started is one of the most difficult challenges in fast-water dredging. Once you even get just a small hole started into the surface of the streambed, the suction nozzle in the hole can serve as an anchor to help hold you there against the current. There will also be several cobbles behind you to use as footholds, which also make it easier to hold a position there. After the hole has been expanded to the point where you can get at least part of your body inside, you will find significant relief from the effects of the current’s flow. But, it can sometimes be a real challenge until you do get to that point! At times, you may find it necessary to start your hole in slower water, then gradually work your way out into the faster current.

One of the main concerns when dredging in fast water is having your mask and/or your regulator swept or knocked off your face. This situation is one that can cause a person to panic, especially when both mask (vision) and regulator (air) are lost at the same time.

PANIC

There is not a single a person among us who won’t panic, given the right (wrong) situation. People who say they will never panic under any circumstances are just not facing reality and, obviously, have never come close to drowning. I believe it is better to understand and acknowledge your limitations before you get into trouble. The closer you cut your safety margin on safety issues, the more aware of your limitations you should be. And, the more important it is to plan in advance how you will react to certain types of emergencies. It is already too late to make such plans the moment something bad happens!
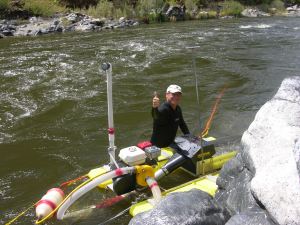
For me, it takes a lot of personal discipline to stay under control when an unexpected rush of turbulent water jerks my mask off and drags me, blindly and chaotically, down river. This has happened to me on several occasions. I know that under those circumstances, it would not take much more confusion (e.g., air line getting snagged, my body being banged against something, losing my balance, getting a breath full of water from my regulator, etc…) for me to totally lose control and freak out (panic).

I have worked with several guys who have a higher tolerance from panic in the water than I do. And, I know others who feel panicky as soon as they put their heads underwater, even under perfectly-controlled conditions. We are all different, and we each have our own particular point at which we will panic in different circumstances. Everyone has a limit. These limits can actually change from day-to-day, depending upon what other things are happening in our lives. It is better that we not delude ourselves about this. If you allow yourself to get overly-confident, and continually put yourself into situations that can take you beyond your limit, sooner or later you will almost-certainly find yourself tested in a life or death situation.

Panic is a survival-mechanism that takes over when your mind is convinced that your life is in grave danger. At this point, your animal instincts take charge and deprive your intellect of the ability to reason things out. Panic tells you that there is no time left, that you are literally fighting for life just before unconsciousness. The situation demands that you spend your last/maximum physical effort to remove yourself from the danger that is about to mortally injure you or cause you to lose your life. Panic is a horrible, terrifying, and, sometimes, embarrassing experience that happens when your normal, rational self loses control, and the animal-part of you takes over.

There are milder versions of panic. Someone might “panic” and do something silly or foolish in a business or a personal setting. That is not the type of panic that I am talking about here. I’m talking about the raw physical panic that grips you at the moment you realize you may be at the point of losing your life.

There is always a chance of getting into serious trouble any time you are working under the water. Trouble underwater is serious because humans cannot breathe water. There is no margin. You are either breathing air or you are not. It is an immediate emergency when there is no air. Such emergencies can happen in a split second, any time you are in a dredging environment.

TAKING EXTRA PRECAUTIONS

Other types of underwater vulnerabilities are especially present during fast-water dredging activity. Some of this vulnerability is because it is sometimes necessary to weigh yourself down more-heavily with lead weights to stay on the river bottom. Extra weight is needed to give you the necessary stability and leverage to control the suction hose and nozzle and to move rocks and obstacles out of your way. The demands of dredging activity require divers to be so heavily weighted down, that it is impossible to swim at the surface without first discarding the weights that hold you to the bottom.
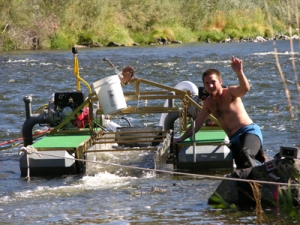
One of the most serious dangers to a dredger is the possibility of being pinned to the bottom by a heavy rock or boulder. All of the oversized rocks that cannot be sucked through the dredge nozzle must be moved out of the hole by hand or with the use of winching equipment. When undercutting the streambed, or taking apart the dredge hole, there is the possibility of larger rocks rolling in on top of you. This possibility increases when you are working in turbulent, fast water. The erratic changes in the pressure that the water exerts on the exposed streambed material, inside and around the dredge-hole, can cause boulders to loosen up and roll into the hole. These same boulders, if located in a streambed where the water is running more slowly, might not loosen up the same way, if at all. For this reason, a fast-water dredger must take extra precautions to remove all larger-sized rocks when they are exposed. One of our mottos is: “You have to get the boulders before they have a chance to get you!”

When working in fast water, all of your normal safety precautions, preventative maintenance measures, and common sense instincts must be scrupulously observed. Fast water may be thought of as a liquid flow of energy that is constantly challenging you and your equipment. Murphy’s Law (“anything that can go wrong, will go wrong”) is always at work in fast water. It is hard enough to deal with the things that you cannot anticipate will happen. You will have enough of these as it is. But, if you neglect to take action with respect to those things that you can reasonably expect to go wrong, you will almost certainly fail in your efforts to dredge in fast water. If it is wrong, fix it now, before it gets worse!
 

OPERATIONAL CONSIDERATIONS

My dredging partners and I have found that it is physically possible to dredge in water that is too fast for the safety of our dredge — even the kind of dredge that has been designed for fast water. Therefore, the need to operate in an environment that is safe for your dredge is one of the major limiting factors in fast-water dredging.

Most fast-water dredgers add more flotation to their dredge platforms to give more stability. This can be done in different ways, including additional pontoons, inflated tire inner tubes, PVC pipe material, Styrofoam, etc.

One of the main considerations when adding more flotation to a dredge is to avoid increasing the drag against the current. Additional drag causes problems in two ways:

1) The fast-water current puts more strain on your dredge, frame, and tie-off lines.

2) More importantly, the surface-tension caused by all that additional water dragging around the dredge makes it difficult to work near the dredge when you are in the water (which can be a particular problem when you are trying to knock out plug-ups from the suction hose near the dredge).

Another goal when adding flotation is to keep the floats as narrow as possible. A wide set of floats is more likely to be tossed or dragged around by the turbulent flow of fast water.

Generally, when working in fast water, I try to find a location for the dredge where the water is a bit slower, just next to the fast water where I plan to work. This way, I can enter the river in slower water and work my way out underneath the faster water, adding suction hose as necessary.

Otherwise, if we position the dredge directly in the fast water, it will become necessary for the divers to contend with fast water when entering the water from the dredge. This can be done; but it makes the operation more difficult – especially, when the dredgers need to climb back onto the dredge.
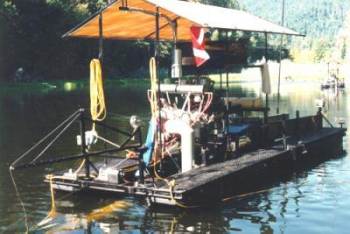
Also, the buildup of cobbles and tailings near the dredge can add to the surface-tension and create an even faster current flow under and around the dredge.

When you are set up with the dredge positioned off to the side in some pocket of slower water, your suction hose will be running perpendicular, at least to some degree, to the flow of the fast water. That much hose exposed broadside to the current creates enormous drag, which can cause the suction hose to kink usually within a foot or so of where it attaches to your power jet. Hose-kinks will cause continuous plug-up problems, so they must be avoided. Therefore, you may find it necessary to disconnect the suction hose and cut off the section that has been kinked. However, you cannot shorten your suction hose very much before you lose the amount of operational flexibility you need for freedom of movement while dredging.

Suction-hose kinks can usually be avoided by setting up a special harness to support the hose in fast water. This is often done by rigging one or two extra ropes down from your main tie-off line. The ropes are fastened to the suction hose at points which will allow the hose to be flexed back by the current, but not to the critical kinking point. You must allow the hose to flex back. It is the bend in the suction hose which allows you the movement to expand the size of your dredge hole.

It is best, when rigging a fast-water harness, to rig it in conjunction with your main dredge tie-off line. This way, the entire dredge and suction-hose harness will move together, as a unit, when you need to move the equipment forward as your dredge-hole progresses.

Suction hose support booms are standard equipment on the commercial Pro-Mack dredges.
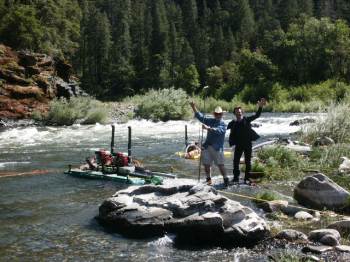
Larger and commercial dredges may be equipped with booms, which can be extended out in front and used to secure a suction-hose safety harness. In this manner, when the dredge moves forward, the suction-hose safety harness moves with it, as in the situation above.

Another concern in fast-water dredging is to keep your suction nozzle and hose from being swept out of your dredge hole. Sometimes, the current will put so much drag on the suction hose that it takes all of your strength and energy to get any nozzle-work done at all! In such a case, you can relieve the main strain of the drag by tying a section of the suction hose to a large rock at the rear of the dredge hole or some other anchor point further upstream. When doing this, always leave enough slack in the hose to allow you to move the suction nozzle forward as your dredge-hole progresses. Also, be sure to remember to untie the suction hose from the river-bottom before you move the dredge. Otherwise, you can damage the hose by causing kinks in the middle! If you kink the hose in the middle, you will have to replace the hose!

We have also worked out a way to extend the suction hose, swing it out on a pendulum line, and anchor it in place using a spare weight belt.  This method nearly eliminates all of the hose drag for the person managing the nozzle.

When you take a lunch-break or knock off for the day, you can anchor your hose and nozzle by either piling rocks on the suction nozzle or by tying the nozzle to a large rock in the bottom of the dredge hole. It is not any fun to start a production-dive by having to work against the current to get your suction hose back up into your dredge hole, because the fast water blew it out after your previous dive. But, of course, all fast-water dredgers get many chances to experience this. It is a normal part of the routine!

One important safety point: When using ropes underwater, it is a bad idea to use any more than is absolutely necessary. A lose rope is poison to divers underwater, especially in swift water! Always cut off any excess rope or pile rocks on top to hold it down. If there is a length of loose rope flopping around in the current, something (like your air line) always seems to get tangled in it. Loose rope under water is dangerous!

Your air line can be another source of problems when dredging in fast water. Always be sure to get all the loops out of your air line before starting your dive. Otherwise, the current can pull these loops into kinks, which can immediately cut off your air supply. Not fun!

When you turn around in your dredge hole to roll boulders, toss cobbles, or do any of the many other things associated with production dredging or sampling, get into the habit of exactly reversing your turn when you face forward again (turning back counterclockwise is “cancelled out” by turning forward clockwise). This practice will help prevent you from putting lots of loops in your air line during the course of the dive. Each loop is a potential kink that can cut off your air supply in fast water. Each loop also increases the amount of drag being brought to bear on your air line in fast water.

If you should get a kink in your air line that cuts off your air supply, you can usually get some immediate relief by pulling your air line in toward your body and letting it go. When you let it go, the pressure is temporarily removed from the kink, and you can usually get a single breath of air. I always try this once, quickly, when my own air is suddenly cut off. If that does not give me immediate relief, I crawl right over to the surface so I can properly correct the problem.

If you are experiencing any difficulty with a kinking air line, your best course of action is to immediately remove every single loop in the line. Getting rid of the loops will require you to rotate yourself in circles, going in the appropriate direction, until the air line is straight again.

Several years ago, I was dredging in fast water with a guy who had to repeatedly dive out of our dredge hole because of a kinking air line. After about the fifth time, I suggested that he take the time to straighten out his air line to fix this problem. This remedy only worked for a short time, because he had developed the habit of turning around and around in the dredge hole as he was moving rocks, which just created more and more loops in his line. Fifteen minutes later, he was diving right back out of the dredge hole again.

These days, you can buy a heavier-type of “safety” airline that will prevent kinking in all but the swiftest of fast water. I recommend this heavier air line to anyone who plans to dredge in swift current.

By the way, your air line is also your direct connection to the dredge and to safety. When you connect your air line to the dredge, even in slow water, it should be wrapped around the dredge frame several times before being attached to the air fitting on the dredge. Most air fittings are made of brass. If you should need to use your air line to pull yourself to the dredge in an emergency, it is better that you not have to depend solely upon the strength of a brass fitting!

Nearly all experienced dredgers are aware of the fact that their air lines are an extension of themselves while under water. Especially in fast water, it is very important that you not allow your air line to tangle around parts of the dredge, underwater obstacles, and/or the air lines of other divers in the dredge hole. If you cross over the top of another diver’s air line, keep that in mind, so you will be sure to cross back over it again when you return. Each time you go to the surface, to remove a plug-up or for whatever reason, take a moment to untangle your line from anything it may have wrapped around. As a standard practice, all dredgers should always untangle your air lines each time you return to the surface for any reason. I personally never end a dive without first freeing my airline completely, so it will be ready for the next dive.

One of the persistent problems of dredging in fast water is the heavy drag on your air line. This can normally be solved by pulling some slack-line into the dredge hole and anchoring it against the current with a single cobble placed on top. This will allow some slack air line between you and the cobble. You want to be sure that your cobble-anchor is not so large that you cannot quickly free your air line in an emergency. Also, when you leave the dredge hole, don’t forget to first disconnect your air line from your anchor.
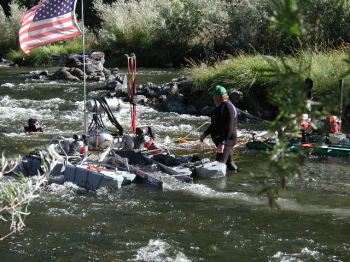
Full face masks are generally not well-suited for diving in swift water. Since they are larger, with substantially more surface area, they are more likely to get accidentally dislodged from your face. This can happen when the mask is bumped on another diver, or an obstacle, or when turbulent water catches it, especially from the side. To further complicate matters, when a full face mask fills with water, the regulator usually does as well. Having to clear the water out of your mask and regulator at the same time can be more difficult and contribute to a panic situation. I personally find that I am more prone to feeling panicky when something goes wrong inside of a full face mask. If your reactions are similar to mine, you may want to avoid using a full face mask in fast water.

DO’S AND DON’TS!

In any kind of a dredging operation, fast or slow water, it is wise to become familiar with your surroundings as your first priority. Before you begin work, make sure you know the easiest and most direct route to crawl over to the surface in the case of an emergency. Don’t wait until an emergency happens before you think about this. By then, it is too late!

Here is some really good advice: Do not tie yourself into a dredge hole in fast water to keep from being swept down river. It is bad enough having a heavy load of lead attached to your body! If you have to tie something, tie the suction nozzle from a point further up river (with no loose rope flapping in your face). Then hold onto the nozzle to keep yourself steady and in place, while you get the hole started. Get rid of the rope as soon as you have a hole started!

Generally, the most effective way to maintain your position in fast water is to streamline your body properly, with your head and chest close to the river-bottom and your rear-end slightly elevated. This posture allows the water-flow to push you down, toward the bottom, so you can get a better footing. Begin creating your dredge hole as soon as you can. The hole will help anchor you in place. The larger you dredge the hole, the easier it gets.

Some dredgers try to solve their stability problem by putting a lot more lead on their weight belts. Sometimes in turbulent water, more lead can be a help. But, be extra careful when walking out of the water on the slippery bottom, so you don’t overload your ankles and knees and injure yourself.

Most importantly, it is very unwise to solve your fast-water buoyancy/stability problem by adding a bunch of additional weight belts. Take it from me; it is hard enough to get one belt off in a hurry, without compounding the emergency with three of them! Sometimes, you cannot manage the needed extra weight without 2 weight belts, but you must understand that a second belt substantially reduces safety margin in an emergency. Additional belts tend to shift around so that the quick releases are in different places, often behind you where it is more difficult to release them during an emergency. Difficulty in finding them in an emergency can contribute to a panic situation and put your life at risk.

Whatever else you do, early in your dredging career, it is wise to discipline yourself to never try and swim for the surface in an emergency while wearing your heavy weight belt. It just doesn’t work! In a panic situation, your body will want to go immediately for the surface instead of removing the weight belt. I have personally saved two people from drowning who were trying to ”swim for it” with their weight belts on. By the time they realized swimming was not going to work, they were in too much trouble (panic) to get their own belts off!

This does not mean you can’t get a good footing on the bottom and jump up to the surface for one quick breath of air. You can do that in an emergency, as long as the water is not too deep or fast. But, if you cannot crawl over to the surface quickly, your first priority should always be to get the lead weights off as soon as possible.

Keep in mind that you usually cannot see the quick-release buckle on your weight belt while underwater. This is because your face mask blocks your vision at that angle. So, it is important to practice locating the quick-release buckle by feeling for it. It is also very important to keep your belt from shifting around, so that the buckle always remains directly on the front of your body. One of the problems we already noted when wearing more than one belt, is that the top one tends to shift around. There is not much you can do about that. So with two belts, you should be prepared to find the top buckle behind your body!

You may also find that it is better to first remove your work glove before trying to release your buckle in an emergency. When I get in trouble, the first thing I do is get rid of the glove on my right hand!

These are all things you must be able to do quickly and instinctively before venturing into fast water. A wise skydiver would never jump out of an airplane without first receiving enough practice and instruction in how to find his rip cord. Similarly, a dredger’s life should be just as well protected by having a confident ability to release your weight belt quickly in an emergency.

Some of the weight belts on the market also include a suspender harness. The only ones I recommend are the ones that have a quick-release, D-ring on one of the suspenders that allows the shoulder harness to come loose on one side when you release a single waist belt buckle. Otherwise, in an emergency, you may find it too difficult to get out of the suspenders, even if the waist belt is released.

All this advice is coming from a guy that has devoted a large part of my life living on the edge. You can sit there in the comfort of your computer reading this stuff and feel quite certain that you can manage any or all of these things if they should come to pass when you are out dredging. But when the severe emergency happens, you are not the same person. You are a maniac!

You should always keep an eye on your diving buddy while dredging in fast water. When we dive with multiple dredgers on an operation, it is standard policy for us all to keep track of each other. If one person needs to leave the dredge-hole or go to the surface for some reason, he always lets someone know he is leaving. Otherwise, when a diver suddenly disappears, we immediately go looking for him. A person in serious trouble underwater only has about 30 seconds to get it together. This is not much time. What good is diving with someone else for the sake of safely, if you are not paying attention to what is happening with him/her, especially in fast water where there is so very little margin for error? A tender, or anyone else resting at the water’s surface, should be paying close attention without distraction when there are dredgers down working in fast water.

If all of this has frightened you, that’s good! That means I have accomplished my goal of alerting you to the dangers inherent in fast-water dredging. Being alert to, and fearful of, those dangers is the starting-point for making your own preparations and contingency plans for dealing with them – before you start working in fast water.

What is fast water? It depends upon the individual. An experienced dredger might be much safer in a typhoon of fast, turbulent water, than an inexperienced person would be in slow, shallow water near the bank. The key for each person is to begin learning in a safe and comfortable environment, gain valuable experience over time, and never attempt to do anything that you cannot easily manage, with safety.
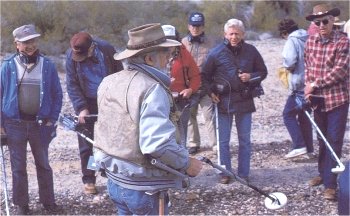


By Jimmy Sierra

“What goes on in that metal box may be a mystery to most of us, but we all know it isn’t magic”


Metal detectingThe title of this article can mean different things to different people and thereby add to the mystique surrounding the entire field of metal detecting, for that is what “Electronic Treasure Hunting” is all about. The word electronic should mean the same to everyone. What goes on in that metal box may be a mystery to most of us, but we all know it isn’t magic.
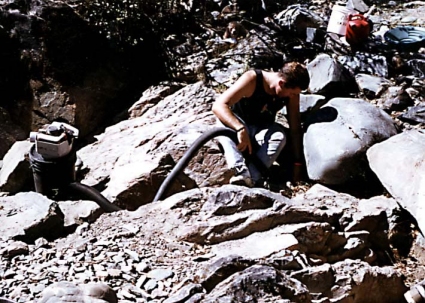
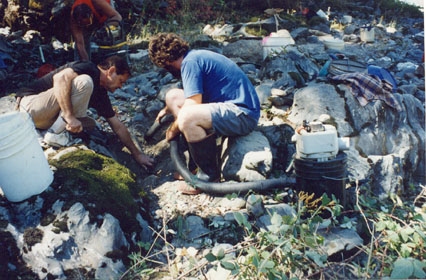
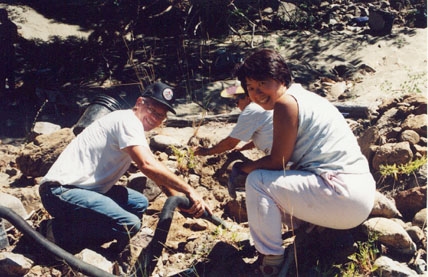
The vast assortment of transistors, resistors, capacitors and various integrated circuits add up to a very sophisticated type of transmitter which broadcasts a signal through the transmitting coil of copper wire contained in the disc or loop at the front-end of the detector. This signal is affected by the electromagnetic field which is present around all metal objects. Thus, when it returns to the receiver-coil in the loop, this signal is changed. The change is interpreted by the complex circuitry in the detector box and lets us know that there is metal out there.

Depending upon the sophistication of the detector, this data can include the possible type of metal, depth of the item and even the shape or identity of the metal object. This may be an over-simplification of what goes on, but we need not worry about how it happens. Let the engineers who invent these devices handle that. The thing to remember is, metal detectors find metal. There are variables that create differences between detectors, and these variables will determine which style of detector is best-suited to the type of treasure hunting that we wish to do.

This brings us to the second part of the title of this article: Treasure Hunting. As I mentioned, this is the part that means different things to different people. To some, it means looking for dropped coins or jewelry in various places such as parks, playgrounds, backyards, beaches, picnic grounds or even old ghost towns. The locations change and the technique for searching varies a great deal, but the basic function of the detector to locate metal is the same. Some consider treasure hunting to be locating caches of buried coins or valuables, even sunken galleons. Again, the treasure and the location change, but the detector is still operated as it is de- signed, to locate metal objects.

To others, treasure hunting takes the form of searching old battle sites or ghost towns for relics of days gone by.

And yet, another select group of treasure hunters who call themselves “prospectors” direct their search for the elusive nuggets of gold, long sought by man to be used as a measure of wealth.

By now I hope it has become apparent that the common denominator linking most treasure hunters together is the electronic metal detector. The location may change and the targets may differ, but all respond to the initial function of the detector to find metal. It is only necessary to vary where we look, and to some degree, develop special skills unique to each type of treasure in order to change from coin shooter to cache hunter to relic hunter to prospector.

This might be a good time to clear up one particular misconception, one that has been brought to my attention hundreds of times over the years by those unfamiliar with treasure hunting. That is, the idea that metal detectors cannot find GOLD. This stems from some misunderstanding about the nature of gold. When I have questioned these people, I have found that most were not really sure if gold was a metal or not. Some had a vague idea that gold might be classed as a mineral. Most, however, were not sure what the difference was between a metal and a mineral.

In brief, the difference between a mineral and a metal is that a mineral is a chemical compound of more than one element, and a metal exists in its pure state as a single element. So, let’s just accept the fact that iron, copper, lead, silver, and GOLD are all metals and can be found free in that form, and that all of them can be located with a metal detector. We can surely begin to see why such mystery surrounds gold and gold prospecting, as well as treasure hunting in general.

I do not mean to imply that electronic treasure hunting or prospecting is as easy as falling off a log; only that it is not magic, and that the skills acquired while learning to hunt coins in a park with a detector are the same skills used when prospecting for gold nuggets in the Mohave Desert. The target and the location change, but the basic skill is only varied by the different types of hunting.

Up until several years ago, one of our most successful coin shooters from the Sacramento area in California had never seen a gold nugget except at the various gold shows where suction dredgers show off the treasures which they find at the bottom of streams and rivers. He had acquired the necessary skills over the years in the operation of his detector. He had learned to utilize the ability of his detector to cancel-out the ground mineralization caused by iron ore and salts which mask the ability to locate metal objects such as coins. He had trained his ear and slow searching techniques to hear those deep older coins. When he decided to give a shot to gold prospecting, he had little else to learn. He was successful right from the start. Of course, he didn’t look for the nuggets in the local park. But, he did find his first nugget in a dry streambed not more than 15 minutes from his house. He was bitten by the gold bug on that first day and will never be the same!

His biggest problem was to find a good place to hunt. He rightly concluded that the best place to start was where the old 49ers had found gold. If it was there then, it was surely there today. He was right. He began by going over the tailings left behind by old-timers. Gold was plentiful and the old methods of recovery were not perfect. Carelessness and lack of skill left plenty behind. He researched old maps and history books to seek out previous diggings. Sometimes, he went over old tailings. Other times, he searched dry washes and gulches near the diggings. Experience sharpened his skill and techniques, just as those many hours spent in the old parks had prepared him for this new approach to treasure hunting.

Averaging three days per week searching, he found more than 40 ounces of gold last year!

I do not want to paint too rosy of a picture here. The fellow mentioned above is a real experienced detectorist. He spends time hunting and looks for the right spots. Few of us will measure up to his success. But most who try their hand at treasure hunting will be pleasantly surprised at how fast they can become skilled in the use of this electronic device. Practice and patience are all that are required. Skill in tuning and operating the detector comes from reading the manual carefully and asking information from the dealer that sold the unit. Other users are a good source for acquiring special helps in learning to use the unit. I, as well as others, have written articles and books explaining in detail the tuning and searching techniques of metal detecting.

Joining up with others in a Club or association will gain you very valuable access to experience and places to hunt for golden treasure.

One of the unpredictable ingredients in the creation of a successful treasure hunter is LUCK!! The old adage that you have to be standing over a target to find it, is true. My friend and I were searching an old baseball field a number of years ago which was adjacent to an old Mission. We both found numerous coins, many silver, but all from this century. I was lucky enough, however, to find a 1778 Spanish half real dating back to the Mission Period. It was only 4 1/2 inches or so deep. It was luck. I was practicing the same learned skills as my partner and we both were successful. My old coin was there because I was standing over it.

I have a good friend with whom I prospect. We dig a lot of targets in order to find the elusive gold nugget. I have found many nuggets, most in the tiny-to-small size-range, but none really large. However, along with many smaller nuggets, this fellow has found a 6-ounce, a 9-ounce, and a 12-ounce piece of Mother Nature’s natural golden treasure. Granted, he hunts for gold nuggets a lot more than I do, but many who hunt as often as he does never find nuggets in that class. Wouldn’t you say some luck came his way? Each one of these nuggets was found with a different make and model of detector.

Many detectors are pretty equivalent in ability to find metal, but all metal detector users are not equal in skill — or in luck.

Another example comes to mind at this time: This one might seem pretty far-fetched, but it is true. A few months ago, a prospector-friend of mine called to announce that he had just found his largest nugget to date. It was a ¾-ounce piece, that’s 15 pennyweight. Now, that is a respectable nugget. Of course, he said he found it with the help of his faithful dog. You might call the dog his gold-hound at this point. While my friend was prospecting along the bank of a popular river, his dog was doing his duty near the water. As he noticed his dog scratching at the sandy shore, he caught a glimpse of something flashing in the sunlight. He went closer to investigate and spotted the aforementioned nugget with loop and all attached. Some luckless prospector had lost his prized specimen from around his neck. One man’s loss is another man’s gain, as they say. It goes without mention that this is one dog that will never want for attention again!

We have talked about learning how to use the detector, regardless of what the object of your search is. There is no substitute for expertise and skill. We have mentioned that buying the proper detector is essential and we have pointed out that a certain amount of good luck doesn’t hurt. The final ingredient is good old perseverance and perspiration.

My basic intent in this article is to clear away some of the magic from electronic metal detecting and show it as an acquired skill, which is what it really is. It is important to buy the best detector you can; one that has the ability to cancel the ground-mineralization. This is most important if you plan to use the detector for prospecting, because gold and silver are most-often found in highly-mineralized soil.

If you are going to use the detector in trashy areas (lots of man-made metal objects), you should buy a detector that has some ability to identify trash. Otherwise, you will have to dig every target that sounds off. This is not only tiring; but since you can only dig so many targets in a day, it diminishes the odds of digging good targets. You can see that this would not be important if you were relic hunting, where all items are potential treasures. But it is more important when coin hunting, where pull tabs and bottle caps are not desired, or in prospecting, where nails and tin cans left from former miners are tedious to dig and not as valuable as gold nuggets. Of course, if the area is virgin, one would not have a need for identifying trash.

Being able to identify a “hot rock” (a rock with different mineral content than the surrounding terrain) is also an important feature to be looked for in a detector to be used for prospecting. Have your dealer help you pick a detector best-suited for your needs, whether they be specialized or multi-purposed.

Good Hunting!


BY MARCIE STUMPF/FOLEY

There is a fairly new method of mining out there in the mining community that is rapidly gaining in popularity, with good reason. It is called “Vacking;” and, as you might suppose, involves vacuuming material.

As a suction dredge vacuums material from the bottom of the river, this is a type of dry-land dredging. It involves using a small, lightweight unit to vacuum cracks and crevices of exposed bedrock, moss on exposed bedrock or boulders, or material in a dry wash in the desert. For this “dry land dredging,” however, there are no uncomfortable and expensive wet-suits to don, no heavy equipment to carry and then set up, and no long period of learning how to operate the equipment, or learning where to find gold.

Anyone who is familiar with mining knows that there is a much larger proportion of fine gold deposited than large gold, in almost any area. Each winter, as the rivers swell with winter rains and snows, much fine gold is washed down them. The fine gold, since it is much lighter in weight, is deposited much higher on the banks, or in the material of the river. As the high waters recede with the onset of spring and summer, much of the areas where the fine gold is deposited is left exposed up on the banks of the rivers.

The new units consist of a two-cycle gasoline engine mounted on a five gallon container, which is equipped with a suction hose and a crevice nozzle. They are very efficient at pulling the fine gold from moss, and at cleaning out crevices. Previous efforts to accomplish this by hand were slow and painstaking, and not very efficient. Collecting fine gold has always been one of the greatest challenges facing any miner, and some people spend years attempting to perfect their fine gold recovery.

Not only does “vacking” do an excellent job at recovering fine gold — it is a lot of fun! It is so fast, simple, and easy to use, that it seems to take all the work out of mining. You are still out in the great outdoors, still getting healthy exercise, but all that’s left when you remove the excess work is the fun.

Since we live and work very near a gold-bearing river, if my husband can squeeze two hours of time, he can get to his favorite spot, set up, get in most of that time mining; and still come home with enough gold to feel he has been mining. If he is dredging, that’s not enough time to more than set up and get started before he has to quit!

These units come on their own back-pack frame, and all accessories are carried right inside the unit. It is a completely self-contained unit, and includes an extra fuel bottle, a crevice tool, a gold pan, a “sniffer bottle” to remove the gold from the pan, and even a sample vial to keep it in. With all these accessories, the unit weighs just 15 lbs., so you could hike into the back country with it without undue strain.

Many wives who are not interested in dredging or motorized sluicing (high-banking) enjoy using this type of unit because it is something they can do completely on their own. The only problem we have seen develop is that when some of the husbands see that the gold recovery exceeds that of their dredge or motorized sluice, they want to use one also. Then, they either fight over the one unit, or join the growing group of “two-vack” families. Since they are such low-cost units, this is pretty easy to do.

I recently talked to one avid vack-miner who has been using one of these units for two years. He was concerned that he might possibly lose some of the fine gold out the exhaust as the unit filled, since it is so lightweight. Shortly after purchasing his unit, he fitted an elbow and extension over the exhaust, and directed it into a container of water. He has used it faithfully, and panned out the light powder that accumulated each time. He has never found even a speck of gold in it.

A crack or crevice in exposed bedrock that runs crossways to the current of the river acts as a natural riffle, catching fine gold just as the riffles of a sluice do. The moss that accumulates on exposed bedrock acts much as the carpet in a sluice, only better! It is amazing just how much fine gold can accumulate there. These are prime areas for vacking.

Areas where people have been working with motorized sluicing equipment have also proven to be good. Even if they have worked the area down to the bedrock, they have been unable to clean the area as thoroughly as it can be cleaned with a Vack, and generally, the richest areas are right on the bedrock.

The greatest demonstration I have ever seen about how gold traps in bedrock and moss, and how much work it is to recover it using conventional methods, is contained in Dave McCracken’s video, “Modern Gold Mining Techniquies.”

Although I have not mentioned finding nuggets with this equipment, it certainly does find them! Even areas that have predominantly fine gold in the high bedrock will trap nuggets during flood storms, and if they are there, this equipment will help you get to them as nothing else will.

Since you do not work directly in the active waterway, and this equipment does not put anything into the waterway, there are no dredge permits required for the use of these units, at least in the state of California.

All in all, Vacking has such a wide range of applications, in so many areas of the country, by such a wide range of people, that the gain in popularity is very understandable. It can only be expected to grow.

If you should get the Vacking bug, be sure you look for us out there, because that’s where we will be every chance we get!

Tags