Planning for a mining program largely involves the following elements:
1) Legal
2) Location and accessibility of the project site
3) Politics with government and local people
4) Timing
5) Operational considerations
6) Shelter and living-support
7) Specialized equipment
8) Supply of food, fuel, supplies and other needs
9) Security
10) Medical and/or emergency support
11) Communications
12) Personnel
All of these elements are vitally important and each must be managed well to make a mining program successful. I’ll just briefly discuss each element in general terms.
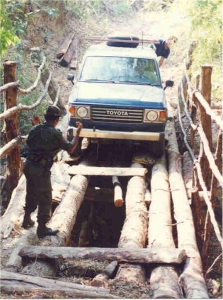
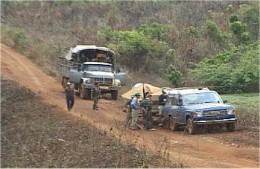
Sometimes, it is necessary to construct your own road into a remote location.
 Because every project is different, relative levels of importance will change depending upon local circumstances. To give you some idea about this, I encourage you to read several articles about the challenges we have faced on different types of projects from our own past experience. Reading through the stories will give you insight into why good planning in advance vastly increases the potential for success in any project:
Legal
The serious part begins with acquisition of the legal right to pursue a mining project. While this is always important, the need to protect your own interest increases in proportion to the magnitude of your investment. It also increases in proportion to the potential for valuable success. My best advice would be to make sure your legal rights are secure during the very early part of the development-stages in your mining program.
Because gaining the legal rights to a mineral property can sometimes require substantial investment in itself, it is not uncommon to perform the preliminary evaluation, or even a preliminary sampling operation, before negotiation of legal rights are finalized. In this case, it can be wise to negotiate the final terms in advance, pending the outcome of your preliminary evaluation or sampling.
 In other words, you might not want to buy or lease a mineral property until you are certain for yourself that a commercial opportunity exists for you there. And you also probably will not want to invest the resources to prove-out a deposit unless you are certain you can develop a project if something valuable is found. Balancing these two needs is a challenge that must be overcome.
Note of caution: In the event that you will invest your own resources into some preliminary field-work to evaluate a property before final negotiations are completed, some consideration should be given to keeping the results of your initial observation and results confidential. This is so that the information does not undermine your position in the negotiation. While this is not always appropriate (depends upon your agreement with the property-owner), it is definitely something that should be considered during planning.
The bottom line is that you will want to make sure that your investment into a project is going to be secured by legal agreements in advance.
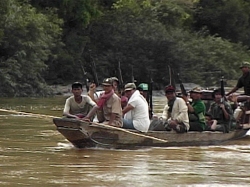
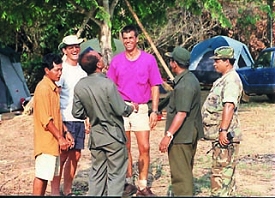 In some countries, dealing with the officials can be the biggest challenge to your project manager.
Another note of caution: One has to be particularly careful when negotiating agreements with private parties and/or government officials in developing countries. Sometimes corruption will undermine the rule-of-law. Under these circumstances, legal agreements may not be enforceable. The U.S. State Department usually publishes a brief risk-assessment about doing business in most countries.
In any event, if you decide to proceed, it is wise to secure the services of competent legal professionals residing in the country where you will do business.
Location and Accessibility
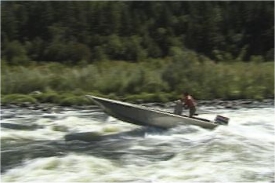
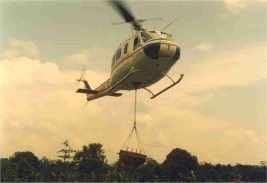
The location of your potential project site(s) will substantially affect the cost and difficulty of pursuing a mining program. Equipment, fuel, supplies and personnel must be transported to the site, and withdrawn when the project is complete. This will need to be accomplished either over land (using roads or trails), by water (using boats) or by air (using airplanes or helicopters).
“Remoteness,” these days, often has more to do with the cost of transport, than the distance things need to be moved. For example, a project site that is accessible by a 2-day river trip on a sizable transport-boat can be much-more easily accessible, than a site that is much closer to civilization, but requires everything to be transported via a 45-minute helicopter ride.
As every situation is different, important consideration and cost-analysis must be given to how you will move gear, supplies and people to and from your project site.
The more remote the location, the higher-grade the mineral deposits will need to be to justify a mining project.
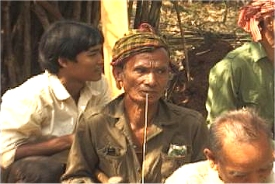
Politics with Officials and Local People
 Any mining program will find itself interacting with government officials and people who reside in the area where the activity will take place. The politics involved with these various relationships is important to maintain, and always will depend, in large part, upon good judgment and emotional flexibility by the project manager. This is even more true when local people will be hired to help support the mining project.
Environmental considerations fall into this element. Not just the true environmental consequences; but just as importantly, the perceived potential impacts that local people, various NGO’s and government officials worry about — even if their perceptions are not based upon reality. You have to manage the real environmental considerations, and you also have to respond to the way people are reacting to your mining program.
Managing relationships with officials in developing countries is a very challenging and risky business.
Because each situation is entirely different, no matter where you do your mining, the best advice I can give concerning this important element is to make sure you have a level-headed project manager that has some vision and understands that every action will have a consequence.
Timing
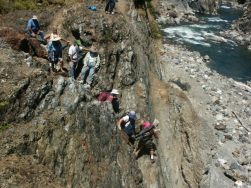
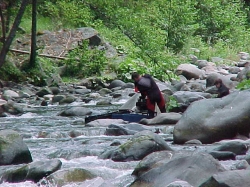
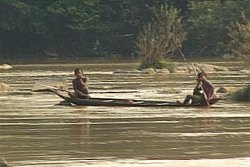
 It takes very specialized people to recover good samples off the bottom of a muddy river.
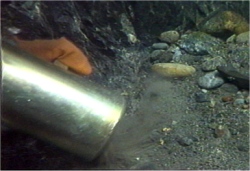
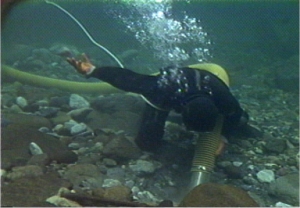
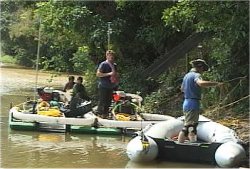
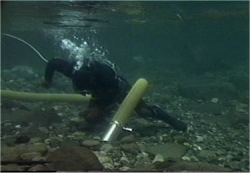
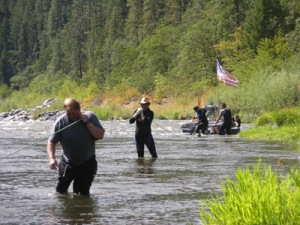
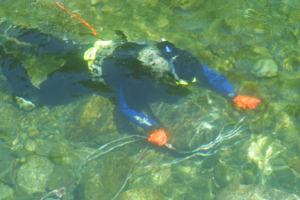
Effective dredging operations require underwater visibility. Visibility is necessary to execute a planned excavation of a dredge-hole, and also for more than one diver to work underwater in the same excavation.
Muddy water turns visibility to pitch black just inches below the surface. Submersible lights do not help, because they will not penetrate through suspended sediments. So a dredger’s progress in dirty water is reduced to whatever he can or she do by feel. It is a very slow process, and safety-margin for the diver is radically-reduced.
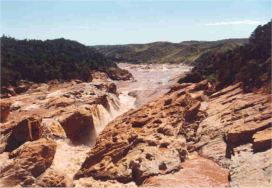
Many mineral-rich areas on the planet have distinct wet and dry seasons. It is important to look into this. Because waterways most-often flow at higher, faster levels during the wet periods – and can also run with poor or no underwater visibility.
More often then not, Rainy seasons create conditions that prevent dredging operations from being effective. It is very wise to plan your sampling and production programs to begin at the beginning of the dry season.
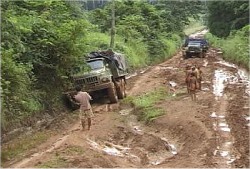
Besides making dredging conditions nearly impossible, the rainy season can also turn road-access into a nightmare! As an example of this, check out the following video sequence that I captured on a road in Cambodia during the rainy season:
When operating in developing countries, unanticipated delays can often delay start-up times by weeks or months. So it is better to time such programs to have all the legal matters resolved, important relationships in good order, and equipment ready to go well in advance of the dry season. While this may sound obvious, more often than not, our Pro-Mack Team has been called in to help with dredging programs just as the rains were beginning and the river was turning muddy. The water was so dirty in the following video sequence, that it was pitch dark only inches below the surface:
Starting a dredge-sampling or production program during the rainy season is near to creating a mission-impossible scenario for the project manager. And your divers, no-matter how enthusiastic they are in the beginning, are likely to lose some of thier motivation to continue once they experience the nightmare of a dark and mucky river-bottom..
Still, sometimes you are forced to do preliminary sampling when conditions are not ideal. In this case, it is important to make safety the primary concern and also realize that results will only be a fraction of what can be accomplished under more suitable conditions.
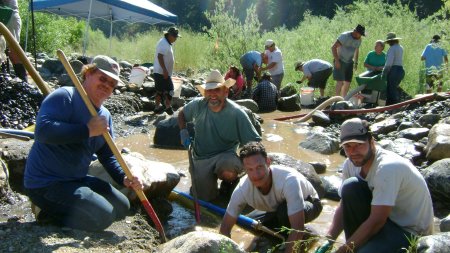
Project operational considerations
 This is all about how you are going to do the sampling or production-part of the program. This is the mission-plan. What are you going to do? Where? For how long? Exactly how are you going to accomplish it? Who is going to participate? With the use of what gear and supplies?
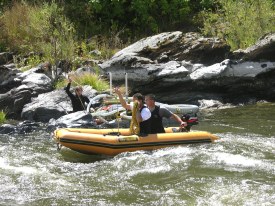
Are you going to need a boat to move your equipment, fuel and people around on the river, or are you going to use roads or trails? Will your access to different places along the river be challenged by extreme fast-water areas, or water that is too shallow to float the dredge?
Are you going to set up a single base camp and return there at the end of each day? Or are you going to move the camp as you make progress sampling along the river?
 How deep is the water and streambed material? This will affect the type and size of dredge you will need to accomplish the job, how much dredge-power you will need, and how long the suction hose and air lines need to be.
Will you be dredging in fast water areas? This might require you to bring longer hoses to extend your reach while keeping the dredge tucked into slower-water pockets along the edge of the river.
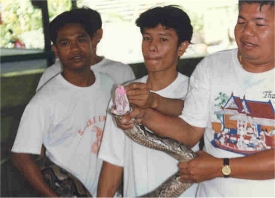
Are there any critters in the water, or along the edge, that you have to defend against? What special gear is needed for this?
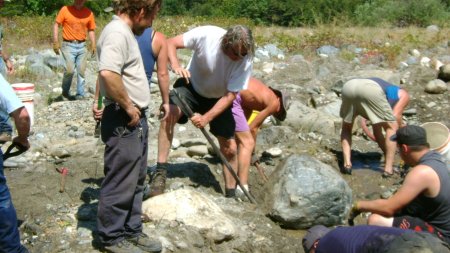
In some places, equipment to move big rocks is even more important than the dredge you will use. Are their big boulders that will require special winching gear to move?
Will you need to bring along special tools to cut a trail or to build living platforms in the jungle?
How are you going to recover the gold (or gemstones)? This is a big question that should be resolved as well as possible during the preliminary evaluation, and entirely confirmed during sampling. If a specialized recovery system or process is required, you will need to bring the gear and supplies along with you so you can perform those tasks.
Shelter and living-support
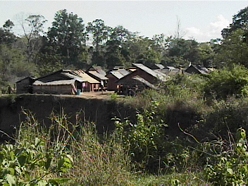
How you will feed and shelter the people who are part of your project largely depends upon the nature of the people involved, how dangerous or uncomfortable the environment is, and how long they will be there.
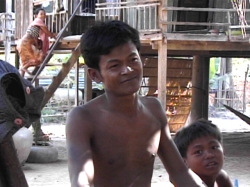
Generally, you will find that helpers from the local village have their own way of providing shelter for themselves and the food that they eat along the river. Sometimes, they don’t require much more from you than a plastic tarp and some rice. I have been in a lot of jungle environments where the local help either brought along their own hammocks and a cooking pot, or already had small shelters set up along for themselves the river.
It is important to address the needs of the local help (which are usually not much) during the preliminary evaluation, and not impose conditions (or food) upon them that they are not comfortable with.
Bringing specialists into a harsh environment from the comforts of civilization requires careful planning. While this may not be true everywhere, it is my own experience that while local helpers are somewhat amused by the special requirements of westerners, they usually do understand that we are not jungle-dwellers like they are. However else they may feel, there is always respect (and desire) for the nice toys and tools that we bring along.
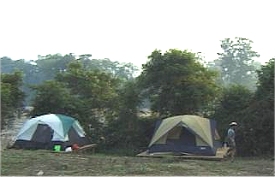 Sometimes, the most important part of shelter is to get off the ground.
The bottom line is that you must bring along whatever is necessary to shelter your personnel from the dangers and any severe discomforts of the environment. Every place is different. A tent goes a long way to keep bugs and (smaller) critters separated from people. Sometimes (often) it is necessary to set up camp off the ground, even when tents are being used. This may require bringing along some wooden boards to put up a platform. Sometimes the platforms already exist, made out of lumber, bamboo or small trees. Sometimes they can be constructed from materials that are present on site. For example, the following video sequence shows a preliminary base camp where tent platforms were constructed from hardwood lumber sawed out of trees on site (with a chain saw):
The locals will know what you need to do to keep your personnel safe from the more serious threats. You will have to use your own judgment how to provide people with support that will keep them reasonably comfortable under the circumstances. It is important to figure this out during the preliminary evaluation.
 On many of the projects that I have been involved with, we hired several helpers from the local village that were also good at hunting and fishing. This reduced the amount of food that we needed to bring along.
A word of caution: When hunters bring dogs, it is wise to avoid making very much contact with them. These jungle dogs are loaded with critters that would much-prefer a human host! Hunting dogs generally increase the need to reside off the ground.
Another word of caution: When living with jungle-dwellers, you must be especially vigilant at imposing strict sanitary measures with anything to do with the food and water that you will consume. This is not easy; because your jungle helpers will not understand, and it is near-impossible to overcome normal routines that are part of their life and culture.
There is a lot to be said about bringing along a special cook who will look after the food and water-needs for the personnel on the team that come from non-jungle environments. This must be a person who already understands basic sanitary principles; and ideally, who normally resides within an environment where such measures are practiced. We have found from past experience that it is too late to try and teach sanitary measures to someone (who will prepare your food) after you arrive in the jungle. And since you cannot watch everything that is done to prepare your food, you can find yourself with a whole crew of sick (sometimes seriously) people even before you hardly get started!
The bottom line is that you have to plan on providing food and water that will not make your people sick, and it is important to provide them with a reasonably comfortable, safe environment to sleep at night.
Specialized equipment
As we have discussed equipment needs in other articles, I will not go into them here. The main point is that you must bring along the gear that will allow you to accomplish the mission.
When accurate samples are required where special recovery equipment is needed, and the sampling must be accomplished with portable dredging equipment, it is sometimes necessary to dredge the samples into special, floating catch-containers. Then the samples can be carefully processed on land.
Here is where you can buy Gold Prospecting Equipment & Supplies.
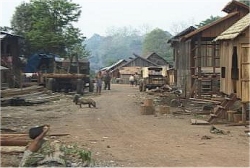
Supply of food, fuel, and other needs
 It is important during the preliminary evaluation to establish where you will acquire fuel, food and other supplies to support your program. There are many primitive areas in the world that do not have structures, services and supplies like we do in the west, so you cannot just assume operational needs will be readily available. For example, the following video segments show areas where we have had to supply mining projects where even small corner food markets are not present, much less Safeway or Albertsons:
Sometimes, access is such that you can plan for a continuing supply of essentials and other needs as the program moves forward. Sometimes, difficult access requires that you bring everything in at the beginning, or plan on occasional deliveries. To keep costs down, deliveries must often be arranged by local boat traffic or by cart over primitive trails. The following video sequence was captured on a project we did in Madagascar, where local deliveries were made by ox cart:
Occasional or regular deliveries increase the need for dependable communications and financial arrangements so that you can better-coordinate with those who will provide the support from a distance.
As there is no refrigeration in the jungle, it is usually true that hunters will need to come up with something every day to keep meat or fish on the table. Even if local help will provide a local supply of protein, we have found that it is a good idea to bring in a supply of freeze-dried meals or canned goods – just in case the hunters have a dad day. Being hungry is hard on morale!
Security
Security is always a concern on a mining operation, on multiple levels. There is the gear out on the river, the gear and supplies at the base camp, the personnel involved with the operation, and the product that is being accumulated. Understandably, every situation is different; so flexibility and good judgment is required.
Under a lot of circumstances, many security concerns can be resolved by investing some advanced-effort and goodwill into the politics with the village(s) in the surrounding area, and with the local people that are hired to help you. A good manager will strive to find the balance between helping a little with the needs of local people, with getting the job accomplished that he is there to do within the budget he has to work with.
One of the first key people to hire in a mining program is a good interpreter. This must be a person whose politics are not in conflict with the local villages. It is important that you enquire about this, because sometimes there are politics going on that you cannot see on the surface.
One of the first priorities during a preliminary evaluation is to pay a respectful visit to the village chief or elder(s). Bringing along a bottle or two of whiskey to present as a gift (unless it is a Muslim community) is almost always a great inroad, and eliminates the requirement that you drink the local brew (which can make you sick) when making friends.
I always make a strong effort to bond with the leaders of the local village(s). For the most part, it is accurate to predict that politics with the local people will go just about as well as you have made friends with the local leaders. Here is a place where a little time can be invested well.
When visiting with local leaders during the preliminary evaluation, I look around to see what I might bring as meaningful gifts that can be shipped over with the sampling gear if we decide to take things to the next level. I am not talking about spending a lot of money on gifts. Flowers don’t cost very much, but look how much they are appreciated when you present them in a meaningful relationship! Thoughtful gestures go a long way in a new relationship, especially when there is a wide gap between the cultures and the toys being played with.
 Being thoughtful in advance can be far less costly than the loss of key gear or equipment by theft, once you are committed to a sampling program.
Some mountain-river environments have very limited access, and not very many people or traffic are moving around. These communities can be rather small, and there are not many secrets. If the general consensus amongst the local people is to support you and/or leave you alone, you will usually not have very many problems with security.
Sometimes you have to resign yourself that there will be a continuous audience of onlookers watching the mining activity along the river. This is mostly because local people have never seen anything like that before. So it may be necessary to work out some reasonable boundaries with the village elders.
Whenever possible, we set up camp some distance away from the local village. This is good practice for a number of reasons. But mainly, it sets up a natural boundary (by distance), creating some degree of privacy. I have never been on a project where local villagers did not respect the privacy we created by setting up our camp some distance away.
I have also found that bringing along some small gifts (like extra pocket knives or Leatherman tools) goes a very long way with the most productive helpers. Although, I keep those out of site, and only pass them out after I have managed some initial bonding with some of the helpers. Special rewards to the most enthusiastic supporters can help build productive relationships.
Generally, we have found that if you treat them with respect and kindness, helpers from the local village understand that we are not the same, have special needs that are different from theirs, and possess desirable belongings from another world – which belong to us. If something turns up missing, I usually make an issue of it right away. This can cause the item to turn back up a little later and eliminate future problems in this respect.
Places where your personnel are in danger from other human beings will require site-specific security measures. Some mineral-rich areas have ongoing civil wars, separatist groups or insurgencies to worry about. Some places have people or groups that kidnap outsiders and hold them for ransom as a means of supporting themselves and their political movements. Needless to say, these are concerns that are important to discover during the preliminary evaluation. Such concerns will almost always be outlined within the State Department’s information about the country. The following video segment was taken in Cambodia on a project where it was necessary to maintain our own local security force:
Increased security problems raise the level of cost. Therefore, the mineral deposits must be richer to justify the risk.
Some careful thought needs to be given to how you will secure money, gold or gemstones, sample results and the other valuable possessions during a mining project. This should probably involve a security safe during an extended production program.
During a sampling program, it just might be that the project manager needs to keep the valuables in his personal possession. Waterproof bags are good to have along for this.
A word of caution about this: If you are making payments to others in the field during a project, it is unwise to pay directly from the source of where you are keeping the valuables. For example, opening up the day-pack where you are keeping all the valuables to pay a vender in the village. Because secrecy is the only security you have protecting those valuables, it is better that outsiders do not see where they are being kept. Keep the bigger money-stash a secret from anyone who does not need to know. In a private place, pull out enough to pay for things, holding that money in a pocket, wallet, belt-pack, or whatever.
 This secrecy-concept also extends to the gold you recover on a mining program. Especially during production! We always set up the final processing structure well away from local traffic, and only allow those near that should or must be involved. The product is never shown or advertised around. It is also hidden like the money, if there is not a well-anchored security safe where it can be locked up.
Showing large amounts of money or other valuables (relative to local levels of income and wealth) is a sure-way to increase security-risk on any mining or sampling operation.
As long as we are on this subject, you also should be careful with your valuables in hotel rooms within developing countries. Keep valuables out of sight, locked up in a suitcase, on your person – or sometimes the hotel provides a safety deposit box. You have to use your own judgment what is the best way to keep things safe. It can be a big mistake to assume the hotel staff, or even the manager, will not go through your room and belongings when you are not present!
Medical and/or emergency support
When setting up a mining program, it is important to establish how and where your personnel are going to receive medical care if they need it, and also emergency support if there is any kind of serious problem.
 A lot depends upon how inaccessible the project site is. When there are villages nearby, you can sometimes find some local medical assistance for matters that are not of a serious nature.
The villages sometimes will have a method worked out to manage medical emergencies.
Sometimes you can locate an emergency-evacuation service from a larger town or city that will send a helicopter or small plane to recover someone who needs emergency medical care. It is a good idea to arrange this service in advance, and work out how you will communicate with them in the event that you need their help (at any hour). It is a good idea to arrange a medical-evacuation service, even if there are local medical services available. This is because medical care generally is better as you get to larger hospitals that provide service to bigger populations


 First, we will cover sampling. A common remark I hear is why put the time, effort, money, etc. into sampling when it can be better-spent on actual mining and making some money? All too often, individuals lose thousands of dollars on their mining ventures; but had they done some sampling and found out that the ground was too low-grade to mine profitably, they would have only spent hundreds of dollars. I have seen an individual go broke trying to mine ground containing less than $2 of gold per yard when there was un-mined ground about 300 yards away running slightly over $100 per yard. That is not a typographical error; it is one hundred dollars. This is, of course, an extreme example; but all too often rich ground is missed. Even before sampling, a literature-search is in order to get an idea of the ground’s value.
 Often, new miners leave a lot of gold values in the bedrock. Some highly-fractured bedrock may have values several feet below the surface. The deepest I have ever read about was a Canadian mine going down nine feet into bedrock to get all of the values.
 This is not only a matter of following through with a single plan. Sometimes, people are unwilling to depart from some course of action once they get started into it. Sampling requires more emotional flexibility than this. Many times, we are just guessing, or hoping, when we begin a sampling operation. Then, as we sink our sample holes, if we are paying attention, we learn more about the area and are able to adjust our sampling plan accordingly. We learn where the gold path (the highway that gold follows in the waterway) is more likely to be by finding out where it isn’t. We find out that the streambed is too deep in some sections of the river by dredging test holes in places where we can’t reach the bottom. We have to be prepared to adjust our sample plan each time we learn something new.
 Stop and think about this for a moment: If we already knew where the gold was, we would not have to sample. We could just go into
  I often see people get discouraged when they fail to find a rich gold deposit in the first sample hole. We all experience this to some extent. But, this happens only because we have allowed ourselves to set unreasonably-high expectations. The
 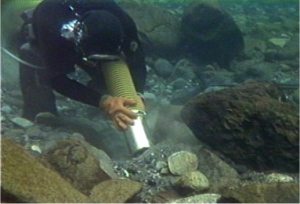 Then, your focus will be where it belongs.
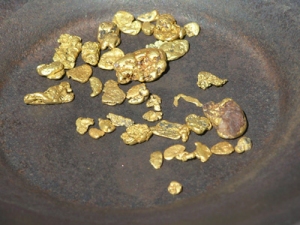


 A) Accidents: While accidents do happen, they mostly can be avoided by planning things out well in advance and having responsible people involved who are being careful. Good management and responsible people can generally stay a few steps ahead of Murphy’s Law (Anything that can go wrong, will go wrong, at the worst possible time!).
 Because we dredge in the water during the sampling phase, it is
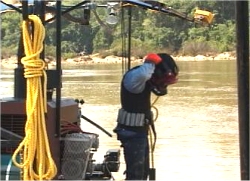
 The best way to avoid continuous problems with sanitation (can be very serious), is to set up your own camp some distance away from local communities and bring in your own cook. This can be someone from the same country who lives in an environment where sanitary-measures are a normal way of life. Then, your cook
 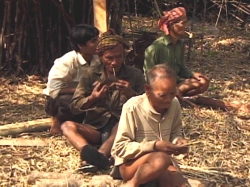 An enthusiastic interpreter will dig for the information that you want to obtain. When communicating with local people on the river, sometimes it is necessary to ask many questions in different ways, to different people, to bring them around to the same concepts that you are trying to express. When you work with people from different cultures who have radically-different backgrounds, often you find that they just do not conceptualize things the same way that you do. A good interpreter is able to bridge this gap and help you get the information you want with some degree of accuracy. He will also help you avoid misconceptions or misunderstandings that can build up stress with locals along the river.
 Longer-range radios are often used between the base camp and civilization. Although atmospheric conditions sometimes make this mode of communication unreliable.
 I saved this section for last, because it is really the most important. If you study all of the material on this web site, you should realize over and over again that it is the personnel on your project that determine the final outcome. They are the key factor that makes it all happen.
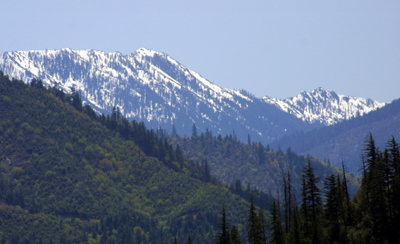 Each summer, thousands of prospectors head for the high country in search of
  These elements are Strength, Ability, Flexibility and Endurance. While everyone is born with ability, the other three elements are the things that must be worked on.
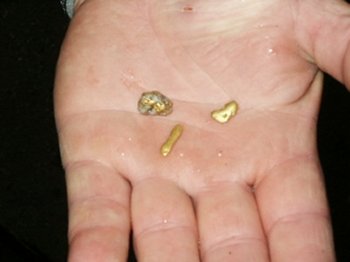 The key to finding high-grade gold is in knowing how to
 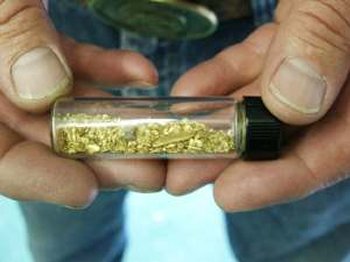 The mountains have been a home away from home for my family for 100 years. They have seen my grandfather, my dad, and myself enjoy all that they have to offer, providing us with an understanding of what it takes to be responsible and self-reliant.
 To become a successful gold prospector, research must top your list of things to do. Research will provide you with a never-ending source of future prospects. Experiencing the joy of being in the field, while enjoying these exciting and rewarding activities, should be a major priority for everyone. Furthermore, repeated trips going into the field, being successful, attaining your goals, and coming home with
  The meaning of “Good Gold” is a matter of perspective and experience. This phrase is generally used in terms of quantity and ease of extraction. A couple of old-timers, sitting around the fire talking gold, will often have enough shared-experiences to know what the other means by “good.”
 Building a workable dry-washer would be a snap. I have always been good at figuring out how machines work and how they should be constructed. Ten minutes with a friends’ bellows dry-washer was enough to get me started on our own machine. A few days later, we were packed and driving to the desert with our newly-built dry-washer and an old 3-horsepower Briggs and Stratton engine. I just had to test my new creation. When it comes to gold, to me,

 I have found, to be most effective, it is best to attack a gold-dredging operation with a rigid work schedule, just like any other job or business-activity. I personally prefer to “pour on the steam” for three straight days. Then, I take one day off from dredging to allow my body to recuperate. The work is physically exhausting on the body if you really pour out the energy. You need to find the appropriate rest-interval that works best for you. Otherwise, your body will get overworked and start breaking down. I use my day-off to perform gear maintenance and the many other miscellaneous chores that are needed to keep the operation running smoothly. I try to get some much-needed free time out of it, as well.
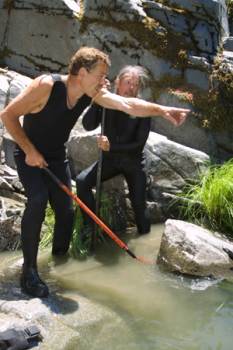
 As all gold hunters know, we are blessed with
 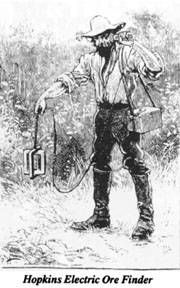 In 1879, Professor D.E. Hughes demonstrated to the Royal Society in London his Induction Balance (I.B.). Its purpose was to study the molecular structure of metals and alloys. However, Hughes and his instrument maker, William Groves, soon recognized the potential of the I.B. as a metal locator, and several were supplied to various London Hospitals for locating metal objects in human bodies. The Royal Mint used the Induction Balance for assaying metals and detecting forgeries.
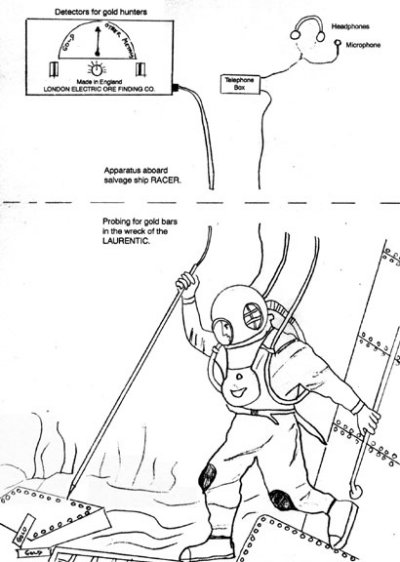 This company also developed an underwater spear-type detector which was used in locating gold bars in the wreck of the LAURENTIC, which was torpedoed during World War 1. This was a discriminating-type detector which could distinguish between gold and other metals. Unfortunately, the patent specifications are very brief and no illustrations are enclosed, hence we lack full information of how this detector worked.
 Successful mining in streambeds is generally accomplished in two steps: (1)
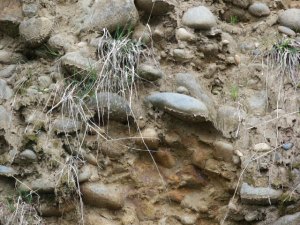
 When hard-packed streambed is being mined, the cobbles and boulders (i.e., rocks that are too large to pass through the recovery system) are tossed back onto a pile behind the production area. As the production area moves forward, piles of boulders and cobbles are left behind in place of the original hard-packed streambed. Sometimes, sand, silt and gravel that is processed through the recovery system is dropped on top of the cobbles. Later, winter storms also wash sand, silt and gravel across the top of the cobbles. The sand, silt and light gravel then filters down and fills in most of the space between the cobbles. Therefore, tailings usually end up as loose stacks of cobbles with sand, silt or light gravel filling the spaces.